")
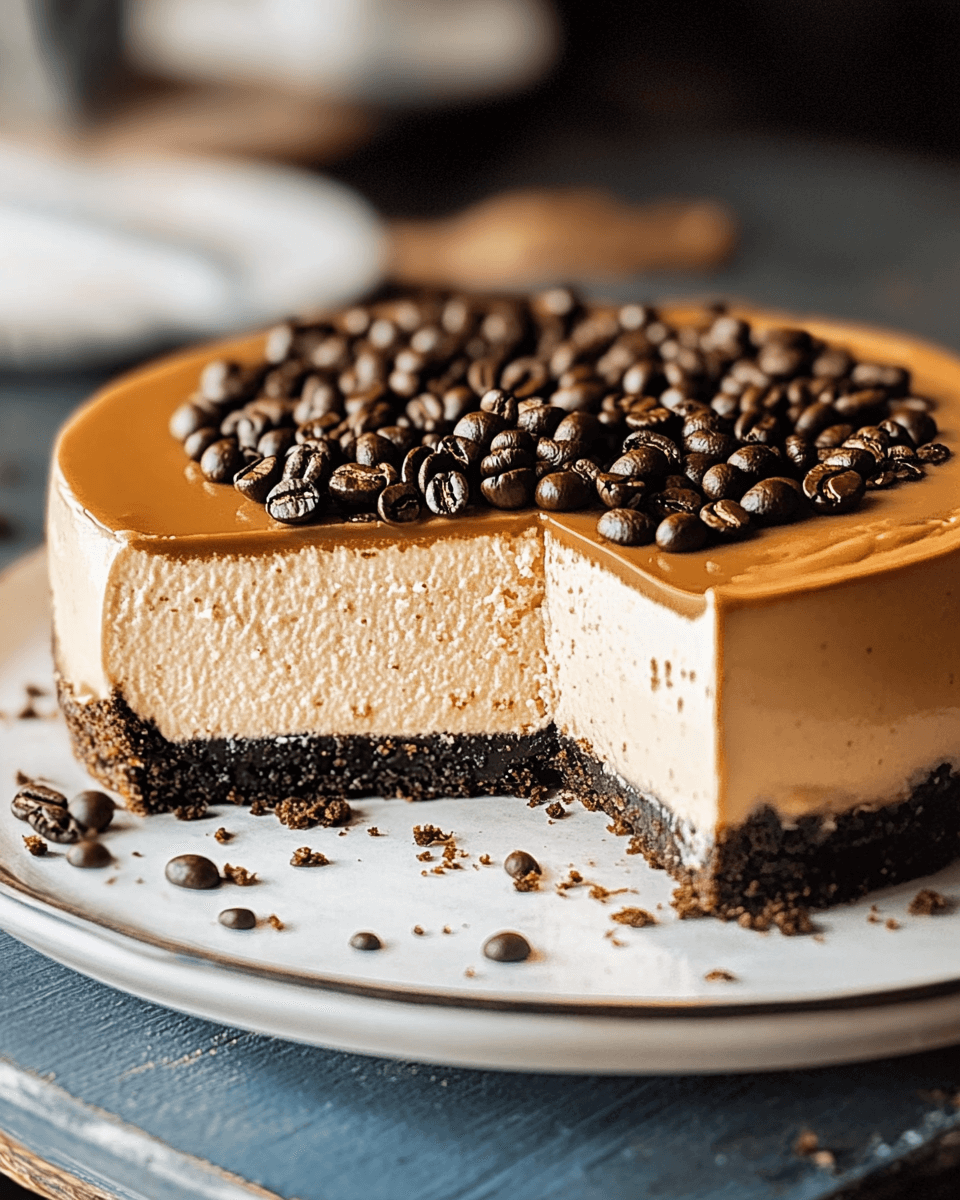
Introduction to Espresso Cheesecake
There’s something magical about the combination of coffee and dessert, isn’t there? As a passionate home cook, I’ve always believed that a slice of espresso cheesecake can turn an ordinary day into something special. This rich and creamy treat is perfect for coffee lovers and those looking to impress friends or family. Whether you’re hosting a gathering or simply craving a sweet indulgence, this espresso cheesecake is a quick solution that brings joy to any occasion. Trust me, once you take that first bite, you’ll understand why this recipe deserves a spot in your kitchen!
Why You’ll Love This Espresso Cheesecake
This espresso cheesecake is not just a dessert; it’s an experience. It’s incredibly easy to whip up, making it perfect for busy weeknights or last-minute gatherings. The rich, creamy texture paired with the bold espresso flavor creates a delightful balance that coffee lovers will adore. Plus, it’s a showstopper! Serve it at your next dinner party, and watch your friends rave about it. Trust me, they’ll be asking for seconds!
Ingredients for Espresso Cheesecake
Gathering the right ingredients is the first step to creating a delicious espresso cheesecake. Here’s what you’ll need:
- Graham cracker crumbs: These form the base of your cheesecake crust, providing a sweet and crunchy texture.
- Unsalted butter: Melted butter binds the crumbs together, adding richness to the crust.
- Granulated sugar: A touch of sweetness enhances the flavors in both the crust and the filling.
- Cream cheese: The star of the show! It gives the cheesecake its creamy, smooth texture.
- Eggs: They help set the cheesecake, giving it structure and a light, airy feel.
- Vanilla extract: A splash of vanilla adds depth and warmth to the flavor profile.
- Sour cream: This ingredient contributes to the creaminess and adds a slight tang that balances the sweetness.
- Brewed espresso: The key ingredient that infuses the cheesecake with a bold coffee flavor. Make sure it’s cooled before adding!
- All-purpose flour: A small amount helps stabilize the filling, ensuring it sets perfectly.
For those looking to elevate the flavor, consider adding chocolate chips to the cream cheese mixture. You can find all the exact measurements at the bottom of the article, ready for printing. Happy baking!
How to Make Espresso Cheesecake
Step 1: Preheat and Prepare
Start by preheating your oven to 325°F. This ensures that your cheesecake bakes evenly. While the oven warms up, grab a 9-inch springform pan and grease it lightly. This step is crucial; it helps the cheesecake release easily once it’s done. Trust me, there’s nothing worse than a stuck cheesecake! Set the pan aside while you prepare the crust.
Step 2: Make the Crust
In a medium bowl, combine the graham cracker crumbs, melted butter, and a bit of sugar. Mix until everything is well blended. The mixture should resemble wet sand. Press this mixture firmly into the bottom of your prepared springform pan. Make sure it’s even! Bake the crust for about 10 minutes, then remove it from the oven and let it cool. This crust is the perfect foundation for your espresso cheesecake.
Step 3: Prepare the Filling
In a large mixing bowl, beat the softened cream cheese with sugar until it’s smooth and creamy. This is where the magic begins! Add the eggs one at a time, mixing well after each addition. Next, stir in the vanilla extract, sour cream, and cooled brewed espresso. The aroma will be heavenly! Finally, sprinkle in the flour and mix until everything is fully combined. This filling is rich and packed with coffee flavor, making it irresistible.
Step 4: Assemble the Cheesecake
Now it’s time to bring it all together! Pour the creamy filling over the cooled crust in the springform pan. Use a spatula to smooth the top, ensuring it’s even. This step is important for presentation. A smooth top will make your cheesecake look professional and inviting. You’re almost there!
Step 5: Bake the Cheesecake
Place the cheesecake in the preheated oven and bake for 50-60 minutes. You want the edges to be set while the center remains slightly jiggly. This is key for that perfect texture! Once done, turn off the oven and leave the cheesecake inside for an hour. This gradual cooling helps prevent cracks. After an hour, remove it from the oven and let it cool to room temperature.
Step 6: Chill and Serve
Patience is a virtue here! Once the cheesecake has cooled, refrigerate it for at least 4 hours, but overnight is best. Chilling allows the flavors to meld beautifully. When you’re ready to serve, slice it up and enjoy the creamy, coffee-infused goodness. Trust me, this espresso cheesecake will be the highlight of your dessert table!
Tips for Success
- Use room temperature cream cheese for a smoother filling.
- Don’t skip the cooling step in the oven; it helps prevent cracks.
- For a richer flavor, consider adding a splash of coffee liqueur to the filling.
- Always let the cheesecake chill overnight for the best texture and flavor.
- Top with whipped cream and a sprinkle of cocoa for an elegant touch.
Equipment Needed
- 9-inch springform pan: Essential for easy removal. A regular cake pan works, but it may be trickier to serve.
- Mixing bowls: Use medium and large bowls for mixing crust and filling.
- Electric mixer: A hand mixer or stand mixer makes beating the cream cheese a breeze.
- Spatula: Perfect for smoothing the filling and scraping down the sides.
- Measuring cups and spoons: Accurate measurements ensure the best results.
Variations
- Chocolate Espresso Cheesecake: Add 1/4 cup of chocolate chips to the filling for a delightful chocolate-coffee combo.
- Nutty Crust: Substitute half of the graham cracker crumbs with finely chopped nuts for added texture and flavor.
- Vegan Option: Use vegan cream cheese and replace eggs with flaxseed meal mixed with water for a plant-based version.
- Decaf Espresso: For those sensitive to caffeine, opt for decaffeinated espresso to enjoy the flavor without the buzz.
- Spiced Variation: Add a pinch of cinnamon or nutmeg to the filling for a warm, spiced flavor profile.
Serving Suggestions
- Pair with a rich cup of coffee or espresso to enhance the flavors.
- Serve with a dollop of whipped cream for added creaminess.
- Garnish with chocolate shavings or cocoa powder for a touch of elegance.
- Fresh berries on the side add a pop of color and freshness.
- Consider a drizzle of caramel sauce for an indulgent twist.
FAQs about Espresso Cheesecake
Can I make espresso cheesecake ahead of time?
Absolutely! In fact, making it a day in advance is ideal. This allows the flavors to develop and the texture to set perfectly. Just keep it covered in the fridge until you’re ready to serve.
What can I substitute for cream cheese?
If you’re looking for a lighter option, you can use Greek yogurt or ricotta cheese. However, keep in mind that the texture and flavor will differ slightly from traditional cream cheese.
How do I prevent cracks in my cheesecake?
To avoid cracks, make sure to cool the cheesecake gradually in the oven after baking. Also, using room temperature ingredients helps create a smoother filling, reducing the risk of cracks.
Can I freeze espresso cheesecake?
Yes, you can freeze it! Just wrap it tightly in plastic wrap and then in aluminum foil. It can last up to three months in the freezer. Thaw it in the fridge before serving for the best texture.
What’s the best way to serve espresso cheesecake?
For a delightful presentation, serve it chilled with a dollop of whipped cream and a sprinkle of cocoa powder. Pair it with a strong cup of coffee to enhance the espresso flavor!
Final Thoughts
Creating this espresso cheesecake is more than just baking; it’s about crafting a moment of joy. Each slice offers a delightful blend of rich flavors and creamy textures that can brighten any day. Whether you’re celebrating a special occasion or simply treating yourself, this dessert is sure to impress. The aroma of freshly brewed espresso mingling with the sweetness of cream cheese is a memory in the making. So, roll up your sleeves, gather your ingredients, and dive into this delicious adventure. Trust me, the smiles and compliments you’ll receive will make it all worthwhile!
PrintEspresso Cheesecake: Discover This Irresistible Recipe!
- Total Time: 4 hours 20 minutes
- Yield: 10 servings
- Diet: Vegetarian
Description
A rich and creamy espresso cheesecake with a graham cracker crust, perfect for coffee lovers.
Ingredients
- 2 cups graham cracker crumbs
- 1/2 cup unsalted butter, melted
- 1/4 cup granulated sugar
- 1 1/2 cups cream cheese, softened
- 1 cup granulated sugar
- 3 large eggs
- 1 teaspoon vanilla extract
- 1/2 cup sour cream
- 1/4 cup brewed espresso, cooled
- 1 tablespoon all-purpose flour
Instructions
- Preheat the oven to 325°F. Grease a 9-inch springform pan.
- In a medium bowl, combine graham cracker crumbs, melted butter, and 1/4 cup sugar. Mix until well combined. Press the mixture firmly into the bottom of the prepared springform pan to form the crust. Bake for 10 minutes, then remove from the oven and let cool.
- In a large mixing bowl, beat the softened cream cheese with 1 cup sugar until smooth and creamy. Add the eggs one at a time, mixing well after each addition.
- Stir in the vanilla extract, sour cream, brewed espresso, and flour until fully combined.
- Pour the cream cheese mixture over the cooled crust in the springform pan. Smooth the top with a spatula.
- Bake the cheesecake in the preheated oven for 50-60 minutes, or until the edges are set and the center is slightly jiggly.
- Turn off the oven and leave the cheesecake inside for an additional hour to cool gradually.
- Remove the cheesecake from the oven and let it cool to room temperature. Once cooled, refrigerate for at least 4 hours, preferably overnight, before serving.
- Slice and serve chilled.
Notes
- For a richer flavor, consider adding 1/4 cup of chocolate chips to the cream cheese mixture.
- You can also top the cheesecake with whipped cream and a dusting of cocoa powder for an elegant presentation.
- Prep Time: 20 minutes
- Cook Time: 60 minutes
- Category: Dessert
- Method: Baking
- Cuisine: American
Nutrition
- Serving Size: 1 slice
- Calories: 350
- Sugar: 22g
- Sodium: 200mg
- Fat: 28g
- Saturated Fat: 17g
- Unsaturated Fat: 8g
- Trans Fat: 0g
- Carbohydrates: 22g
- Fiber: 1g
- Protein: 6g
- Cholesterol: 90mg
")