")
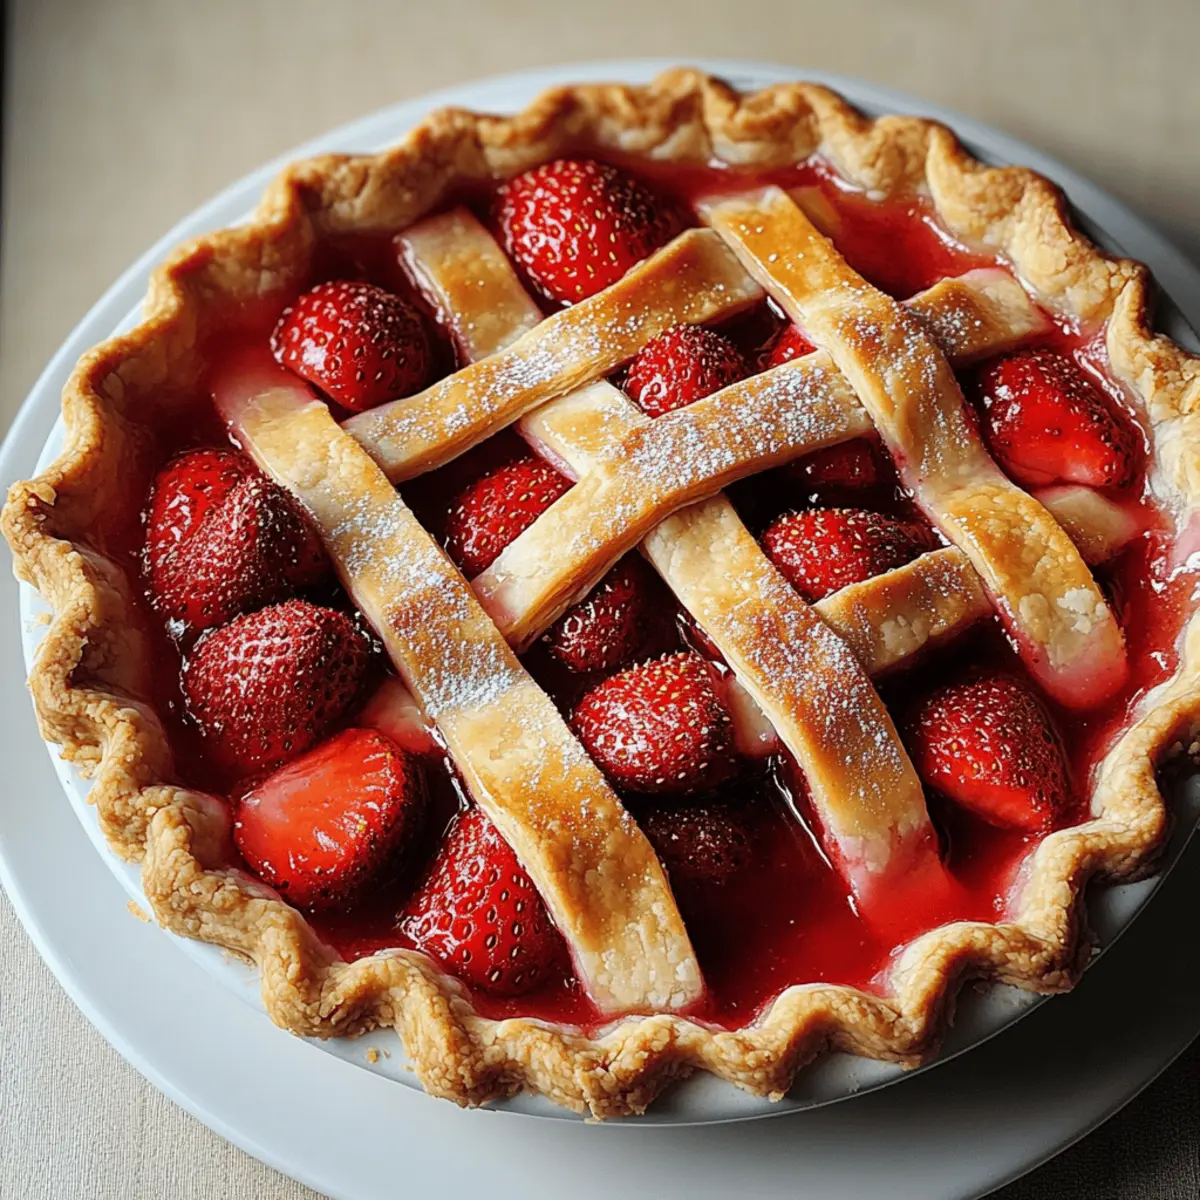
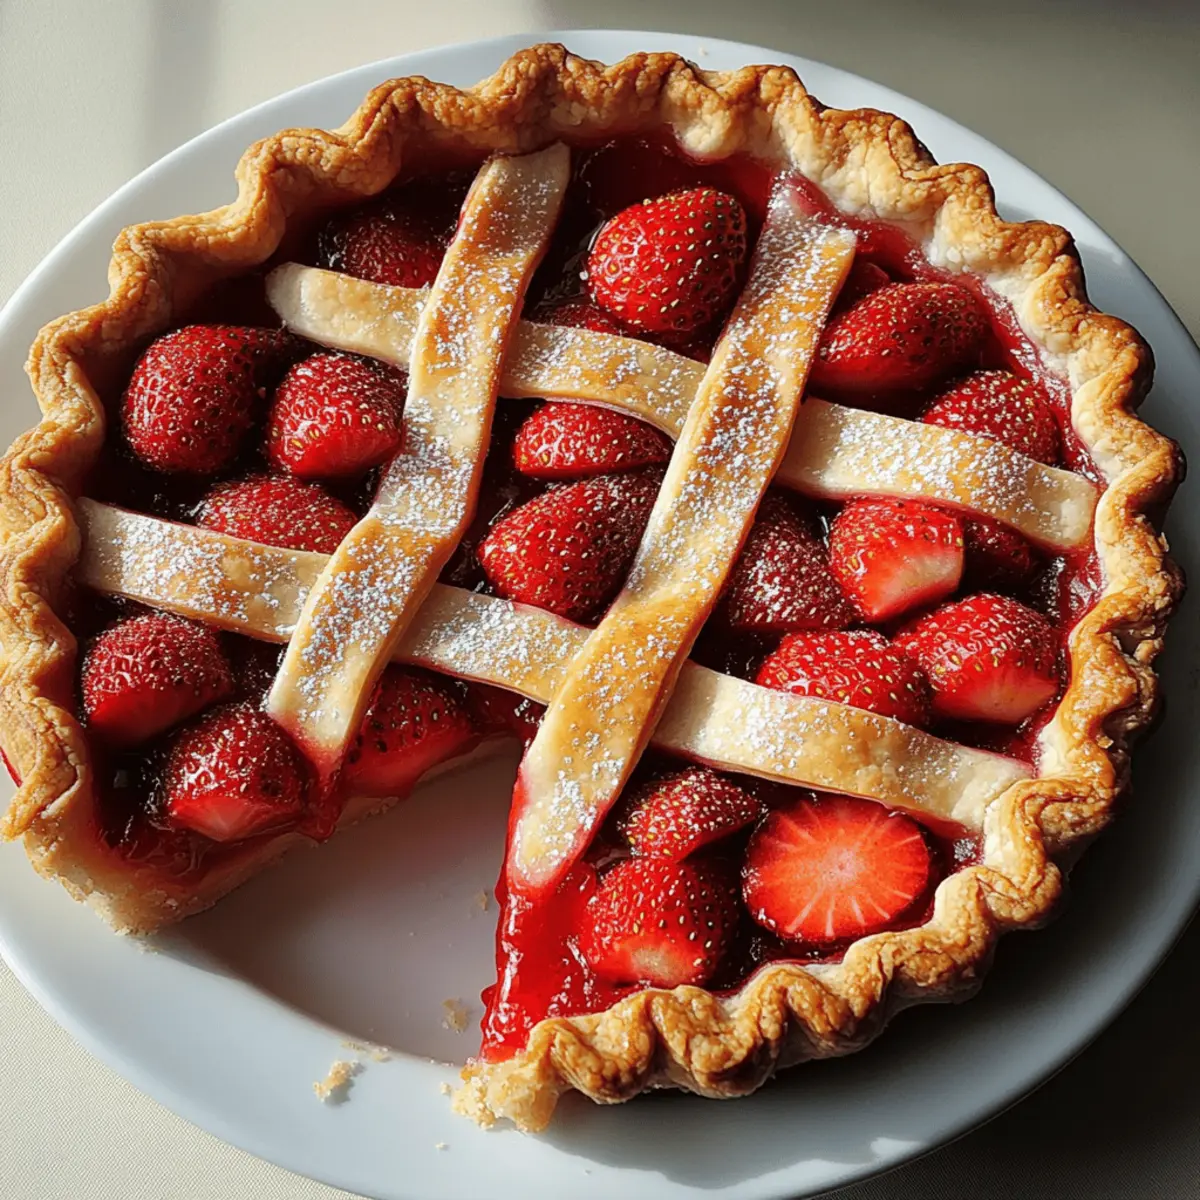
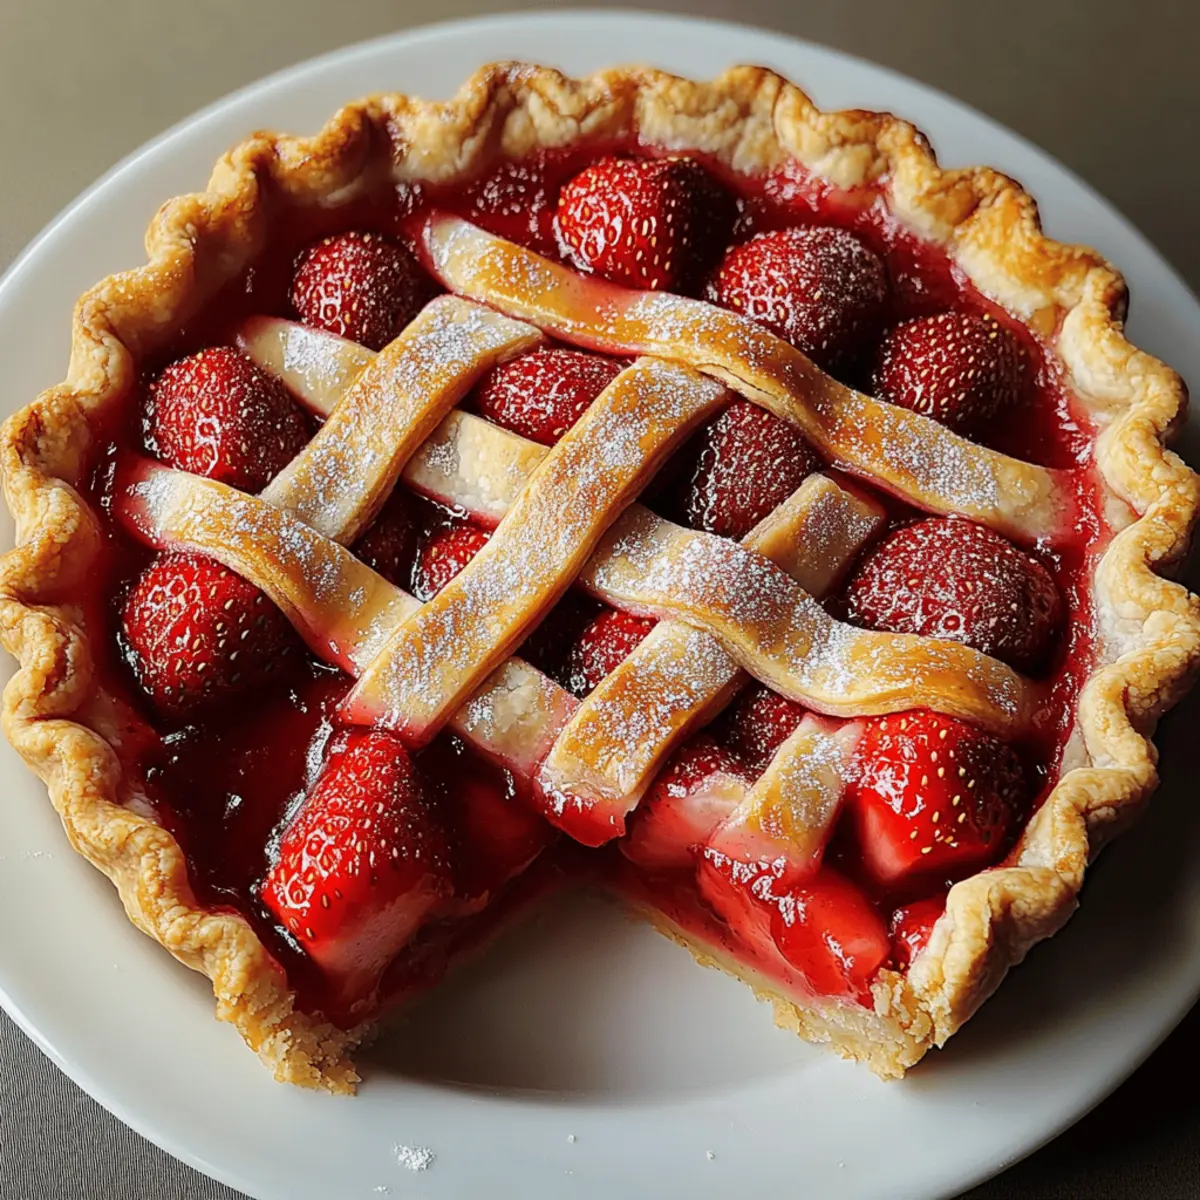
The scent of sun-warmed strawberries fills the kitchen, instantly transporting me to summer picnics and joyful gatherings. My Rustic Sweet Baked Strawberry Pie, a celebration of this vibrant season, captures the essence of those carefree days. With its flaky, buttery crust encasing the sweet, tangy filling, it’s an irresistible treat that’s perfect for any dessert table. This pie not only brings fresh flavors but also gives you the simple joy of crafting something homemade, making it a fantastic way to impress friends and family without spending hours in the kitchen. Plus, it’s an excellent head-turner at potlucks, inviting nostalgic conversations and memories. Are you ready to create this delectable masterpiece that effortlessly combines comfort and celebration?
Why is this pie a summer favorite?
Fresh Ingredients: Bursting with sun-kissed strawberries, this pie showcases the best flavors of summer. Each bite delivers a perfectly balanced sweetness that will make your taste buds dance.
Easy to Make: The simple steps make it a fun kitchen project, perfect for both novice bakers and seasoned chefs looking for a quick dessert option.
Impressive Presentation: With its golden-brown crust and vibrant filling, this pie is not just tasty; it’s a stunning centerpiece for gatherings.
Crowd-Pleaser: Serve it warm with a scoop of vanilla ice cream, and you’ll quickly become the star of any potluck. Want to elevate your dessert game even more? Try pairing it with my Strawberry Cream Cheese or whip up a refreshing side of Chipotle Corn Salsa.
Versatile Options: Feel free to experiment by swapping out strawberries for your favorite berries, making this pie a versatile dessert for all seasons!
Rustic Sweet Baked Strawberry Pie Ingredients
• The essential components for a delicious summer dessert!
For the Pie Crust
- All-Purpose Flour – Provides structure for the pie crust, ensuring a sturdy yet flaky texture.
- Granulated Sugar – Adds sweetness to the crust; adjust based on preference.
- Salt – Enhances overall flavor in the crust.
- Unsalted Butter (chilled and cubed) – Creates flaky layers; keep it very cold to avoid melting.
- Ice Water – Binds the dough together; helps maintain the cool temperature of the butter.
For the Strawberry Filling
- Fresh Strawberries (hulled and halved) – The star ingredient, delivering juicy bursts of flavor essential for a Rustic Sweet Baked Strawberry Pie.
- Granulated Sugar (for filling) – Sweetens the strawberries while drawing out their juices.
- Corn Starch – Thickens the filling, preventing it from becoming too runny.
- Lemon Juice – Brightens the strawberry filling, balancing sweetness with zesty acidity.
- Vanilla Extract – Adds aromatic depth and enhances the overall flavor.
- Unsalted Butter (for dotting) – Increases richness and buttery goodness in the filling.
For the Finishing Touches
- Egg (beaten, for wash) – Gives the crust a beautiful golden finish.
- Turbinado Sugar (optional, for topping) – Adds a delightful crunch and sparkle to the top crust.
Step‑by‑Step Instructions for Rustic Sweet Baked Strawberry Pie
Step 1: Prepare the Pie Crust
Begin by whisking together 2 cups of all-purpose flour, ¼ cup of granulated sugar, and 1 teaspoon of salt in a large mixing bowl. Cut in 1 cup of chilled, cubed unsalted butter using a pastry cutter until the mixture resembles coarse crumbs. This creates the foundation for your Rustic Sweet Baked Strawberry Pie, so make sure the butter remains cold to ensure a flaky texture.
Step 2: Form the Dough
Gradually add 6 to 8 tablespoons of ice water, mixing gently until the dough holds together—avoid overworking it! Once combined, divide the dough into two equal discs, wrap each in plastic wrap, and refrigerate for at least 1 hour. Chilling the dough helps it firm up, making it easier to roll out for your pie.
Step 3: Preheat the Oven
After the dough has chilled, preheat your oven to 375°F (190°C). This ensures your Rustic Sweet Baked Strawberry Pie bakes evenly and achieves that delightful golden-brown crust. While the oven warms, you can prepare the delicious strawberry filling.
Step 4: Make the Strawberry Filling
In another bowl, gently combine 4 cups of hulled and halved fresh strawberries, ½ cup of granulated sugar, ¼ cup of corn starch, 1 tablespoon of lemon juice, and 1 teaspoon of vanilla extract. Stir until the strawberries are well-coated. This filling is what gives your pie its sweet and tangy flavor, bursting right from the oven!
Step 5: Roll Out the Dough
Remove one dough disc from the refrigerator and, on a floured surface, roll it out into a circle that’s about 12 inches in diameter. Carefully place this rolled dough into a 9-inch pie pan, allowing any excess to hang over the edges. This will create a sturdy base for your Rustic Sweet Baked Strawberry Pie.
Step 6: Fill the Crust
Pour the strawberry filling into the prepared crust, spreading it evenly. Dot the mixture with small pieces of 2 tablespoons of unsalted butter to enhance the richness. This step adds something special to every bite, ensuring a heavenly flavor profile in your pie.
Step 7: Prepare the Top Crust
Roll out the second disc of dough in the same manner until it’s also about 12 inches in diameter. Cover the filled pie with this rolled-out dough, then trim the excess, leaving about an inch overhang. Crimp the edges to seal the Rustic Sweet Baked Strawberry Pie, creating a beautiful decorative finish.
Step 8: Vent and Brush
Using a sharp knife, cut slits in the top crust for venting steam as it bakes. This prevents the filling from bubbling over and helps achieve that perfect golden-brown color. Next, brush the surface with a beaten egg for a lovely sheen and optionally sprinkle with turbinado sugar for added crunch.
Step 9: Bake the Pie
Place your assembled pie on a baking sheet and bake in the preheated oven for 45-55 minutes. It’s ready when the crust is golden brown and the filling is bubbling through the slits. Keep an eye on it close to the end to ensure it doesn’t over-brown, showcasing that delicious rustic charm.
Step 10: Cool and Serve
Once baked, remove the pie from the oven and let it cool on a wire rack for at least 30 minutes before slicing. This cooling period allows the filling to set, making it easier to serve. Your Rustic Sweet Baked Strawberry Pie is now ready to be the star of your summer gatherings!
What to Serve with Rustic Sweet Baked Strawberry Pie
Indulging in a slice of this luscious pie is fantastic on its own, but pairing it with complementary dishes enhances the experience even more.
- Fresh Whipped Cream: Light and airy, whipped cream adds a rich, velvety texture that harmonizes beautifully with the pie’s fruity filling.
- Vanilla Ice Cream: Classic and creamy, a scoop of vanilla ice cream melts slightly into the warm pie for a dreamlike bite.
- Minted Fruit Salad: Refreshing and colorful, this salad adds a zesty touch that balances the sweetness of the pie, inviting delightful contrasts.
- Lemonade: A chilled glass of lemonade offers a tangy refreshment, perfectly cutting through the richness and enhancing the summer feel.
- Coffee or Iced Tea: A warm cup or chilled glass of either drink adds a sophisticated note, making this pie an elegant option for afternoon gatherings.
- Almond Biscotti: Crunchy and slightly sweet, the biscuit crumbles effortlessly alongside the pie, adding a fun texture and an extra layer of flavor.
- Shortbread Cookies: Buttery and crumbly, these cookies provide a delightful crunch, making them a perfect complement to each slice of pie.
- Chocolate Sauce: A drizzle of warm chocolate adds an indulgent touch, giving a decadent twist that chocolate lovers will adore.
Expert Tips for Rustic Sweet Baked Strawberry Pie
-
Chill Your Ingredients: Ensure that the butter is very cold when mixing into the dough for the best flaky texture in your Rustic Sweet Baked Strawberry Pie.
-
Avoid Overmixing: Mix the dough gently; overworking it will lead to a tough crust. Aim for a consistency that holds together without being mushy.
-
Careful with Sweetness: Adjust the sugar in both the crust and filling based on the sweetness of your strawberries to balance flavors effectively.
-
Monitor Baking Time: Keep an eye on the pie towards the end of baking to prevent over-browning; the goal is a golden crust with bubbling filling.
-
Vent for Perfection: Don’t skip the slits in the top crust! This venting allows steam to escape, ensuring a beautifully baked pie without a soggy bottom.
How to Store and Freeze Rustic Sweet Baked Strawberry Pie
Fridge: Store leftover pie in the refrigerator for up to 3 days. Cover it with plastic wrap or foil to maintain freshness and prevent drying out.
Freezer: For longer storage, freeze the pie for up to 3 months. Wrap the cooled pie tightly in plastic wrap and then in aluminum foil to avoid freezer burn.
Reheating: To enjoy a warm slice later, reheat in the oven at 350°F (175°C) for about 15-20 minutes. This helps restore the flaky texture of the crust and warms the filling beautifully.
Serving Tip: Serve the pie warm with a scoop of vanilla ice cream or a dollop of whipped cream for a delightful treat!
Rustic Sweet Baked Strawberry Pie Variations
Feel free to get creative with these variations, turning this classic pie into your own unique masterpiece!
-
Berry Blend: Mix fresh strawberries with blueberries or raspberries for a colorful twist that enhances the flavor profile and adds freshness.
-
Gluten-Free Crust: Substitute all-purpose flour with a gluten-free flour blend to accommodate dietary restrictions without sacrificing flavor.
-
Honey-Sweetened: Replace granulated sugar with honey in the filling for a natural sweetness that pairs beautifully with the strawberries.
-
Citrus Burst: Add a teaspoon of orange zest to the filling for a delightful citrus note, brightening up the sweetness and providing extra complexity.
-
Spicy Kick: Incorporate a pinch of cayenne pepper or cinnamon into the filling to introduce warm heat, making every bite delightfully different.
-
Almond Joy: Mix in a little almond extract into the filling for a hint of nutty flavor that complements the strawberries beautifully.
-
Caramel Drizzle: After baking, drizzle caramel sauce over the pie for an indulgent touch that adds richness and sweetness, transforming your dessert into a showstopper.
-
My Personal Favorite: Serve warm with a scoop of vanilla ice cream, or elevate the experience by opting for a dollop of my luscious Strawberry Cream Cheese on top. You won’t regret the added creaminess!
Whether it’s a vibrant berry mix or a spicy kick you crave, these variations will help you make this Rustic Sweet Baked Strawberry Pie your own. Enjoy the creative process and the compliments that are sure to follow!
Make Ahead Options
Preparing your Rustic Sweet Baked Strawberry Pie in advance is a fantastic way to save time for those busy summer gatherings! You can make the pie dough up to 3 days ahead; simply wrap it tightly in plastic wrap and refrigerate. Alternatively, you can freeze it for up to 3 months—just be sure to thaw it overnight in the fridge before rolling it out. The strawberry filling can also be prepped a day in advance and stored in an airtight container in the refrigerator. To finish, simply assemble and bake the pie according to the instructions, ensuring it turns out just as delicious as if made fresh on the day. This approach allows you to enjoy more quality time with your guests!

Rustic Sweet Baked Strawberry Pie Recipe FAQs
How do I choose ripe strawberries for my pie?
Absolutely! Look for strawberries that are bright red and plump, without any dark spots or mold. Ripe strawberries should yield slightly to gentle pressure. If they smell fragrant and sweet, you’ve found the perfect ones for your Rustic Sweet Baked Strawberry Pie!
What is the best way to store leftovers?
For optimal freshness, store your leftover pie in the refrigerator for up to 3 days. Keep it covered with plastic wrap or foil to prevent it from drying out. If you prefer, you can also place it in an airtight container—just remember to let it cool completely before sealing.
Can I freeze Rustic Sweet Baked Strawberry Pie?
Absolutely! You can freeze the pie for up to 3 months. First, ensure it has cooled completely after baking. Wrap the pie tightly in plastic wrap to prevent freezer burn, then wrap it again in aluminum foil. When you’re ready to enjoy it again, simply thaw overnight in the fridge and reheat in the oven at 350°F (175°C) for about 15-20 minutes.
What should I do if my pie filling is too runny?
If you find your filling is runny, it could be due to excess moisture from the strawberries. I suggest using cornstarch to thicken the filling effectively; usually, about 1/4 cup should suffice. Ensure you let the filling sit for a few minutes after mixing in the cornstarch to allow it to activate. It’s important to coat the strawberries with sugar and cornstarch beforehand so they release less juice while baking.
What if someone has a dairy allergy?
If you’re cooking for someone with a dairy allergy, you can easily switch to a dairy-free margarine or shortening for the crust. Many brands offer plant-based butter alternatives that would work beautifully, maintaining the flaky texture of your Rustic Sweet Baked Strawberry Pie. Just be mindful of checking ingredients on any pre-made products!
Rustic Sweet Baked Strawberry Pie for a Perfect Summer Treat
Ingredients
Equipment
Method
- Prepare the pie crust by whisking together flour, sugar, and salt. Cut in the chilled butter until it resembles coarse crumbs.
- Form the dough by adding ice water and mixing until it holds together. Divide into discs and refrigerate for 1 hour.
- Preheat the oven to 375°F (190°C) after the dough has chilled.
- Make the filling by combining strawberries, sugar, corn starch, lemon juice, and vanilla extract.
- Roll out one dough disc and place it in a pie pan, letting the excess hang over.
- Fill the crust with the strawberry mixture and dot with unsalted butter.
- Cover with the second rolled dough, trim excess, and crimp the edges.
- Vent the top crust with slits and brush with egg wash, optionally sprinkling with turbinado sugar.
- Bake the pie on a baking sheet for 45-55 minutes until golden brown.
- Cool on a wire rack for at least 30 minutes before slicing.
")