")
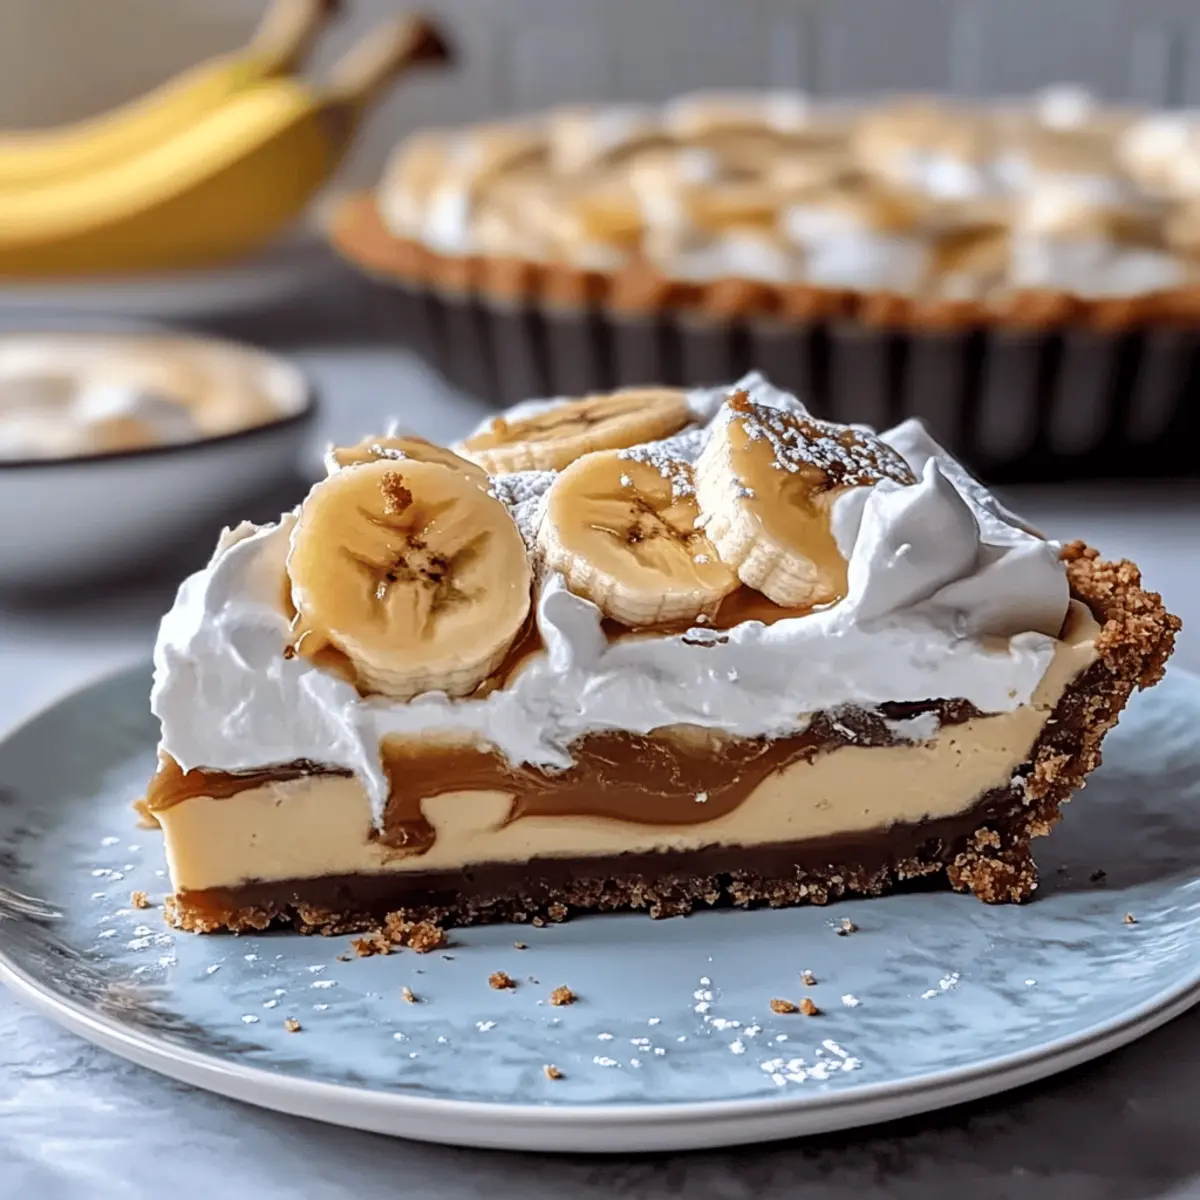
One bite of this decadent no-bake Banoffee Pie, and it’s as if you’ve been transported to a cozy café in the heart of England. With its crunchy biscuit base, gooey toffee, and layers of fresh bananas, this pie is the ultimate crowd-pleaser for any gathering. The beauty of this Banoffee Pie recipe lies not just in its sumptuous flavor but also in the ease of preparation—perfect for those busy days when you crave homemade goodness without the fuss. Plus, it easily accommodates dietary preferences with plant-based alternatives, making it a great fit for everyone at the table. Whether it’s a birthday celebration or just a sweet treat after dinner, why not surprise your loved ones with this show-stopping dessert? What delicious twist will you add to your Banoffee Pie?

Why is This Banoffee Pie a Must-Try?
Decadent Flavor: Each slice delivers a rich, creamy toffee flavor mingled with the sweetness of fresh bananas. Irresistible Texture: The crunchy biscuit base perfectly contrasts the soft and airy whipped topping. No-Bake Convenience: This recipe requires little time and no baking, making it perfect for even the busiest home cooks. Customizable for All: Easily tailor the pie to fit dietary needs—try a vegan version with coconut cream! Crowd-Pleasing Delight: With its delightful presentation and delicious taste, it’s sure to impress at any gathering. For a comforting side treat, consider whipping up some Cowboy Soup to pair with your dessert!
Banoffee Pie Ingredients
For the Biscuit Base
• Digestive Biscuits – Create the pie’s base structure; graham crackers can be used if digestive biscuits are unavailable.
• Unsalted Butter – Binds biscuit crumbs for the crust; melt before mixing with biscuit crumbs.
For the Toffee Layer
• Sweetened Condensed Milk – Forms the creamy toffee layer; ensure it is well-cooked for proper consistency.
For the Filling
• Bananas – Adds natural sweetness and moisture; any ripe, sweet banana variety works perfectly.
For the Whipped Topping
• Heavy Cream – Creates the light and airy whipped topping; can be replaced with coconut cream for a dairy-free version.
• Powdered Sugar – Sweetens whipped cream; adjust quantity to taste.
• Vanilla Extract – Enhances the flavor of the whipped cream; use pure extract for the best quality.
Optional Topping
• Dark Chocolate – Adds a decorative and flavorful topping; can be melted for drizzling or used as shavings.
This Banoffee Pie recipe promises to deliver a delicious sweet treat that you’ll be excited to share!
Step‑by‑Step Instructions for Decadent No-Bake Banoffee Pie
Step 1: Prepare the Biscuit Base
Begin by crushing the digestive biscuits into fine crumbs using a food processor or by placing them in a zip-top bag and rolling with a rolling pin. Melt the unsalted butter in a saucepan or microwave, then combine it with the biscuit crumbs. Press this mixture firmly into the bottom of a 9-inch tart pan to form an even layer, and refrigerate for 1 hour until set.
Step 2: Make the Toffee Layer
In a heavy-bottomed saucepan, add the sweetened condensed milk and cook over medium heat for 5-7 minutes, stirring constantly. Watch as it thickens and turns a golden color—this indicates it’s ready. Once achieved, pour the warm toffee mixture over the chilled biscuit base, spreading it evenly, and allow it to cool to room temperature before the next step.
Step 3: Assemble the Pie
Once the toffee has set completely, slice fresh bananas into thin rounds and layer them evenly over the toffee. Aim for generous coverage to balance the sweetness of the toffee with the fresh banana flavor. This layer of banana not only adds moisture but also complements the rich textures in your Decadent No-Bake Banoffee Pie.
Step 4: Whip the Cream
Take a chilled mixing bowl and add the heavy cream, powdered sugar, and vanilla extract. Using an electric mixer, beat the mixture on medium-high speed until you achieve soft peaks, which should take around 3-4 minutes. Spread the whipped cream generously over the banana layer, creating a smooth and fluffy topping for your pie.
Step 5: Finishing Touches
For an optional decorative flair, melt some dark chocolate and drizzle it over the whipped cream, or use a vegetable peeler to create chocolate shavings. You can also dust the top with cocoa powder if desired. After decorating, refrigerate the pie for at least 2 hours to let the flavors meld and ensure a clean slice when serving.
Banoffee Pie Recipe Variations
Feel free to put your own spin on this delightful dessert with these simple variations and substitutions!
-
Vegan Option: Use coconut cream and dairy-free butter for a delicious plant-based take, ensuring everyone can enjoy it.
-
Nutty Twist: Stir in crushed pecans or walnuts into the biscuit base for an added layer of crunch. The nuts will complement the creaminess beautifully!
-
Choco-licious: Add crushed Oreo cookies instead of digestive biscuits for a chocolatey crust that enhances the pie’s richness. This is a fun twist that chocolate lovers will adore.
-
Fruit Fusion: Swap out bananas for other fruits like strawberries or raspberries for a fruity twist. Each fruit will bring its unique flavor and freshness to the pie.
-
Spicy Kick: Sprinkle a pinch of cinnamon or nutmeg into the whipped cream for a warm, spicy note that contrasts beautifully with the sweetness of the toffee.
-
Caramel Delight: Drizzle extra caramel sauce over the pie before serving for a luxurious touch that will make every bite even more decadent.
-
Zesty Lemon: Add a splash of lemon juice to the bananas to enhance their flavor and provide a refreshing zing that complements the sweetness of the toffee.
While you’re having fun with this Banoffee Pie recipe, why not also check out a comforting Cowboy Soup or try some Variations Chopped Cheese for a savory accompaniment?
Storage Tips for Banoffee Pie
Fridge: Store leftovers in an airtight container in the refrigerator for up to 3 days. This keeps the pie fresh while preserving its delightful textures.
Freezer: Freeze individual slices of Banoffee Pie wrapped securely in plastic wrap and aluminum foil for up to 1 month. Thaw in the fridge overnight before serving.
Reheating: While this Banoffee Pie is best served chilled, if you’ve frozen a slice, let it come to room temperature for 15 minutes before enjoying to revive the flavors.
Make-Ahead: You can prepare this Banoffee Pie recipe up to 24 hours in advance. Just ensure it’s well-covered and refrigerated until ready to serve.
Expert Tips for the Best Banoffee Pie
-
Chill Before Serving: Refrigerate your pie for at least 2 hours to allow the flavors to meld beautifully and ensure a clean slice when serving.
-
Whip It Right: Whip the heavy cream until you achieve soft peaks. This keeps your topping light and airy—overbeaten cream can become clumpy and dense.
-
Watch the Toffee: While making the toffee layer, stir constantly and avoid overcooking the sweetened condensed milk to prevent burning—this can ruin your delicious Banoffee Pie.
-
Banana Selection: Choose ripe, sweet bananas for optimal flavor and texture. Underripe bananas may not provide the same sweetness and creaminess.
-
Customize With Care: Feel free to add toppings like crushed nuts or dark chocolate shavings, but be mindful that added ingredients can alter the overall texture of your Banoffee Pie.
What to Serve with Decadent No-Bake Banoffee Pie
Imagine how delightful it would be to complement this luscious dessert with perfect pairings, enhancing every bite.
-
Coffee: A warm, rich brew balances the sweetness, making it a perfect end to your meal. Sip slowly to appreciate how it elevates the creamy layers.
-
Vanilla Ice Cream: Add a cold and creamy contrast that harmonizes beautifully with the pie’s flavors. Picture a scoop, melting slightly against the cool pie – pure bliss!
-
Fresh Berries: Bright, tart berries like raspberries or strawberries offer a refreshing burst of flavor. Their acidity helps to cut through the richness, providing a delightful balance.
-
Chocolate Mousse: Elevate your dessert experience with a silky chocolate mousse. Its deep flavor pairs wonderfully with the banoffee, creating a luxurious treat after every spoonful.
-
Nutty Caramel Sauce: Drizzle this on top for an extra layer of indulgence; the crunch of nuts brings in a satisfying texture. It adds a gourmet twist that’s sure to impress your guests.
-
Herbal Tea: Consider serving a soothing herbal tea like chamomile or peppermint. These gentle flavors cleanse the palate and round out a sweet ending to your meal.
Each of these pairings ensures your Banoffee Pie experience is as rich and rewarding as possible, inviting everyone to linger around the table just a little longer.
Make Ahead Options
This Decadent No-Bake Banoffee Pie is an absolute gem for meal prep enthusiasts! You can prepare the biscuit base and the toffee layer up to 24 hours in advance, ensuring you save precious time on busy days. Simply crush the biscuits, mix them with melted butter, and press into the pan as directed; then cook the sweetened condensed milk until thickened and pour it over the crust. Store the pie components separately in the refrigerator to maintain freshness. When you’re ready to serve, just slice the bananas and layer them on top, then whip the cream and spread it over the bananas. This way, you’ll have a stunning dessert ready to impress, all with minimal last-minute effort!
Banoffee Pie Recipe FAQs
What type of bananas should I use for the Banoffee Pie?
You should opt for ripe, sweet bananas as they add the best flavor and texture to the pie. Look for bananas with a few brown spots on the skin; they tend to be sweeter and creamier. Avoid underripe bananas, as they won’t provide the same level of sweetness or smoothness in the final dessert.
How long can I store leftover Banoffee Pie?
Leftovers can be stored in an airtight container in the refrigerator for up to 3 days. Make sure to place it in a cool spot away from any strong-smelling foods to preserve its flavor. However, for the best taste and texture, it’s recommended to enjoy the pie within the first two days of preparation.
Can I freeze Banoffee Pie?
Absolutely! You can freeze individual slices of Banoffee Pie wrapped securely in plastic wrap and aluminum foil for up to 1 month. Just ensure they’re wrapped well to prevent freezer burn. When you’re ready to enjoy, thaw the slices in the fridge overnight and bring them to room temperature before serving to revive their delightful flavors.
What should I do if my toffee layer is too thick?
If your toffee layer ends up too thick and difficult to spread, simply add a tablespoon or two of milk while gently reheating it in a saucepan over low heat. Stir continuously until it reaches a smoother consistency that’s easier to pour over your biscuit base. This method also revitalizes the flavor and keeps it from becoming grainy.
Is there a vegan option for the Banoffee Pie?
Yes, you can easily make a vegan version of this Banoffee Pie! Replace the heavy cream with coconut cream and use vegan butter instead of unsalted butter for the crust. Ensure your biscuits are dairy-free too—many brands offer vegan-friendly options. This way, everyone can indulge in a slice of this delightful dessert.
How should I serve the Banoffee Pie for the best experience?
For the ultimate experience, serve your Banoffee Pie chilled with extra banana slices or a sprinkle of chocolate shavings on top for a luxurious touch. Pair it with a cup of coffee or a glass of dessert wine to enhance the flavors even more. Enjoy!
Irresistible Banoffee Pie Recipe: No-Bake Delight Awaits
Ingredients
Equipment
Method
- Begin by crushing the digestive biscuits into fine crumbs using a food processor or by placing them in a zip-top bag and rolling with a rolling pin. Melt the unsalted butter in a saucepan or microwave, then combine it with the biscuit crumbs. Press this mixture firmly into the bottom of a 9-inch tart pan to form an even layer, and refrigerate for 1 hour until set.
- In a heavy-bottomed saucepan, add the sweetened condensed milk and cook over medium heat for 5-7 minutes, stirring constantly until it thickens and turns a golden color. Pour the warm toffee mixture over the chilled biscuit base, spreading it evenly, and allow it to cool to room temperature.
- Once the toffee has set completely, slice fresh bananas into thin rounds and layer them evenly over the toffee to balance the sweetness.
- Take a chilled mixing bowl and add the heavy cream, powdered sugar, and vanilla extract. Using an electric mixer, beat the mixture on medium-high speed until you achieve soft peaks, which should take around 3-4 minutes. Spread the whipped cream generously over the banana layer.
- For an optional decorative flair, melt some dark chocolate and drizzle it over the whipped cream, or create chocolate shavings. After decorating, refrigerate the pie for at least 2 hours.
")