")
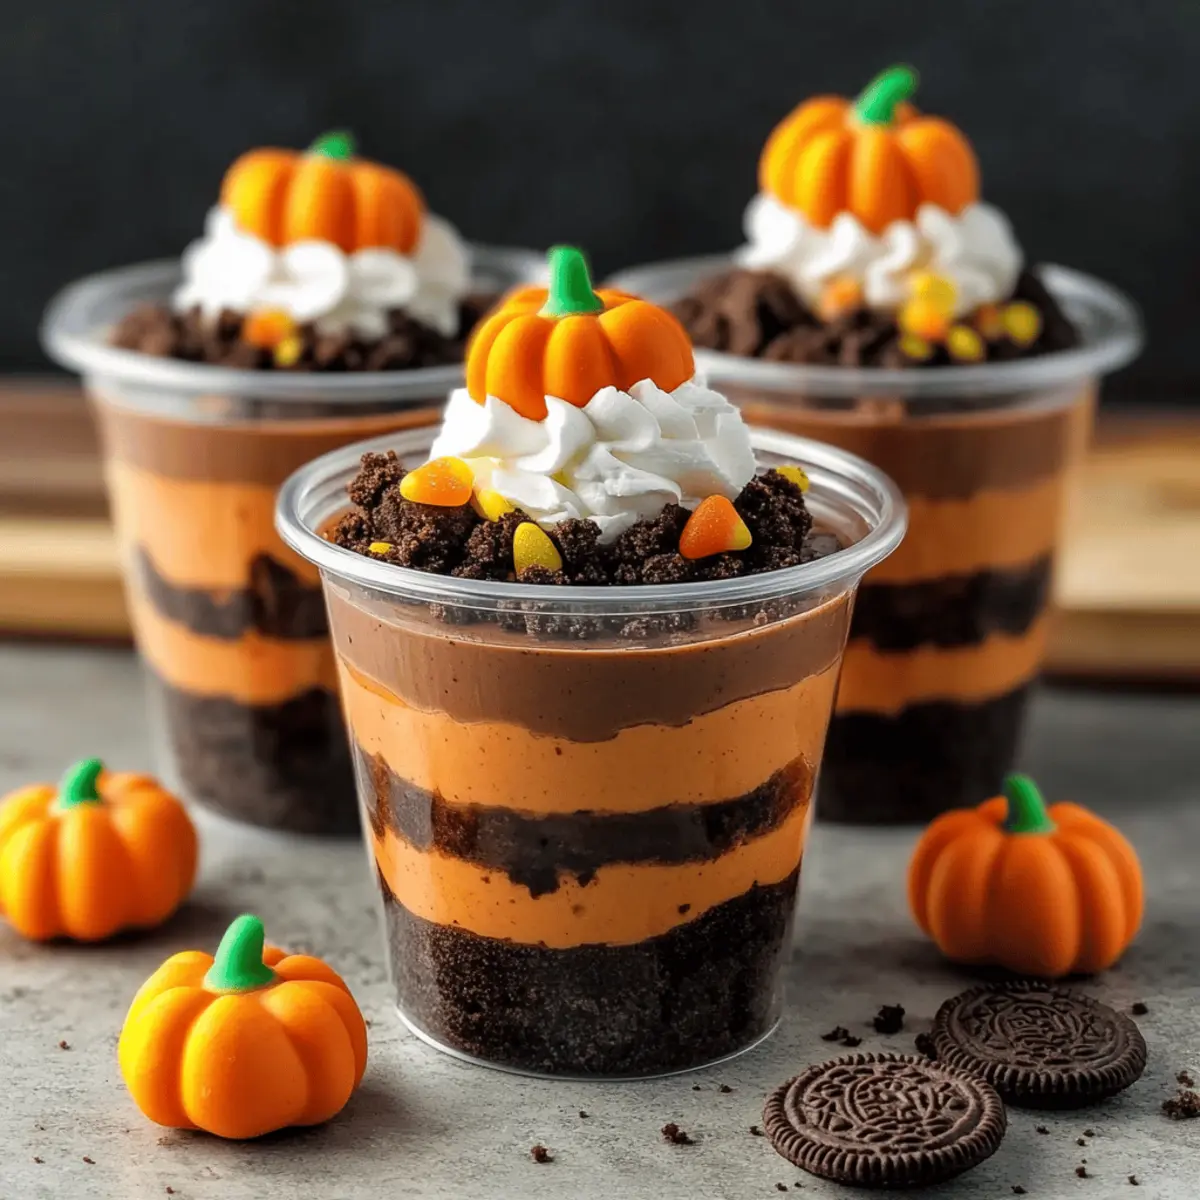
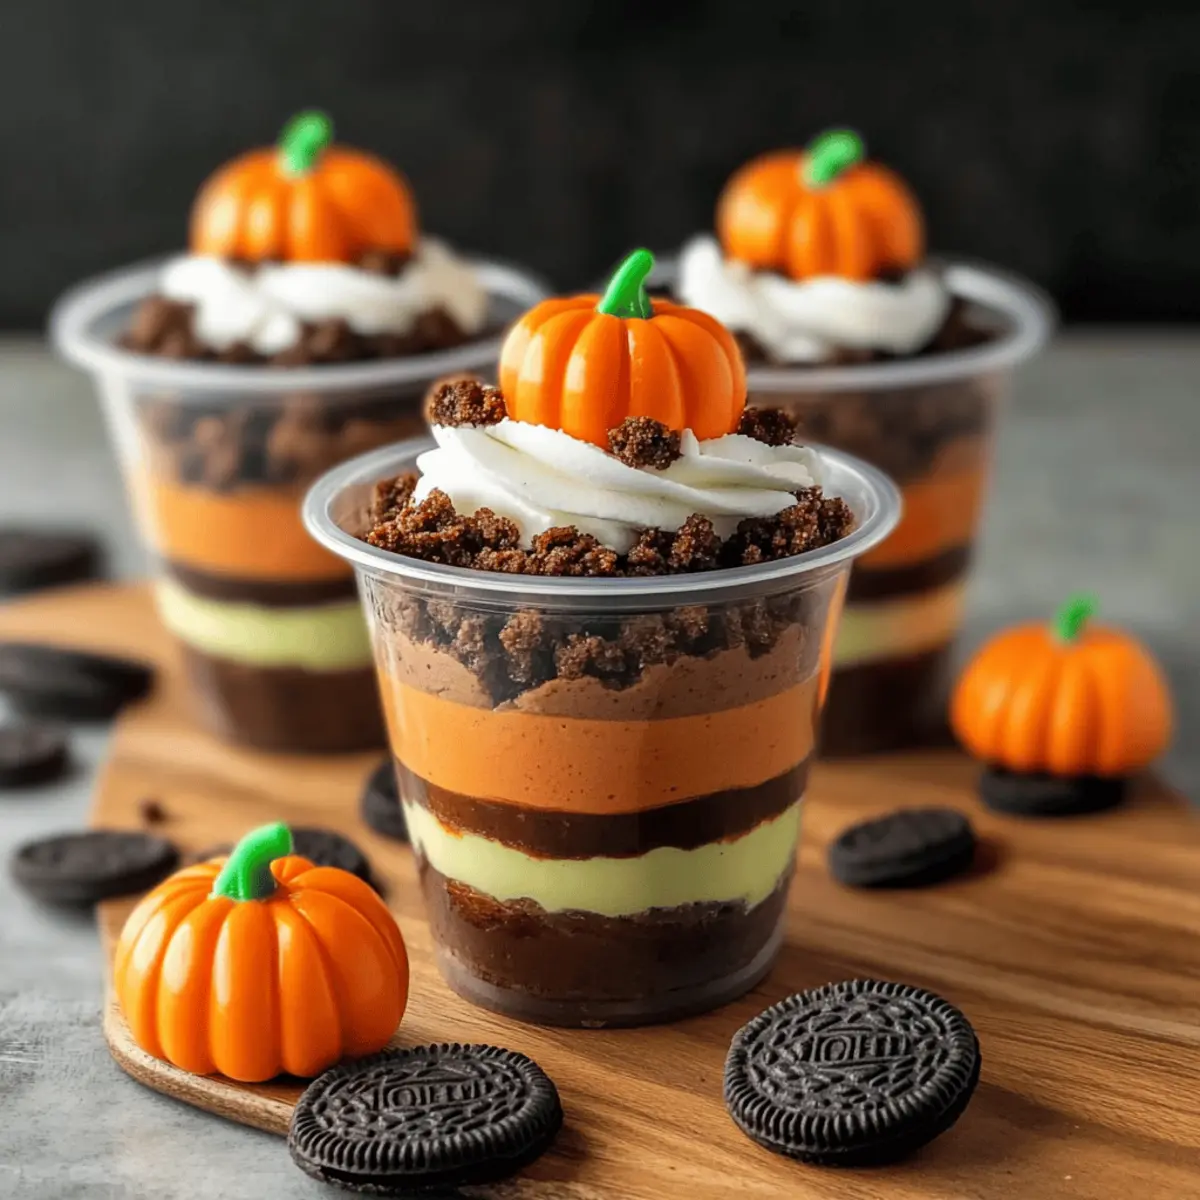
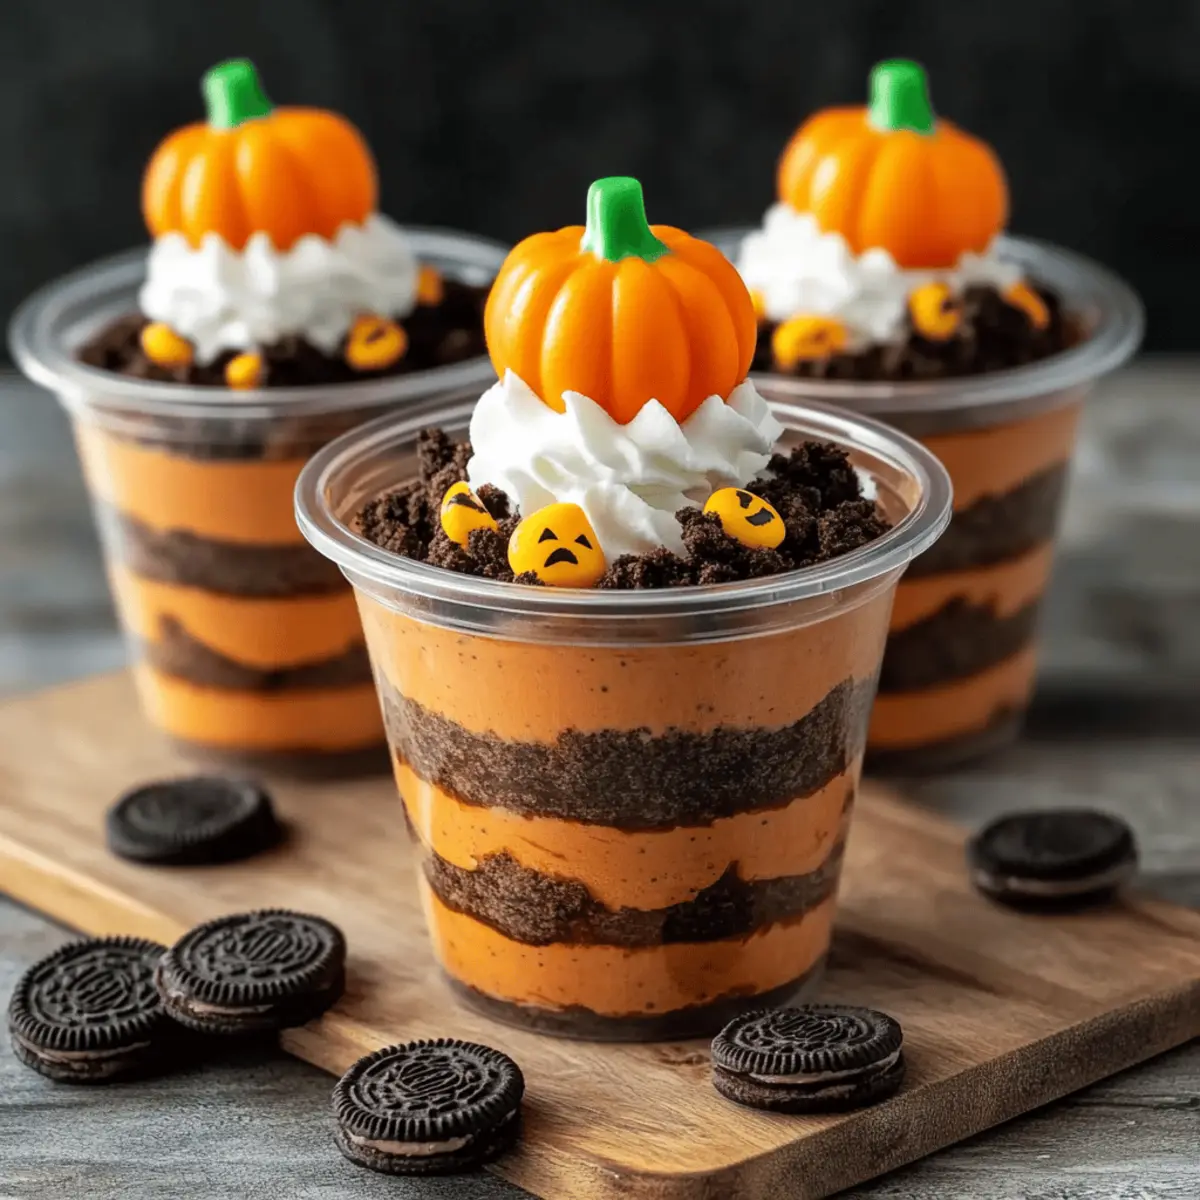
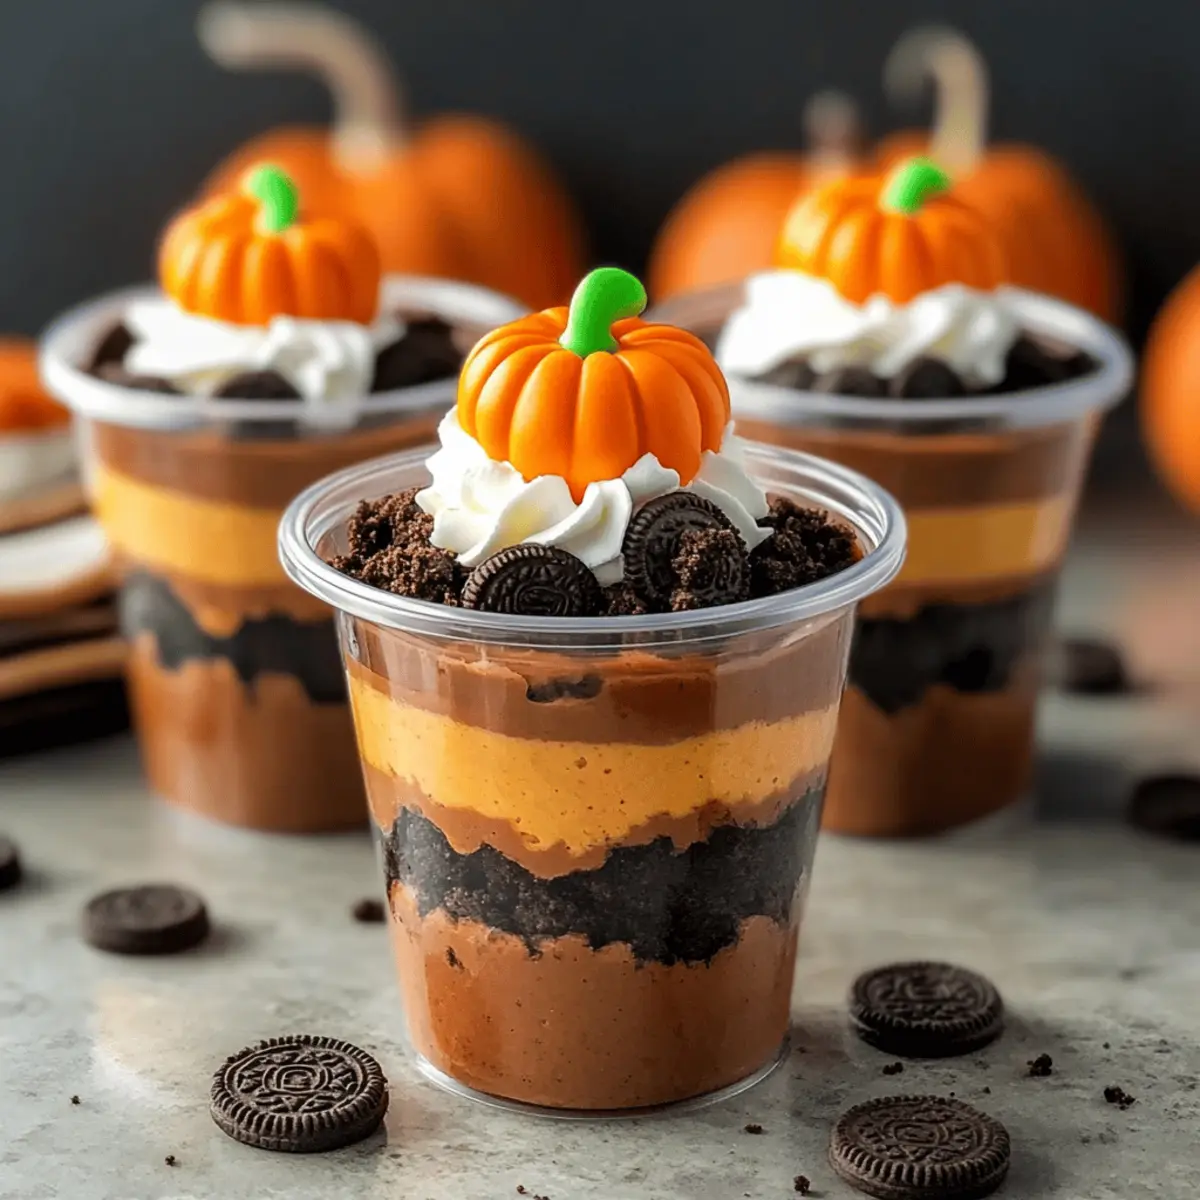
As I stood in the kitchen, the crisp autumn air wafting through the window, it struck me: Halloween is the perfect time for whimsical treats that spark joy. Enter the Pumpkin Patch Dirt Cups—a charming no-bake dessert that brings together creamy chocolate pudding and crunchy Oreos for a festive spin that both kids and adults will adore. Not only are these delightful cups a breeze to whip up, but they also allow for an adorable personalization with Halloween-themed toppings! Ideal for busy moments leading up to Halloween, they can be prepared in advance, giving you more time to savor the spooky season. Have you ever thought about how fun it is to create a dessert that looks as good as it tastes? Let’s dive into this recipe and create some magic together!
Why Are Pumpkin Patch Dirt Cups Perfect?
Whimsical and fun: These no-bake treats are not only simple to prepare but also a festive delight that captures the spirit of Halloween.
Customizable toppings: Let your creativity shine with candy pumpkins, gummy worms, or sprinkles to make each cup uniquely yours!
Family-friendly: Fun for kids and adults alike, they’re fantastic for parties where everyone can dig in and enjoy.
Make-ahead convenience: Prep ahead of time to reduce stress and maximize enjoyment during your Halloween festivities.
Flavors that please: The combination of rich chocolate pudding and crunchy Oreos will satisfy any sweet tooth—even more, when you explore variations with flavored pudding or gluten-free options!
Pumpkin Patch Dirt Cups Ingredients
For the Pudding Mixture
- Chocolate Pudding Mix – Provides the creamy base and rich chocolate flavor; consider dairy-free pudding mix for a vegan option.
- Milk – Activates the pudding mix and adds creaminess; switch to almond milk for a dairy-free version.
- Whipped Cream – Adds a light, airy texture and sweetness; use dairy-free whipped cream if needed.
For the Crunchy Layer
- Oreos – Offers crunch and a deep chocolate flavor; gluten-free cookies can be used as a substitute.
For the Topping
- Candy Pumpkins – A decorative element that enhances the Halloween theme; try adding optional gummy worms for extra fun!
Step‑by‑Step Instructions for Pumpkin Patch Dirt Cups
Step 1: Mix the Pudding
In a large mixing bowl, combine the chocolate pudding mix with 2 cups of cold milk. Whisk vigorously for 2 minutes until the mixture is smooth and slightly thickened. Allow it to sit for about 5 minutes to reach your desired creamy consistency. You’ll know it’s ready when it looks rich and velvety.
Step 2: Incorporate Whipped Cream
Once your pudding is thickened, gently fold 1 cup of whipped cream into the pudding mixture using a spatula. Aim for a smooth, fluffy texture—avoid overmixing to keep it airy. This combination creates the creamy base for our Pumpkin Patch Dirt Cups, ensuring every bite is light and delightful.
Step 3: Prepare the Cups
Grab clear plastic cups or dessert glasses to showcase the layers of your Pumpkin Patch Dirt Cups. Start with a generous spoonful of the pudding mixture at the bottom of each cup, smoothing it out for an even base. This first layer will be the foundation of your whimsical Halloween treat.
Step 4: Add the Crunchy Layer
Next, crush your Oreos into fine crumbs and sprinkle a layer over the pudding in each cup. Use about 2 tablespoons per cup, or enough to create a nice crunch. This layer not only contributes great flavor but also gives a wonderful texture contrast against the smooth pudding.
Step 5: Layer Again
Repeat the layering process by adding another generous spoonful of the chocolate pudding mixture over the crushed Oreos. Smooth it out nicely to ensure even coverage. Follow with another layer of crushed Oreos on top, building a delightful tower of flavors and textures in each cup.
Step 6: Top with Whipped Cream
Spoon a dollop of whipped cream on top of each layered cup for a fluffy finishing touch. This adds a light and airy element to the Pumpkin Patch Dirt Cups, making them visually appealing and inviting. You can do a swirled effect if you’re feeling creative!
Step 7: Add Halloween Decorations
Finally, decorate each cup with candy pumpkins, placing them artfully on top of the whipped cream. If desired, you can also add optional gummy worms for an extra touch of whimsy. These decorations will make your dessert festive, perfect for Halloween celebrations.
Step 8: Chill and Serve
Once fully layered and decorated, refrigerate your Pumpkin Patch Dirt Cups for at least 30 minutes before serving. This chilling time allows the flavors to meld together beautifully. When ready to enjoy, simply serve chilled, keeping the cups covered to preserve freshness until it’s time to indulge.
How to Store and Freeze Pumpkin Patch Dirt Cups
Refrigerator: Store any leftover Pumpkin Patch Dirt Cups covered in the fridge for up to 2 days. This keeps them fresh while maintaining their delightful layers.
Room Temperature: These cups should not be left out for more than 2 hours to ensure food safety. Always refrigerate when not serving.
Freezer: While it’s not recommended to freeze the assembled cups, you can freeze the pudding mixture and Oreo crumbs separately for up to 1 month. Thaw in the fridge before layering for best results.
Reheating: No reheating is necessary for these no-bake treats. Enjoy them chilled right from the fridge for the best taste and texture!
Pumpkin Patch Dirt Cups Variations
Feel free to unleash your creativity and personalize these delightful cups to match your taste and occasion!
-
Dairy-Free: Use coconut milk and dairy-free whipped cream to create a delicious vegan version that doesn’t compromise on flavor.
Imagine indulging in a creamy treat that feels just as rich and satisfying without any dairy! -
Gluten-Free: Substitute Oreos with gluten-free chocolate cookies for a safe and equally delicious sweet treat.
This ensures that everyone can enjoy the layers of chocolatey goodness without worry. -
Flavored Pudding: Try vanilla, butterscotch, or even pumpkin spice pudding for a unique twist on this classic dessert.
Each flavored pudding brings a new dimension, making it a fun experiment for your taste buds! -
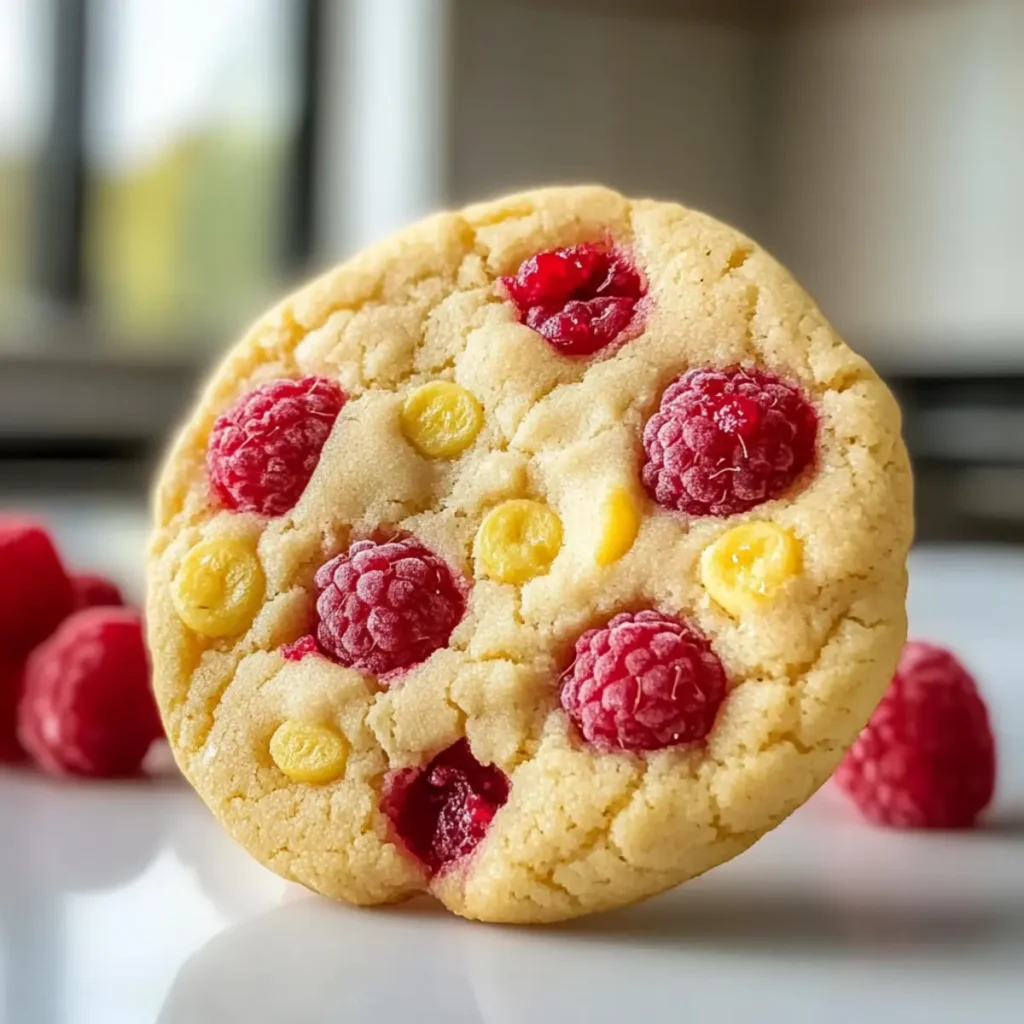
Fruit Toppings: Enhance the sweetness by adding fresh fruit like raspberries or sliced strawberries on top of the whipped cream.
The burst of freshness not only elevates the dish’s flavor but adds a pop of color, making it even more visually appealing. -
Chocolate Boost: Sprinkle mini chocolate chips or drizzle melted chocolate over the whipped cream for serious chocoholics.
This variation promises a rich, decadent experience in every spoonful, perfect for chocolate lovers! -
Spicy Kick: Add a pinch of cinnamon or a dash of cayenne pepper to the pudding for a whole new flavor profile.
This unexpected heat will surprise your guests and add a warming element to an otherwise sweet treat! -
Layer It Up: Instead of just two layers, create multiple layers of pudding, cookies, and toppings for a tall and impressive dessert.
The more layers, the more fun in discovering all the different textures and flavors with each bite! -
Personalized Garnishes: Let guests top their own cups with an array of toppings—think sprinkles, nuts, or even crushed candy bars!
This interactive element makes your dessert table more engaging and allows everyone to customize their treat just the way they like it.
With these variations, you can truly make the Pumpkin Patch Dirt Cups your own! For even more ideas, consider pairing them with a warm cup of spiced apple cider or exploring other no-bake dessert options that are just as delightful. Happy creating!
Expert Tips for Pumpkin Patch Dirt Cups
- Thickened Pudding: Allow the pudding to thicken for at least 5 minutes before layering. This prevents runny cups and ensures a delightful texture.
- Gentle Folding: When incorporating whipped cream into the pudding mixture, fold gently to maintain its airy texture and avoid deflation.
- Layering Technique: Create distinct layers by smoothing each layer down; this not only enhances presentation but also the tasting experience of these Pumpkin Patch Dirt Cups.
- Fresh Decorations: Garnish just before serving to keep the candy pumpkins vibrant and the whipped cream fluffy for a stunning visual appeal.
- Storage Tips: If you have leftovers, cover them and store in the refrigerator for up to two days to maintain freshness without losing texture.
What to Serve with Pumpkin Patch Dirt Cups
Elevate your Halloween festivities by pairing these charming cups with delicious sides and drinks that are sure to enhance the celebration.
-
Spiced Apple Cider: The warmth of this drink balances the sweetness of the cups, making it a classic autumn pairing.
-
Pumpkin Spice Muffins: These fluffy muffins echo the pumpkin theme, providing a comforting and festive touch alongside your dessert.
-
Chocolate-Covered Strawberries: A delightful contrast in flavor and texture, these add a fruity element that complements the rich chocolate pudding.
-
Candy Corn & Peanut Mix: This sweet and salty mix creates a fun crunch that resonates with the Halloween spirit—perfect for nibbling!
-
Caramel Apples: This classic autumn treat offers a satisfying crunch and sweetness that will delight your guests, enhancing the playful atmosphere.
-
Vanilla Ice Cream: A scoop of creamy vanilla ice cream adds a cooling element that pairs beautifully with the chocolate pudding layers.
-
Ghost-shaped Cookies: Fun and whimsical, these cookies are a delightful nod to Halloween traditions, perfect for dipping into the pudding.
-
Mini Pumpkin Pies: Individual pies echo the fall flavors of the Pumpkin Patch Dirt Cups while keeping the dessert theme consistent.
Consider these pairing ideas, and watch as your Halloween gathering transforms into a feast of flavors and festive cheer!
Make Ahead Options
These Pumpkin Patch Dirt Cups are fantastic for busy home cooks looking to save time! You can prepare the chocolate pudding mixture and crushed Oreos up to 24 hours in advance. Just store the pudding in an airtight container in the refrigerator to keep it fresh and prevent any skin from forming. Create the layers in your cups, but hold off on garnishing with whipped cream and candy pumpkins until you’re ready to serve—this ensures they stay fluffy and vibrant. When it’s time to indulge, simply add the whipped cream and decorations, and you’ll have a delightful dessert that’s just as delicious as if you made it that day!
Pumpkin Patch Dirt Cups Recipe FAQs
What type of chocolate pudding mix should I use?
Absolutely! You can use any chocolate pudding mix you love, such as instant or cooked varieties. For a vegan option, look for dairy-free chocolate pudding mixes, which are now widely available.
How long can I store leftover Pumpkin Patch Dirt Cups?
Leftover Pumpkin Patch Dirt Cups can be stored in the refrigerator for up to 2 days. Just make sure to cover them with plastic wrap or store them in airtight containers to maintain their freshness and layers.
Can I freeze Pumpkin Patch Dirt Cups?
While it’s not ideal to freeze the entire assembled Pumpkin Patch Dirt Cups, you can freeze the chocolate pudding mixture and crushed Oreos separately for up to 1 month. To do this, freeze the pudding in an airtight container and the Oreos in a zip-top bag. Thaw both in the refrigerator before assembling your cups again.
What should I do if my pudding isn’t thickening?
If your pudding isn’t thickening as expected, check the instructions on your pudding mix. Generally, allowing it to sit for an additional 5-10 minutes can help. If temperatures are too warm, consider refrigerating the pudding for a short while to help it set up properly. Remember, you want it to be thick enough to create solid layers in your cups!
Are there any dietary considerations for Pumpkin Patch Dirt Cups?
Definitely! These treats can be made suitable for various dietary needs. For those with nut allergies, use oat or rice milk instead of dairy or almond milk. If gluten is a concern, opt for gluten-free Oreo cookies, and for a vegan version, make sure to use dairy-free pudding and whipped cream. Always check labels to ensure that all ingredients align with dietary restrictions.
Can I customize the toppings for my Pumpkin Patch Dirt Cups?
Very! Feel free to get creative with toppings. Beyond candy pumpkins, you can use chocolate chips, sprinkles, or fresh fruits like raspberries. The more the merrier in making your cups visually appealing and tasty!
Pumpkin Patch Dirt Cups: Fun No-Bake Halloween Delight
Ingredients
Equipment
Method
- In a large mixing bowl, combine the chocolate pudding mix with 2 cups of cold milk. Whisk vigorously for 2 minutes until smooth and slightly thickened. Allow to sit for 5 minutes to reach desired consistency.
- Gently fold 1 cup of whipped cream into the pudding mixture using a spatula until smooth and fluffy.
- Grab clear plastic cups or dessert glasses and spoon a generous amount of pudding mixture at the bottom of each cup for an even base.
- Crush Oreos into fine crumbs and sprinkle a layer over the pudding in each cup. Use about 2 tablespoons per cup.
- Repeat layering with another spoonful of chocolate pudding mixture over the crushed Oreos, followed by another layer of crushed Oreos.
- Top each cup with a dollop of whipped cream for a fluffy finish.
- Decorate each cup with candy pumpkins and optional gummy worms.
- Refrigerate for at least 30 minutes before serving to allow flavors to meld.
")