")
As I stood in my kitchen, the sizzle of chicken frying filled the air, instantly transporting me to a cozy izakaya in Japan. Learning to make Japanese Katsu Bowls became a culinary adventure that transformed my evenings into something truly special. The crispy chicken cutlets, perfectly paired with fluffy rice and drizzled with a savory tonkatsu sauce, create the ultimate comfort food experience. One of the best parts? This delightful dish is not only a crowd-pleaser but also surprisingly quick to prepare, making it ideal for busy weeknights or when you want to impress guests. Are you ready to dive into this delicious journey of textures and flavors? Let’s cook up some Katsu magic!
Why Are Katsu Bowls So Irresistible?
Crispy Perfection: The golden-brown exterior of the katsu provides a satisfying crunch that contrasts beautifully with the tender chicken inside.
Authentic Flavor: Using tonkatsu sauce adds a rich, umami-packed dimension that elevates this comfort food dish beyond the ordinary.
Quick and Easy: Despite its restaurant-quality appeal, this recipe is surprisingly simple to whip up in under an hour, perfect for busy weeknights.
Versatile Options: Want to switch things up? Try using pork instead of chicken or even a vegetarian option with crispy tofu—the possibilities are endless.
Fun for Everyone: Whether you’re serving up family dinner or hosting friends, these Katsu Bowls will impress and satisfy all. Pair it with pickled vegetables for added freshness, making your meal even more delightful! If you’re keen on a simple yet flavorful lunch idea, check out the Lunch Homemade Japanese recipe too!
Japanese Katsu Bowls Ingredients
For the Chicken Katsu
• Chicken Breasts – The primary protein source; you can substitute with pork loin for a different flavor.
• Salt and Pepper – Enhance the chicken flavor; adjust to your personal preference.
• All-Purpose Flour – Creates a coating for the chicken; gives a solid base for the breadcrumbs.
• Eggs – Help the breadcrumbs stick; ensure they are well-beaten before use.
• Panko Breadcrumbs – Provides a light, crispy exterior; for a gluten-free option, use gluten-free breadcrumbs.
• Vegetable Oil – Used for frying; can be replaced with canola or peanut oil for a different taste.
For the Rice
• Japanese Short-Grain Rice – Yields an authentic texture; sushi rice is a suitable substitute.
• Rice Vinegar, Sugar, Salt – Season the rice for enhanced flavor; adjust sweetness and saltiness to your liking.
For the Tonkatsu Sauce
• Tonkatsu Sauce – A critical component bringing umami flavor; store-bought is fine but homemade is even better.
• Soy Sauce, Worcestershire Sauce, Ketchup – Flavor enhancers for the sauce; mix for a balanced dip.
Toppings
• Shredded Cabbage – Adds a fresh crunch; can be substituted with your choice of leafy greens.
• Green Onions – Provides a burst of flavor and color; optional but recommended for freshness.
• Sesame Seeds – Garnish with nuttiness; optional yet enhances the presentation.
• Pickled Ginger – An optional topping that adds acidity and complements the dish.
Dive into making these Japanese Katsu Bowls to experience a comforting and satisfying meal that will delight your family and friends!
Step‑by‑Step Instructions for Japanese Katsu Bowls
Step 1: Prepare the Rice
Begin by rinsing 2 cups of Japanese short-grain rice under cold water until the water runs clear, which removes excess starch. Soak the rinsed rice in water for 30 minutes. After soaking, drain and transfer the rice to a covered saucepan, adding 2 cups of fresh water. Bring to a boil, reduce heat to low, and simmer for about 15 minutes until the water is absorbed and rice is fluffy.
Step 2: Season the Rice
Once the rice is cooked, combine 2 tablespoons of rice vinegar, 1 tablespoon of sugar, and a pinch of salt in a small bowl, stirring until dissolved. Gently fold this mixture into the warm rice using a wooden spatula, being careful not to mash the grains. This seasoning process enhances the rice flavor and gives it that authentic touch often found in Japanese Katsu Bowls.
Step 3: Prepare the Katsu
While the rice cooks, take 2 chicken breasts and place them between two sheets of plastic wrap. Using a meat mallet, pound the chicken to an even thickness of about ½ inch. Season both sides generously with salt and pepper, ensuring the flavor penetrates, which will make your chicken katsu deliciously savory.
Step 4: Bread the Chicken
Set up a dredging station: in one shallow dish, place ½ cup of all-purpose flour. In a second dish, beat 2 eggs until well combined. In a third dish, spread 1 cup of panko breadcrumbs. Dredge each chicken breast first in the flour, shaking off excess, then dip in the beaten eggs, and finally coat both sides with panko breadcrumbs, pressing gently to adhere the crumbs for a crispy exterior.
Step 5: Fry the Katsu
In a large skillet, heat about ½ inch of vegetable oil over medium heat until it reaches 350°F (175°C). Carefully place the breaded chicken breasts in the hot oil, avoiding overcrowding the pan. Fry for 4-5 minutes on each side or until they are golden brown and crispy, checking for an internal temperature of 165°F (74°C). Use tongs to transfer the cooked katsu to a paper towel-lined plate to drain excess oil.
Step 6: Make the Sauce
While the katsu rests, prepare the tonkatsu sauce by combining ¼ cup of tonkatsu sauce, 1 tablespoon of soy sauce, 1 tablespoon of Worcestershire sauce, and 1 tablespoon of ketchup in a small bowl. Stir until well mixed, adjusting taste if needed, creating a savory, tangy drizzle that brings the Japanese Katsu Bowls together beautifully.
Step 7: Assemble the Bowl
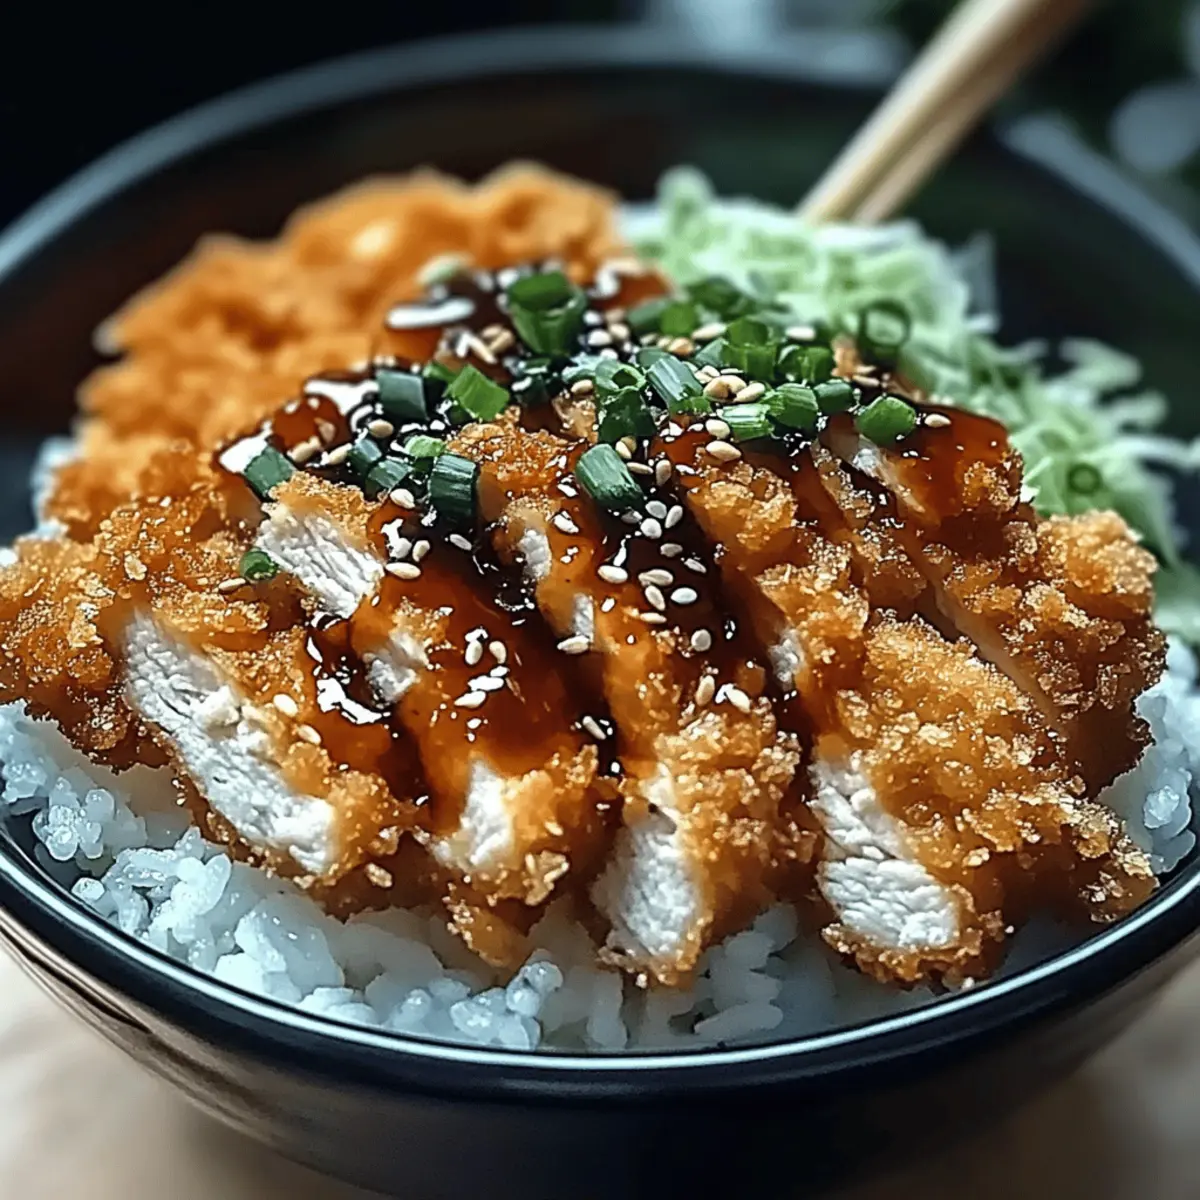
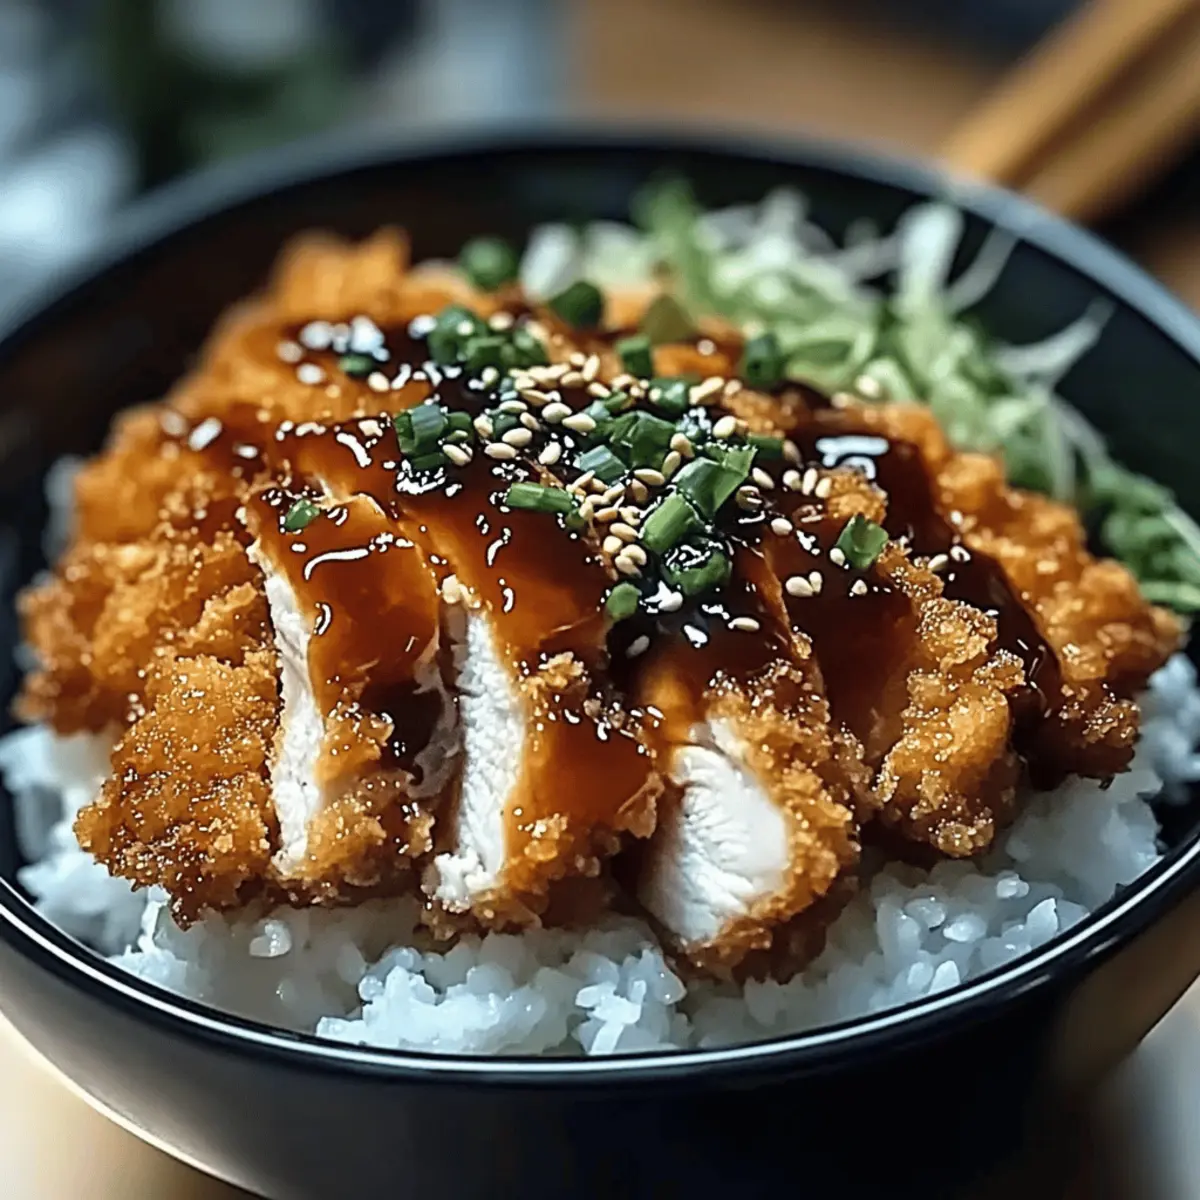
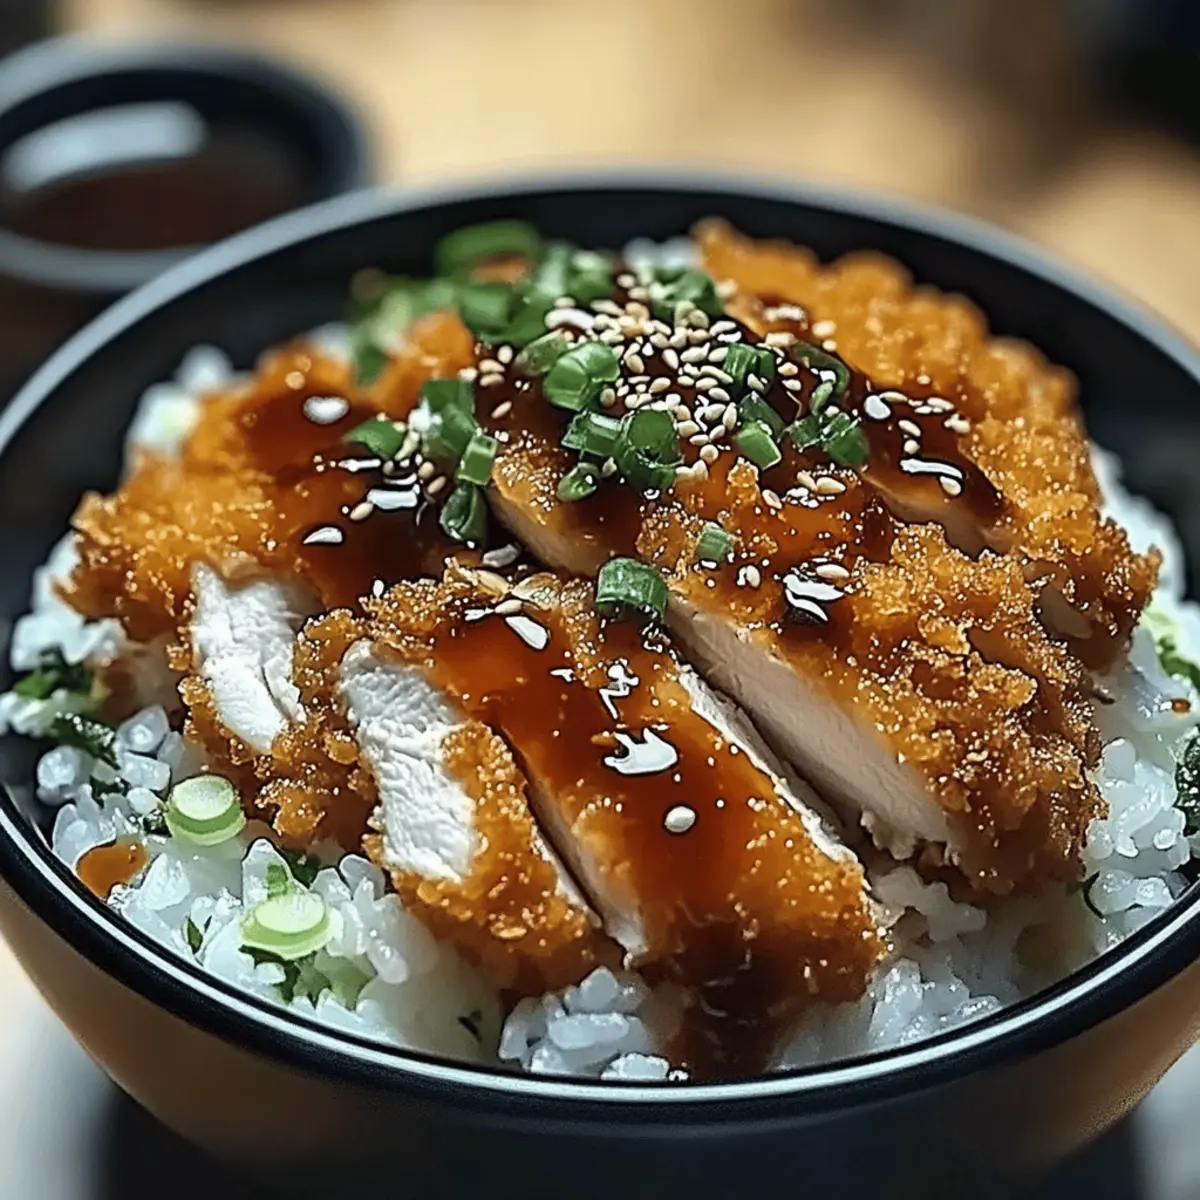
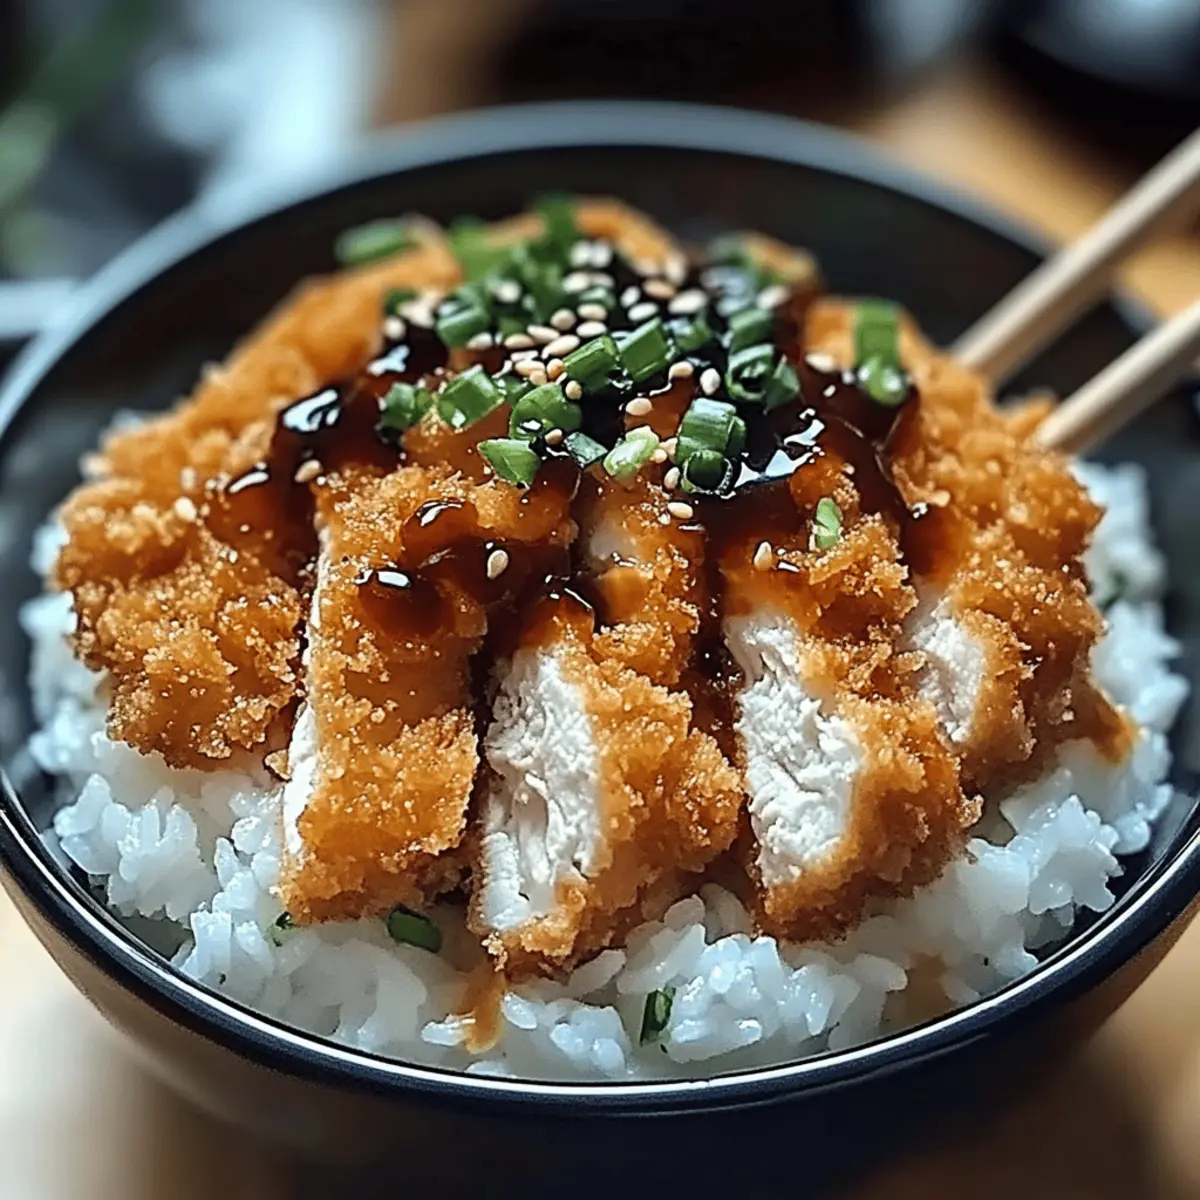
To serve, take a generous scoop of the seasoned rice and place it in a bowl. Top with sliced chicken katsu, creating an inviting presentation. Drizzle the prepared sauce generously over the katsu. Finally, add a handful of shredded cabbage, sprinkling chopped green onions and sesame seeds for garnish, along with optional toppings like pickled ginger for an added kick of flavor.
What to Serve with Authentic Japanese Katsu Bowls
Elevate your Japanese Katsu Bowls experience by pairing them with delightful sides and beverages that create a harmonious meal.
- Fresh Garden Salad: A light salad dressed in rice vinegar balances the rich katsu, adding freshness and crunch to every bite.
- Miso Soup: This comforting soup offers a warm umami flavor that complements the crispy katsu, enhancing your Japanese dining experience.
- Pickled Vegetables: A zesty side of pickled radish or cucumber cuts through the richness of the katsu, providing bright acidity and a pop of color.
- Steamed Edamame: These flavorful pods offer a delightful, nutty texture and add a healthy touch that’s perfect for nibbling as you enjoy your meal.
- Sushi Rolls: Pair your katsu with simple cucumber or avocado sushi rolls; their cool flavors will nicely offset the crispy warmth of the katsu.
- Green Tea: A soothing cup of hot green tea enhances the overall experience, cleansing the palate and allowing the flavors to shine through.
- Brown Rice: For a wholesome twist, substitute traditional white rice with brown rice. Its nuttiness adds depth while satisfying your dietary needs.
- Craft Beer: A light Japanese lager or pale ale pairs wonderfully with katsu, as the carbonation lifts the heaviness while complementing the savory notes.
- Homemade Custard Dessert: End the meal on a sweet note with a light custard, its creamy texture and subtle sweetness balancing the savory aspects of the meal.
- Fruit Plate: A refreshing assortment of seasonal fruits, like melon or berries, provides a vibrant, sweet contrast and enhances the meal’s overall appeal.
How to Store and Freeze Japanese Katsu Bowls
Fridge: Store any leftover Japanese Katsu Bowls in an airtight container for up to 3 days. To maintain crispiness for the katsu, avoid mixing it with the rice until serving.
Freezer: For longer storage, freeze the breaded chicken katsu separately in a freezer-safe container for up to 2 months. To reheat, bake at 375°F (190°C) until heated through and crispy, about 20-25 minutes.
Reheating: Reheat rice gently in the microwave or stovetop with a splash of water to restore moisture. For best results, reheat katsu in the oven to keep it crispy, rather than using the microwave.
Assembly: When ready to enjoy, layer the reheated rice and katsu, drizzle with fresh sauce, and add toppings to recreate that delicious original flavor!
Expert Tips for Japanese Katsu Bowls
-
Oil Temperature: Ensure the oil is hot enough before frying; it should sizzle when a small piece of bread is added. This prevents soggy katsu.
-
Chicken Thickness: Pound the chicken evenly to about ½ inch. This ensures uniform cooking, so you get that juicy inside with crispy outside.
-
Rest Before Slicing: Let the fried chicken rest for a few minutes before slicing. This helps retain moisture, making your katsu even juicier.
-
Seasoning Rice: Taste the rice after seasoning. Adjust vinegar, sugar, and salt to your preference for the perfect flavor balance with the Japanese Katsu Bowls.
-
Make-Ahead Sauce: Prepare the tonkatsu sauce in advance. It can be stored in the fridge for up to a week, making dinner prep easier on busy nights.
Make Ahead Options
Japanese Katsu Bowls are a wonderful meal prep solution for busy cooks! You can prepare the chicken katsu up to 24 hours ahead by breading the chicken and storing it in the refrigerator. Keep the panko-coated chicken in an airtight container to maintain its crispiness. You can also cook the rice in advance and refrigerate it for up to 3 days; just reheat it gently to revive its soft texture. When you’re ready to enjoy your Katsu Bowls, simply fry the prepped katsu directly from the fridge until golden brown, assemble your bowls with the reheated rice, and drizzle the sauce for a delicious meal that tastes just as fresh as if made that day!
Japanese Katsu Bowls Variations & Substitutions
Feel free to explore different ways to make these Japanese Katsu Bowls a delightfully personal meal experience!
- Pork Katsu: Swap chicken for pork loin for a classic twist and rich flavor.
- Vegetarian: Use breaded eggplant or tofu instead of katsu to create a delicious meat-free dish.
- Soft-Boiled Egg: Top your katsu bowl with a soft-boiled egg for a creamy addition and extra richness.
- Flavored Rice: Enhance your rice by adding dashi to bring out umami, creating an even tastier base.
- Crispy Shallots: Add crispy shallots on top for an added layer of crunch and savory flavor.
- Spicy Katsu: Kick up the heat by mixing sriracha into the tonkatsu sauce or using a spicy mayo drizzle.
- Sweet & Sour: Mix a touch of honey or maple syrup into your sauce for a sweeter balance that contrasts beautifully with the savory katsu.
- Fresh Herbs: Garnish your bowl with fresh cilantro or basil to introduce a burst of brightness and freshness.
For a delicious lunch alternative, don’t miss out on the Lunch Homemade Japanese recipe, too!
Japanese Katsu Bowls Recipe FAQs
How do I select the best chicken for my Katsu Bowls?
Absolutely! When choosing chicken breasts, look for ones that are firm and plump. Fresh chicken should have a pink hue and minimal dark spots. If you’re considering using pork loin, opt for cuts that are well-marbled for added flavor.
What’s the best way to store leftovers?
Very! Store leftover Katsu Bowls in an airtight container in the fridge for up to 3 days. To keep the katsu crispy, I recommend storing the chicken separately from the rice. When you’re ready to enjoy them again, simply reheat the katsu in the oven for a few minutes until it’s hot and crispy again.
Can I freeze my Katsu Bowls?
Definitely! To freeze, separate the cooked chicken katsu and the rice. Wrap the katsu tightly in plastic wrap and then in a freezer-safe bag or container for up to 2 months. When you’re ready to eat, bake the chicken at 375°F (190°C) for about 20-25 minutes until you’re back to that delightful crispy texture. Reheat the rice gently with a splash of water in the microwave to keep it moist.
What should I do if my katsu isn’t crispy?
No worries! If your katsu isn’t turning out crispy, check the oil temperature. It should be hot enough (around 350°F or 175°C) so that a bread crumb sizzles upon contact. Additionally, ensure you coat the chicken evenly and don’t overcrowd the pan. Fry in batches if necessary for the best results!
Can I make this dish gluten-free?
Absolutely! You can easily make Japanese Katsu Bowls gluten-free by swapping the all-purpose flour and panko breadcrumbs with gluten-free alternatives. Specifically, look for gluten-free flour blends and breadcrumbs, which work just as well in the breading process without compromising taste.
Is this recipe suitable for pets or those with allergies?
Very! Always be cautious. While chicken itself is safe for pets, avoid sharing the katsu with them, as seasoning and sauces can be harmful. As for allergies, be mindful of the breading ingredients and sauces. Substitute any problematic items, such as soy sauce, with allergy-friendly variations if needed.
Crispy Japanese Katsu Bowls That Will Bring Comfort Home
Ingredients
Equipment
Method
- Rinse the rice under cold water until the water runs clear, soak for 30 minutes, then drain and cook with 2 cups of water.
- Combine rice vinegar, sugar, and salt, stir until dissolved, and fold into the warm rice after cooking.
- Pound chicken breasts between plastic wrap to ½ inch thick, and season both sides with salt and pepper.
- Set up dredging station with flour, beaten eggs, and panko breadcrumbs. Dredge the chicken, then coat with panko.
- Heat oil in a skillet, fry the chicken for 4-5 minutes on each side until golden brown and cooked through.
- Combine tonkatsu sauce ingredients in a bowl and mix well.
- Assemble by placing rice in a bowl, topping with katsu, drizzling sauce, and adding toppings.
")