")
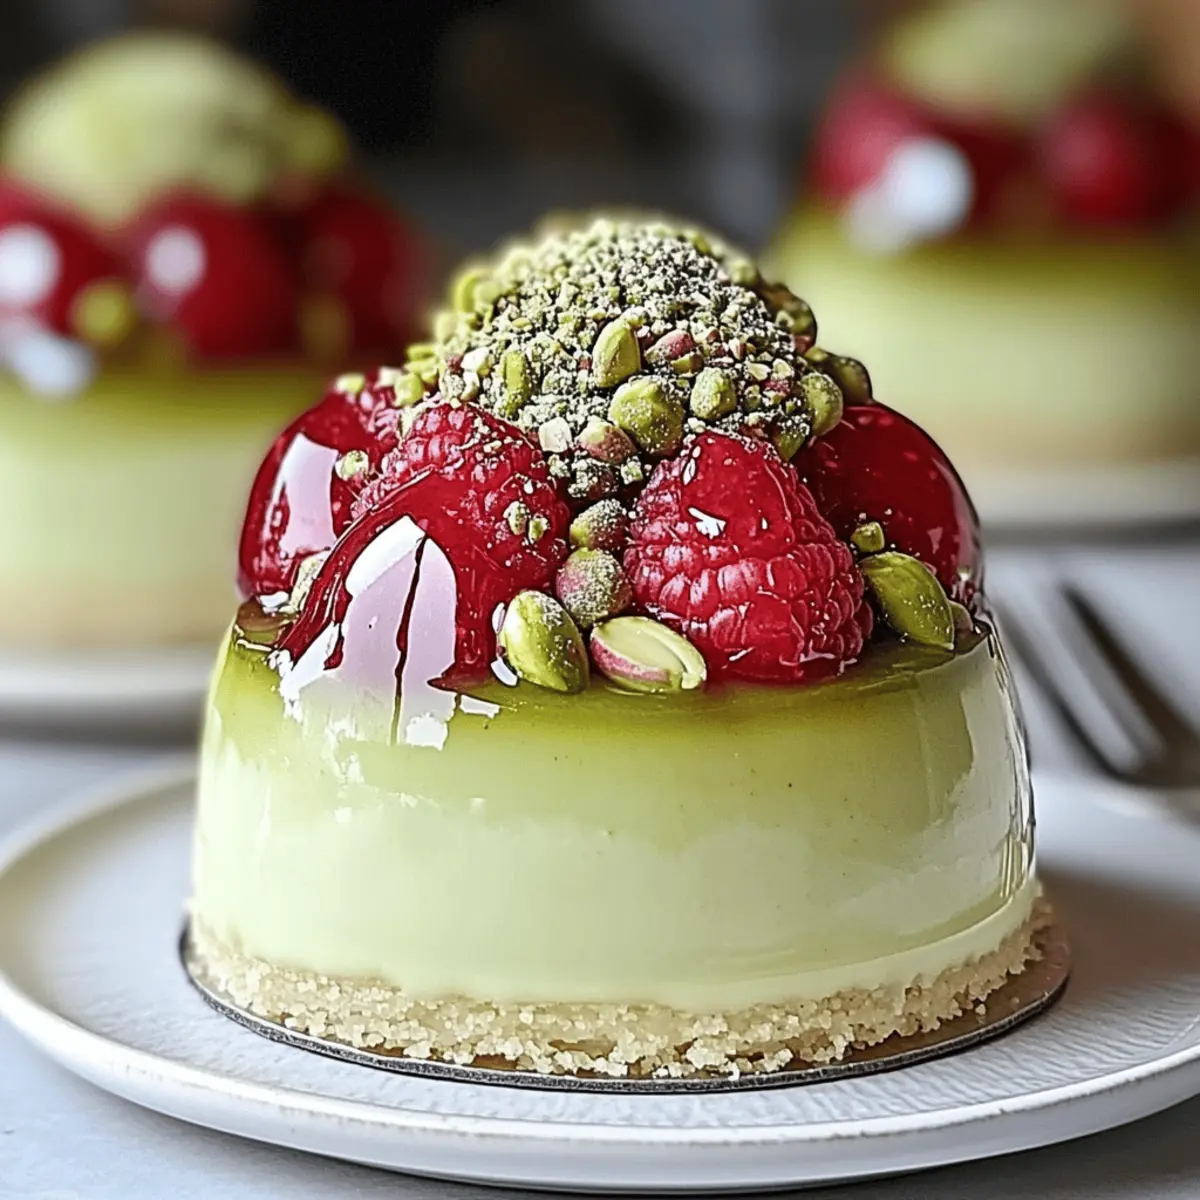
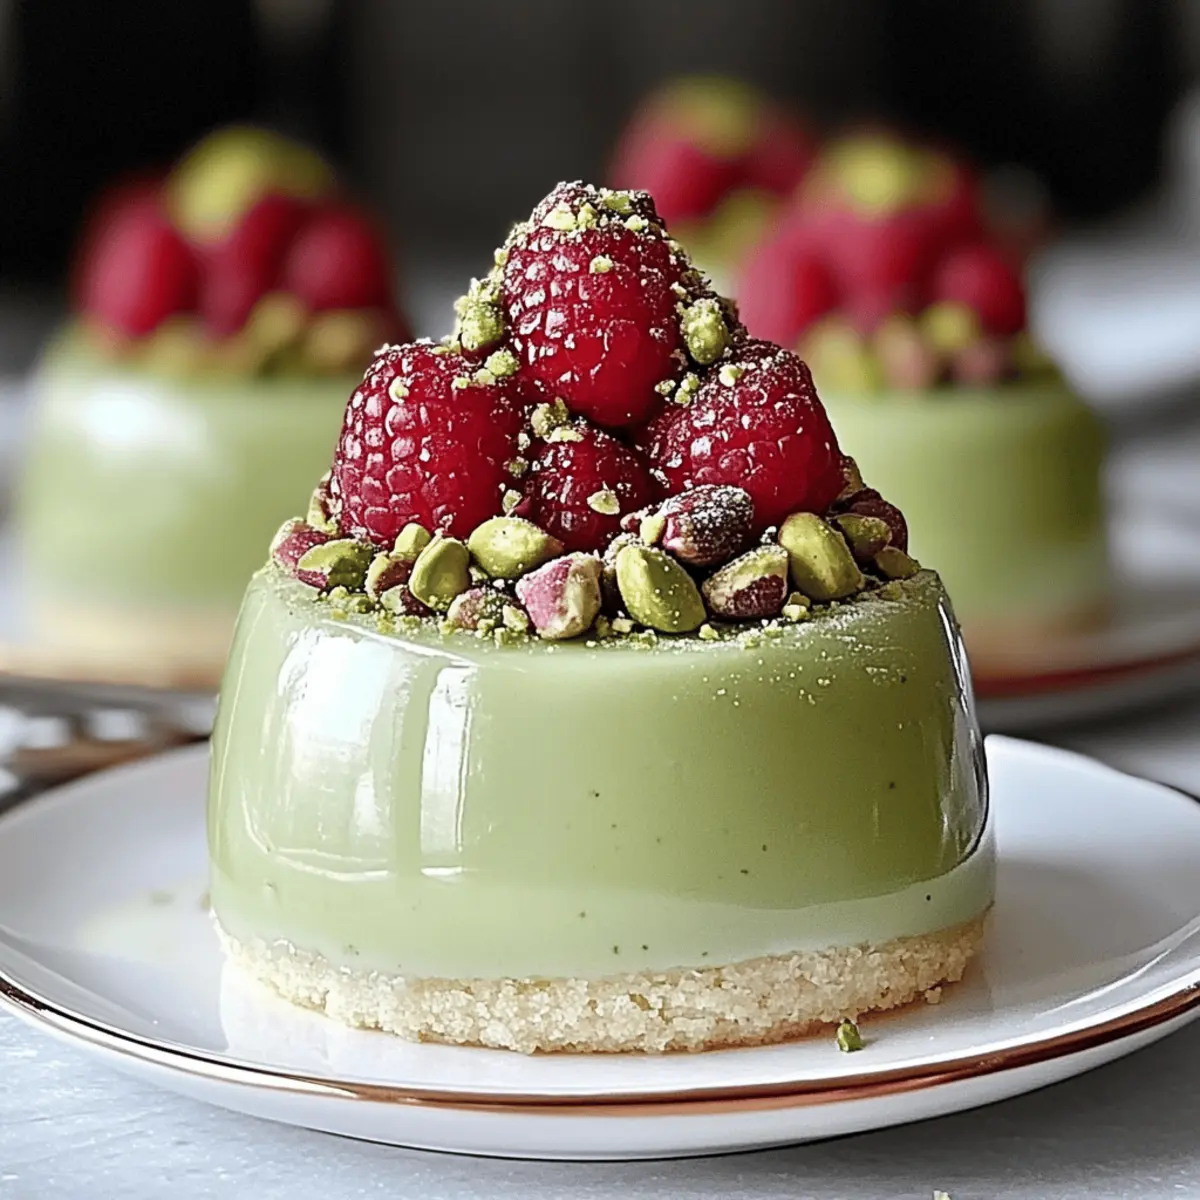
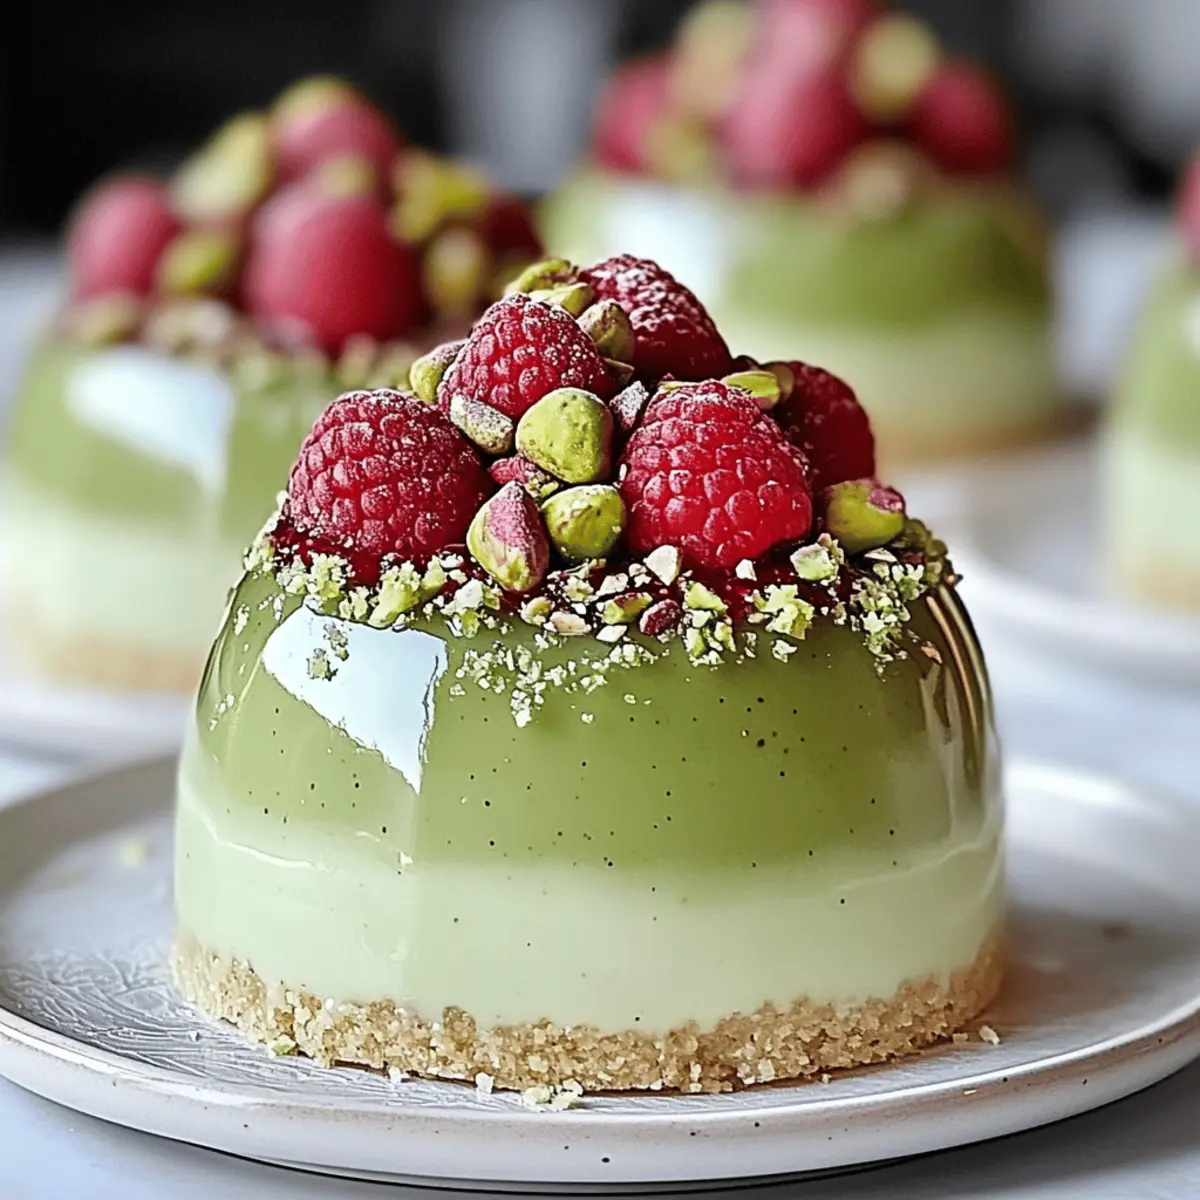
As I pulled these Pistachio & Raspberry Cheesecake Domes from the freezer, the glossy mirror glaze shimmered like a jewel, promising a delightful experience ahead. This no-bake dessert is not only a stunner on the table but also a crowd-pleaser, making it ideal for any celebration. The combination of the creamy pistachio cheesecake perfectly contrasts the tart raspberry center, creating a flavor explosion that dances on your palate. Perfect for bakers of all skill levels, this recipe offers the joy of creating something elegant without the fuss of baking. Ready to elevate your dessert game and impress your guests? Let’s dive into this luscious creation that will have them coming back for more!
Why Are These Cheesecake Domes Irresistible?
Delightfully Elegant: These Pistachio & Raspberry Cheesecake Domes are the epitome of sophistication, making them the star of any dessert table. No-Bake Perfection: With no baking required, they save you time while delivering stunning results. Flavor Harmony: The creamy pistachio and tangy raspberry create a delightful contrast that keeps your taste buds buzzing. Versatile Presentations: Whether served individually or in bite-sized morsels, they adapt beautifully for any occasion. Simple Techniques: Even novice bakers will shine with these straightforward steps, as each layer adds a little magic without overwhelming complexity. And if you love unique cheesecakes, be sure to check out our guide on Making Cheesecake Dip for more delightful ideas!
Pistachio & Raspberry Cheesecake Domes Ingredients
For the Cheesecake Filling
• Cream Cheese – Provides creaminess and structure for the cheesecake filling.
• Powdered Sugar – Adds sweetness to the filling and helps achieve a smooth texture.
• Pistachio Paste – Contributes nutty flavor and rich color to the cheesecake; use pure paste for the best results.
• Vanilla Extract – Enhances the overall flavor profile of the cheesecake.
• Heavy Cream – Used to create a light and airy texture in the cheesecake filling; ensure it’s cold for whipping.
For the Raspberry Center
• Fresh Raspberries – Offers bright, tart flavor for the raspberry center; can substitute with other berries if desired.
• Sugar – Balances the tartness of the raspberries for a harmonious sweetness.
• Lemon Juice – Enhances the flavor of the raspberry center, providing refreshing acidity.
• Cornstarch – Thickens the raspberry filling; be sure to dissolve it in water before using.
For the Sponge Base
• Eggs – Binds the ingredients for the sponge base, contributing to its light structure.
• Sifted Flour – Provides structure to the sponge cake; consider gluten-free flour as a substitute if necessary.
• Baking Powder – Aids in leavening the sponge to achieve a light and fluffy texture.
For the Mirror Glaze
• White Chocolate – Forms the base for the mirror glaze, contributing sweetness and a luxurious finish.
• Heavy Cream (for glaze) – Creates a silky texture in the mirror glaze.
• Green Food Coloring (optional) – Enhances the visual appeal of the glaze.
For Garnish
• Crushed Pistachios – Adds a delightful crunch and nutty charm to the presentation.
• Fresh Raspberries – Perfect for visual appeal and an extra burst of flavor.
Ready to bring these Pistachio & Raspberry Cheesecake Domes to life? Gather your ingredients and let’s get started on creating this stunning no-bake dessert!
Step‑by‑Step Instructions for Pistachio & Raspberry Cheesecake Domes
Step 1: Make the Raspberry Center
In a medium saucepan over medium heat, combine fresh raspberries, sugar, and lemon juice. Cook for about 5-7 minutes, stirring gently until the raspberries soften and break down. Once thickened, stir in the cornstarch slurry and cook for an additional 2 minutes. Pour the mixture into small silicone molds and freeze for at least 2 hours until solid, creating a flavorful raspberry center.
Step 2: Prepare the Cheesecake Filling
In a mixing bowl, beat together cream cheese, powdered sugar, pistachio paste, and vanilla extract until the mixture is smooth and creamy, about 3-4 minutes. In a separate bowl, whip the cold heavy cream to stiff peaks, ensuring the cream doubles in volume. Gently fold the whipped cream into the pistachio mixture in thirds, being careful not to deflate the fluffiness. Your pistachio cheesecake filling is now ready!
Step 3: Assemble the Domes
Take your silicone dome molds and spoon a layer of the cheesecake filling into each mold, about halfway full. Carefully insert the frozen raspberry centers into the center of each dome, ensuring they are surrounded by cheesecake filling. Top off with more cheesecake filling, smoothing the surface with a spatula, and freeze the assembled domes for at least 4 hours or until fully set.
Step 4: Make the Sponge Base
Preheat your oven to 350°F (175°C). In a mixing bowl, beat eggs and sugar together until the mixture becomes pale and fluffy, around 5-7 minutes. Gently fold in the sifted flour and baking powder until just combined. Pour the batter onto a lined baking tray and bake for 8-10 minutes or until lightly golden and springs back when touched. Allow it to cool, then cut out rounds slightly smaller than the dome molds.
Step 5: Complete the Domes
Once your cheesecake domes are fully set, take them from the freezer and press a sponge round onto each dome, covering the cheesecake completely. Ensure no gaps are left for a cleaner finish. Cover the molds with plastic wrap and return them to the freezer for an additional 2 hours, allowing the dessert to firm up completely before glazing.
Step 6: Prepare the Mirror Glaze
In a small saucepan, heat heavy cream until it simmers, then pour it over chopped white chocolate in a mixing bowl. Stir until the chocolate is fully melted and the mixture is smooth, about 2-3 minutes. Add the pistachio paste and optional green food coloring, whisking until fully blended. Allow the glaze to cool to approximately 90°F (32°C) for optimal pouring consistency.
Step 7: Glaze the Domes
Carefully unmold each frozen cheesecake dome by gently pulling away from the silicone. Place them on a wire rack set over a baking sheet to catch excess glaze. Slowly pour the prepared mirror glaze over each dome, allowing it to drizzle down the sides and catch the light. Allow any excess to drip off before transferring the domes to your serving plates.
Step 8: Garnish and Serve
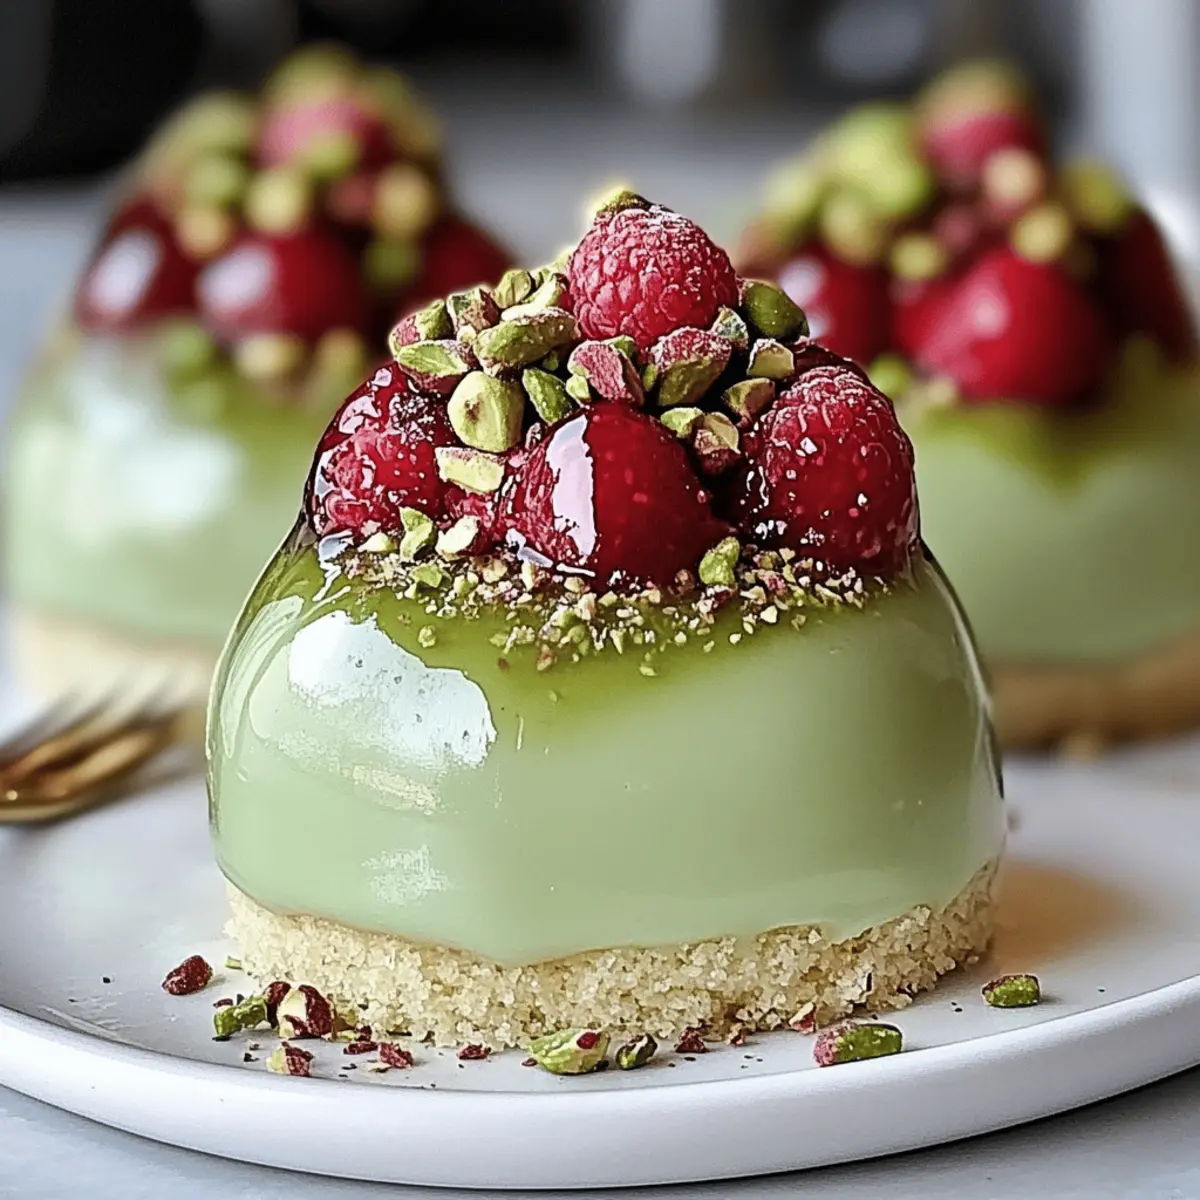
To finish off your stunning Pistachio & Raspberry Cheesecake Domes, sprinkle each dome with crushed pistachios and a few fresh raspberries for an elegant touch. Let the domes sit at room temperature for 15-20 minutes before serving, allowing the flavors to meld. Serve chilled and delight in this exquisite dessert that’s sure to impress your guests!
Storage Tips for Pistachio & Raspberry Cheesecake Domes
Room Temperature: These cheesecake domes are best enjoyed chilled; avoid leaving them at room temperature for more than 2 hours to maintain their texture.
Fridge: Once glazed, store the Pistachio & Raspberry Cheesecake Domes in an airtight container in the fridge for up to 3 days for maximum freshness.
Freezer: If leftovers remain, un-glazed domes can be frozen for up to 2 weeks. Wrap them tightly in plastic wrap and place in a freezer-safe container. Glaze just before serving.
Reheating: There is no need to reheat these dessert domes; serve them cold for the most delightful experience!
What to Serve with Pistachio & Raspberry Cheesecake Domes
Elevate your dessert presentation and create an unforgettable dining experience with these perfect pairings.
-
Fresh Mint Leaves: Adds a burst of freshness that complements the rich flavors of the cheesecake. Tossing a few leaves on the plate brings a lovely touch of color.
-
Savory Biscotti: The crunchiness and slight saltiness of biscotti provide a delightful contrast against the smooth, creamy texture of the domes; dip it in coffee for an exquisite experience.
-
Berry Coulis: A drizzle of homemade berry coulis not only enhances the raspberry flavors in the domes but also adds a pop of vibrant color to your plate.
-
Chocolate Ganache: This luscious, silky sauce offers a decadent touch that harmonizes beautifully with the sweetness of the cheesecake and the tartness of the raspberries.
-
Honeyed Yogurt: A dollop of honey-infused yogurt makes for a light, tangy accompaniment that balances the richness of the cheesecake while adding a creamy texture.
-
Sparkling Wine: A glass of sparkling wine or Prosecco enhances the celebratory vibe of the dessert, with effervescence that complements its elegant nature.
-
Chai Spiced Tea: The warm spices in chai tea harmonize with the nuts in the cheesecake, making it a cozy pairing that’s especially nice in cooler months.
-
Lemon Sorbet: A refreshing scoop of lemon sorbet cleanses the palate and provides a bright counterpoint to the richness of the cheesecakes, keeping the dessert experience light and delightful.
Make Ahead Options
These Pistachio & Raspberry Cheesecake Domes are perfect for busy home cooks looking to save time during special occasions! You can prepare the raspberry centers and cheesecake filling up to 24 hours in advance; simply freeze the raspberry mixture in molds and refrigerate the cheesecake filling until ready to assemble. The completed domes can be stored in the freezer for up to 2 weeks. Just before serving, press the sponge bases onto the domes and glaze them for that fresh, irresistible finish. Remember, glazing should be done right before serving to ensure a beautiful shine! With these make-ahead options, your dessert presentation will be effortless and every bite just as delightful!
Pistachio & Raspberry Cheesecake Domes Variations
You can easily modify these delightful domes to suit your taste, adding layers of flavor and fun!
- Almond Variation: Substitute pistachio paste with almond paste for a unique nutty flavor twist that brings warmth to each bite.
- Berry Mix: Swap out raspberries for mixed berries like strawberries or blueberries for a burst of color and different flavor profiles. The sweetness of strawberries pairs beautifully with creamy textures!
- Vegan: Use coconut cream instead of heavy cream, and cashew cheese for a dairy-free version that retains richness.
- Chocolate Drizzle: Add a drizzle of dark chocolate over the glaze for a sweet contrast that adds depth to the taste. It’s an indulgent touch on an already luxurious dessert that chocolate lovers will adore!
- Gluten-Free Sponge: Replace regular flour with a blend of gluten-free flours to accommodate those with dietary restrictions without compromising texture.
- Spice Up: Incorporate a pinch of cardamom or cinnamon into the cheesecake filling for an unexpected spice contrast that enhances the nutty flavor of the pistachios. It brings a warm, aromatic note that elevates each bite!
- Bite-Sized Treats: Use mini molds to create smaller domes, perfect for appetizers or dessert platters that add an elegant touch to your gatherings.
- Passion Fruit Touch: Add a layer of passion fruit puree on top of the raspberry center for a tropical twist that brings excitement and tartness to each dome.
If you’re curious about trying new flavors, consider checking out our guide on Making Cheesecake Dip to bring even more creativity to your dessert table!
Expert Tips for Pistachio & Raspberry Cheesecake Domes
-
Chill Ingredients: Ensure your heavy cream is cold before whipping; this helps achieve maximum volume in your cheesecake filling.
-
Smooth Glaze: Allow the mirror glaze to cool to about 90°F (32°C) before pouring. This temperature helps it maintain a perfect flow and prevents melting the domes.
-
Use Quality Nuts: Always opt for high-quality pistachio paste in your Pistachio & Raspberry Cheesecake Domes to enhance flavor. Low-quality paste may contain additives that alter the taste.
-
Mind the Freezing: Don’t rush the freezing process. Allow each layer to freeze fully, ensuring your domes hold their shape and texture perfectly.
-
Creative Variations: Experiment with different fruit centers, such as strawberries or blueberries, to add a unique twist while keeping the same technique!
-
Presentation Matters: Garnish with a sprinkle of crushed pistachios and fresh raspberries for that elegant finish.
Pistachio & Raspberry Cheesecake Domes Recipe FAQs
What should I look for when selecting raspberries?
Absolutely! When choosing fresh raspberries for your cheesecake center, look for berries that are plump, firm, and vibrant in color. Avoid any raspberries with dark spots or signs of mold, as they are past their prime. Fresh raspberries should also have a slight sheen and feel dry—any moisture can negatively affect their flavor and firmness.
How long can I store the glazed cheesecake domes in the fridge?
Very well! Once you’ve glazed your Pistachio & Raspberry Cheesecake Domes, store them in an airtight container in the fridge for up to 3 days. Be sure to keep them cool, as that helps preserve the silky texture and vibrant flavors.
Can I freeze un-glazed cheesecake domes?
Of course! If you happen to have any leftover un-glazed domes, you can freeze them for up to 2 weeks. Simply wrap each dome tightly in plastic wrap and place them in a freezable container. When you’re ready to serve, unfreeze and glaze them just before presenting for a fresh finish.
What if my mirror glaze is too thick to pour?
Don’t worry! If you find your mirror glaze thickening, gently reheat the mixture over low heat while whisking continuously until it reaches a smooth, pourable consistency. Make sure to cool it down to about 90°F (32°C) before glazing your domes for optimal results, ensuring a silky finish without melting them!
Are these cheesecake domes suitable for those with nut allergies?
Good question! Since these Pistachio & Raspberry Cheesecake Domes use pistachio paste, they are not safe for those with nut allergies. However, if you’re seeking a nut-free alternative, consider substituting pistachio paste with a dairy-based or coconut-based cream for flavor while ensuring the result remains luscious and creamy. Always double-check all ingredient labels when preparing for those with dietary restrictions!
How can I tell when my raspberry center is thick enough?
Great inquiry! To ensure your raspberry center is perfectly thickened, after combining the raspberries with sugar and lemon juice, cook for about 5-7 minutes until they soften and break down. When you add the cornstarch slurry, continue stirring for an additional 2 minutes. You’ll know it’s thick enough when it coats the back of a spoon without running off too quickly—this will give you a deliciously satisfying center for each dome!
Pistachio & Raspberry Cheesecake Domes That Impress Every Time
Ingredients
Equipment
Method
- Make the Raspberry Center: In a saucepan, combine raspberries, sugar, and lemon juice. Cook for 5-7 minutes until softened. Stir in the cornstarch slurry and cook for 2 minutes. Pour into molds and freeze for at least 2 hours.
- Prepare the Cheesecake Filling: Beat together cream cheese, powdered sugar, pistachio paste, and vanilla until smooth. Whip heavy cream to stiff peaks. Fold into the pistachio mixture in thirds.
- Assemble the Domes: Spoon cheesecake filling into molds halfway, insert raspberry centers, then top with more cheesecake filling. Freeze for at least 4 hours.
- Make the Sponge Base: Preheat oven to 350°F. Beat eggs and sugar until pale and fluffy. Fold in flour and baking powder, pour onto baking tray, and bake for 8-10 minutes. Cool and cut rounds.
- Complete the Domes: Press sponge rounds onto each dome, cover completely. Freeze for an additional 2 hours.
- Prepare the Mirror Glaze: Heat heavy cream until simmering. Pour over chopped chocolate, stir until melted. Add pistachio paste and food coloring, whisk until smooth. Let cool to 90°F.
- Glaze the Domes: Unmold cheesecakes and pour glaze over each dome on a wire rack. Allow excess to drip off.
- Garnish and Serve: Sprinkle with crushed pistachios and fresh raspberries. Let sit at room temperature for 15-20 minutes before serving.
")