")
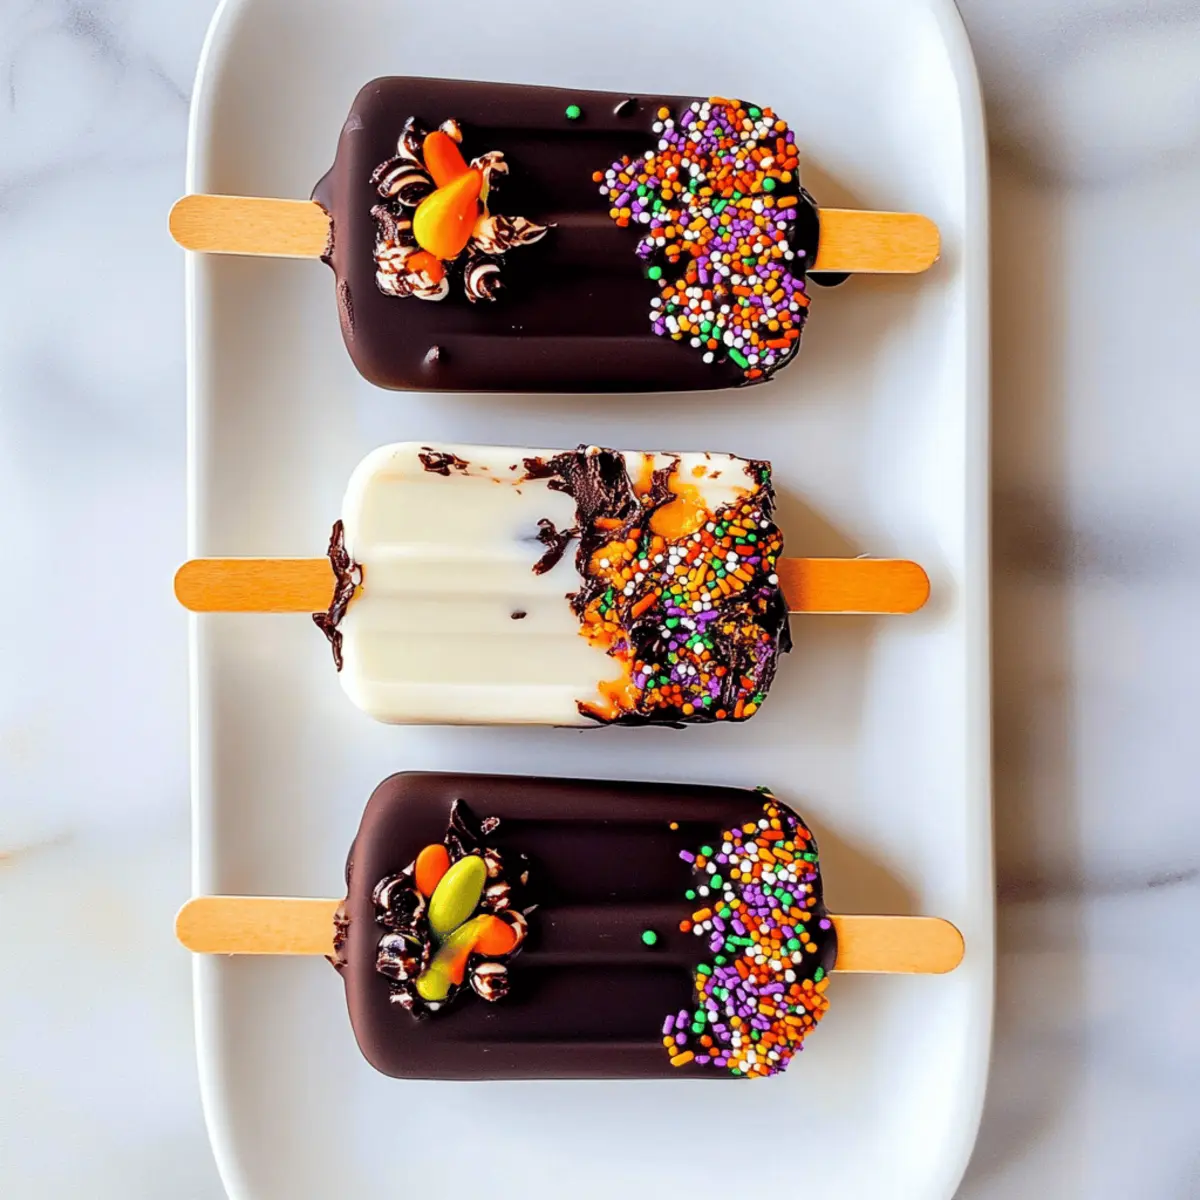
The leaves are turning, and there’s a playful chill in the air—Halloween is creeping closer! What better way to celebrate than with Halloween Cakesicles? These fun and easy treats transform leftover cake or cupcakes into festive, chocolate-coated delights that are perfect for any spooky gathering. Not only will you reduce waste by repurposing your delicious creations, but these cakesicles are also a surefire hit with kids and adults alike. With endless options for decoration and flavors, you can let your creativity run wild, ensuring each bite is as unique as your Halloween spirit. Ready to dive into some sweet and playful kitchen magic? Let’s get started!
Why will kids love these cakesicles?
Kid-Friendly Fun: These Halloween Cakesicles are not just a treat; they’re an activity! Kids will love helping you decorate, making them perfect for family bonding time.
Creative Freedom: With endless decorating possibilities, you can customize each cakesicle to match your Halloween theme, whether it’s spooky ghosts or vibrant pumpkins.
Easy Recipe: The straightforward steps mean even novice bakers can whip these up with ease, turning leftover cake into delicious memories in no time!
Waste Not, Want Not: This recipe is a fantastic way to repurpose leftover cake or cupcakes, ensuring nothing goes to waste while satisfying your sweet tooth.
Party Pleaser: Perfect for Halloween parties or school events, these cakesicles are colorful, delicious, and will surely impress guests of all ages!
Halloween Cakesicles Ingredients
For the Cake Base
• Leftover Cake or Cupcakes – Any flavor works; red velvet adds a festive touch for Halloween.
• Frosting – Use your favorite type; it helps bind the cake and adds moisture.
For the Coating
• Coating Chocolate or Candy Melts – Ghirardelli is recommended for excellent flavor; colored melts make for great decoration.
• Food Color (optional) – Oil-based or powdered colors work best for achieving vibrant shades when melting chocolate.
For Shaping
• Cakesicle Mold – Essential for shaping your cakesicles; having 2-3 molds speeds up the process.
This recipe for Halloween Cakesicles is an easy way to bring creativity and fun to your kitchen while repurposing leftover cake into delightful desserts!
Step‑by‑Step Instructions for Halloween Cakesicles
Step 1: Prepare Cake Mixture
Begin by crumbling your leftover cake or cupcakes into a large mixing bowl. Add enough frosting to bind the cake together, mixing until it’s well combined and resembles a dough consistency. This mixture should hold its shape when pressed. Aim for about 1-2 cup of frosting per 4 cups of cake.
Step 2: Mold Filling
Next, firmly pack the cake mixture into your cakesicle molds, filling them to the top for a nice, rounded shape. Use a spatula or your fingers to ensure that the mixture is evenly distributed and compacted within the mold. This helps the Halloween Cakesicles maintain their form once removed from the molds.
Step 3: Chill
Once filled, place the molds in the refrigerator to set for at least 30 minutes. This chilling time is crucial for the cakesicles to firm up, making them easier to remove later. You’ll know they’re ready when the mixture feels solid to the touch, not soft or crumbly.
Step 4: Melt Chocolate
While the molds chill, melt your coating chocolate or candy melts. You can do this in a microwave-safe bowl in 30-second intervals, stirring in between, until smooth and fully melted. Alternatively, use a double boiler on low heat. The ideal temperature is around 110°F to prevent overheating, which can ruin the chocolate’s texture.
Step 5: Coat Cakesicles
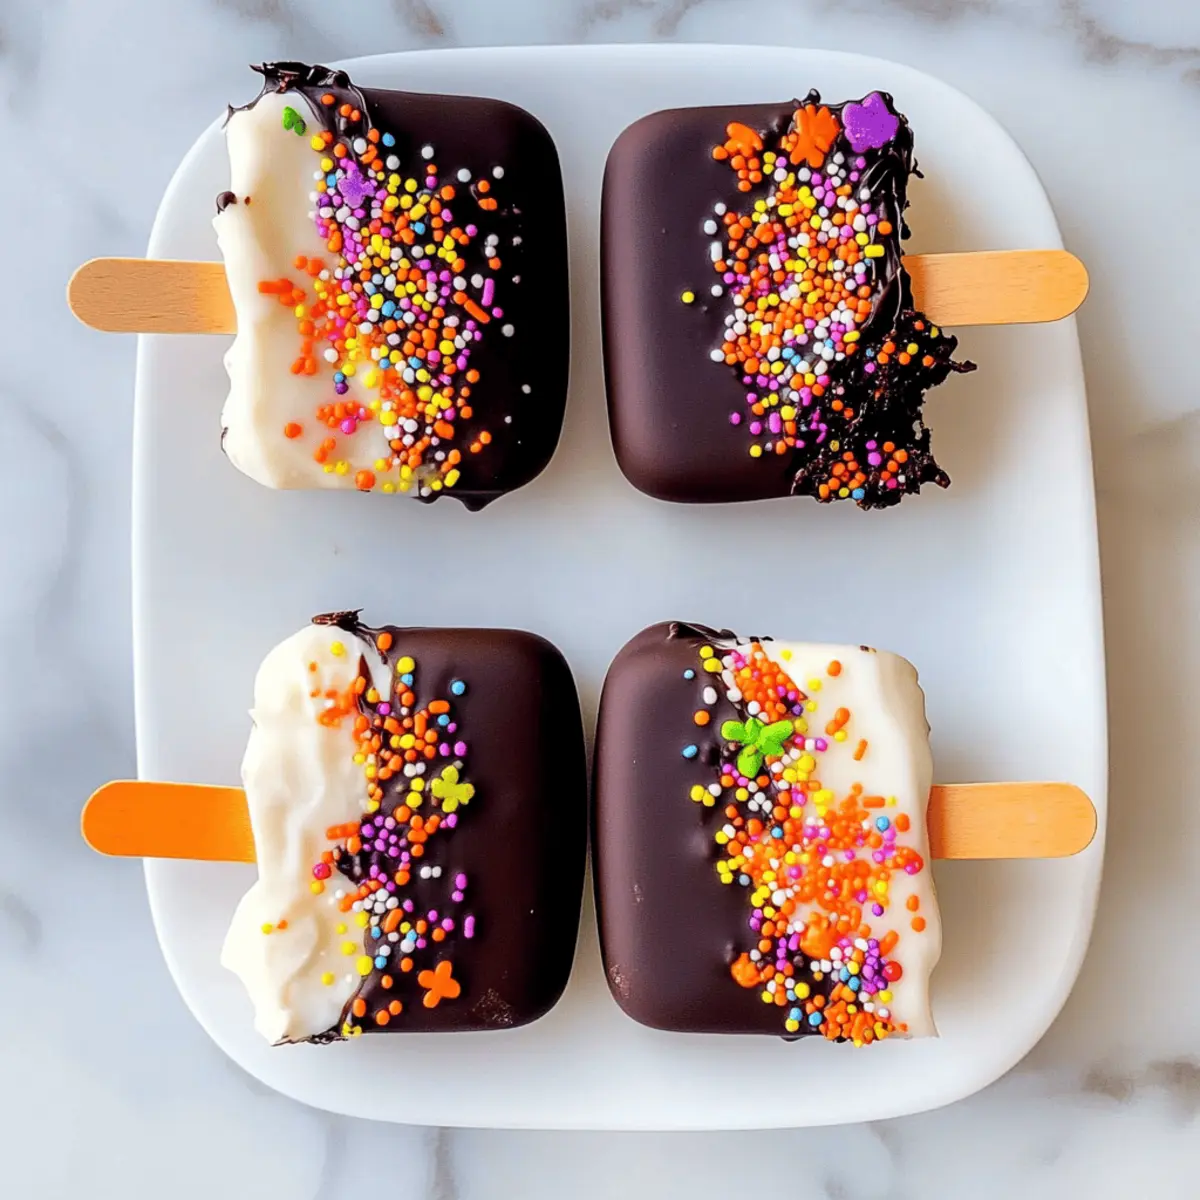
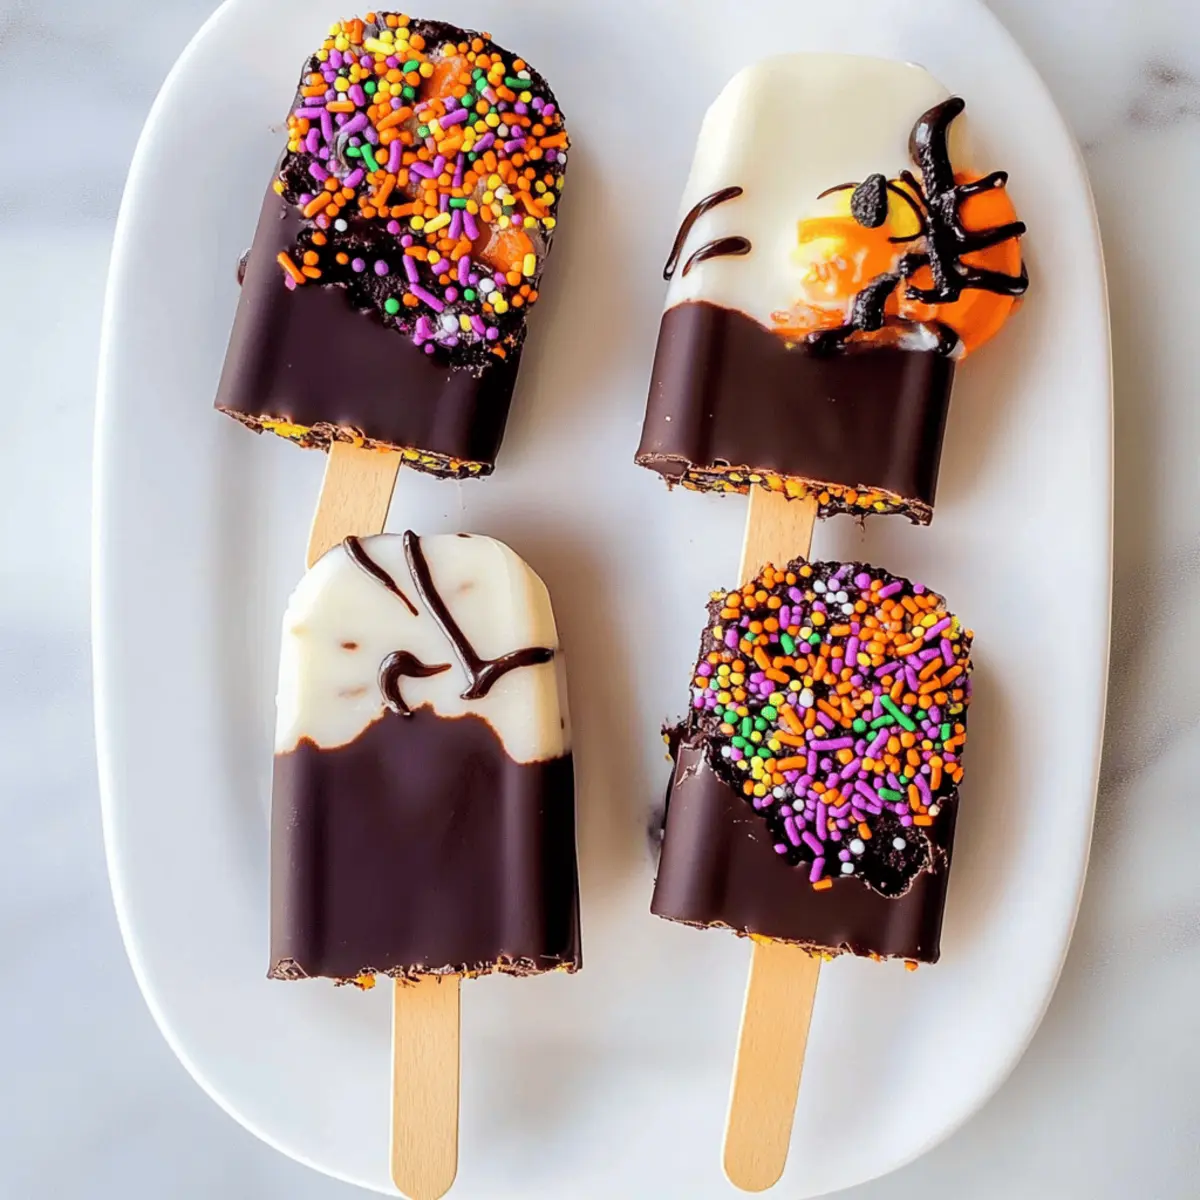
Carefully remove the chilled cakesicles from the molds. Dip each one into the melted chocolate, ensuring they are completely coated. Allow any excess to drip back into the bowl and place the coated cakesicles on a parchment-lined tray. The chocolate shell should shimmer and appear even and thick for a professional finish.
Step 6: Decorate
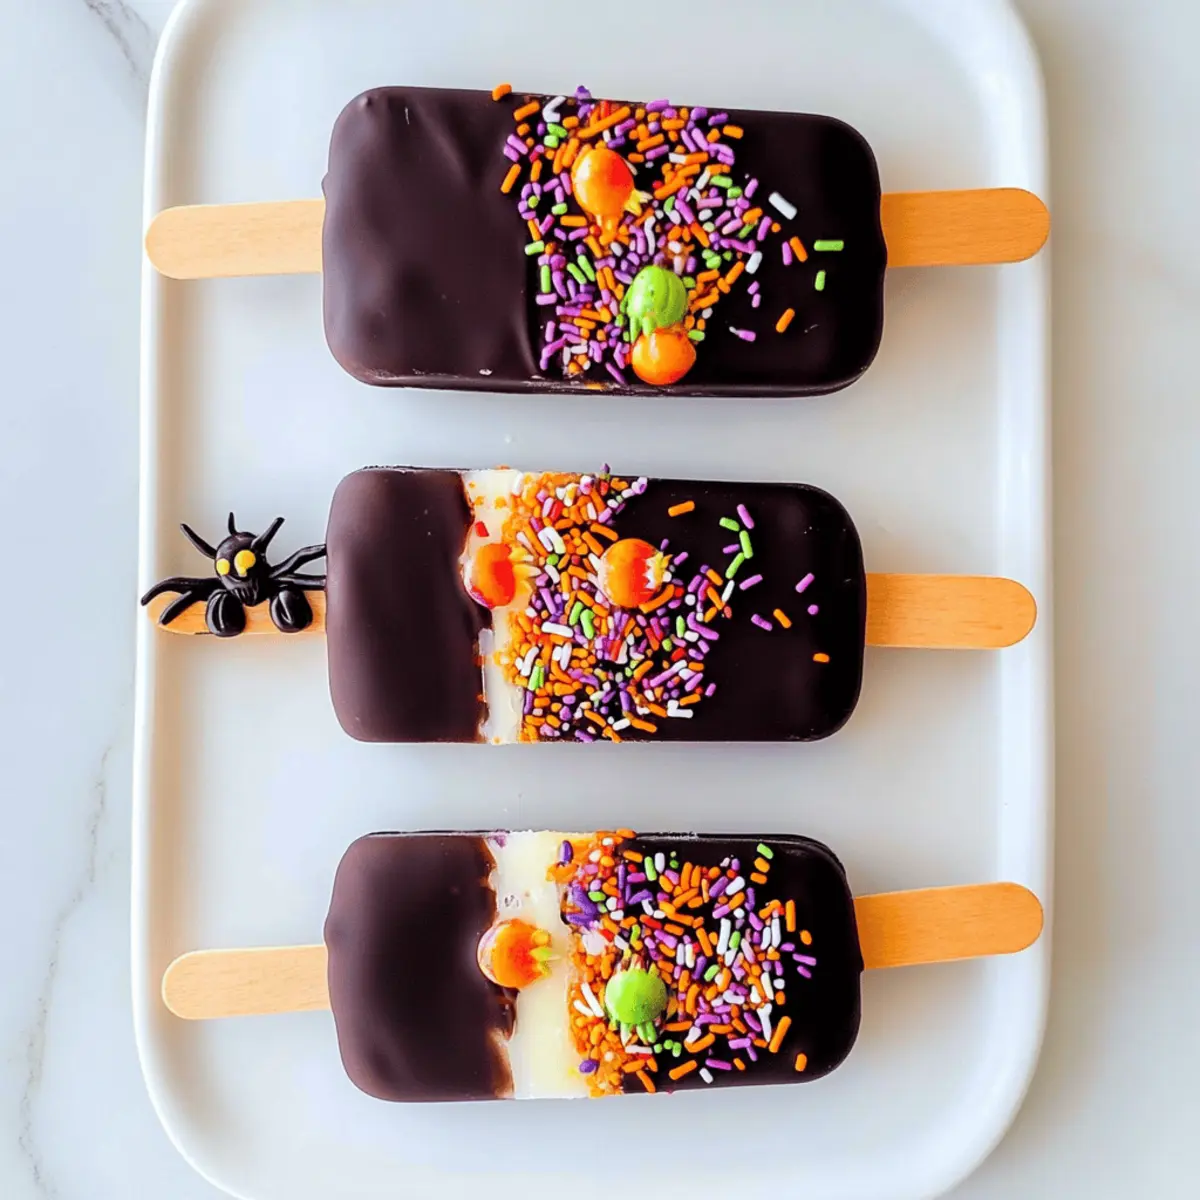
Before the chocolate sets, add your desired decorations such as sprinkles, edible eyes, or festive Halloween-themed adornments. The warmth of the chocolate will help these toppings adhere well, creating a colorful, fun design on each Halloween Cakesicle.
Step 7: Set and Serve
Finally, let the decorated cakesicles sit at room temperature or in the refrigerator until the chocolate hardens completely. This will take about 15-30 minutes. Once set, your Halloween Cakesicles are ready to be enjoyed! Store any leftovers in an airtight container in the fridge for up to a week.
Make Ahead Options
These Halloween Cakesicles are perfect for meal prep enthusiasts! You can prepare the cake mixture and fill the molds up to 24 hours in advance, ensuring your celebrations are seamless and stress-free. Simply crumble your leftover cake, mix in the frosting, and pack the mixture into the molds before refrigerating. This chilling step allows them to set properly. When you’re ready to serve, just melt your coating chocolate, dip the chilled cakesicles, and decorate them to your heart’s content. To maintain the delicious quality, store any prepared cakesicles in an airtight container in the refrigerator, and enjoy them within a week for the best flavor and texture!
What to Serve with Halloween Cakesicles?
Elevate your Halloween gathering with dishes and treats that beautifully complement the playful sweetness of these delightful cakesicles.
-
Whipped Cream: A dollop of sweetened whipped cream adds a light, fluffy contrast to the rich chocolate coating of the cakesicles.
-
Fruit Skewers: Bright, fresh fruit pieces create a colorful balance to the sweetness, making them a refreshing bite alongside every morsel of decadence.
-
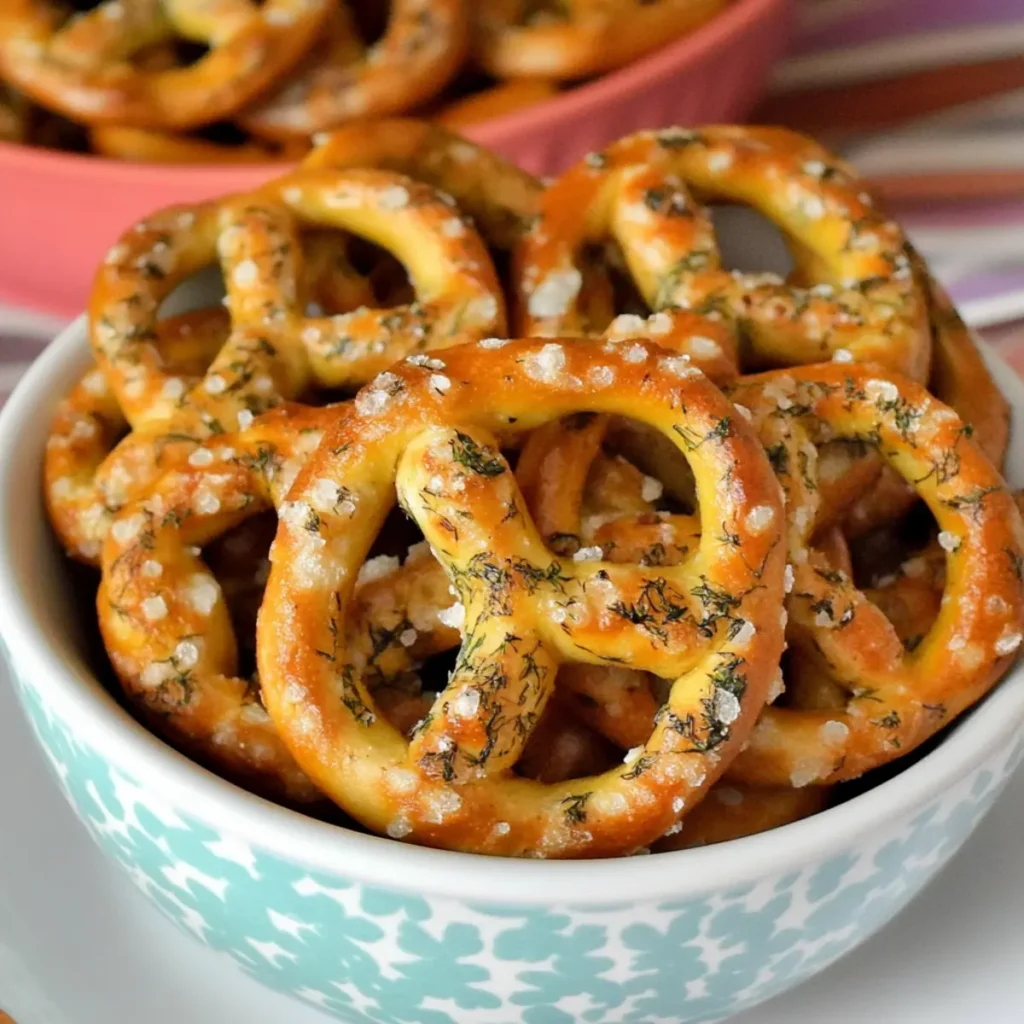
Chocolate Dipped Pretzels: The salty crunch of pretzels dipped in chocolate harmonizes with the sweet flavors of cakesicles, offering a delightful contrast in textures.
-
Halloween Punch: A spooky-themed drink, like a cranberry-orange Halloween punch, is a festive accompaniment that quenches thirst while keeping the party vibe alive.
-
Candy Corn: A bowl of classic candy corn serves as a perfect sweet touch and a seasonal decoration, celebrating Halloween’s color palette with every bite.
-
Mini Ghost Cupcakes: These mini desserts bring a whimsical touch to your table, making them a delightful pairing that echoes the fun spirit of the cakesicles.
-
Pumpkin Spice Popcorn: Sweet and spiced, this popcorn adds a crunchy texture and a seasonal flavor twist that complements cakesicles while keeping the Halloween spirit vibrant.
-
Spooky Cheese Board: Curate a cheese board with themed crackers and a mix of cheeses for adults—a savory option that pairs surprisingly well with sweets!
-
Vanilla Ice Cream: A scoop of creamy vanilla ice cream offers a cold, velvety contrast to the warm chocolate coating, creating an indulgent dessert experience.
Halloween Cakesicles Variations & Substitutions
Unleash your creativity and make these Halloween Cakesicles your own with these fun twists!
-
Flavor Switch: Change the base cake flavor to chocolate, vanilla, or even lemon for a unique taste surprise.
A chocolate cakesicle brings a decadent twist, perfect for chocolate lovers seeking a treat! -
Frosting Twist: Experiment with different frosting types, like cream cheese or caramel, to add rich new flavors.
Cream cheese frosting pairs wonderfully with red velvet cake, creating a classic combo that’s simply irresistible. -
Coating Options: Use white or dark chocolate instead of milk chocolate for a contrasting coating.
White chocolate can be flavored with peppermint or orange zest for a festive flair; how fun is that? -
Decorative Themes: Customize your decorations based on various themes—think spooky spiders or adorable pumpkin faces!
A little creativity with edible decorations can turn each cakesicle into a whimsical treat that’s picture-perfect. -
Heat It Up: Add a pinch of chili powder or cayenne to your chocolate for a surprising spicy kick!
This unexpected heat can elevate your dessert and intrigue adventurous taste buds—give it a go! -
Nutty Texture: Incorporate crushed nuts, like pecans or almonds, into the cakesicle mixture for added crunch.
The textural contrast makes for a delicious bite, adding an unexpected layer to each sweet creation. -
Vegan Version: Substitute traditional frosting with a plant-based version and use vegan chocolate for a dairy-free option.
This ensures everyone at the celebration can enjoy these festive treats without missing out! -
Edible Glitter: Enhance the Halloween vibe by sprinkling edible glitter on top of the melted chocolate before it sets.
The sparkly finish adds a magical touch, making your cakesicles perfect for a fun, festive display at any gathering.
Feel free to get inspired and adjust these suggestions to match your taste or occasion! Enjoy your delicious creations, and don’t forget to check out more delicious ideas like repurposing leftover cake and fun decorating techniques!
How to Store and Freeze Halloween Cakesicles
Fridge: Keep Halloween Cakesicles in an airtight container in the refrigerator for up to one week. This ensures they stay fresh and delicious while preventing them from drying out.
Freezer: For longer storage, you can freeze the cakesicles. Wrap each one tightly in plastic wrap and then place them in a freezer-safe bag for up to 3 months. Thaw in the fridge before enjoying.
Reheating: There’s no need to reheat cakesicles; simply enjoy them cold or at room temperature for the best taste.
Make-Ahead: Preparing these Halloween Cakesicles a day in advance is a great way to save time before the festivities. Just remember to store them properly to maintain their quality!
Expert Tips for Halloween Cakesicles
- Choose Quality Ingredients: Use high-quality candy melts for the best flavor and smooth finish. Avoid cheap brands that can affect taste and texture.
- Don’t Overfill Molds: Make sure not to overpack the cakesicle molds; this can cause breakage when removing the cakesicles. A snug fit is best.
- Work Quickly When Decorating: Since the chocolate sets fast, decorate each cakesicle promptly after coating to ensure toppings stick well.
- Chill Again if Needed: If the chocolate starts to melt while working, pop the cakesicles back in the fridge briefly to firm up before continuing.
- Experiment with Flavors: Try different cake or frosting flavors to surprise your taste buds. Kids will love the variety of Halloween Cakesicles!
Halloween Cakesicles Recipe FAQs
What should I look for when selecting leftover cake?
Absolutely! When choosing leftover cake, aim for a texture that’s moist but not too dense. Look for cakes without dark spots or dryness. If using cupcakes, ensure they’re fresh and not overly crumbly. Red velvet works wonderfully for a festive look, but any flavor will do just fine!
How should I store my Halloween Cakesicles?
To keep your Halloween Cakesicles fresh, store them in an airtight container in the refrigerator for up to one week. This will help maintain their delicious flavor and moisture! If you see any condensation, ensure they’re cooled down completely before sealing; otherwise, moisture can make the chocolate lose its crispiness.
Can I freeze Halloween Cakesicles?
Yes, you can freeze these delightful treats! Wrap each cakesicle tightly in plastic wrap, then place them into a freezer-safe bag or container. They can be stored like this for up to 3 months. When you’re ready to enjoy them, simply thaw them in the refrigerator overnight. This keeps them from getting too soft or losing their shape.
What should I do if my cakesicles are breaking when removing them from the mold?
Very! If your cakesicles are breaking, it’s usually due to overpacking the mold or not chilling long enough. Next time, lightly tap the filled molds on the counter to eliminate air bubbles and ensure their firmness. If they still break, return them to the freezer for 5-10 minutes to harden a bit before attempting to remove them. A little patience goes a long way!
Are these cakesicles safe for kids with allergies?
When making Halloween Cakesicles, consider allergies carefully. If you’re using store-bought frosting and chocolate, check for common allergens like nuts, gluten, or dairy. You can explore allergy-friendly alternatives, such as using vegan buttercream or dairy-free chocolate, to accommodate everyone. Always communicate with guests to avoid any surprises!
How can I customize my Halloween Cakesicles?
Absolutely! To make your Halloween Cakesicles unique, try mixing different combinations of cake flavors and frostings. You can use food colors to dye your chocolate, giving them vibrant hues. Experiment with various festive toppings like candy eyes, colored sprinkles, or themed edible decorations to reflect your Halloween spirit! Each cakesicle can become a canvas of creativity!
Halloween Cakesicles: Easy and Fun Treats for Spooky Celebrations
Ingredients
Equipment
Method
- Begin by crumbling your leftover cake or cupcakes into a large mixing bowl. Add enough frosting to bind the cake together, mixing until it's well combined and resembles a dough consistency.
- Next, firmly pack the cake mixture into your cakesicle molds, filling them to the top for a nice, rounded shape.
- Place the molds in the refrigerator to set for at least 30 minutes. You'll know they're ready when the mixture feels solid to the touch.
- Melt your coating chocolate or candy melts in a microwave-safe bowl in 30-second intervals, stirring in between, until smooth and fully melted.
- Carefully remove the chilled cakesicles from the molds. Dip each one into the melted chocolate, ensuring they are completely coated.
- Before the chocolate sets, add your desired decorations such as sprinkles, edible eyes, or festive Halloween-themed adornments.
- Let the decorated cakesicles sit until the chocolate hardens completely, about 15-30 minutes. Store any leftovers in an airtight container in the fridge.
")