")
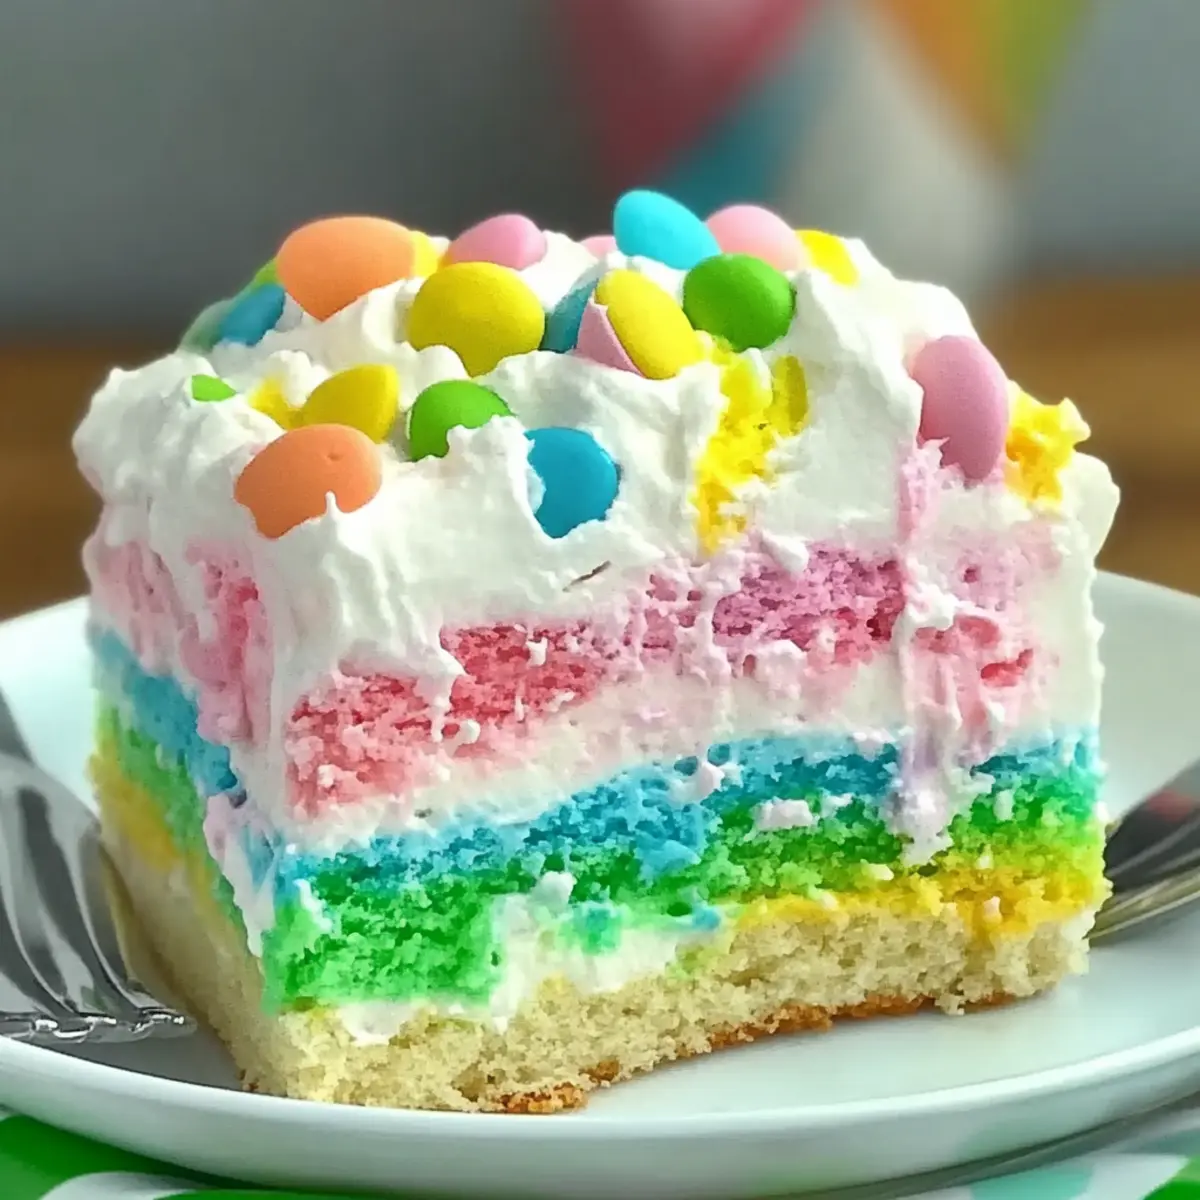
As I walked through the cheerful chaos of springtime preparations, a wave of nostalgia washed over me. There’s something magical about brightly colored desserts that bring back the joy of childhood holidays, and this Easter Poke Cake captures that essence perfectly. Not only does it offer a feast for the eyes with its vibrant layers, but this easy dessert is also a make-ahead dream, allowing you to impress your guests with minimal effort. With a moist, fluffy base enveloped in creamy white chocolate pudding and topped with light whipped cream, it’s a delightful centerpiece for any gathering. Ready to dive into a dessert that’s as fun to make as it is to eat? Let’s get started!
Why Is This Poke Cake a Must-Try?
Simplicity: This Easter Poke Cake is incredibly easy to make, perfect for both novice bakers and seasoned pros alike. Vibrant Colors: Its colorful layers elevate the dessert’s visual appeal, making it a showstopper at any spring celebration. Make-Ahead: You can prepare this delightful treat in advance, reducing stress on the big day. Flavorful Fillings: With rich white chocolate pudding soaked into the cake, each bite is a heavenly explosion of flavor. For added fun, consider variations like a Rainbow Poke Cake or transform leftovers into cupcakes that your guests will adore! Crowd-Pleaser: Its light texture and sweet taste ensure that everyone will come back for seconds.
Easter Poke Cake Ingredients
For the Cake
• White Cake Mix – This serves as the delightful base; for a twist, you can use vanilla or lemon cake mix instead.
For the Pudding Filling
• Instant White Chocolate Pudding – Adds a creamy, luscious layer; feel free to swap it out for vanilla or cheesecake pudding for different taste sensations.
• Milk – Essential for mixing the pudding; any type, whether dairy or non-dairy, works perfectly.
For the Whipped Topping
• Heavy Cream – Crucial for whipping homemade cream; can be substituted with store-bought whipped topping if you’re short on time.
• Powdered Sugar – Sweetens your whipped cream; adjust to your desired level of sweetness.
For the Color
• Food Coloring – To achieve those vibrant layers; both standard liquid food coloring or gel can provide beautiful results.
This Easter Poke Cake is sure to brighten your spring celebrations!
Step‑by‑Step Instructions for Easter Poke Cake
Step 1: Prepare Cake Mix
Begin by preheating your oven to 350°F (175°C). In a large mixing bowl, follow the box instructions to combine the white cake mix with the required water, oil, and eggs. Mix until smooth and creamy, about 2 minutes. The batter should be thick and well blended, ensuring an even texture for your Easter Poke Cake.
Step 2: Color the Batter
Once your batter is ready, divide it equally into four separate bowls. Add a few drops of food coloring to each bowl, creating your desired vibrant colors for the layers. Stir each bowl gently to mix, ensuring the color is evenly distributed throughout the batter. You’re now ready to create a colorful spectrum in your cake!
Step 3: Layer in Baking Dish
Grease a 9×13 inch baking dish with butter or non-stick spray for easy removal. Using a spoon, drop dollops of each colored batter into the dish, alternating colors to create a beautiful pattern. Once all batter is added, smooth the surface gently and swirl lightly with a knife for a marbled effect. This layering will give the Easter Poke Cake its festive look.
Step 4: Bake the Cake
Place the baking dish in the preheated oven and bake according to the cake mix package instructions, typically 25 to 30 minutes. You’ll know the cake is done when it’s golden on top and a toothpick inserted into the center comes out clean. Allow the cake to cool in the pan for about 10 minutes before moving to the next step.
Step 5: Poke the Cake
Once the cake is slightly cooled, take the handle of a wooden spoon and poke holes in a grid pattern, about one inch apart, across the top of the cake. Make sure to poke all the way down but not through the bottom. This step is essential for the pudding to seep into the cake and create that delicious Easter Poke Cake texture.
Step 6: Prepare Pudding Filling
In a mixing bowl, whisk together the instant white chocolate pudding mix and milk until the mixture is smooth and begins to thicken. This should take about 2 minutes. Then, pour the pudding mixture evenly over the cooled cake, ensuring it fills all the holes and saturates the top. This step adds both flavor and moisture to your cake.
Step 7: Chill the Cake
Cover the cake with plastic wrap or aluminum foil, and place it in the refrigerator. Chill for at least 2 hours to allow the pudding to set properly and soak into the cake. This is a crucial step that enhances the overall texture of your Easter Poke Cake, making it wonderfully moist.
Step 8: Top with Whipped Cream
Just before serving, remove the cake from the refrigerator. In a mixing bowl, whip your heavy cream along with powdered sugar until soft peaks form. Spread the whipped cream generously over the top of the cake, creating a fluffy and light finish. This topping will contrast beautifully with the colorful layers below, completing your stunning Easter Poke Cake.

Expert Tips for Easter Poke Cake
-
Cooling Time Matters: Always allow your cake to cool completely before poking holes and adding the pudding. This ensures the pudding doesn’t melt away.
-
Pudding Consistency: Mix the pudding quickly, using cold milk, to avoid it setting too soon. A smooth filling makes for a better Easter Poke Cake.
-
Color Depth: For vibrant colors, opt for gel food coloring rather than standard liquid. You’ll achieve a more intense and beautiful look.
-
Sprinkle Timing: If you plan to use sprinkles, wait until the whipped cream topping is applied to prevent them from bleeding into the cake.
-
Flavor Variations: Don’t hesitate to switch the white chocolate pudding with lemon or chocolate for a delicious twist that adds extra dimension to your Easter Poke Cake.
-
Storage Tip: Keep any leftover cake in the fridge, but consume it within three days for the best flavor and texture.
What to Serve with Easter Poke Cake
Elevate your spring gatherings with delightful sides and treats that will enhance the sweetness of this vibrant cake.
-
Fresh Berries: A medley of strawberries, blueberries, and raspberries adds a refreshing contrast to the sweetness of the cake while enhancing its colorful presentation.
-
Chocolate Drizzle: A rich chocolate drizzle brings an indulgent touch that pairs beautifully with the white chocolate pudding, offering a deliciously contrasting flavor profile.
-
Vanilla Ice Cream: Creamy vanilla ice cream is the perfect complement, creating a luscious combination that balances the cake’s soft texture with a chilled boost.
-
Coconut Macaroons: These chewy treats add a delightful bite and nutty flavor that elevates the overall dessert experience with a tropical twist.
-
Lemonade Spritzer: A refreshing citrus lemonade spritzer with a hint of mint provides a bright, zesty contrast that can cut through the cake’s richness.
-
Carrot Cake Cupcakes: Serve alongside cupcakes for a playful twist on the Easter theme. Their spiced flavor adds warmth and complements the fruity notes of the poke cake.
-
Easter-Themed Cookies: Decorated cookies can add a festive flair, enticing guests with their playful designs and sweet crunch that complements the softness of the poke cake.
-
Sparkling Wine or Prosecco: A light, bubbly drink pairs wonderfully with the sweetness of the cake, enhancing festive cheer while providing a refreshing touch.
Make Ahead Options
These Easter Poke Cakes are perfect for meal prep enthusiasts who want to save time during festive gatherings! You can bake and poke the cake up to 24 hours in advance; just ensure it’s completely cool before refrigerating. The pudding filling can be added up to 3 days ahead, allowing the flavors to meld beautifully. Cover it tightly with plastic wrap to maintain moisture and prevent drying out. When you’re ready to serve the Easter Poke Cake, simply whip fresh cream and spread it on top for a fluffy finish. This preparation method allows you to enjoy a stunning dessert with minimal effort on the day of your celebration!
How to Store and Freeze Easter Poke Cake
Fridge: Store the Easter Poke Cake in an airtight container in the refrigerator for up to 3 days. Make sure it’s tightly covered to keep it fresh and flavorful.
Freezer: If you want to freeze it, wrap individual slices in plastic wrap and then place them in a freezer-safe container. They will maintain their quality for up to 2 months.
Reheating: When ready to enjoy, thaw the frozen slices in the refrigerator overnight. For serving, bring the cake to room temperature or gently warm it in the microwave for about 10-15 seconds.
Serving Tip: As the cake is filled with pudding, it’s best served chilled to preserve the creamy texture and vibrant appearance.
Easter Poke Cake Variations & Substitutions
Feel free to get creative and tailor your Easter Poke Cake to your taste and dietary needs!
-
Dairy-Free: Substitute heavy cream with coconut cream and use dairy-free pudding for a delightful creamy texture. This twist brings an exotic flair without sacrificing flavor.
-
Gluten-Free: Swap white cake mix for a gluten-free version. Ensure your pudding mix is also gluten-free, and enjoy a worry-free dessert that everyone can indulge in!
-
Add Extra Fruit: Layer fresh berries on top of your whipped cream for a burst of freshness. Strawberries or blueberries not only add color but also a delightful tartness.
-
Chocolate Version: For a chocolate lover’s dream, use chocolate cake mix instead of white. You can also replace the white chocolate pudding with chocolate pudding for a double chocolate delight!
-
Cupcake Twist: Transform your Easter Poke Cake into individual cupcakes using the same colorful batter. Top them with whipped cream for bite-sized treats perfect for any gathering.
-
Layered Delight: Instead of a single cake, consider creating cake jars with layers of pudding and cake, making for a fun and trendy dessert option. Plus, they’re perfect for serving!
-
Mix and Match Flavors: Combine different flavored puddings like strawberry and banana for a fruity explosion, or try a lemon pudding to brighten up those vibrant colors even more.
-
Rainbow Theme: Use all the colors of the rainbow by incorporating multiple types of food coloring, creating a delightful visual feast that embodies spring’s essence.
Your Easter Poke Cake can be as unique as your celebrations! For more festive ideas, check out our enchanting Barbie Cake Tips for inspiration, or dive into the excitement of a Rainbow Poke Cake for a colorful twist.

Easter Poke Cake Recipe FAQs
How do I choose the best ingredients for this cake?
Absolutely! When selecting a white cake mix, look for one that is light and fluffy—this is key for a tender crumb. For the pudding, instant white chocolate pudding works beautifully, but don’t hesitate to try vanilla or cheesecake for a twist. Fresh eggs and high-quality milk (dairy or non-dairy) will also enhance the flavor and texture of your Easter Poke Cake.
What’s the best way to store leftover Easter Poke Cake?
Very! To preserve the taste and texture, store your cake in an airtight container in the refrigerator for up to 3 days. Make sure it’s well-covered to prevent it from drying out. For longer storage, wrap individual slices in plastic wrap and place them in a freezer-safe container, where they can last for up to 2 months.
Can I freeze my Easter Poke Cake?
Absolutely! If you’re looking to freeze the cake, I recommend dividing it into individual portions. Wrap each slice tightly in plastic wrap, then place them in a freezer bag or container to prevent freezer burn. When you’re ready to enjoy, simply leave the slices to thaw in the refrigerator overnight, and they will taste fresh and delightful!
What should I do if my pudding sets too quickly?
Don’t worry! If your pudding starts to set while you’re mixing, whisk in a splash of cold milk to loosen it up. Make sure to mix the pudding with cold milk for the best texture; it should be smooth and somewhat thick but pourable. This will ensure it soaks into those holes perfectly and keeps your Easter Poke Cake moist.
Are there any dietary considerations to keep in mind?
Definitely! If you’re planning on serving this cake to guests with dietary restrictions, consider using dairy-free milk and substituting the heavy cream with a whipped coconut topping for those who are lactose intolerant. Always double-check all ingredient labels for potential allergens, especially if sensitive to gluten or eggs, as alternate mixes may be needed.

Delightful Easter Poke Cake You Can Make Ahead for Celebrations
Ingredients
Equipment
Method
- Preheat oven to 350°F (175°C). Combine white cake mix, water, oil, and eggs in a large mixing bowl and mix until smooth, about 2 minutes.
- Divide batter into four bowls and add food coloring to each bowl to create colored layers.
- Grease a 9x13 inch baking dish and alternate spoonfuls of each colored batter into the dish.
- Bake according to package instructions, typically 25 to 30 minutes. Allow to cool for 10 minutes.
- Poke holes in the cooled cake using a wooden spoon handle in a grid pattern.
- Whisk together instant pudding mix and milk, then pour over the cake, filling the holes.
- Cover and refrigerate for at least 2 hours.
- Whip heavy cream with powdered sugar until soft peaks form, then spread over the cake.
")