")
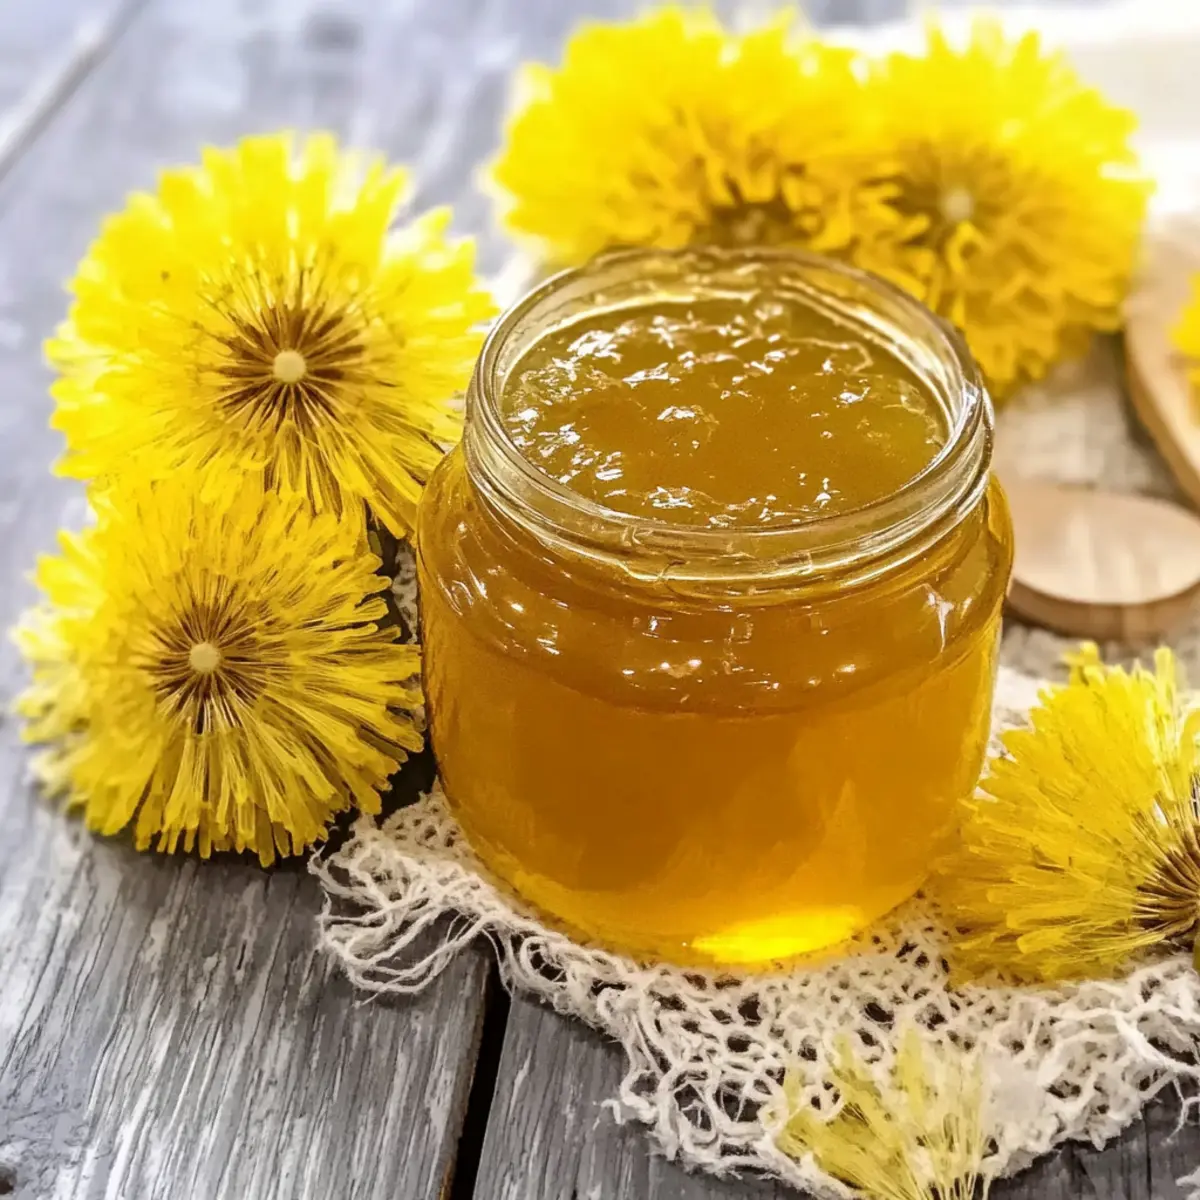
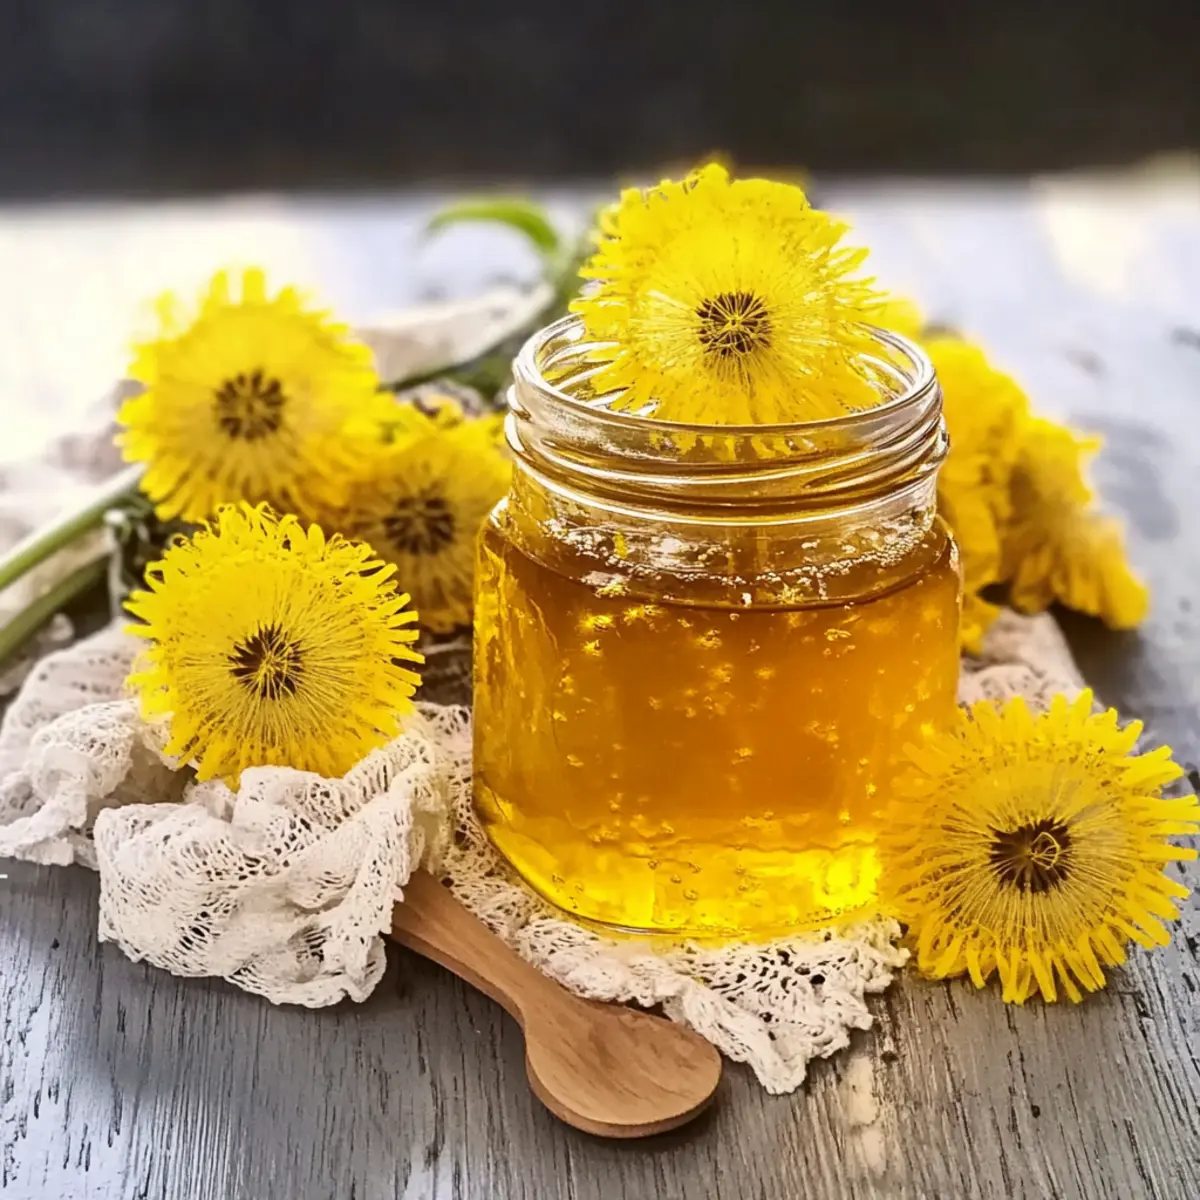
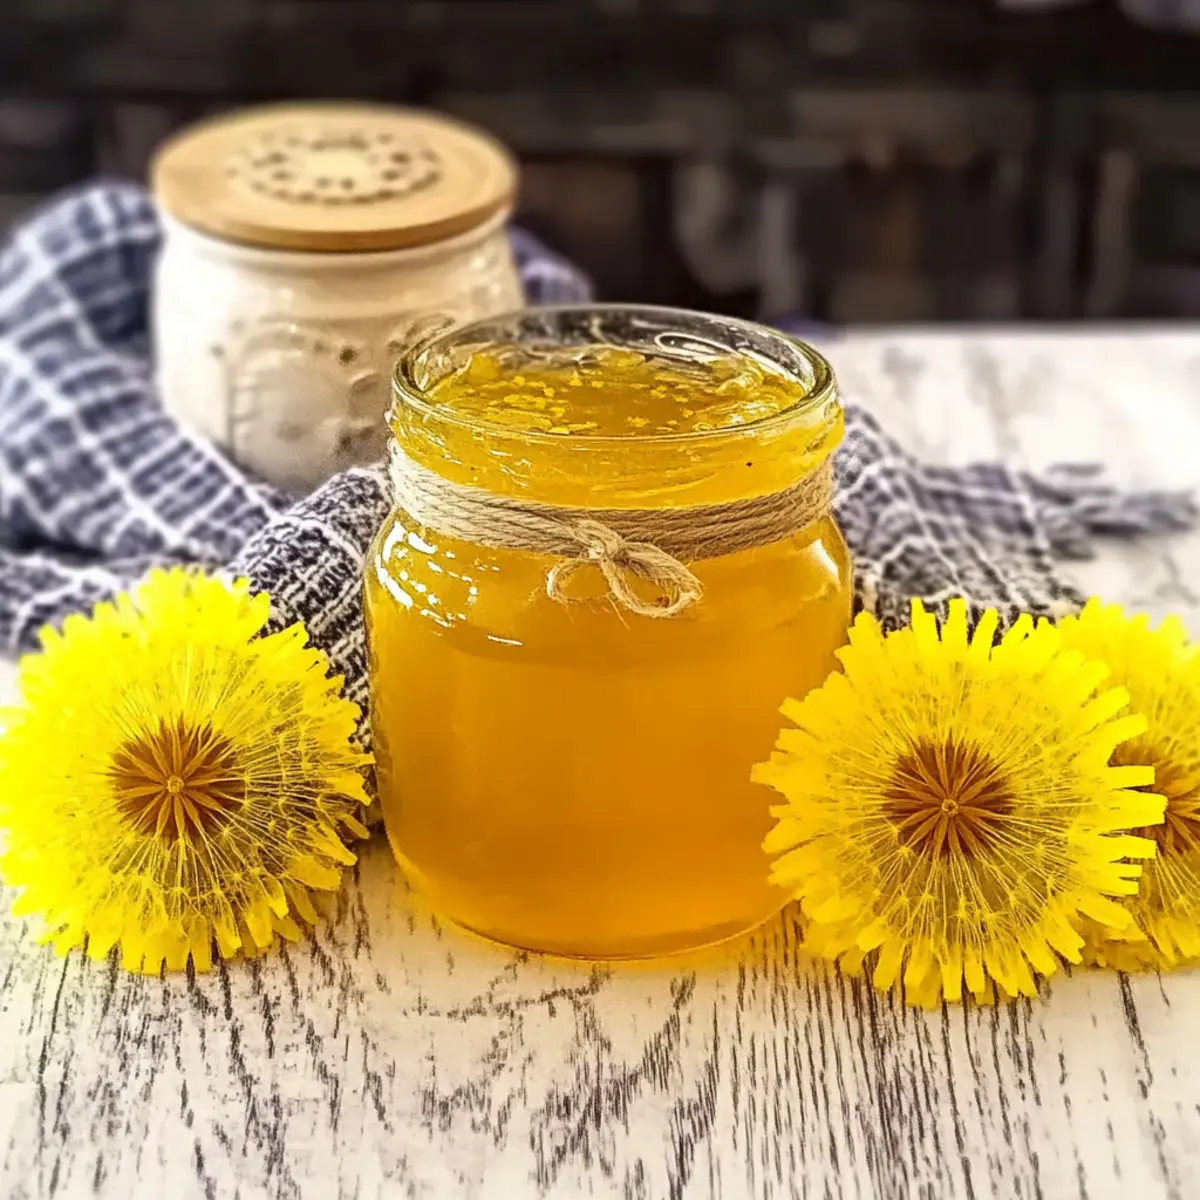
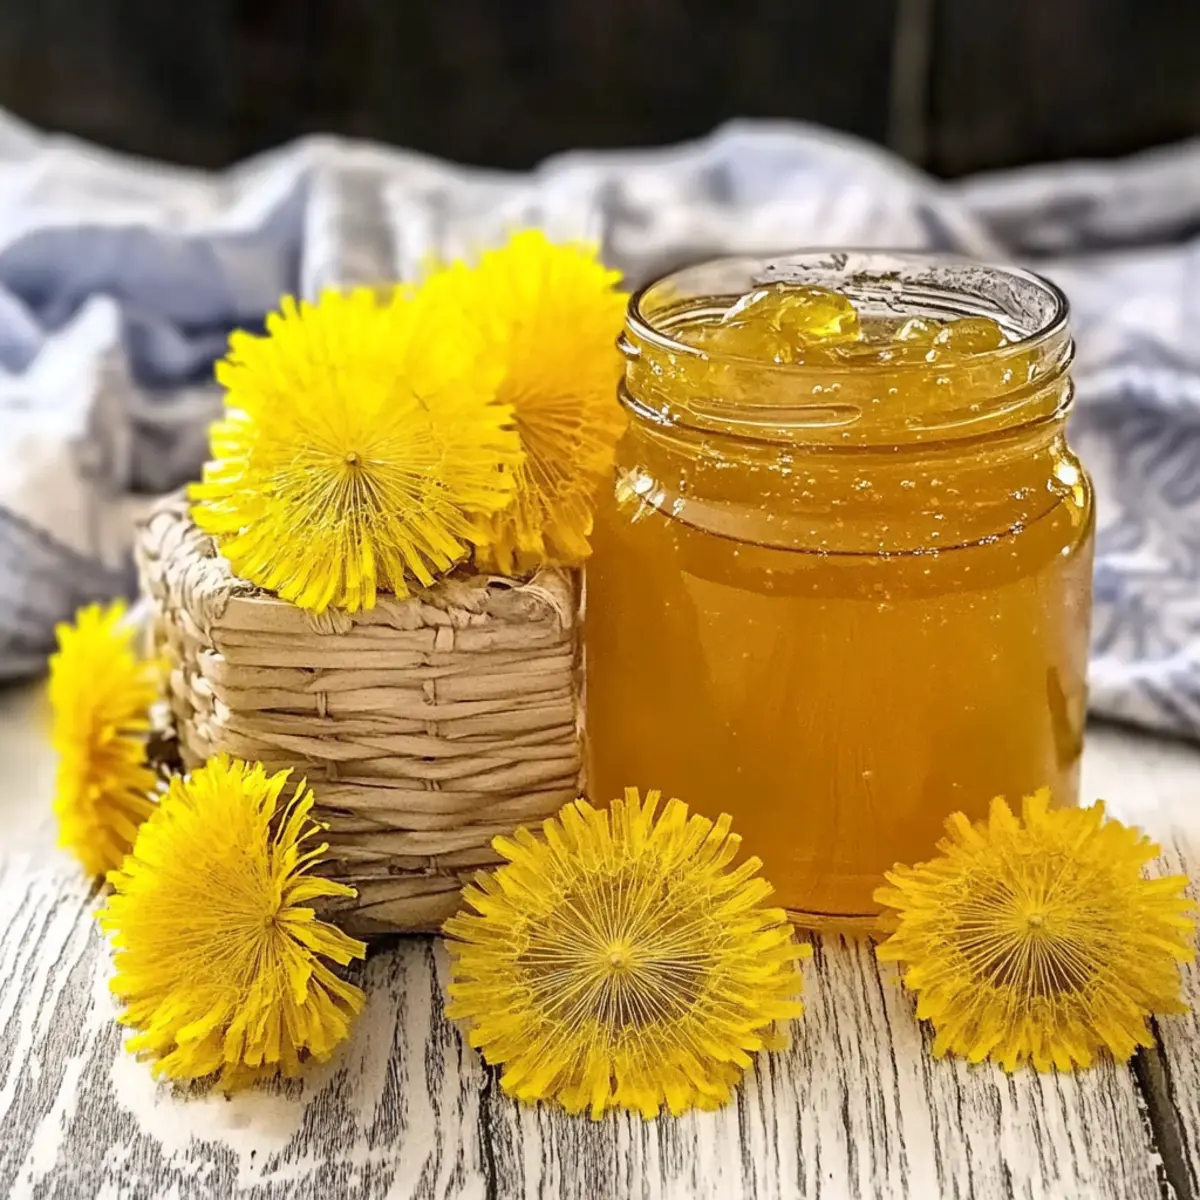
As I stood in my garden, I couldn’t help but marvel at the sunny carpet of dandelions dotting the landscape—often dismissed as mere weeds, but today, they had a sweet secret waiting to be uncovered. Making Dandelion Jelly is a delightful way to embrace the vibrant flavors of spring while reviving a forgotten culinary treasure. Not only is this recipe incredibly easy to whip up, but it also provides a unique twist on homemade preserves that’s sure to impress your friends and family. Imagine the joy of spreading this golden, floral delight over warm toast or pairing it with rich cheeses during your next gathering. Ready to turn those cheerful blossoms into a jar of sunshine? Let’s get started on this extraordinary adventure in canning!
Why Dandelion Jelly Will Surprise You?
Unique Flavor Profile: This isn’t your average jelly! Delicate floral notes combined with a touch of sweetness create a delightful spread that surprises the palate.
Eco-friendly Treat: Making this jelly fosters sustainability by using what many consider a weed; it’s a great way to reduce waste and appreciate nature’s bounty.
Perfect for Gifting: Brightly colored and delicious, Dandelion Jelly makes a stunning gift. Wrap it up with a lovely ribbon for friends and family!
Easy Canning Fun: If you’re new to canning, this recipe is a fantastic introduction. Detailed instructions make it approachable and enjoyable for anyone!
Great for Various Uses: Spread it on toast, mix it into yogurt, or pair it with cheese. The ways to enjoy it are endless—add this to your repertoire of homemade preserves!
Ready to dive into the world of homemade treasures? Check out this guide on canning basics to get started!
Dandelion Jelly Ingredients
Get ready to create a delightful jelly with these essential ingredients!
For the Jelly Base
• Dandelion Petals – Collect 2 cups of loose yellow petals; avoid any green parts to ensure a sweet flavor.
• Boiling Water – Use 2 cups to properly steep the dandelion petals and extract their delightful essence.
• Lemon Juice – Incorporate 1/4 cup for a refreshing acidity that balances the sweetness; citric acid can be a suitable substitute.
• Granulated Sugar – A hefty 4 cups sweeten the jelly and act as a natural preservative.
• Certo Liquid Fruit Pectin – One package helps the jelly to set perfectly; powdered pectin can serve as a convenient alternative.
Embrace the charm of homemade Dandelion Jelly and transform those sunny blooms into jars of happiness!
Step‑by‑Step Instructions for Dandelion Jelly
Step 1: Harvest Dandelion Petals
Begin by gathering 2 cups of bright, yellow dandelion petals from untreated areas, being careful to avoid any green parts or stems. It’s best to pick them on a dry day when the flowers are fully open. Once harvested, gently rinse the petals in cool water to remove any dirt or insects, and then pat them dry with a paper towel.
Step 2: Steep
Place the cleaned dandelion petals in a heatproof bowl and pour 2 cups of boiling water over them. Cover the bowl with plastic wrap or a lid and let it steep in the refrigerator for up to 24 hours. This allows the petals to infuse their sweet, floral flavor into the water, creating a flavorful dandelion tea.
Step 3: Strain
After steeping, carefully strain the dandelion tea through a fine mesh strainer or cheesecloth into a large pot. Use the back of a spoon to press down on the petals and extract as much liquid as possible. You’ll want to have about 2 cups of this fragrant liquid to use as the base for your delightful Dandelion Jelly.
Step 4: Combine Ingredients
In the large pot with strained dandelion tea, add 1/4 cup of fresh lemon juice along with 4 cups of granulated sugar. Stir the mixture well over medium heat until the sugar fully dissolves, and the mixture begins to bubble gently. This step is crucial to ensure the sweetness balances the floral notes perfectly in your Dandelion Jelly.
Step 5: Boil
Increase the heat and bring the mixture to a full rolling boil that cannot be stirred down, usually around 220°F (104°C). Allow it to boil vigorously for about 1-2 minutes, stirring occasionally. Once you see large bubbles and the mixture turns a lovely golden color, you’re ready to move on to the next step for your Dandelion Jelly.
Step 6: Add Pectin
After reaching a rolling boil, stir in one package of Certo liquid fruit pectin. Continue boiling for an additional 2 minutes, stirring continuously to ensure the pectin is fully incorporated. You’ll notice the mixture will thicken slightly, indicating that your Dandelion Jelly is coming together beautifully.
Step 7: Skim Foam
Once you’ve boiled the mixture with pectin, check for foam forming on the surface. Using a spoon, carefully skim off any foam to achieve a clear jelly. This step not only improves the appearance but also enhances the overall texture of your fragrant Dandelion Jelly.
Step 8: Color (Optional)
If you desire an even more vibrant color for your Dandelion Jelly, add a few drops of yellow food coloring. Stir gently to evenly distribute the color throughout the mixture. This step is purely optional but can give your jelly a visually appealing, sunny hue that brightens any table setting.
Step 9: Jar Preparation
Prepare your canning jars by processing the seals in a pot of hot water for a few minutes. Then, ladle the hot dandelion jelly into cleaned half-pint jars, leaving about 1/4 inch of headspace at the top. This ensures proper sealing and retains the freshness of your homemade Dandelion Jelly.
Step 10: Seal Jars
Wipe the rims of the jars clean to ensure a good seal, then apply the prepared seals and metal rings securely. Allow the jars to cool at room temperature for about 24 hours. As they cool, you should hear popping sounds indicating that the seals are forming properly, ensuring your jelly is preserved safely.
Step 11: Canning (Optional)
For extended storage, process the sealed jars in a water bath canner for about 10 minutes. Make sure the jars are submerged in boiling water and that the water covers the jars by at least an inch. This step enhances the preservation of your Dandelion Jelly, allowing it to last up to a year in a cool, dark pantry.
What to Serve with Homemade Dandelion Jelly?
Indulge in the sweet adventures of your homemade jelly with these delightful pairings that will elevate your mealtime experience.
- Creamy Mashed Potatoes: These buttery potatoes create a smooth contrast to the floral jelly, making for a sumptuous twist on a classic dish.
- Savory Cheese Platter: Pair with soft cheeses like goat or cream cheese; the sweet floral notes beautifully balance their tangy richness.
- Toast with Honey Butter: Spread a generous layer of honey butter on warm toast before adding the jelly for an indulgent breakfast treat full of flavor.
- Grilled Chicken: The bright flavor of the jelly glistening atop grilled chicken offers an exciting and fresh twist, perfect for summer barbecues.
- Lemonade Spritzer: A refreshing beverage with lemon and soda creates a zesty complement that contrasts delightfully with the sweetness of the jelly.
- Homemade Yogurt: Swirl dandelion jelly into creamy yogurt to enhance its flavor with a floral touch, perfect for a wholesome breakfast.
From savory to sweet, these pairings will ensure that every bite of your homemade Dandelion Jelly is a joyful celebration of flavor!
How to Store and Freeze Dandelion Jelly
Fridge: Store your opened Dandelion Jelly in the refrigerator, where it will remain fresh for up to 3 weeks. Ensure the lid is tightly sealed to preserve its delightful flavor.
Freezer: If you need to store it longer, place Dandelion Jelly in airtight freezer-safe containers or jars. It can last up to a year in the freezer, but be mindful of leaving some headspace as it expands when frozen.
Room Temperature: Unopened, properly canned jars can be stored in a cool, dark pantry for up to a year. Just make sure the jars are sealed well for optimal freshness.
Reheating: If your jelly becomes too firm after refrigeration, gently reheat it in a small saucepan over low heat until it softens, stirring until smooth.
Dandelion Jelly Variations & Substitutions
Feel free to get creative with this Dandelion Jelly recipe—there are countless ways to customize this delightful preserve!
-
Floral Fusion: Experiment with other edible flowers, like violets or lilacs, for a colorful twist. Mix them with dandelion petals for a unique flavor combination.
-
Honey Sweetness: Substitute some or all of the granulated sugar with honey for a richer, floral taste. Keep in mind that honey may adjust the jelly’s texture slightly.
-
Citrus Zing: Swapping lemon juice for orange or lime juice can transform the flavor profile and add a refreshing twist to your jelly. This change brings a delightful citrus note to complement the floral essence.
-
Herbal Infusion: Add fresh herbs such as mint or basil to the steeping process for a fragrant, herbaceous touch. A few sprigs will enhance the jelly without overwhelming the floral notes.
-
Spicy Kick: Incorporate a dash of ginger or a pinch of cinnamon during boiling for a warm spice that complements the sweet flavors beautifully. Balancing these spices can elevate your jelly to a whole new level.
-
Chili Heat: For those who love a touch of heat, a few slices of jalapeño during the boil can create a spicy version of dandelion jelly. Just be cautious with the quantity, as a little goes a long way!
-
Additional Color: If you want that vibrant sunny hue to pop, consider a touch of natural turmeric or beet juice. These add color without significantly affecting the flavor.
-
Low-Sugar Option: For a lighter take, use a low-sugar pectin and cut down on sugar, allowing the natural sweetness of the dandelions to shine through. It’s a lighter option without sacrificing taste.
By experimenting with these variations, you can create a unique Dandelion Jelly that suits your taste perfectly. Check out more great ideas about using edible flowers in your cooking by visiting our guide on cooking with flowers!
Expert Tips for Dandelion Jelly
Fresh Petals First: Use only fresh dandelion petals from untreated areas to ensure your Dandelion Jelly is safe and tasty. Avoid any green parts to prevent bitterness.
Steeping Time Matters: Steep the petals for at least 12 hours, but no longer than 24, to extract the best flavor without bitterness.
Sugar Importance: Ensure you use the correct amount of granulated sugar; it not only sweetens but also preserves the jelly. Too little can lead to spoilage.
Thorough Straining: Don’t rush the straining process; press down on the petals to maximize liquid extraction, ensuring your jelly has the best flavor.
Check Seals: After cooling, press the center of each jar lid; it shouldn’t pop back. This indicates a good seal for your Dandelion Jelly, ensuring freshness.
Label and Date: Always label your jars with the contents and date made. Proper labeling helps keep track of freshness and reminds you of your homemade treasures!
Make Ahead Options
These delightful Dandelion Jelly jars are perfect for meal prep enthusiasts! You can harvest and steep the dandelion petals up to 24 hours in advance, simply store them covered in the refrigerator to maintain freshness and prevent browning. The strained dandelion tea can also be prepared in advance and kept refrigerated for up to 3 days before proceeding with the jelly-making process. When ready to finish the jelly, just combine the tea with lemon juice and sugar, boil, add pectin, and follow the remaining steps. This ensures you’ll have a charming homemade treat ready to impress with minimal effort on busy weeknights!
Dandelion Jelly Recipe FAQs
How do I know if my dandelion petals are ripe for jelly making?
Absolutely! When harvesting dandelion petals, choose bright yellow flowers that are fully open, avoiding any with green parts or stems, as these can impart bitterness. It’s best to collect them on a dry day to ensure they are clean and flavorful.
What is the best way to store my Dandelion Jelly?
For opened jars, store your Dandelion Jelly in the refrigerator with a tightly sealed lid, where it will stay fresh for up to 3 weeks. If you have unopened jars that have been properly canned, keep them in a cool, dark pantry for up to a year. Always check seals on the lids to ensure freshness.
Can I freeze Dandelion Jelly for long-term storage?
Very much! To freeze your Dandelion Jelly, ladle it into airtight freezer-safe containers or jars, leaving some headspace to allow for expansion. It can last up to a year in the freezer. When you’re ready to enjoy it, simply let it thaw in the refrigerator overnight or use a gentle heat method to rewarm it.
What should I do if my Dandelion Jelly didn’t set?
Don’t worry, it happens! If your jelly didn’t set properly, you can reprocess it by adding more pectin. First, pour the jelly back into a pot and measure its volume. For every 4 cups of jelly, combine it with 1 package of Certo liquid pectin, then bring it to a full boil for 1-2 minutes while stirring continuously. This should help it set perfectly!
Is Dandelion Jelly pet-friendly or safe for allergies?
Absolutely! Dandelion flowers are generally safe for pets, but you should always consult your vet before introducing any new foods into your pet’s diet. In terms of allergies, this jelly is free from common allergens, but it’s essential to check individual ingredients (like citrus or sugar) if you or someone you know has specific dietary restrictions. Be sure to use organically harvested dandelions to ensure they are free from pesticides and chemicals.
Can I alter the flavor of my Dandelion Jelly?
The more the merrier! You can experiment with flavors by adding spices like ginger or herbs like mint during the boiling process. If you prefer a sweeter jelly, consider incorporating honey or other edible flowers into the mix. Enjoy these creative tweaks to enhance your homemade Dandelion Jelly!
Delightful Dandelion Jelly: A Homemade Sweet Spring Surprise
Ingredients
Equipment
Method
- Harvest 2 cups of bright, yellow dandelion petals from untreated areas.
- Steep dandelion petals in 2 cups of boiling water for up to 24 hours.
- Strain the dandelion tea into a large pot.
- Combine strained dandelion tea with 1/4 cup of lemon juice and 4 cups of sugar; stir until dissolved.
- Boil the mixture to a full rolling boil for about 1-2 minutes.
- Stir in one package of Certo liquid fruit pectin and boil for an additional 2 minutes.
- Skim off any foam to achieve a clear jelly.
- Add yellow food coloring for vibrant color, if desired.
- Prepare canning jars by processing seals in hot water; ladle in hot jelly.
- Seal jars cleanly and allow to cool for about 24 hours.
- Process sealed jars in a water bath canner for 10 minutes for extended storage.
")