")
As I unwrapped the flour sack, a wave of nostalgia swept over me, taking me back to sunlit Easter gatherings filled with laughter and delicious aromas. This Tasty Easter Cake captures that spirit perfectly—a delightful centerpiece adorned with a whimsical Chocolate Egg Nest that’s sure to impress your family and friends. Not only is this cake a visual showstopper, but its simple preparation makes it accessible for bakers at any skill level. Plus, the potential for a vegan option means everyone can join in the celebration! Truly, this cake isn’t just a dessert; it’s a heartwarming reminder of connection and joy around the table. Are you ready to create some sweet memories?
Why Love This Chocolate Egg Nest Cake?
Simplicity at its core: This delightful cake is easy to assemble, making it perfect for bakers of all levels.
Festive flair: The whimsical Chocolate Egg Nest topping transforms a classic vanilla cake into a holiday showstopper that everyone will admire.
Flavorful layers: Each slice is moist and rich, thanks to the buttery frosting and soft vanilla base, ensuring a delicious experience.
Vegan-friendly option: With simple substitutions, you can easily accommodate guests with various dietary preferences, broadening the appeal of your Easter gathering.
Crowd-pleaser: This cake is designed to impress, making it an excellent choice for family gatherings or potlucks. Pair it with fresh berries or a scoop of ice cream for the ultimate treat! If you’re looking for more cake inspiration, try out this delightful Chocolate Chalet Cake or the zesty Lemon Cake Mix Cookies.
Cake with Chocolate Egg Nest Ingredients
• Create your own delicious Chocolate Egg Nest cake with these must-have ingredients!
For the Cake
- All-Purpose Flour – Provides structure and tenderness; avoid dense flour like whole wheat.
- Sugar – Adds sweetness and moisture; coconut sugar can give a delightful caramel flavor.
- Baking Powder – A key leavening agent; make sure it’s fresh for the best rise.
- Baking Soda – Also a leavening agent; check for freshness to avoid a dense texture.
- Salt – Enhances flavor; kosher or sea salt is recommended for balanced taste.
- Butter (unsalted) – Adds richness and tenderness; ensure it’s at room temperature for easy mixing.
- Egg Whites – Provide structure and lightness; for a vegan option, replace with egg replacer.
- Vanilla Extract – Infuses a warm flavor; almond extract is a lovely substitute for variation.
- Sour Cream – Contributes to moisture and richness; plain yogurt can be used as a great alternative.
- Milk – Adds liquid content to the batter; switch to dairy-free milk if needed.
- Lemon Zest (optional) – Brightens up the flavor profile for a refreshing touch.
For the Frosting
- Powdered Sugar – Essential for a smooth, buttery frosting; sift before using for clump-free results.
- Milk – Adds creaminess; use dairy-free milk for a non-dairy frosting.
For the Decoration
- Blue Food Coloring (optional) – Elevates the visual appeal for a festive look.
- Shredded Coconut – Toasted for topping; adds a beautiful texture and flavor.
- Cocoa Powder – Unsweetened, perfect for creating the nest effect; a vital part of our cake’s charm.
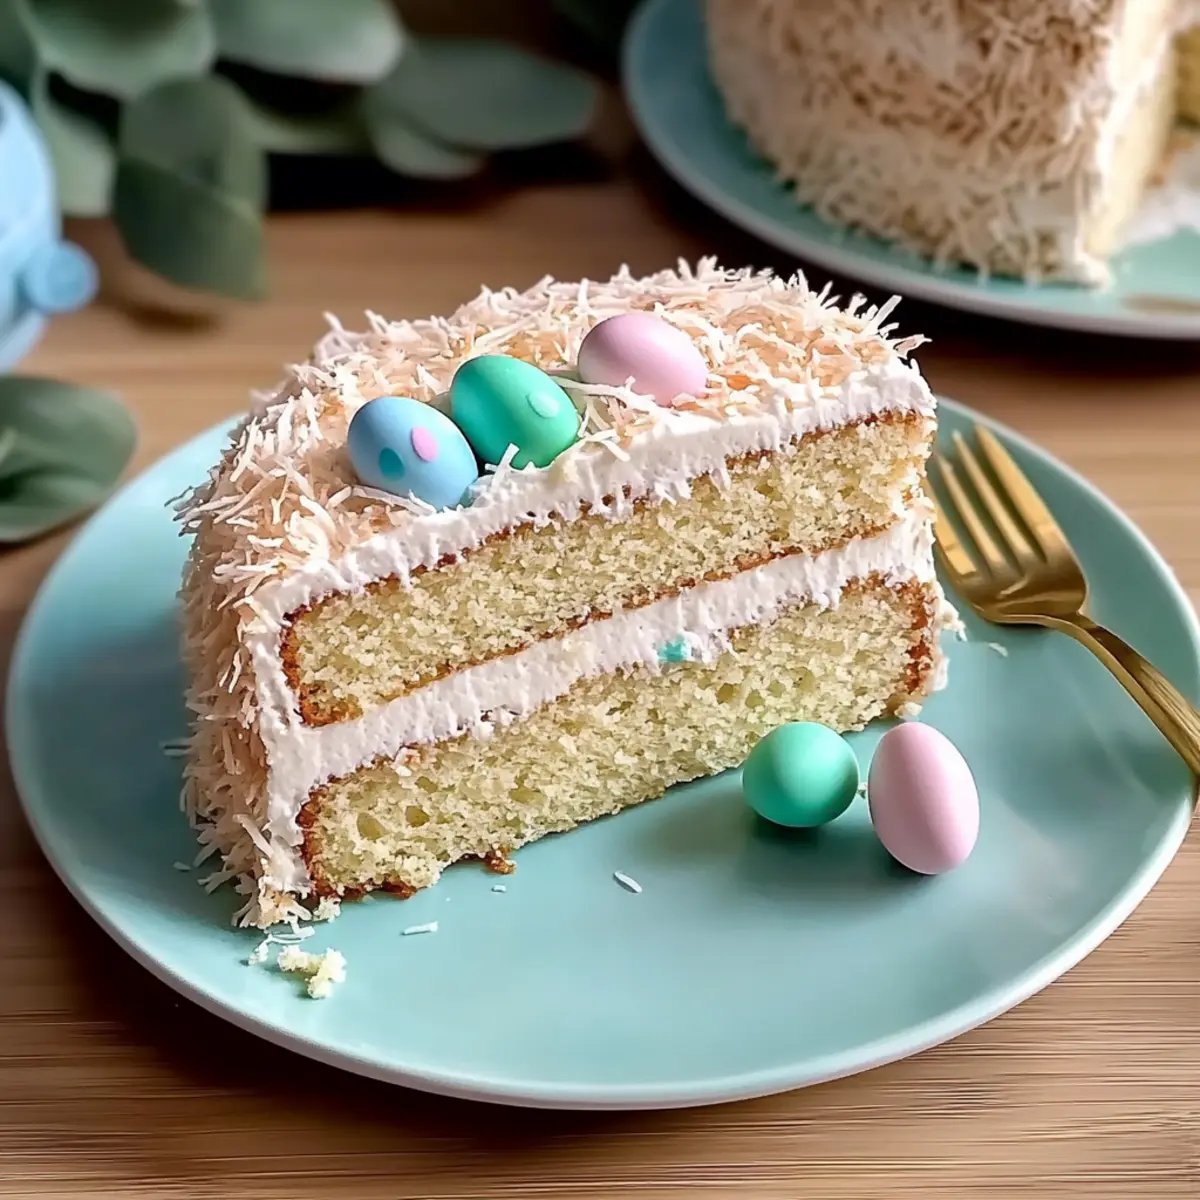
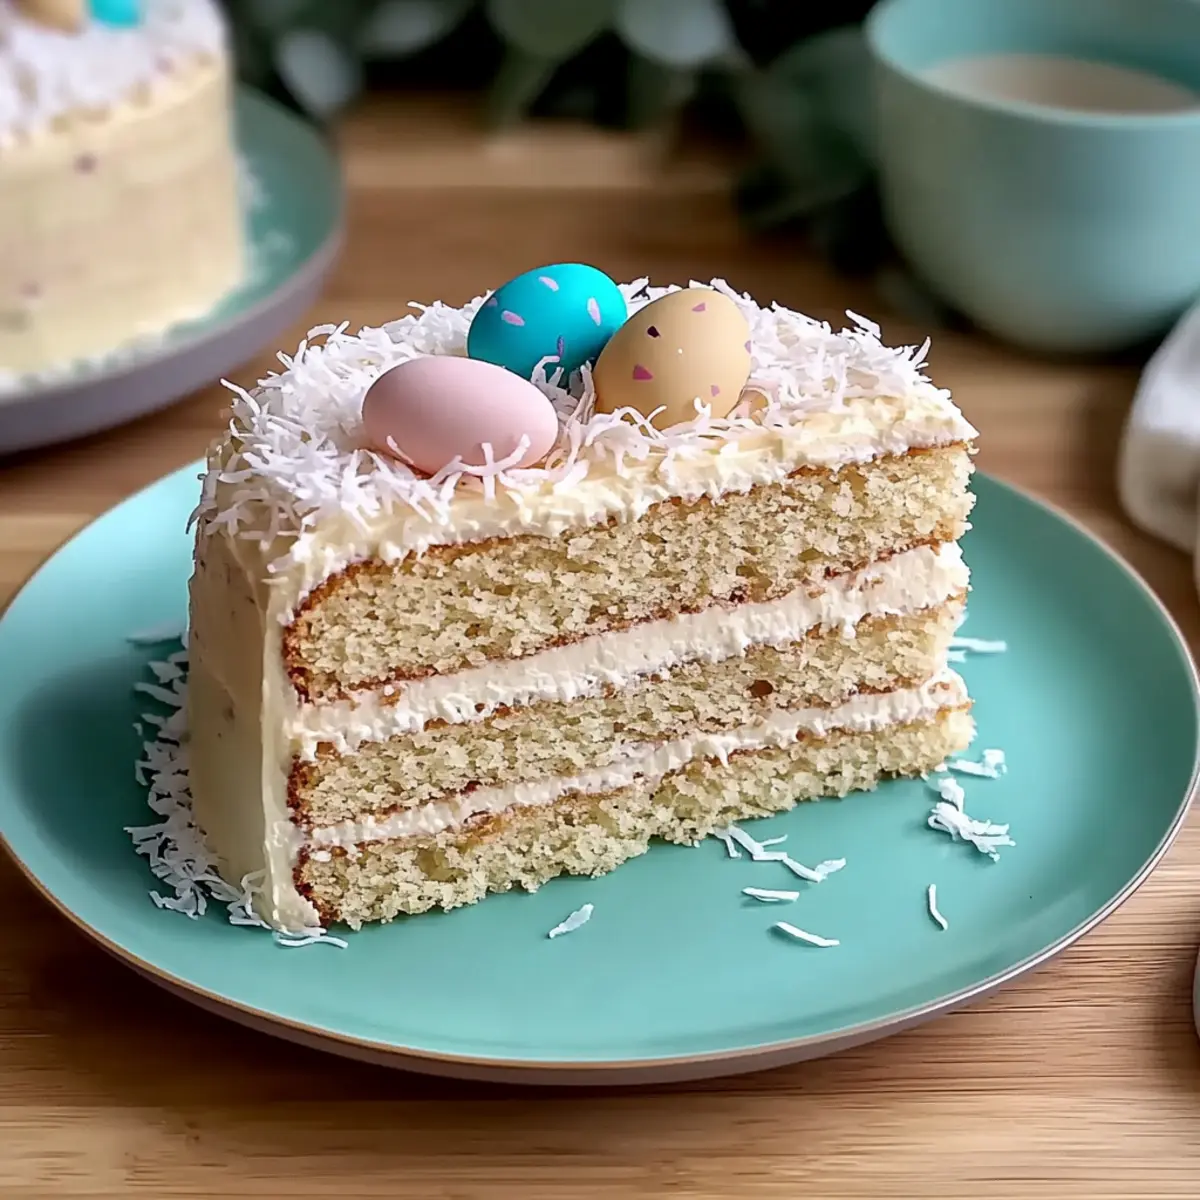
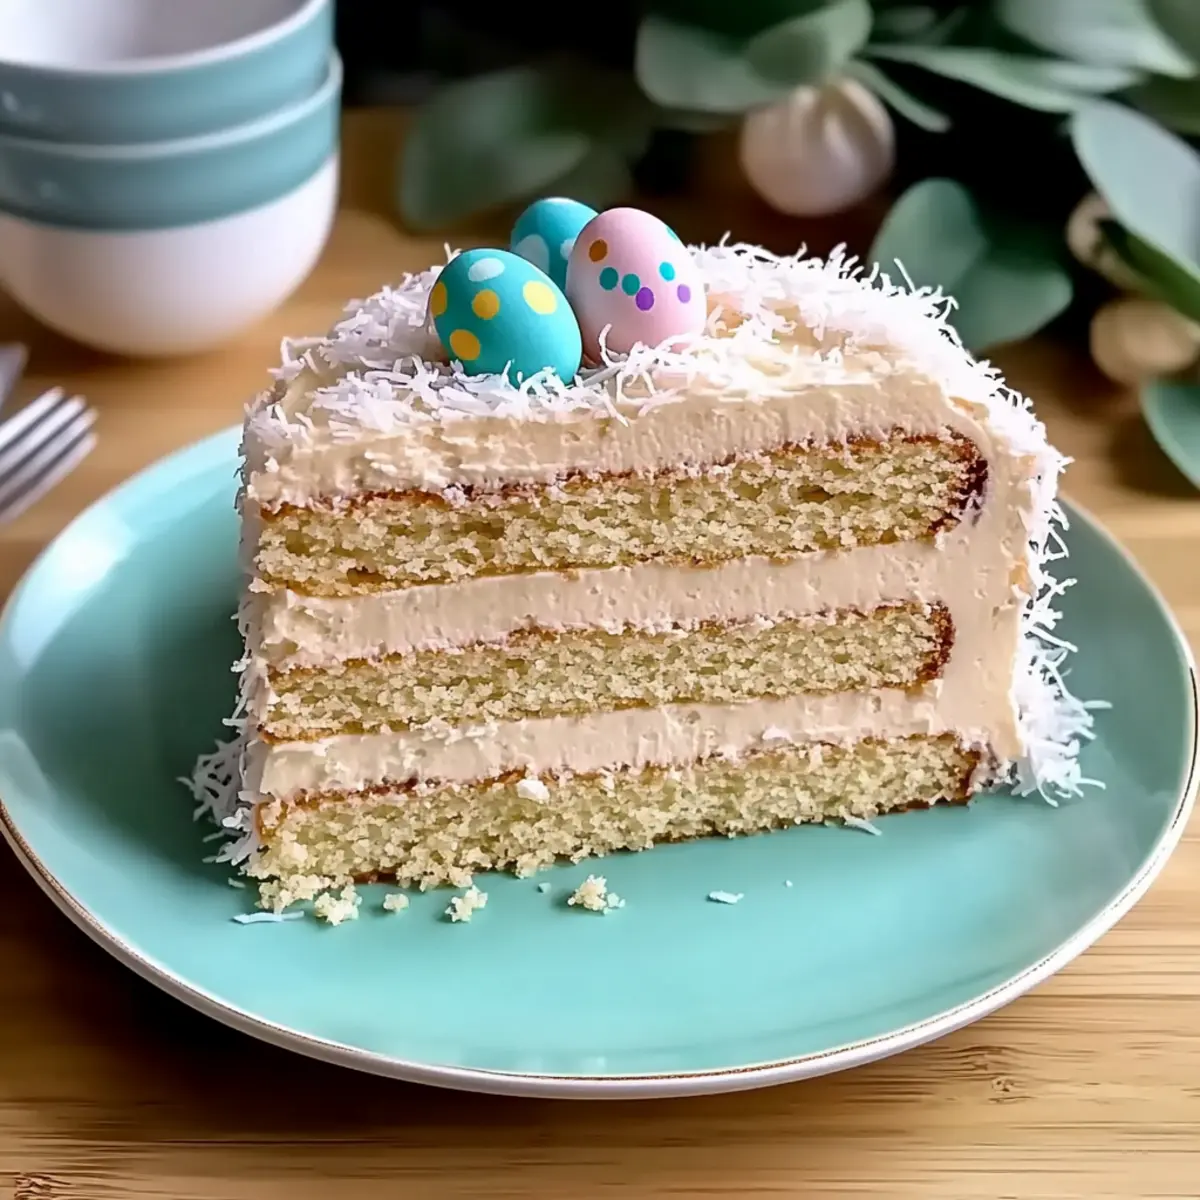
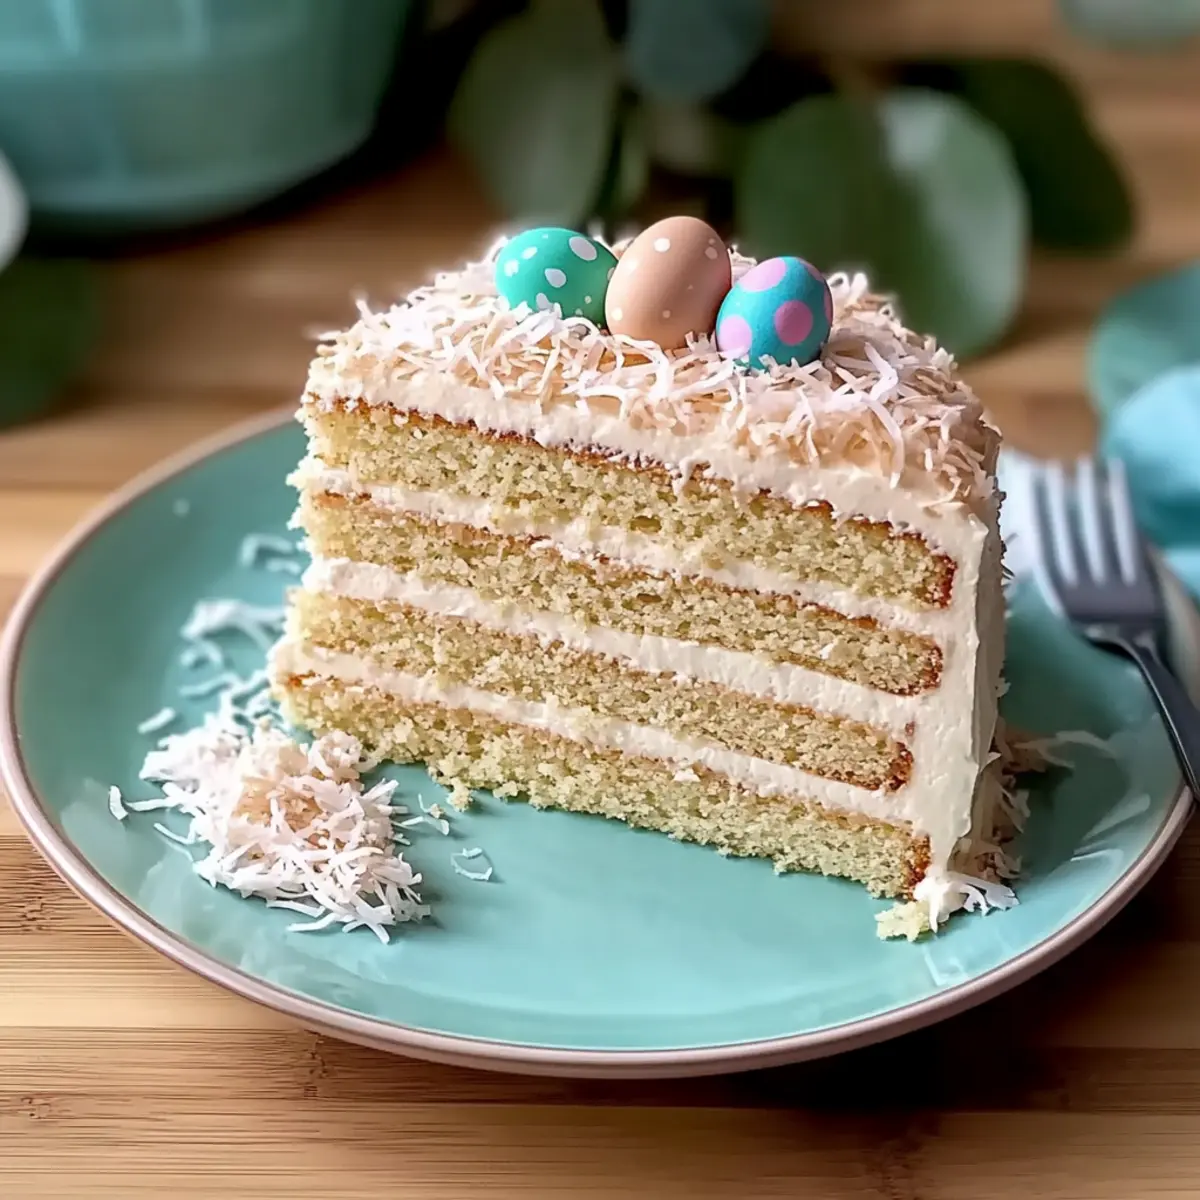
- Chocolate Eggs – The star of the decoration; Cadbury Mini Eggs are a great choice to finish off your cake beautifully!
Let this Tasty Easter Cake inspire your baking creativity, and share delicious moments with those you love!
Step‑by‑Step Instructions for Tasty Easter Cake
Step 1: Preheat Your Oven
Begin by preheating your oven to 325°F (163°C). While the oven warms, prepare three 6-inch round cake pans by greasing them with unsalted butter and then dusting with all-purpose flour. This ensures that your Tasty Easter Cake layers will come out easily once baked.
Step 2: Toast the Coconut
On a baking sheet, spread shredded coconut evenly. Place it in the preheated oven and toast for 5-10 minutes, stirring halfway through, until the coconut turns a lovely golden brown and releases a fragrant aroma. Keep a close eye on it to prevent burning, as coconut can toast quickly.
Step 3: Mix Dry Ingredients
In a large mixing bowl, sift together all-purpose flour, sugar, baking powder, baking soda, and salt. Whisk thoroughly until the dry mixture is well combined and free of lumps. This step is crucial for ensuring an even texture in your Tasty Easter Cake, as it helps with proper rising.
Step 4: Combine Wet Ingredients
In a separate bowl, whisk together the egg whites, vanilla extract, sour cream, and milk until the mixture is smooth and well blended. The egg whites add lightness to the cake, and this mixture will bring moisture to the batter, resulting in a delightful cake.
Step 5: Combine the Mixtures
Gradually fold the wet ingredients into the dry mixture using a spatula. Mix gently until everything is just combined, being careful not to overmix. This step is key for keeping your Tasty Easter Cake light and fluffy, perfect for any festive occasion.
Step 6: Bake Cake Layers
Divide the batter evenly among the prepared pans. Bake in the center of your preheated oven for 25-30 minutes, or until a toothpick inserted into the center comes out clean. You’ll know the cake is done when it springs back slightly when touched and has a light golden color on top.
Step 7: Cool the Cake Layers
Once baked, remove the layers from the oven and allow them to cool in the pans for 10 minutes. After this initial cooling period, carefully transfer the layers to a wire rack to cool completely. This step allows your Tasty Easter Cake to set properly before frosting.
Step 8: Prepare the Frosting
In a mixing bowl, beat the room-temperature unsalted butter until creamy and smooth. Gradually add sifted powdered sugar, then mix in milk, vanilla extract, and a pinch of salt. Beat until the frosting is fluffy, light, and spreadable, ensuring a delectable finish for your cake.
Step 9: Assemble the Cake
Start layering your cooled cake by frosting the top of the first layer with buttercream. Place the second layer on top and repeat, carefully stacking each layer. Once all three layers are stacked, frost the top and sides of the Tasty Easter Cake for a smooth and generous coverage.
Step 10: Create the Nest Decoration
To add your whimsical Chocolate Egg Nest, gently dust the top of the cake with cocoa powder. Sprinkle the toasted coconut over the cocoa layer to resemble a nest, then nestle chocolate eggs in the center. This fun decoration will bring festive flair to your cake.
Step 11: Chill the Cake
Finally, refrigerate your decorated Tasty Easter Cake for 10-15 minutes to set the frosting and decorations. This short chill time helps to ensure that your beautiful decorations hold in place while enhancing the flavors before serving.
Make Ahead Options
These Tasty Easter Cake layers are perfect for meal prep, allowing busy home cooks to enjoy more time with family on the holiday! You can prepare the cake layers up to 3 days in advance; simply allow them to cool completely, wrap tightly in plastic wrap, and refrigerate. The frosting can also be made and stored in an airtight container for up to 5 days, ensuring it remains light and fluffy. When you’re ready to serve, frost the chilled cake layers, create the Chocolate Egg Nest decoration, and refrigerate for just 10-15 minutes to set before enjoying. Following these steps helps maintain the cake’s delicious quality while saving you time on the big day!
Expert Tips for Cake with Chocolate Egg Nest
-
Ingredient Temperature: Ensure all ingredients, especially butter and eggs, are at room temperature for a smooth batter that rises beautifully.
-
Mixing Method: Be gentle when folding the wet and dry ingredients together; overmixing can lead to a dense cake instead of the light and fluffy texture desired for the Tasty Easter Cake.
-
Check Freshness: Always check the expiration dates on your baking powder and baking soda. Fresh leavening agents are key to making your cake rise perfectly.
-
Layer Leveling: If your cake layers dome up during baking, use a serrated knife to trim the tops after cooling. This will help the layers stack evenly when assembling your cake.
-
Chill Before Serving: Allow the cake to chill in the refrigerator after decorating. This helps the frosting set properly and enhances the presentation of your cake with chocolate egg nest decoration.
Storage Tips for Cake with Chocolate Egg Nest
Room Temperature: Store the cake covered at room temperature for up to 2 days. This keeps it fresh and moist, perfect for enjoying during your Easter celebrations.
Fridge: Refrigerate any leftover cake for up to 5 days, ensuring it’s in an airtight container to maintain its delightful texture and flavor.
Freezer: Unfrosted layers can be frozen for up to 3 months. Wrap each layer tightly in plastic wrap and then foil for optimal freshness.
Reheating: For best results, allow the cake to reach room temperature before serving. If desired, you can reheat individual slices in the microwave for 10-15 seconds.
What to Serve with Tasty Easter Cake
Imagine the joy of gathering around a table adorned with a slice of festive delight, celebrating the flavors of the season.
- Fresh Berries: The bright sweetness of strawberries or blueberries adds a refreshing contrast to the rich flavors of the cake.
- Whipped Cream: Light and airy, this indulgent topping complements the buttercream frosting and adds a luscious touch to each bite.
- Vanilla Ice Cream: A scoop of creamy ice cream creates a delightful temperature contrast and balances the cake’s sweetness beautifully.
- Warm Coffee: The rich, bold flavors of freshly brewed coffee provide a comforting backdrop, making each slice of cake even more enjoyable.
- Sparkling Lemonade: This fizzy, citrusy drink is perfect for spring gatherings, enhances the festive spirit, and pairs thoughtfully with the cake’s sweetness.
- Chocolate-Covered Strawberries: For a decadent twist, these treats echo the chocolate eggs on the cake, creating a cohesive flavor experience for your celebration.
- Fruit Salad: A vibrant bowl of fresh fruit adds a light, healthful element to the dessert table, introducing a medley of textures and flavors.
- Classic Tea: A warm cup of herbal or black tea offers a soothing balance, perfect for enjoying a slice of cake in a cozy moment.
Each pairing elevates the Tasty Easter Cake, creating an unforgettable feast for you and your loved ones!
Cake with Chocolate Egg Nest Variations
Feel free to unleash your creativity and customize this delightful cake experience to match your taste buds!
- Vegan Delight: Substitute egg whites with flaxseed meal mixed with water, and use plant-based milk and butter for a full vegan twist. A rich flavor without sacrificing the joy of cake!
- Citrus Burst: Add lemon or orange zest into the batter for a refreshing zing that brightens each slice. This little twist on a classic vanilla cake makes it even more special.
- Chocolate Surprise: Blend in unsweetened cocoa powder into the batter for a chocolate version of the cake that’s equally decadent. Pair with a chocolate buttercream for a double chocolate delight!
- Gluten-Free Goodness: Use a gluten-free flour blend in place of all-purpose flour to make this cake gluten-free friendly. Ensure you adjust the moisture accordingly for the best texture.
- Fruit Fusion: Incorporate pureed strawberries or raspberries into the batter for a fruity burst of flavor that enhances the cake’s sweetness. Just imagine those lovely, vibrant colors!
- Nutty Twist: Stir in chopped nuts, like walnuts or almonds, to the batter for a delightful crunch in every bite. This adds texture and a unique flavor profile that everyone will love.
- Caramel Drizzle: Top with warm caramel sauce instead of frosting for a sweet finish that can elevate the overall dessert experience. The gooey sweetness is truly irresistible!
- Layered Indulgence: Create a layer of your favorite jam or fruit preserves between the cake layers before frosting for an added sweetness that’s sure to charm everyone at the table. Enjoy exploring these variations and making this Tasty Easter Cake uniquely yours! If you’re inspired for more delicious creations, check out this Strawberry Cake Filling idea or indulge in a slice of Coconut Cake Vape.
Cake with Chocolate Egg Nest Recipe FAQs
How do I choose ripe ingredients for my Cake with Chocolate Egg Nest?
Absolutely! For the best flavor and texture, ensure your eggs are fresh (check the expiration date) and that your butter is at room temperature, soft enough to cream easily. When using milk or yogurt, pick items that have a clean, fresh scent. If you’re adding lemon zest, choose bright yellow lemons with a smooth skin. For coconut, opt for shredded sweetened coconut that’s fresh and aromatic.
What’s the best way to store the Cake with Chocolate Egg Nest?
To keep your cake fresh, store it covered at room temperature for up to 2 days. If you have leftovers, refrigerate them in an airtight container for up to 5 days. Allow the cake to come to room temperature before serving for the best flavor. If you want to store it longer, unfrosted cake layers can be wrapped tightly in plastic wrap and then foil, and frozen for up to 3 months.
Can I freeze my Cake with Chocolate Egg Nest?
Certainly! If you have unfrosted layers you’d like to preserve, wrap each layer tightly in plastic wrap and then in aluminum foil. They can be frozen for up to 3 months. When you’re ready to enjoy, simply defrost the layers in the refrigerator overnight or at room temperature for a few hours, and then frost them as desired.
What should I do if my cake layers come out uneven?
Very! If your cake layers have domed while baking, don’t worry! Once they’re completely cooled, use a serrated knife to carefully trim the tops for even layers. This will ensure a stable and beautiful cake when you stack them. Using a cake leveler can also simplify this process for perfectly even layers.
Are there any dietary considerations for the Cake with Chocolate Egg Nest?
The more the merrier! This cake can easily accommodate various dietary needs. For a vegan version, replace the egg whites with an egg replacer or flaxseed meal mixed with water. Be sure to use dairy-free milk and plant-based butter. Also, check that your chocolate eggs don’t contain any allergens for your guests, especially for those with nut allergies. Enjoy celebrating without worry!
Delightful Cake with Chocolate Egg Nest for Your Easter Table
Ingredients
Equipment
Method
- Preheat your oven to 325°F (163°C) and prepare three 6-inch round cake pans with butter and flour.
- Spread shredded coconut on a baking sheet and toast in the oven for 5-10 minutes.
- In a large mixing bowl, sift and whisk together the dry ingredients: flour, sugar, baking powder, baking soda, and salt.
- In a separate bowl, whisk together the wet ingredients: egg whites, vanilla, sour cream, and milk.
- Fold the wet mixture into the dry mixture gently to combine.
- Divide the batter among the prepared pans and bake for 25-30 minutes or until a toothpick comes out clean.
- Cool the layers in the pans for 10 minutes, then transfer to a wire rack to cool completely.
- Beat the room-temperature butter until creamy and smooth, then gradually add sifted powdered sugar and milk to create frosting.
- Assemble the cake by frosting between layers and covering the top and sides.
- Dust the top with cocoa powder, sprinkle with toasted coconut, and nestle chocolate eggs in the center.
- Refrigerate the finished cake for 10-15 minutes to set the frosting.
")