")
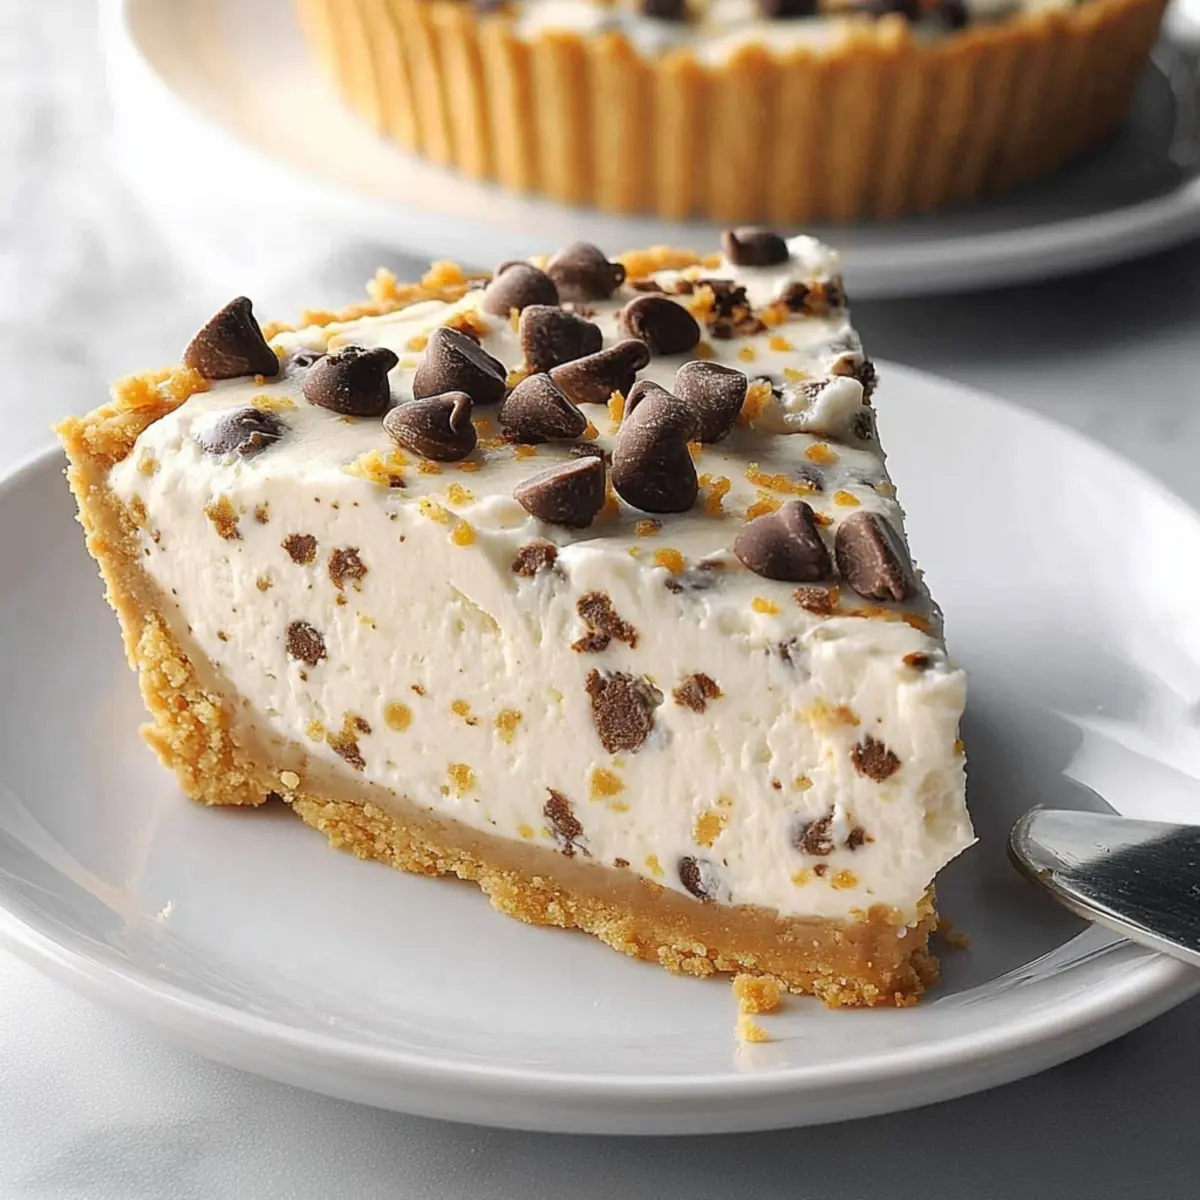
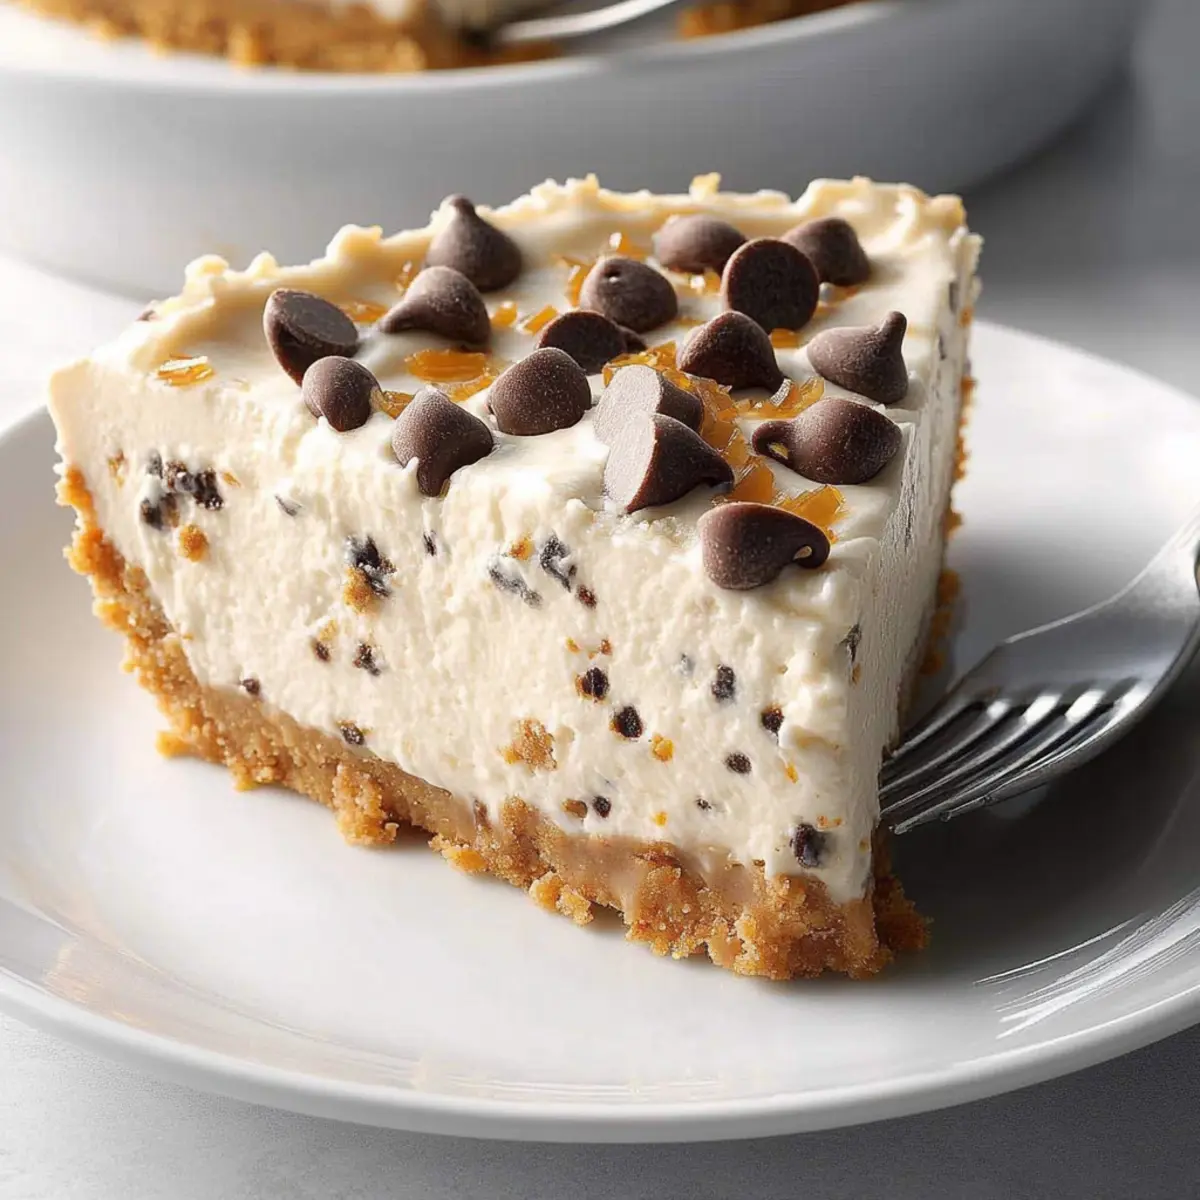
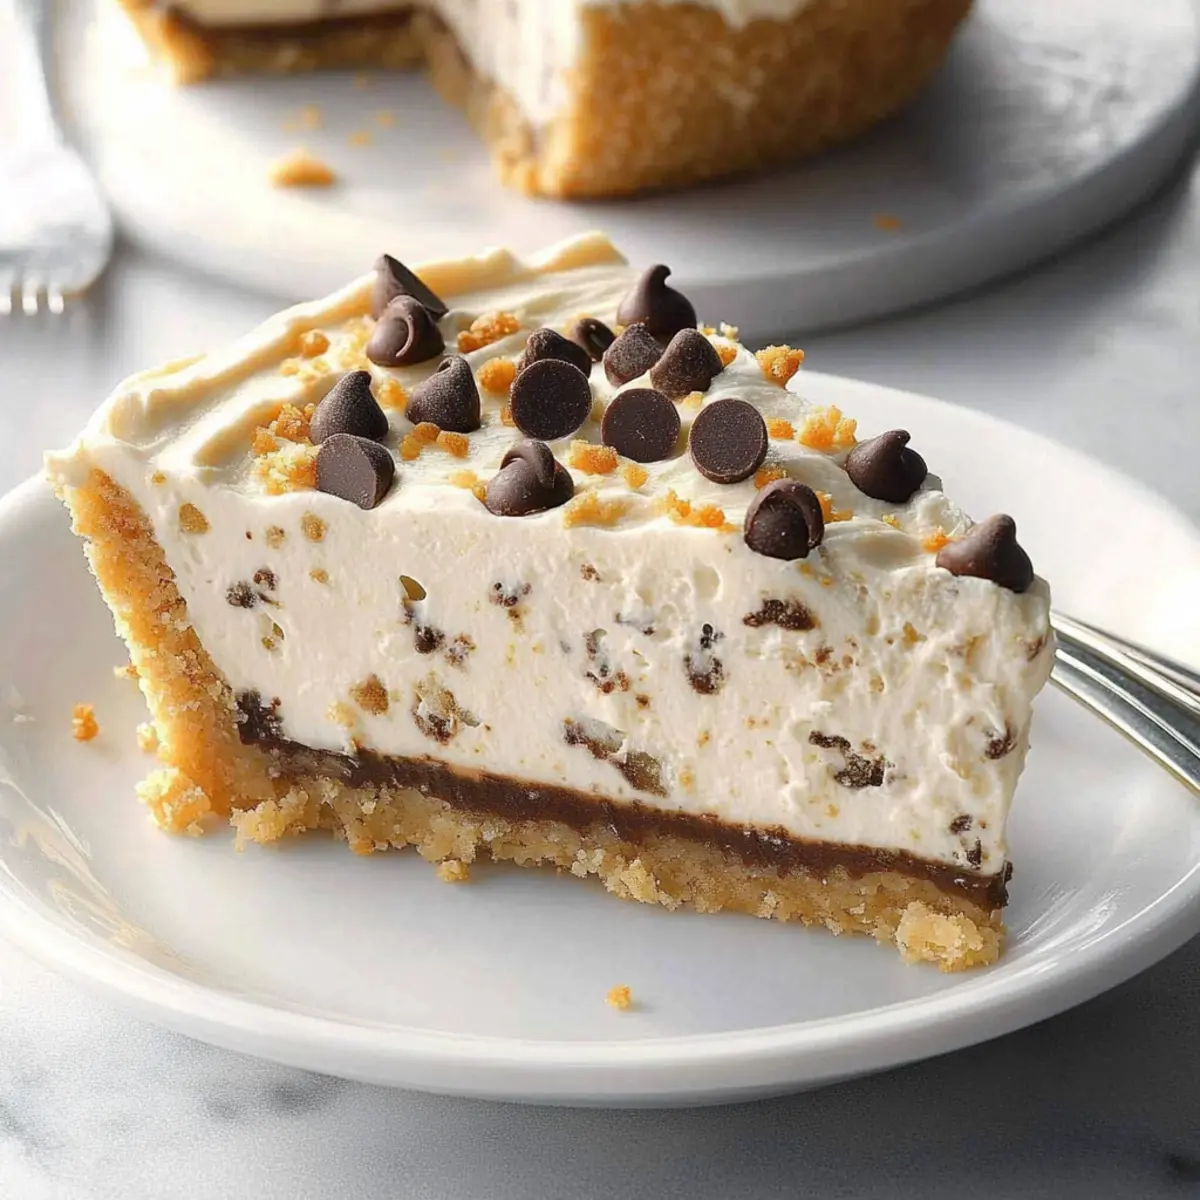
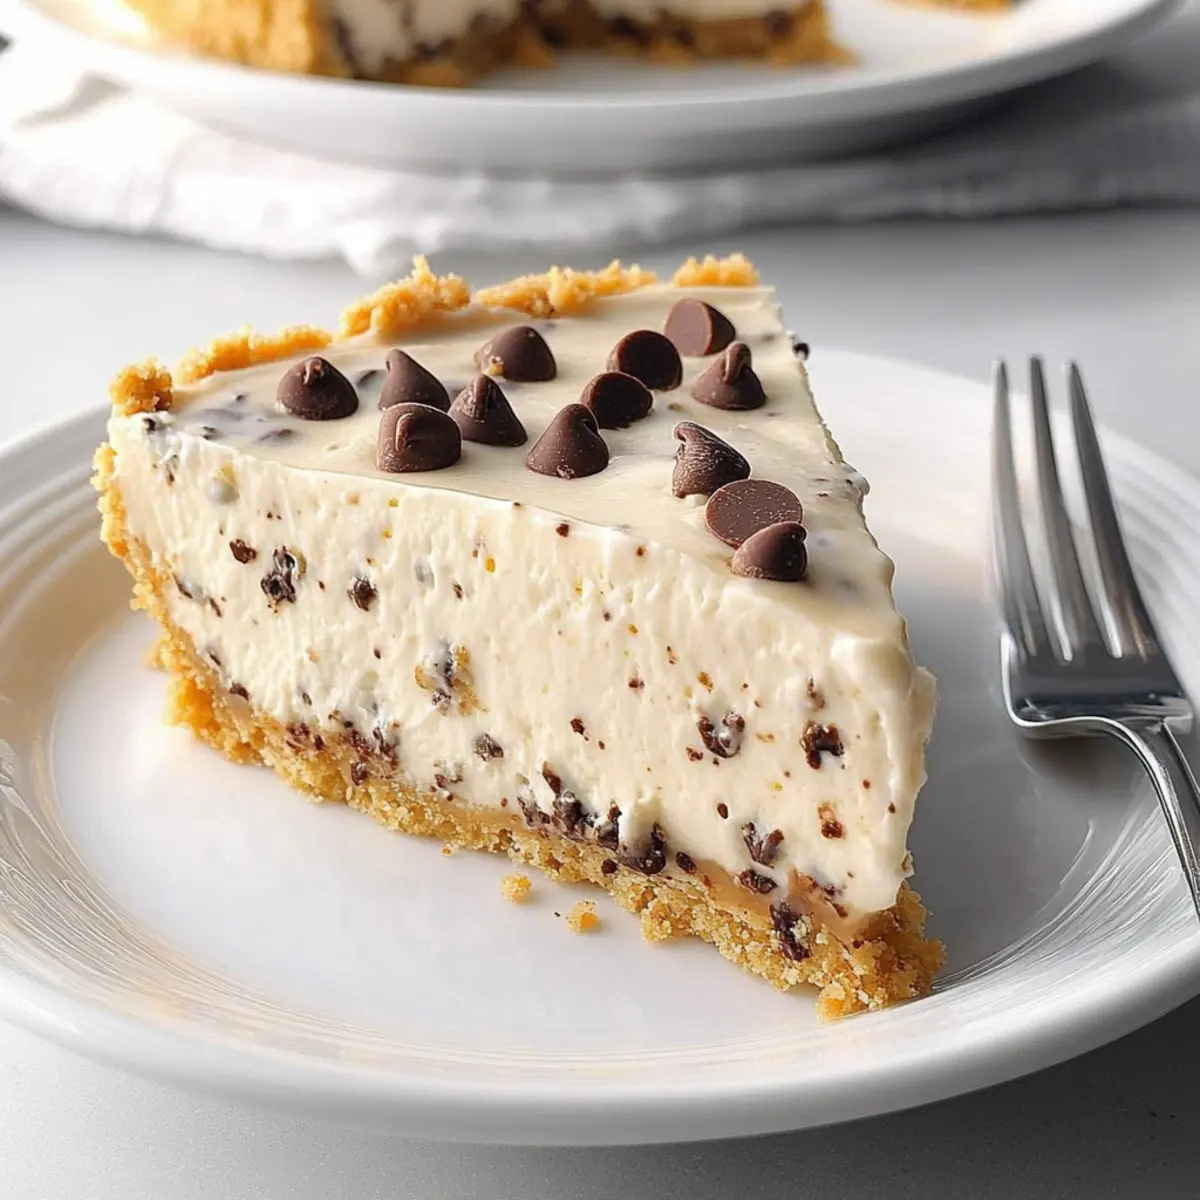
The moment I took that first bite of No-Bake Chocolate Chip Cannoli Cheesecake, it felt like a sweet embrace from an Italian Nonna. Combining the rich, silky flavors of classic cannoli with the fluffiness of cheesecake, this dessert brings a unique twist to your dining table. What I love most is how quick and easy it is to prepare—under 30 minutes! This delightful treat is perfect for warm afternoons and is sure to steal the spotlight at family gatherings. The adaptability of the crust lets you choose between traditional cannoli shells or even ice cream cones for a whimsical flair, plus you can customize the flavors with options like zesty lemon instead of orange. Are you ready to dive into this creamy indulgence?
Why is this cannoli cheesecake so special?
Indulgent, Unique Flavor: This No-Bake Chocolate Chip Cannoli Cheesecake beautifully blends classic Italian flavors with creamy cheesecake, giving you a dessert that feels like a mini celebration.
Quick and Simple: Prepped in just under 30 minutes, this recipe is perfect for busy weeknights or last-minute gatherings.
Versatile Base: Choose your preferred crust, whether it’s the crunchy cannoli shells or fun ice cream cones, allowing you to tailor the dish to your taste.
Flexible Flavor Options: Switch up the zest with lemon for a tangy twist or enjoy the classic orange flavor; the choice is yours!
Crowd-Pleasing Delight: Whether you’re hosting a party or enjoying a quiet night in, this cheesecake will wow both family and friends. It’s a surefire way to elevate any occasion. For more inspiration, explore how to make a delightful Sara Lee Cheesecake or learn about Making Cheesecake Dip for various dessert options!
Cannoli Cheesecake Ingredients
For the Crust
• Cannoli shells – The classic choice for a crunchy, indulgent base; ice cream cones can be a fun substitute.
• Sugar – Sweetener for both the crust and filling; it enhances the overall flavor beautifully.
• Graham cracker crumbs – Adds texture; go with graham crackers if cannoli shells aren’t available.
• Butter – Binds the crust ingredients together; melt for easy mixing.
For the Filling
• Cream cheese – Provides creaminess and richness; make sure it’s softened for better blending.
• Confectioners’ sugar – Sweetens the filling; it’s important for achieving a smooth texture.
• Orange zest – Adds a hint of citrus brightness; lemon zest makes a great alternative.
• Ground cinnamon – Infuses warmth and depth; it beautifully complements the sweetness.
• Ricotta cheese – Lightens the filling and adds that authentic cannoli flavor; mix well to eliminate lumps.
• Vanilla extract – Enhances the flavor of the filling; it’s a staple in dessert recipes.
• Rum extract – Introduces subtle complexity; it’s optional, but recommended for a traditional taste.
• Miniature semisweet chocolate chips – Adds delightful texture and sweetness; consider using dark chocolate for intense richness.
For the Garnish
• Chopped pistachios – Provide a crunchy finish and add elegance; optional but highly recommended for color contrast.
Step‑by‑Step Instructions for No-Bake Chocolate Chip Cannoli Cheesecake
Step 1: Prepare the Crust
Begin by pulsing the cannoli shells or graham crackers in a food processor until they reach a coarse crumb texture. Transfer the crumbs to a mixing bowl, then combine them with sugar and melted butter until everything is well-coated. Press this mixture firmly into the bottom and up the sides of a greased 9-inch pie plate. Chill the crust in the refrigerator for about 1 hour to firm it up.
Step 2: Make the Filling
While the crust chills, prepare the creamy filling for your Cannoli Cheesecake. In a mixing bowl, beat the softened cream cheese and confectioners’ sugar together until smooth and fluffy. Next, add the orange zest and ground cinnamon, blending until fully incorporated. Gently mix in the ricotta cheese, vanilla extract, and a hint of rum extract for that classic cannoli flavor until the mixture is cohesive and creamy.
Step 3: Fold in Chocolate Chips
Once your filling is smooth, it’s time to add a touch of sweetness and texture. Carefully fold in the miniature semisweet chocolate chips into the cream mixture. Use a spatula to ensure the chocolate is evenly distributed without over-mixing, as you want to maintain the light and fluffy texture of the filling.
Step 4: Assemble and Chill
With your crust firm and filling ready, it’s time to assemble your No-Bake Chocolate Chip Cannoli Cheesecake. Pour the filling into the chilled crust, smoothing the top with a spatula for an even finish. Cover the cheesecake with plastic wrap and refrigerate it for at least 4 hours, or until it sets completely, ensuring every bite is rich and satisfying.
Step 5: Garnish and Serve
After the cheesecake has set, remove it from the refrigerator and sprinkle chopped pistachios on top for a lovely crunch and decorative touch. Slice into generous pieces and serve chilled, perhaps with a dollop of whipped cream or fresh fruit, to enjoy this delightful blend of flavors in your Cannoli Cheesecake!
Cannoli Cheesecake Variations & Substitutions
Customize your Cannoli Cheesecake to match your cravings and culinary inspirations!
- Ice Cream Cone Crust: Swap traditional cannoli shells with waffle ice cream cones for a fun, sweet twist that’s a hit with kids!
- Graham Cracker Base: If you’re out of cannoli shells, graham cracker crumbs work wonderfully, offering a crunchy alternative to ground.
- Lemon Zest: Replace orange zest with lemon for a tangy flavor that brightens your cheesecake and adds a refreshing touch.
- Vanilla Bean: Elevate the flavor by using vanilla bean paste instead of extract; it’ll add tiny specks of flavor and increased depth.
- Almond Extract: For a nutty complexity, swap in almond extract for added warmth, giving your cheesecake a unique spin.
- Dairy-Free Option: Use vegan cream cheese and coconut or almond milk for a dairy-free dessert that still delivers on richness and flavor.
- No-Chocolate Version: Omit the chocolate chips for a purer cheese flavor, making this a classic Italian cannoli-inspired cheesecake.
- Nutty Topping: Consider sprinkling crushed hazelnuts or almonds over the top for an extra nutty crunch that complements the cake beautifully.
Experimenting with these substitutions can turn a delightful dessert into an unforgettable experience! If you’re in the mood for something else, why not explore how to make a delightful Sara Lee Cheesecake or learn about Making Cheesecake Dip for even more creative dessert options!
Expert Tips for Cannoli Cheesecake
Room Temperature Cream Cheese: Allow cream cheese to come to room temperature before mixing; this helps prevent lumps in your filling, ensuring a silky Cannoli Cheesecake.
Crust Choices: If you opt for ice cream cones instead of cannoli shells, be mindful that they may become soggy over time. Serve immediately after assembling for best texture.
Chill Time: For the best flavor, refrigerate the cheesecake for at least 4 hours, but overnight is even better, allowing all those beautiful flavors to meld together.
Avoiding Overmixing: When folding in chocolate chips, do so gently to maintain the lightness of the filling. Overmixing can result in a denser texture.
Creative Variations: Don’t hesitate to add a splash of almond extract or switch zests for personalized flavors. Each variation can give your Cannoli Cheesecake a fun twist!
Make Ahead Options
These No-Bake Chocolate Chip Cannoli Cheesecakes are perfect for meal prep enthusiasts! You can prepare the crust up to 24 hours in advance by making it and chilling it tightly wrapped in the fridge; this helps it firm up beautifully. The cheesecake filling can also be made ahead—just whip it up and store it in an airtight container in the refrigerator for up to 3 days. When you’re ready to serve, simply spread the filling into the prepped crust, smooth the top, and allow it to set for at least 4 hours before garnishing with pistachios. This way, you’ll enjoy a deliciously creamy dessert with minimal effort on the day of your gathering!
What to Serve with No-Bake Chocolate Chip Cannoli Cheesecake
When it comes to a luscious dessert like this, it’s all about pairing it with delightful accompaniments that enhance its creamy, indulgent experience.
- Fresh Berries: Their bright acidity and juiciness cut through the richness of the cheesecake, providing a refreshing contrast. A handful of raspberries or strawberries adds a pop of color and flavor.
- Whipped Cream: A dollop of freshly whipped cream adds an airy lightness, perfectly complementing the velvety cheesecake while making each bite more indulgent. The sweetness of the cream balances the rich flavors beautifully.
- Chocolate Ganache: Drizzle warm chocolate ganache over the cheesecake for an extra layer of chocolatey goodness. This adds an indulgent touch and creates a wonderful visual appeal.
- Italian Espresso: The bold flavors of a shot of espresso harmonize beautifully with the cheesecake’s sweetness, giving you a delightful after-meal experience. Consider serving it alongside for a true Italian dessert vibe!
- Pistachio Crumble: Sprinkle crushed pistachios on top of the cheesecake for a crunchy texture that echoes the nutty notes of the filling. This added element introduces an elegant flair while amplifying flavors.
- Citrus Sorbet: Serve a scoop of lemon or orange sorbet on the side for a bright, refreshing note that cuts through the creaminess of the cheesecake. It’s a delicious way to cleanse the palate!
How to Store and Freeze Cannoli Cheesecake
Fridge: Store your No-Bake Chocolate Chip Cannoli Cheesecake in an airtight container in the fridge for up to 4 days to maintain its freshness and creamy texture.
Freezer: If you want to enjoy it longer, individual slices can be wrapped tightly in plastic wrap and stored in the freezer for up to 2 months. Thaw in the fridge before serving.
Covering: Always cover the cheesecake with plastic wrap or a lid in the fridge to prevent absorbing any odors from other foods, keeping its flavors intact.
Reheating: This cheesecake is best served chilled; simply slice and enjoy straight from the fridge without reheating to preserve its delightful texture.
No-Bake Chocolate Chip Cannoli Cheesecake Recipe FAQs
How do I select the right cannoli shells for the crust?
Absolutely! When choosing cannoli shells, look for ones that are fresh and crisp, free of any dark spots or cracks. If you can’t find them, graham crackers make a fantastic alternative, adding a different texture while still keeping that delicious flavor.
What is the best way to store leftover cannoli cheesecake?
Very important! Your No-Bake Chocolate Chip Cannoli Cheesecake should be stored in an airtight container in the refrigerator for up to 4 days. This helps maintain its creamy texture and delicious flavors. Just make sure to cover it with plastic wrap or a lid to avoid absorbing any odors from other foods.
Can I freeze cannoli cheesecake for later?
Absolutely! To freeze individual slices, wrap them tightly in plastic wrap and place them in an airtight container. Your cheesecake can last up to 2 months in the freezer. To enjoy, simply move a slice to the fridge for several hours to thaw before serving. This will help retain its delightful texture and taste.
What if my cheesecake turns out too runny?
If your cheesecake isn’t setting properly, it might be due to under-mixing or not letting it chill long enough. Make sure you beat the cream cheese and confectioners’ sugar until smooth and well combined. If it’s still a bit runny after refrigerating, consider adding a touch more ricotta or refrigerating it longer. Another option is to freeze the cheesecake for a firmer texture, then let it thaw in the fridge before serving.
Is this cheesecake safe for people with nut allergies?
Good to know! The recipe itself does not contain any nuts, but the optional pistachios used for garnish do. If you’re serving someone with a nut allergy, simply omit the pistachios. Enjoying the cheesecake without this addition will still offer a delicious experience!
Can I make variations to the flavor?
Very much so! Feel free to experiment with different zests—using lemon instead of orange can add a delightful tang. Also, you could swap out the chocolate chips for dried fruits or extra nuts if you’d like to mix things up! The more the merrier when it comes to creativity in the kitchen!
Irresistible Cannoli Cheesecake to Satisfy Your Sweet Tooth
Ingredients
Equipment
Method
- Begin by pulsing the cannoli shells or graham crackers in a food processor until they reach a coarse crumb texture. Transfer the crumbs to a mixing bowl, then combine them with sugar and melted butter until well-coated. Press this mixture firmly into the bottom and up the sides of a greased 9-inch pie plate. Chill the crust in the refrigerator for about 1 hour to firm it up.
- While the crust chills, prepare the creamy filling. In a mixing bowl, beat the softened cream cheese and confectioners' sugar together until smooth and fluffy. Add the orange zest and ground cinnamon, blending until fully incorporated. Gently mix in the ricotta, vanilla, and optional rum extract until cohesive and creamy.
- Carefully fold in the miniature semisweet chocolate chips into the cream mixture to maintain the light and fluffy texture.
- Pour the filling into the chilled crust, smoothing the top with a spatula. Cover with plastic wrap and refrigerate for at least 4 hours, or until it sets completely.
- Remove from the refrigerator and sprinkle chopped pistachios on top for garnish. Slice into pieces and serve chilled.
")