")
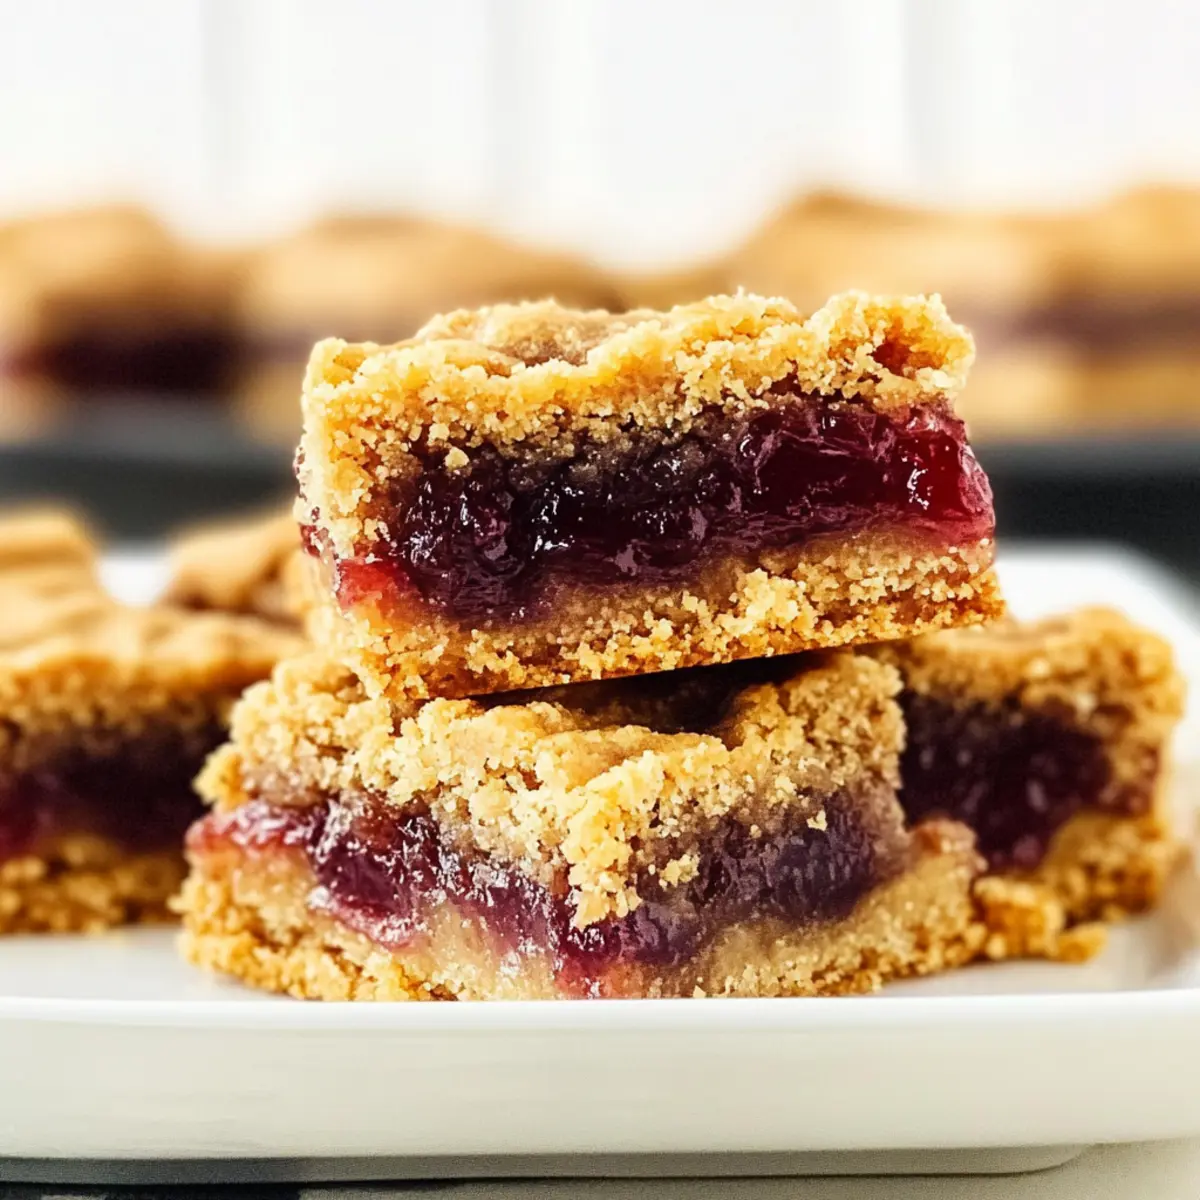
Stumbling upon a childhood favorite can spark the most delightful nostalgia. Remember those lunchtime PB&J sandwiches? I’m excited to share a modern twist with these Peanut Butter and Jelly Bars, blending creamy peanut butter and sweet grape jelly into a soft, crumbly dessert that’s sure to brighten any day. These bars are not only easy to whip up, making them perfect for busy afternoons, but they’re also a fantastic crowd-pleaser for parties and bake sales alike. Best of all, you can swap in your favorite jams or nut butters for a personal spin. Ready to elevate your dessert game and satisfy that sweet tooth? Let’s dive into this recipe that brings a classic comfort food right to your table!
Why Will You Love These Bars?
Nostalgic Flavor: These Peanut Butter and Jelly Bars evoke classic childhood memories, with a rich peanut buttery taste paired with sweet, fruity jelly—perfect for a trip down memory lane.
Effortless Preparation: No complicated techniques here! This recipe is designed for busy days, requiring minimal prep time but delivering maximum satisfaction.
Versatile Substitutions: Feel free to experiment! Whether you use almond butter instead of peanut butter or swap grape jelly for your favorite jam, the options are endless.
Crowd-Pleasing Delight: Perfect for bake sales, picnics, or cozy gatherings, these bars are sure to please both kids and adults alike with their soft, crumbly texture.
Quick Storage: Leftovers? No problem! Store them in an airtight container for up to 3 days, or freeze individually for a sweet treat whenever you desire.
Peanut Butter and Jelly Bars Ingredients
For the Batter
- Butter – Provides richness and moisture; use unsalted for better control of salt levels.
- Brown Sugar & Sugar (Granulated) – Combines to add sweetness and tenderness to the dough.
- Vanilla Extract – Enhances flavor depth and adds warmth to the bars.
- Eggs – Binds ingredients and contributes to a soft texture; includes 2 large eggs plus 1 yolk for added richness.
- Flour (Self-Rising) – Gives structure; can be substituted with all-purpose flour plus baking powder and salt.
- Peanut Butter (Creamy, No Sugar Added) – The star ingredient that provides a rich, nutty flavor essential for the bars.
For the Jelly Layer
- Grape Jelly – Adds that classic PB&J twist; offers a sweet layer; feel free to swap with strawberry or raspberry preserves for a different taste.
Step‑by‑Step Instructions for Peanut Butter and Jelly Bars
Step 1: Preheat and Prepare
Begin by preheating your oven to 350°F (175°C) and greasing a 9×13 inch baking dish with a little butter or cooking spray. This ensures that your Peanut Butter and Jelly Bars will release easily once baked. Set the prepared dish aside while you focus on mixing the dough.
Step 2: Cream the Butters and Sugars
In a large mixing bowl, combine 1 cup of softened unsalted butter with 1 cup of brown sugar and ½ cup of granulated sugar. Using an electric mixer, beat on medium speed for 1-2 minutes until the mixture is smooth and creamy, resembling a light, fluffy texture. This step is crucial for creating the base of your bars.
Step 3: Add Eggs and Vanilla
Next, crack in 2 large eggs plus 1 yolk into the creamed mixture, followed by 1 teaspoon of vanilla extract. Beat the mixture on medium speed until everything is well combined, which should take about 1-2 more minutes. You want a homogenous blend before moving on!
Step 4: Incorporate the Flour
Gradually sift in 2 cups of self-rising flour, folding it gently into the mixture with a spatula or wooden spoon. Mix just until the flour is incorporated, taking care not to overmix; the dough should be soft and slightly sticky, forming a cohesive ball.
Step 5: Layer Two-Thirds of the Dough
Pour approximately two-thirds of the dough into the prepared baking dish. Using a spatula, spread it evenly across the bottom to form a smooth layer. This initial base layer will hold the delicious peanut butter and jelly filling once baked.
Step 6: Spread the Jelly Layer
Take about 1 cup of grape jelly and give it a good whisk to ensure a smooth consistency. Evenly spread the jelly over the layer of dough you just placed in the dish. Be generous but make sure to leave a bit of the dough exposed around the edges; it will create a lovely jammy center.
Step 7: Add the Remaining Dough
Now, spoon small dollops of the remaining dough on top of the jelly layer. Spread these gently without entirely covering the jelly; this allows some of the jam to peek through while baking. Aim for an artistic and rustic look with random pockets of jelly inviting sweetness.
Step 8: Bake the Bars
Slide the baking dish into your preheated oven and bake the Peanut Butter and Jelly Bars for about 40 minutes. Keep an eye on them until the edges are golden brown and a toothpick inserted into the center comes out mostly clean, with a few moist crumbs attached.
Step 9: Cool and Cut
Once baked, remove the dish from the oven and let it cool in the pan for at least 15-20 minutes. This allows the bars to set, making it easier to cut them into squares. Once they reach room temperature, slice them into bars and serve, relishing in the delightful combination of peanut butter and jelly!
What to Serve with Peanut Butter and Jelly Dessert Bars
Indulge in a delightful array of pairings that will elevate your dessert experience and complement the rich flavors of these bars.
-
Fresh Fruit Salad: A colorful combination of seasonal fruits adds a refreshing contrast, enhancing the nostalgic sweetness while providing a healthy balance.
-
Vanilla Ice Cream: Rich and creamy, vanilla ice cream melts perfectly alongside these soft bars, creating a blissful mix of flavors that brings joy with every bite.
-
Chocolate Drizzle: Adding a drizzle of melted chocolate transforms these bars into an indulgent treat, offering a luscious layer that harmonizes beautifully with the peanut butter and jelly.
-
Whipped Cream: Light and airy whipped cream serves as an excellent topping, creating a lovely textural contrast while adding a touch of elegance to your dessert.
Indulging in these combinations turns your Peanut Butter and Jelly Bars into a complete dessert experience, satisfying every craving!
-
Iced Tea or Lemonade: Refreshing beverages like iced tea or lemonade offer a zesty contrast, cutting through the creaminess of the bars and cleansing the palate.
-
Chocolate Milk: For a nostalgic touch, serve alongside a glass of cold chocolate milk—fun and cherished, this pairing evokes memories of childhood favorites.
Awake your senses with these delicious partners, perfect for sharing or savoring solo!
Storage Tips for Peanut Butter and Jelly Bars
-
Room Temperature: Keep your Peanut Butter and Jelly Bars in an airtight container at room temperature for up to 3 days for the best texture and flavor.
-
Fridge: If you prefer a cooler treat, you can store the bars in the fridge for up to a week. Just be sure to wrap them well to prevent drying out.
-
Freezer: Freeze individually wrapped bars for up to a month. When you’re ready to enjoy, simply thaw them at room temperature for a few hours.
-
Reheating: For a warm, melty treat, reheat in the microwave for 10-15 seconds; they will regain that soft, gooey texture that everyone loves!
Expert Tips for Peanut Butter and Jelly Bars
- Avoid Overmixing: When combining the flour, mix only until incorporated. Overmixing can lead to tough bars instead of the desired crumbly texture.
- Perfect Jelly Spread: Ensure the jelly is spread evenly across the dough layer without completely covering it. This allows the jelly to burst with flavor during baking.
- Check for Doneness: Keep a close eye on the baking time. Test with a toothpick to avoid dry bars; they should be set but still moist in the middle.
- Add Crunch: For a delightful texture contrast, mix in chopped nuts like peanuts or walnuts to the dough. You can also use almond butter for a unique twist in your peanut butter and jelly bars.
- Cooling Time Matters: Let the bars cool in the pan before cutting. This helps them hold their shape better and prevents them from crumbling.
Peanut Butter and Jelly Bars Variations
Feel free to unleash your creativity and personalize these bars to suit your taste buds—your kitchen is your canvas!
-
Nut Butter Swap: Use almond, cashew, or sunflower butter instead of peanut butter for a unique twist. Each nut butter adds its own distinctive flavor, creating a deliciously different experience.
-
Jelly Variety: Substitute grape jelly with your favorite jam, like raspberry, apricot, or blueberry. This simple swap can transform the entire flavor profile and surprise your palate with delightful new combinations.
-
Chocolate Drizzle: Melt some dark chocolate and drizzle it over the cooled bars for a decadent touch. Not only does it add a rich chocolatey flavor, but it also elevates the presentation to a new level.
-
Texture Boost: Mix in chopped nuts like pecans or walnuts to the dough for added crunch. This elevates the texture of your bars, creating a delightful contrast between the soft, crumbly base and the crunchy surprise.
-
Spice It Up: Add a pinch of cinnamon or nutmeg to the dough for an aromatic twist. These warm spices complement the peanut butter beautifully, enhancing the overall flavor.
-
Dairy-Free Option: Use coconut oil instead of butter, and ensure your nut butter contains no added sugars or dairy. This creates a creamy and delicious dessert appealing to vegan diets.
-
Oatmeal Layer: For a heartier version, mix in rolled oats into the dough. The oats add chewiness and make these bars more filling, perfect for a breakfast option or hearty snack.
-
Heat Level: Want a surprising kick? Incorporate a teaspoon of cayenne or chili powder into the dough for a spicy twist, creating a truly adventurous dessert. Pair this with a mild jam to balance the flavors beautifully.
If you’re looking for more inspired ideas in your baking repertoire, check out my Peanut Butter Crackers for a savory twist, or indulge in a slice of Caramel Kentucky Butter for a sweet tooth satisfaction!
Make Ahead Options
These Peanut Butter and Jelly Dessert Bars are ideal for meal prep enthusiasts looking to save time during busy weeks! You can prepare the dough and spread the jelly layer up to 24 hours in advance. Simply mix the dough as directed, layer two-thirds in the baking dish, and top with whisked jelly. Cover tightly with plastic wrap and refrigerate until you’re ready to bake. When you’re set to enjoy these treats, preheat your oven, drop spoonfuls of the remaining dough on top of the jelly, and bake as instructed. With this make-ahead approach, you’ll have delicious bars ready to wow your family at a moment’s notice!
Peanut Butter and Jelly Dessert Bars Recipe FAQs
How do I select ripe ingredients for the Peanut Butter and Jelly Bars?
Absolutely! For the best flavor, use fresh ingredients. Choose a creamy peanut butter that doesn’t contain added sugars; I love the no sugar added versions for a pure nutty flavor. For the jelly, pick one that’s vibrant and free of any dark spots, indicating freshness. If you’re using fruit preserves, ensure they are in good condition, with no signs of fermentation or spoilage.
What are the best storage methods for leftover Peanut Butter and Jelly Bars?
Very! To keep your bars fresh, store them in an airtight container at room temperature for up to 3 days. If you want them to last longer, pop them in the fridge for about a week, but ensure they’re wrapped well to avoid drying out. For that maximum freshness, I recommend freezing them individually wrapped for up to a month. Just remember to let them thaw at room temperature before enjoying them!
How can I freeze Peanut Butter and Jelly Bars?
Absolutely! Follow these steps to freeze them perfectly:
- Allow the bars to cool completely at room temperature.
- Slice them into individual portions for easy thawing later.
- Wrap each bar tightly in plastic wrap, then place them in a freezer-safe bag or container.
- Label with the date.
These bars can be frozen for up to a month. When you’re ready to indulge, just thaw them on the counter for a couple of hours and they’ll be as good as new!
What should I do if my bars turn out too dry?
Oh no! If you find your Peanut Butter and Jelly Bars are too dry, it could be due to overbaking. Always keep an eye on the edges and use the toothpick test—remove them just when a few moist crumbs cling to it. If your bars happen to dry out, try serving them with a dollop of whipped cream or a scoop of ice cream on the side to add some moisture back.
Are there any dietary considerations I should be aware of?
Yes, definitely! If you’re cooking for guests, be aware that peanut butter is a common allergy. You can substitute peanut butter with almond butter, sunflower seed butter, or even tahini if needed. Ensure that any jams or jellies you choose are free from allergens and check labels if you’re serving others who may have specific dietary needs. I often make variations for different tastes or needs to ensure everyone can enjoy these dessert bars!

Peanut Butter and Jelly Bars: Sweet Nostalgia in Every Bite
Ingredients
Equipment
Method
- Preheat your oven to 350°F (175°C) and grease a 9x13 inch baking dish.
- In a large mixing bowl, combine 1 cup of softened unsalted butter with 1 cup of brown sugar and ½ cup of granulated sugar. Beat until smooth and creamy.
- Add 2 large eggs and 1 teaspoon of vanilla extract to the mixture. Beat until well combined.
- Gradually sift in 2 cups of self-rising flour and fold it gently into the mixture until incorporated.
- Pour approximately two-thirds of the dough into the prepared baking dish and spread it evenly.
- Take 1 cup of grape jelly and spread it over the layer of dough, leaving some edges exposed.
- Spoon small dollops of the remaining dough on top of the jelly layer.
- Bake for about 40 minutes, until the edges are golden brown and a toothpick comes out mostly clean.
- Let the bars cool in the pan for at least 15-20 minutes before cutting them into squares.
")