")
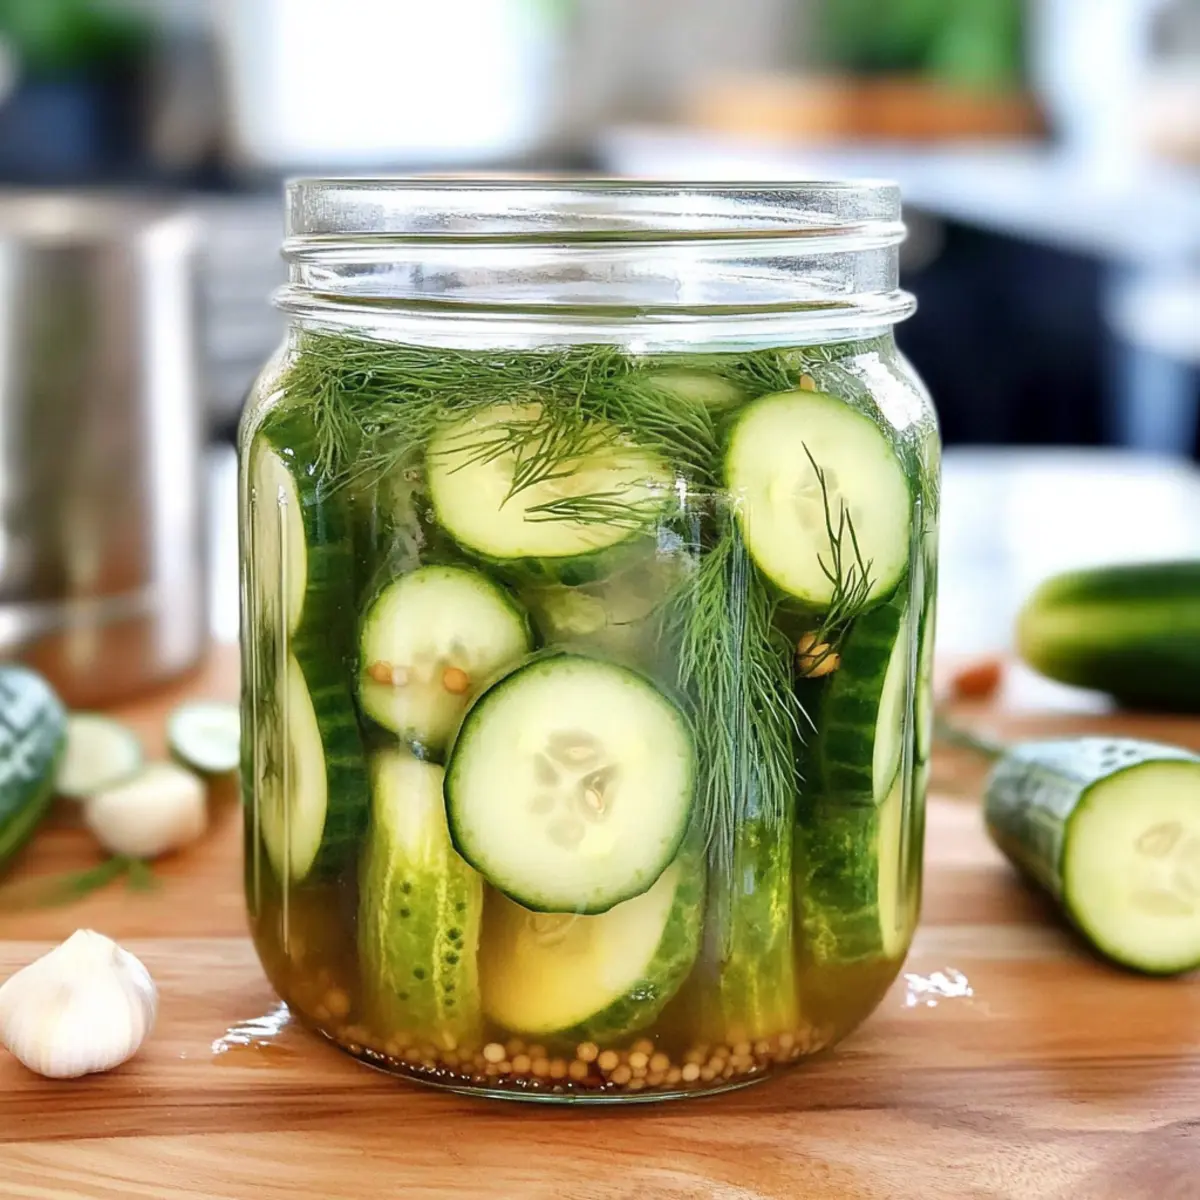
As I rummaged through my fridge one lazy afternoon, I stumbled upon a bag of cucumbers just begging for some attention. With summer in full swing, the idea of whipping up a batch of homemade dill pickles sent my mind racing. These Quick and Easy Homemade Dill Pickles are a delightful way to savor the refreshing crunch of garden cucumbers paired with the bold flavors of dill and garlic. Best of all, this refrigerator pickle recipe is perfect for both seasoned home chefs and absolute beginners, requiring no canning techniques whatsoever. In just a few simple steps, you can relish a tangy snack that’s not only quick to prepare but also perfect for brightening up sandwiches, burgers, or just enjoyed straight from the jar. Are you ready to turn those humble cucumbers into something extraordinary? Let’s dive in!
Why Are These Pickles So Irresistible?
Simplicity: This recipe is a breeze to follow, making it perfect for busy home cooks who want delicious food without the hassle of canning.
Freshness: With crisp cucumbers and vibrant herbs, each bite delivers a burst of fresh flavors that will brighten your day.
Versatile Uses: Enjoy them as an addition to sandwiches, burgers, or even as a standalone snack. These pickles are sure to elevate any meal!
Quick Prep: No waiting around for weeks—these refrigerator pickles are ready to enjoy within 24 hours, giving you instant gratification.
Real Ingredients: With wholesome components like apple cider vinegar and pure maple syrup, you can feel good about what you’re eating. If you’re looking for a sweet treat as well, check out my Dill Pickle Soup for another refreshing flavor!
Crowd-Pleaser: They’re not only tasty but also great for gatherings, ensuring your pickles will be a hit at your next BBQ or picnic.
Homemade Dill Pickles Ingredients
For the Brine
• Water – Base for the brine that ensures the right texture.
• Rice Vinegar – Adds a smooth, mild tanginess; substitute with white vinegar for a sharper taste.
• Apple Cider Vinegar – Contributes depth and classic pickle flavor; can use red wine vinegar for a different profile.
• Pure Maple Syrup – Balances acidity naturally, enhancing sweetness without refined sugar; honey can be a substitute but may alter flavor.
• Salt – Enhances flavor and is crucial for preservation.
• Red Pepper Flakes – Add slight heat and flavor; adjust or omit if desired.
• Pepper – Provides a subtle spicy note; can substitute with black peppercorns for a different texture.
For the Pickles
• Cucumber – Fresh pickling or English cucumbers are best for this homemade dill pickles recipe.
• Fresh Dill – Provides distinctive dill flavor; dried dill can be a substitute in a pinch.
• Garlic Cloves – Infuses the brine with savory flavor; use more for a bolder taste.
• Bay Leaves – Adds depth to the brine’s flavor profile; can be omitted if unavailable.
Step-by-Step Instructions for Quick and Easy Homemade Dill Pickles
Step 1: Prepare the Brine
In a wide-mouth quart jar, combine 1 cup of water, ½ cup of rice vinegar, ½ cup of apple cider vinegar, 2 tablespoons of pure maple syrup, 1 tablespoon of salt, 1 teaspoon of red pepper flakes, and ½ teaspoon of pepper. Using a spoon or whisk, stir the mixture thoroughly for about 1-2 minutes until the salt and maple syrup dissolve completely. This flavorful brine will give your homemade dill pickles their tangy kick!
Step 2: Slice Cucumbers
Wash your cucumbers under cool running water. Depending on your preference, cut them into spears or rounds—about ¼ to ½ inch thick will give the best crunch. Lay the cucumber slices side by side and fill your quart jar with these fresh veggies, visualizing how they’ll soak up that delicious brine while chilling in the fridge.
Step 3: Add Ingredients to Jar
Once your cucumbers are snugly in the jar, it’s time to add flavor! Tuck in a generous handful of fresh dill, smash 2-4 garlic cloves with the flat side of a knife, and place them around the cucumbers. If you have bay leaves, drop 1-2 into the jar for added depth. This step creates a beautiful, aromatic mix that turns your simple cucumbers into homemade dill pickles.
Step 4: Pour the Brine
Taking your brine mixture from Step 1, carefully pour it over the cucumbers, filling the jar until the cucumbers are completely submerged. If needed, use a clean spoon to gently push down the cucumbers, ensuring they’re nestled in the flavorful brine. This is the magic moment where the flavors begin to meld together, setting the stage for the best homemade dill pickles!
Step 5: Refrigerate
Seal the jar tightly with a lid and place it in the refrigerator. Allow the cucumbers to marinate in the brine for at least 24 hours; however, for optimum flavor, leave them for up to 3 days. While the pickles chill, you’ll notice them taking on a beautiful color and that mouthwatering tang—just the right time to get your taste buds ready for your homemade dill pickles!
Step 6: Storing
Once you’re ready to enjoy your homemade dill pickles, make sure they remain submerged in the brine to keep fresh. Store them in the refrigerator, and they’ll continue to develop flavor for about 2-3 weeks. Perfect for snacking or as a scrumptious addition to your favorite meals, these quick pickles are a delightful treat you’ll want to have on hand!
What to Serve with Quick and Easy Homemade Dill Pickles?
These delightful homemade treasures are perfect for brightening up any meal, filling your plate with flavor and crunch.
-
Savory Sandwiches: The tangy crunch of dill pickles adds an irresistible flavor boost to any sandwich, making each bite even more satisfying. Perfect with turkey, ham, or a classic BLT!
-
Juicy Burgers: Slide these pickles onto your favorite burger for a zesty contrast that elevates the entire dish. The crispness and acidity complement rich meats beautifully.
-
Potato Salad: Incorporating chopped dill pickles into a creamy potato salad brings a delightful crunch and tang. It’s a perfect summer side alongside grilled meats.
-
Charcuterie Boards: Arrange them on a platter with cured meats, cheeses, and olives for a vibrant charcuterie board. Their vivid color and flavor will catch the eye and tantalize the taste buds.
-
Fresh Salads: Toss chopped dill pickles into a green salad for a refreshing zing. They pair wonderfully with creamy dressings and fresh veggies, lightening up heavier meals.
-
Spicy Tacos: Add them to your taco bar for a cool, crunchy contrast to spicy fillings. They add a wonderful layer of flavor to the savory mix.
-
Beer Pairing: For a refreshing drink option, enjoy a cold craft beer. The bitterness can counterbalance the pickles’ acidity perfectly, making for a delightful experience.
-
Chocolate Desserts: Yes, you read that right! For an adventurous pairing, serve a small piece of dark chocolate after enjoying your pickles. The rich sweetness offers a surprising contrast to the tangy flavors.
How to Store and Freeze Homemade Dill Pickles
Fridge: Store homemade dill pickles in an airtight jar in the refrigerator. They’ll maintain their crispness and freshness for up to 2-3 weeks.
Submersion: Always ensure that the cucumbers are fully submerged in the brine to avoid spoilage and keep them crunchy.
Refrigerating Tips: For optimal flavor, wait at least 24 hours before diving in; they taste best after a couple of days as the flavors meld.
Freezer: While not recommended for freezing due to their texture, you can enjoy these quick refrigerator pickles fresh from the fridge for immediate enjoyment!
Expert Tips for Homemade Dill Pickles
-
Choose Fresh Cucumbers: Use firm, fresh pickling or English cucumbers for the best crunch and flavor in your homemade dill pickles.
-
Submerge Completely: Ensure cucumbers are fully submerged in the brine to avoid spoilage; this is vital for maintaining crispness.
-
Adjust Spiciness: Feel free to spice things up! Add more red pepper flakes or even sliced jalapeños for a zesty kick tailored to your taste.
-
Patience Pays Off: For richer flavors, allow your pickles to marinate longer; they will improve in taste after a couple of days in the fridge.
-
Experiment with Flavors: Don’t hesitate to tweak the ingredients—try adding mustard seeds or coriander seeds for a unique twist on your homemade dill pickles!
Homemade Dill Pickles Variations
Feel free to get creative and customize your homemade dill pickles with these exciting twists that will tantalize your taste buds.
-
Sweet Pickles: Increase the maple syrup or add brown sugar for a delightful, sweet contrast to the tangy brine. Think classic picnic charm, perfect for patty melts!
-
Garlic-Heavy: Boost the number of garlic cloves for those who enjoy a mouthful of garlicky goodness. The result will be a punchy, savory experience in every bite.
-
Spicy Kick: Add sliced jalapeños along with red pepper flakes for a spicy variation. These fiery pickles will awaken all your senses and go wonderfully with any BBQ dish.
-
Herbed Delight: Experiment with additional herbs like thyme or oregano for a fragrant twist. Each bite will offer a new flavor dimension that brings your homemade dill pickles to life.
-
Mustard Seed Crunch: Toss in some mustard seeds for extra texture and flavor complexity. This addition creates an unexpected dimension that might just become your new favorite!
-
Vinegar Swap: Alternate vinegars like balsamic or white wine for a unique flavor profile. Each change brings its own character to the brine, transforming your pickles with minimal effort.
-
Cucumber Variety: Experiment with different types of cucumbers—try Persian or Kirby varieties for varying textures and flavors. This twist allows you to discover new favorites that suit your palate.
-
Asian Fusion: Add a splash of soy sauce or sesame oil for an exciting umami flavor. These homemade dill pickles would pair beautifully with rice dishes or Asian-inspired meals.
If you’re on a flavor quest, don’t forget to pair these pickles with delightful recipes like a luscious homemade Vanilla Creamer for your morning latte or the unique taste of a Discover Unique Quesadilla for dinner. Enjoy the journey!
Make Ahead Options
These Quick and Easy Homemade Dill Pickles are a fantastic choice for meal prep enthusiasts! You can prepare the brine in advance and store it in the refrigerator for up to 3 days. Simply mix the water, rice vinegar, apple cider vinegar, maple syrup, salt, red pepper flakes, and pepper, and keep it ready to go. Slice the cucumbers on the day you plan to enjoy them—this ensures they stay crisp. When you’re ready to serve, add the cucumbers, dill, garlic, and bay leaves to the jar with the prepped brine, refrigerate overnight, or for at least 24 hours to allow the flavors to develop beautifully. This method not only saves you time but also guarantees delicious, crunchy homemade dill pickles whenever you need a refreshing snack!
Quick and Easy Homemade Dill Pickles Recipe FAQs
How do I choose the best cucumbers for pickling?
Absolutely! When selecting cucumbers for your homemade dill pickles, look for firm, fresh pickling or English cucumbers. Avoid cucumbers that are soft or have dark spots all over, as they may not provide the desired crunch. I often recommend using pickling cucumbers because their smaller size and thicker skin make them ideal for pickling.
What is the best way to store homemade dill pickles?
To store your homemade dill pickles, keep them in an airtight jar in the refrigerator. They should maintain their crispness and will stay fresh for up to 2-3 weeks. Always ensure that the cucumbers are fully submerged in the brine to avoid spoilage. If you notice any signs of mold or off smells, it’s best to discard them.
Can I freeze homemade dill pickles?
I suggest avoiding freezing homemade dill pickles, as the texture of cucumbers will change and become mushy once thawed. Instead, keep them made fresh in the fridge to enjoy their delightful crunch. You can savor your quick refrigerator pickles within 2-3 weeks, making them perfect for a quick snack or a companion to meals.
What should I do if my pickles are too salty?
If your homemade dill pickles turn out too salty, a simple trick is to rinse them under cold water before serving. This will help reduce the saltiness. You can also dilute the brine by mixing in some additional water, but keep in mind that this may slightly alter the flavor profile. Always taste as you go and adjust according to your preference!
What if I don’t have fresh dill? Can I use dried dill instead?
Very! If you’re out of fresh dill, you can substitute dried dill in a pinch. Generally, use about one-third of the amount of dried dill as fresh, since dried herbs are more concentrated. For example, if your recipe calls for 3 tablespoons of fresh dill, use about 1 tablespoon of dried dill. While the flavor may not be as vibrant, it’s a perfectly acceptable alternative for your homemade dill pickles!
Homemade Dill Pickles: Crunchy Treasures You’ll Love!
Ingredients
Equipment
Method
- Prepare the Brine: In a quart jar, combine water, rice vinegar, apple cider vinegar, maple syrup, salt, red pepper flakes, and pepper. Stir for 1-2 minutes to dissolve completely.
- Slice Cucumbers: Wash cucumbers and cut into spears or rounds, about ¼ to ½ inch thick. Fill the quart jar with the cucumber slices.
- Add Ingredients to Jar: Add fresh dill, smashed garlic cloves, and bay leaves to the jar with cucumbers.
- Pour the Brine: Carefully pour the brine over the cucumbers until they are submerged.
- Refrigerate: Seal the jar tightly and refrigerate for at least 24 hours for best flavor.
- Storing: Keep pickles submerged in brine in the refrigerator for 2-3 weeks.
")