")
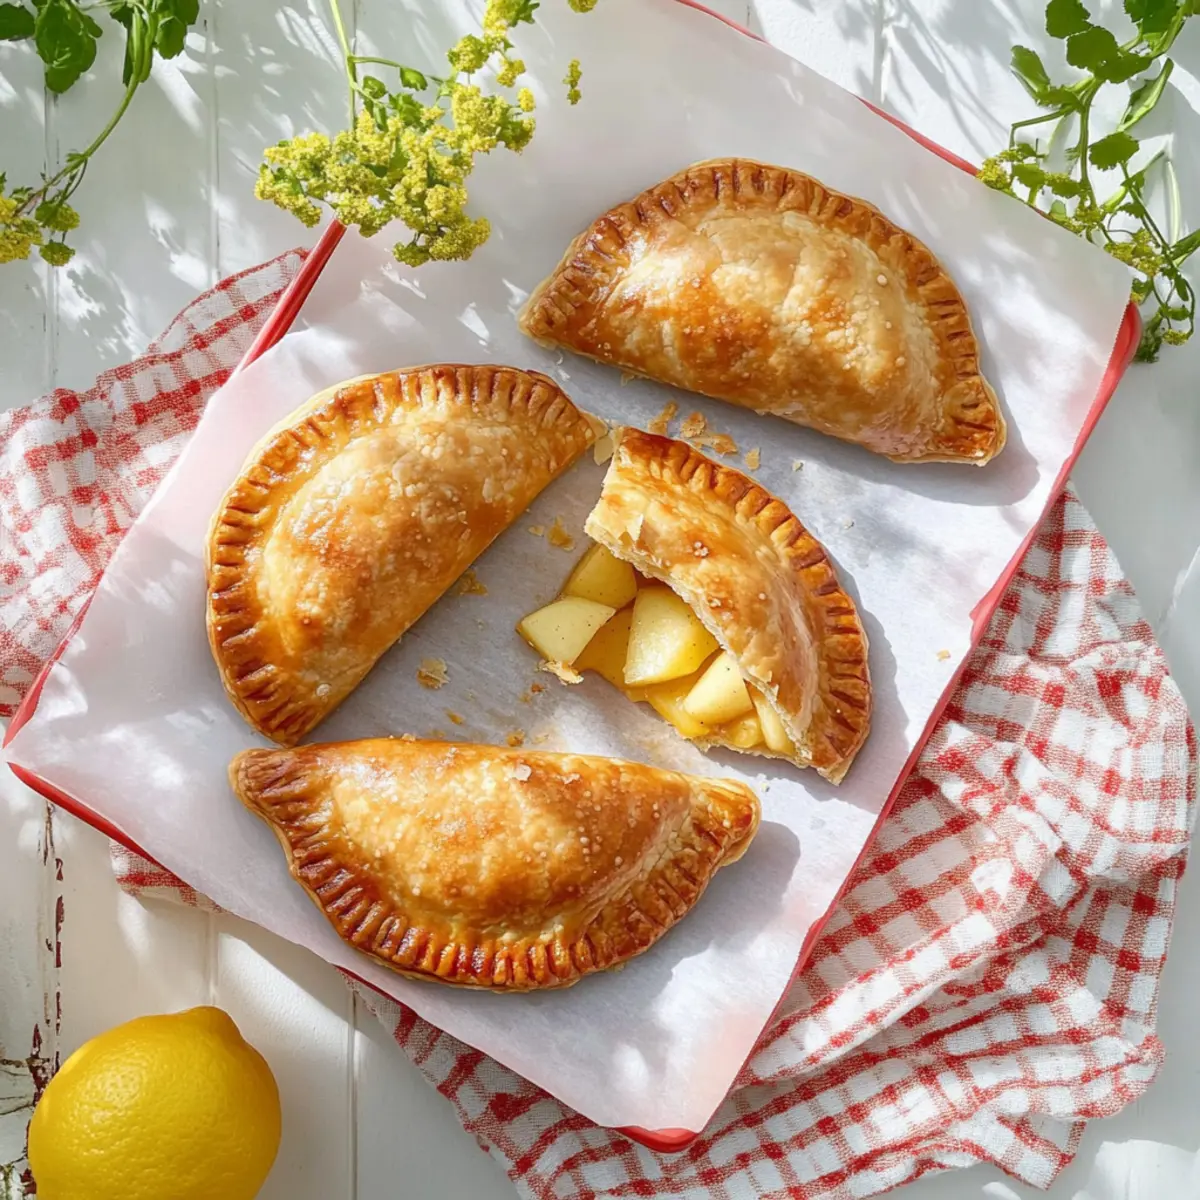
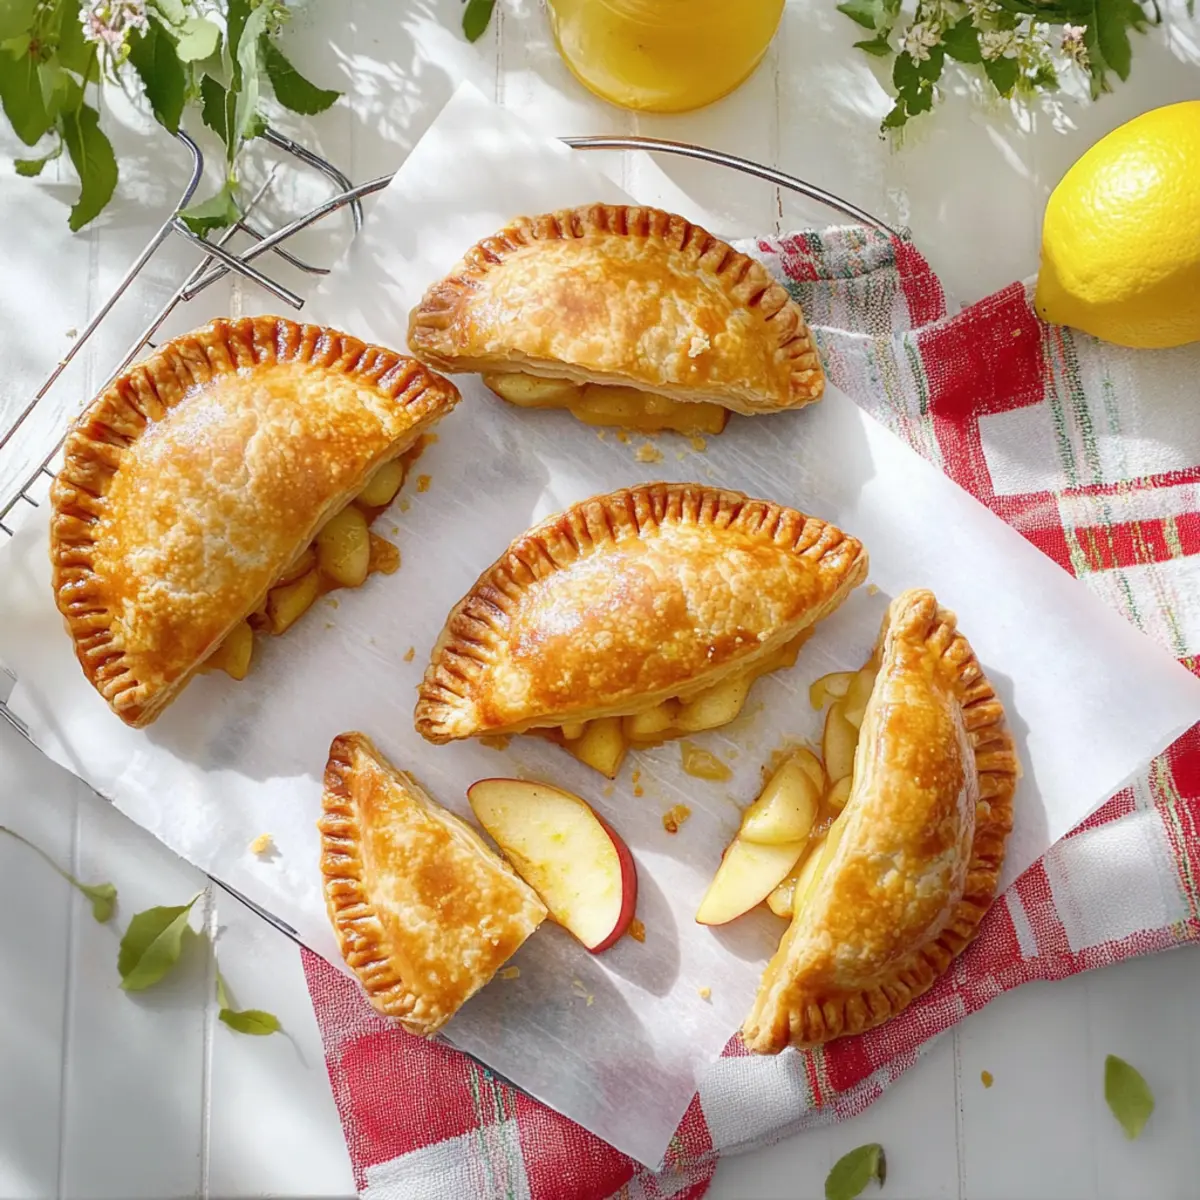
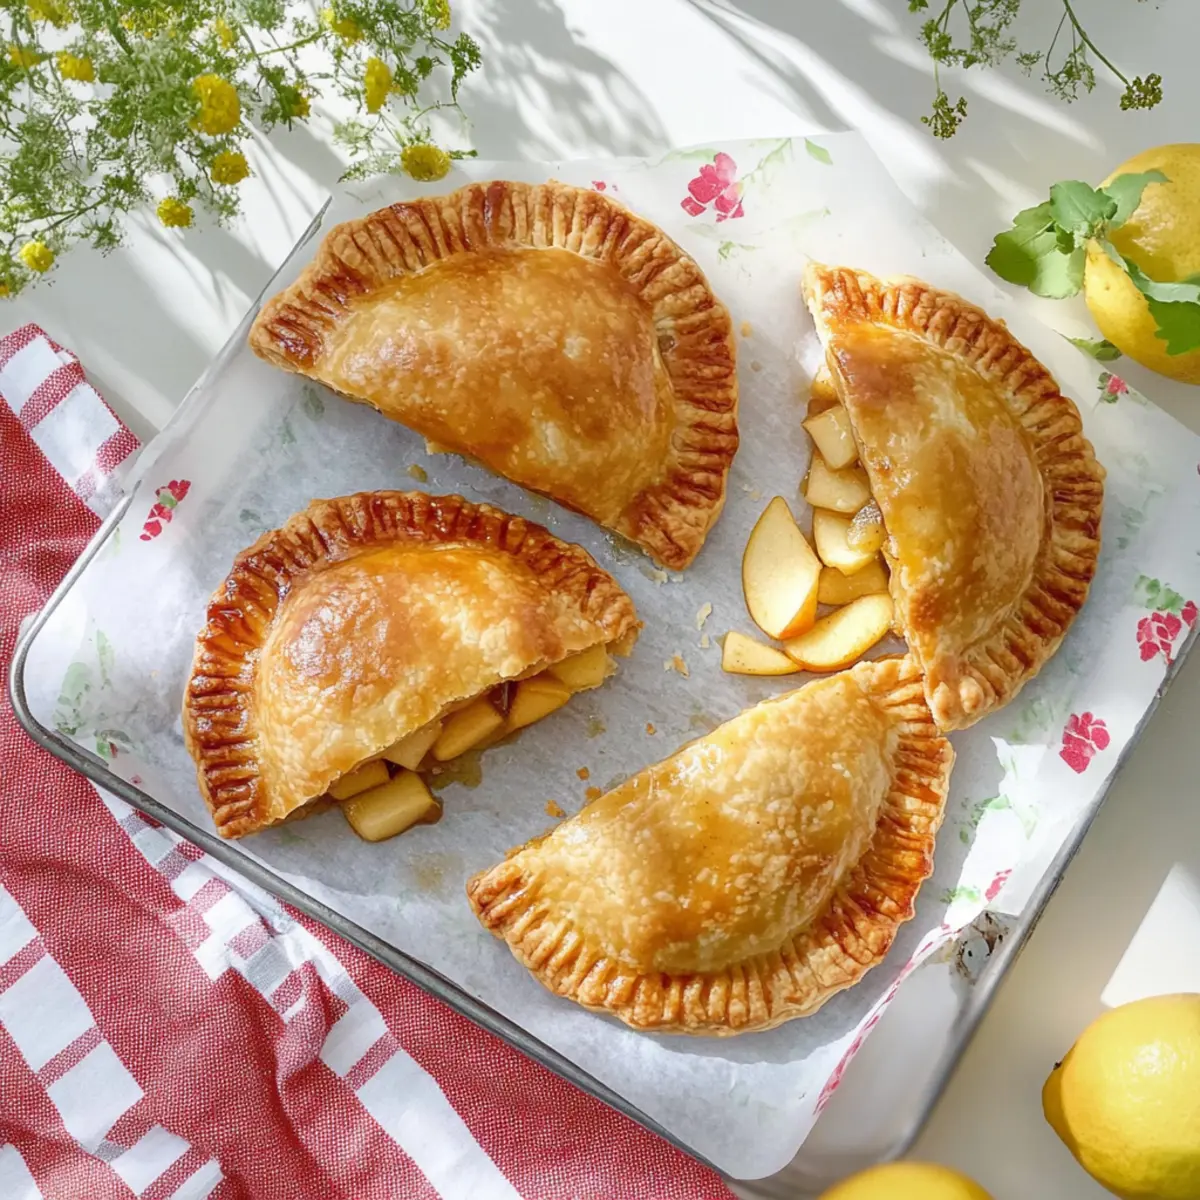
As I bit into the crispy edge of a fried apple hand pie, the sweet aroma of cinnamon and freshly sautéed apples swept me off my feet, transporting me straight to my childhood days. This Fried Apple Hand Pie recipe captures that nostalgia, combining tender apples with a hint of lemon in a flaky, golden crust that’s simply irresistible. Not only are these hand pies a delightful treat to enjoy, but they also offer the convenience of portability—perfect for picnics or a quick snack on the go. Whether you serve them warm or let them cool for later, they’re destined to become a favorite for family gatherings or cozy evenings at home. Curiosity piqued? Let’s dive into making these delicious bites together!
Why Make Fried Apple Hand Pies?
Convenience: These hand pies are perfectly portable, making them an ideal snack for picnics or road trips.
Irresistible Flavors: The warm combination of apples, cinnamon, and a hint of lemon creates a flavor explosion that evokes nostalgia.
Crispy Texture: Frying provides a delightful, flaky crust that contrasts beautifully with the gooey apple filling, giving each bite a satisfying crunch.
Versatile Variations: Feel free to experiment with different fruits or try baking for a healthier take! You might love the sweet twist of a Lemon Meringue Pie too.
Crowd-Pleaser: No dessert spread is complete without these hand pies; they are sure to be a hit at any gathering!
Get excited to make these scrumptious bites that will have everyone asking for more!
Fried Apple Hand Pie Ingredients
For the Filling
- Apples – Use tart varieties like Granny Smith for a perfectly balanced filling.
- Lemon Juice – Fresh juice adds brightness and intensifies the apple flavor.
- Sugar – Adjust sweetness according to the apple variety; brown sugar offers a richer taste.
- Cinnamon – This warm spice enhances the apples’ sweetness and aroma; feel free to substitute with nutmeg for a twist.
For the Crust
- Pie Crust – Opt for homemade for the best flavor, though pre-made saves time dramatically.
For Frying
- Oil – Choose neutral oils like vegetable oil to fry the hand pies; ensure it’s hot enough for a perfect crunch!
Elevate your experience with these Fried Apple Hand Pie ingredients, and let those fragrant, golden bites infuse your kitchen with love and warmth!
Step‑by‑Step Instructions for Fried Apple Hand Pie
Step 1: Prepare the Apple Filling
Begin by peeling and dicing about three tart apples, like Granny Smith, into small cubes. In a mixing bowl, combine the diced apples with a splash of fresh lemon juice, a sprinkle of sugar, and a generous dusting of cinnamon. Allow the mixture to sit for about 10 minutes, letting the flavors meld and the apples release their juices.
Step 2: Roll Out the Pie Crust
On a lightly floured surface, roll out your pie crust to about 1/8 inch thick. Using a 5-inch round cutter, carefully cut out circles from the dough. Gather the scraps and roll them out again as needed, ensuring you have enough rounds for your Fried Apple Hand Pies. The crust should be smooth and pliable, ready to encase the sweet apple filling.
Step 3: Fill the Dough Circles
Working with one dough circle at a time, spoon a generous tablespoon of the apple filling onto one half of the circle, leaving a small border around the edge. Carefully fold the other half of the dough over the filling to create a pocket. Press the edges together firmly to seal, then use a fork to crimp the edges for an extra decorative touch. Repeat with the remaining circles and filling.
Step 4: Heat the Oil for Frying
In a large frying pan, pour enough neutral oil—such as vegetable oil—to cover the bottom by about half an inch. Heat the oil over medium heat, allowing it to reach approximately 350°F (175°C). To check if the oil is ready, drop in a small piece of dough; it should bubble and sizzle immediately. This ensures your Fried Apple Hand Pies will have that perfect crispy texture.
Step 5: Fry the Apple Hand Pies
Carefully place a few filled hand pies into the hot oil, making sure not to overcrowd the pan. Fry each pie for about 3-4 minutes on one side, or until they turn a golden brown. Gently flip them over using tongs or a slotted spoon, cooking the other side for another 3-4 minutes. Look for a rich golden color and a crisp exterior to indicate they are done.
Step 6: Drain and Cool
Using a slotted spoon, remove the Fried Apple Hand Pies from the oil and place them on a plate lined with paper towels. This will absorb any excess oil and keep them from becoming soggy. Allow the hand pies to cool slightly for about 5 minutes before serving. The filling will be hot, so take a moment to let them rest while the aroma fills your kitchen.
How to Store and Freeze Fried Apple Hand Pie
Room Temperature: Store leftover hand pies in an airtight container at room temperature for up to 3 days to maintain their crispness.
Fridge: For longer preservation, keep the hand pies in the fridge for up to 5 days. Reheat in the oven to restore their flaky texture.
Freezer: Freeze un-fried hand pies for up to 3 months, placing them in a single layer on a baking sheet before transferring to a freezer bag. Fry directly from frozen, adding a few extra minutes to cooking time.
Reheating: To reheat, place cooled fried pies in a preheated oven at 350°F (175°C) for 10-15 minutes until warmed through, ensuring your Fried Apple Hand Pie is as delicious as the day it was made!
Fried Apple Hand Pie Variations
Feel free to get creative with your Fried Apple Hand Pies; the possibilities are endless!
-
Berry Bliss: Swap apples for mixed berries. This sweet-tart combination bursts with flavor and adds a vibrant twist!
-
Peachy Keen: Use fresh peaches instead of apples for a summer-inspired treat. Their juicy sweetness complements the flaky crust perfectly.
-
Nutty Delight: Add crushed walnuts or pecans to the filling for an extra crunch. This lovely texture pairs beautifully with the soft fruit.
-
Chocolate Drizzle: Once fried, drizzle melted chocolate on top for an indulgent dessert. The rich chocolate elevates these hand pies to a whole new level!
-
Baked Alternative: For a healthier version, bake instead of fry. Brush the tops with a little butter or milk for color and bake at 400°F (200°C) for about 20 minutes.
-
Spiced Up: Experiment with spices! Try adding allspice or cardamom to the apple filling for an aromatic twist that will surprise your taste buds.
-
Mini Hand Pies: Make smaller versions for bite-sized snacks. Perfect for gatherings, they’re easy to enjoy and a fun twist on the classic!
-
Serve with Flair: Pair these hand pies with a scoop of ice cream or a dollop of whipped cream. A side of Lemon Meringue Pie is a delightful way to bring extra sweetness to your dessert table.
These variations invite you to explore and personalize your Fried Apple Hand Pies. Enjoy experimenting and let your imagination run wild!
Expert Tips for Fried Apple Hand Pies
Oil Temperature Matters: Ensure the oil is at the right temperature for frying; test it first. If it’s too cool, the pies will absorb oil and become greasy.
Adjust Filling Wisely: Don’t overfill the hand pies! Too much filling can lead to messy spills during frying, ruining the crispy exterior.
Use Quality Ingredients: Always opt for fresh apples and high-quality pie crust for the best Fried Apple Hand Pie experience. It makes a noticeable difference in flavor.
Cool Down Before Serving: Let the hand pies cool for a few minutes after frying. The filling can be extremely hot, so a little patience ensures safe, delicious enjoyment.
Experiment with Spices: Feel free to mix up spices like nutmeg or ginger alongside cinnamon to customize your filling and elevate the flavors.
Make Ahead Options
These Fried Apple Hand Pies are a fantastic choice for meal prep! You can prepare the apple filling up to 3 days in advance by combining the diced apples with lemon juice, sugar, and cinnamon, then refrigerating it in an airtight container. Additionally, you can assemble the hand pies and freeze them before frying; they’ll hold their quality for about 24 hours in the freezer. When you’re ready to enjoy your hand pies, simply heat the oil and fry them straight from the freezer, adding a few extra minutes to the cooking time. This way, you’ll have fresh, crispy hand pies with minimal effort—perfect for busy weeknights!
What to Serve with Fried Apple Hand Pie
These delightful hand pies deserve companions that enhance their sweet flavors and crispy texture.
-
Vanilla Ice Cream: A scoop of vanilla ice cream provides a creamy contrast, making each bite a heavenly experience. The cold creaminess balances the warm, gooey filling beautifully.
-
Caramel Sauce: Drizzled over the hand pies, this rich, warm sauce complements the sweetness of the apple filling, creating a decadent dessert that’s hard to resist.
-
Whipped Cream: Light and airy, a dollop of fresh whipped cream adds a luscious texture, perfect for scooping up every last bit of the fried pie.
-
Coffee or Tea: A warm cup of coffee or a soothing herbal tea invites comfort, making these hand pies a cozy afternoon treat or a nice finish after dinner.
-
Fresh Fruit Salad: Bright, juicy fruits like berries and citrus cuts through the sweetness, offering a refreshing contrast that elevates your dessert spread.
-
Cinnamon Sugar Dusting: Lightly sprinkling cinnamon sugar on the hand pies amplifies their sweet aroma and warmth, giving them a festive touch that celebrates comfort food indulgence.

Fried Apple Hand Pie Recipe FAQs
What kind of apples should I use for the filling?
Absolutely! For a perfectly balanced filling, I recommend using tart varieties like Granny Smith apples. Their natural acidity plays beautifully against the sweetness of the sugar, creating a vibrant flavor profile.
How should I store the Fried Apple Hand Pies?
You can store leftover hand pies in an airtight container at room temperature for up to 3 days, which allows them to maintain their delightful crispness. If you’d like to keep them longer, you can refrigerate them for up to 5 days. Just reheat in the oven to restore that flaky texture.
Can I freeze the hand pies?
Yes, you can! I often make a double batch and freeze the un-fried hand pies for up to 3 months. Place them in a single layer on a baking sheet to freeze them solid, then transfer to a well-sealed freezer bag. Fry them directly from frozen, just be sure to add a few extra minutes to the cooking time.
What do I do if the filling spills out while frying?
No worries, it happens! To prevent this, be sure not to overfill the hand pies during assembly. If you do experience spills, adjust the frying temperature; making sure it’s hot enough will help seal the edges better. For future batches, crimp the edges more securely with a fork to keep the goodness inside!
Are there dietary considerations I should be aware of?
Yes! If anyone in your household has allergies, please note that the hand pies contain gluten from the pie crust and may also have dairy if you’re using a butter-based crust. For a dairy-free option, you can swap in vegan butter or plant-based alternatives in the crust. Always double-check your ingredient labels to ensure everyone’s safety.
Can pets have the Fried Apple Hand Pies?
It’s best to avoid sharing these sweet treats with your pets! While the apples themselves are safe for dogs and cats in moderation, the sugar and fried crust can be harmful. Always stick to pet-approved treats when sharing with your beloved furry friends.
Fried Apple Hand Pie: Crispy Treats for Perfect Picnics
Ingredients
Equipment
Method
- Begin by peeling and dicing about three tart apples into small cubes. In a mixing bowl, combine the diced apples with lemon juice, sugar, and cinnamon. Allow to sit for 10 minutes.
- On a lightly floured surface, roll out your pie crust to about 1/8 inch thick. Using a 5-inch round cutter, cut out circles from the dough.
- Spoon a tablespoon of apple filling onto one half of the dough circle, fold over, press edges to seal, and crimp with a fork. Repeat with remaining rounds.
- Heat the oil in a large frying pan over medium heat to about 350°F (175°C). Test with a small piece of dough to check temperature.
- Carefully place filled hand pies in hot oil; fry for 3-4 minutes on each side until golden brown.
- Remove fried hand pies with a slotted spoon and place on a paper towel-lined plate to cool for 5 minutes before serving.
")