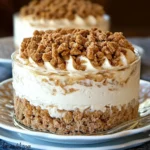
There’s nothing quite like the combination of creamy vanilla ice cream and the sweet, spiced flavor of Biscoff. Now imagine that paired with the crunch of Rice Krispies cereal in a cool, refreshing dessert. This Biscoff Crunch Ice Cream Cake is the ultimate summer treat or year-round indulgence. Easy to make and requiring no baking, it’s a showstopper for any occasion. Whether you’re serving it at a birthday party, a family gathering, or just spoiling yourself, this cake is guaranteed to impress.
Why You’ll Love This Biscoff Crunch Ice Cream Cake
- No-Bake Perfection: Perfect for when you don’t want to heat up the kitchen.
- Irresistible Layers: Creamy ice cream sandwiched between crunchy, caramel-like Biscoff layers.
- Minimal Ingredients: You only need three simple ingredients to create a dessert that tastes gourmet.
- Quick and Easy: Prep this cake in under 15 minutes—your freezer does all the hard work.
- Family Favorite: Kids and adults alike will adore the rich flavor and fun crunch in every bite.
Ingredients for Biscoff Crunch Ice Cream Cake
| Ingredient | Quantity |
|---|---|
| Biscoff Spread | 1 cup |
| Rice Krispies cereal | 3 cups |
| Vanilla ice cream (softened) | ½ gallon |
This short ingredient list makes the recipe incredibly simple while still delivering big on flavor and texture.
Step-by-Step Instructions for Biscoff Crunch Ice Cream Cake
1. Melt the Biscoff Spread
- Start by scooping 1 cup of Biscoff Spread into a medium microwave-safe bowl.
- Heat it in the microwave for 20–30 seconds, or until softened and easy to stir. This step helps coat the Rice Krispies cereal evenly.
2. Combine Biscoff Spread with Rice Krispies
- Add 3 cups of Rice Krispies cereal to the melted Biscoff Spread.
- Stir until every piece of cereal is fully coated, creating a crunchy, sticky mixture that will form the base and topping of your cake.
3. Prepare the Pan
- Line a 9×13-inch baking pan or springform pan with parchment paper. This will make removing the cake much easier once it’s frozen.
4. Create the Crunchy Base Layer
- Take half of the Biscoff-Rice Krispies mixture and press it evenly into the bottom of the prepared pan. Use a spatula or the back of a spoon to ensure it’s smooth and level.
5. Add the Ice Cream Layer
- Spoon the softened vanilla ice cream over the Biscoff crunch layer. Spread it evenly with a spatula, creating a thick, creamy middle layer.
- Tip: Don’t let the ice cream get too melted—just soft enough to spread easily.
6. Top with Remaining Crunch
- Sprinkle the remaining Biscoff-Rice Krispies mixture over the ice cream layer. Gently press it down so it adheres to the ice cream without squishing it too much.
7. Freeze the Cake
- Cover the pan with plastic wrap or aluminum foil to prevent freezer burn.
- Place the cake in the freezer for at least 4 hours, or until it’s completely firm.
8. Slice and Serve
- Once the cake is fully frozen, remove it from the pan using the parchment paper overhangs.
- Slice into squares or wedges and serve immediately.
Tips for the Best Biscoff Crunch Ice Cream Cake
- Use Softened Ice Cream: Let the ice cream sit at room temperature for 5–10 minutes before spreading to make it more manageable.
- Line the Pan: Always use parchment paper to make removing the cake clean and easy.
- Customize the Ice Cream: While vanilla is classic, you can experiment with other flavors like caramel, chocolate, or Biscoff ice cream.
- Add Extra Layers: For a more indulgent dessert, add a layer of whipped cream or drizzle melted chocolate over the top before freezing.
- Press Layers Firmly: Ensure the crunch mixture is packed down well for stable layers when slicing.
Nutritional Information (Per Serving)
| Nutrient | Amount |
|---|---|
| Calories | ~250 kcal |
| Carbohydrates | ~33g |
| Protein | ~3g |
| Fat | ~11g |
| Sugars | ~22g |
Note: Nutritional values are approximate and depend on specific brands used.
FAQs About Biscoff Crunch Ice Cream Cake
1. What is Biscoff Spread?
Biscoff Spread is a sweet, creamy spread made from Speculoos cookies. It has a rich, caramelized flavor with hints of cinnamon and spices, making it perfect for desserts.
2. Can I use a different cereal?
Yes! While Rice Krispies cereal adds the perfect crunch, you can substitute with crushed graham crackers, cornflakes, or even granola for a twist.
3. How do I store leftovers?
Wrap the remaining cake tightly in plastic wrap or store slices in an airtight container in the freezer. It will stay fresh for up to 1 week.
4. Can I make this cake ahead of time?
Absolutely! This cake can be made up to 3 days in advance. Just keep it covered in the freezer until you’re ready to serve.
5. What’s the best way to cut the cake?
Use a sharp knife dipped in warm water to slice through the layers easily. Wipe the knife clean between cuts for neat servings.
6. Can I add toppings?
Yes! Drizzle melted chocolate, sprinkle crushed Biscoff cookies, or add whipped cream for extra flair.
Why This Ice Cream Cake Is Perfect for Any Occasion
Whether it’s a hot summer day or a holiday gathering, Biscoff Crunch Ice Cream Cake is a dessert that shines year-round. Its irresistible combination of creamy ice cream and crunchy Biscoff layers offers the perfect balance of textures and flavors. Plus, it’s easy to make and serves a crowd, making it ideal for birthdays, potlucks, or just a sweet treat at home.
Time to Make Your Own Biscoff Crunch Ice Cream Cake!
Now that you have the recipe, it’s time to gather your ingredients and create this showstopping dessert. With just three simple ingredients and a little freezer time, you’ll have a cake that’s sure to impress everyone who tries it. So, roll up your sleeves, grab a spoon, and let the magic of Biscoff begin. Happy freezing and happy indulging! 🍰✨
Print
Biscoff Crunch Ice Cream Cake: A Perfect No-Bake Dessert
- Total Time: 4 hours 15 minutes (including freezing)
- Yield: 12 servings
Description
Indulge in the creamy and crunchy delight of a Biscoff Crunch Ice Cream Cake. With layers of sweet vanilla ice cream sandwiched between a caramelized Biscoff and Rice Krispies crunch, this no-bake dessert is perfect for every occasion. Whether you’re cooling off in the summer heat or celebrating a special moment, this simple yet irresistible treat will have everyone asking for seconds!
Ingredients
- 1 cup Biscoff Spread
- 3 cups Rice Krispies cereal
- ½ gallon vanilla ice cream, softened slightly
Instructions
1. Melt the Biscoff Spread:
- Place the Biscoff Spread in a medium microwave-safe bowl.
- Heat it in the microwave for 20–30 seconds, or until it’s softened and easy to stir.
2. Combine Biscoff Spread with Rice Krispies:
- Add the Rice Krispies cereal to the melted Biscoff Spread.
- Stir until the cereal is fully coated, creating a sticky, crunchy mixture.
3. Prepare the Pan:
- Line a 9×13-inch baking pan or springform pan with parchment paper. This will make removing the cake much easier after freezing.
4. Create the Crunchy Base Layer:
- Spread half of the Biscoff-Rice Krispies mixture evenly in the bottom of the prepared pan.
- Press it down firmly with a spatula to form a stable base.
5. Add the Ice Cream Layer:
- Spoon the softened vanilla ice cream over the base layer of Biscoff crunch.
- Use a spatula to spread the ice cream evenly, creating a smooth, thick layer.
6. Add the Top Crunch Layer:
- Sprinkle the remaining Biscoff-Rice Krispies mixture over the ice cream layer.
- Press it down gently so it adheres to the ice cream without compressing it too much.
7. Freeze the Cake:
- Cover the pan with plastic wrap or foil to protect it from freezer burn.
- Freeze the cake for at least 4 hours, or until it’s completely firm and ready to slice.
8. Slice and Serve:
- Remove the cake from the freezer. Lift it out of the pan using the parchment paper edges.
- Slice into squares or wedges with a sharp knife. Serve immediately and enjoy!
Notes
- Storage: Keep leftovers wrapped in plastic or in an airtight container in the freezer for up to 1 week.
- Softened Ice Cream: Let the ice cream sit at room temperature for about 5–10 minutes before spreading, so it’s easy to handle.
- Custom Flavors: Swap out vanilla ice cream for flavors like chocolate, caramel, or coffee for a fun twist!
- Extra Toppings: Drizzle melted chocolate, add whipped cream, or sprinkle crushed Biscoff cookies on top before freezing for added decadence.
- Prep Time: 15 minutes
- Category: Dessert
- Method: Baking
- Cuisine: American


