")
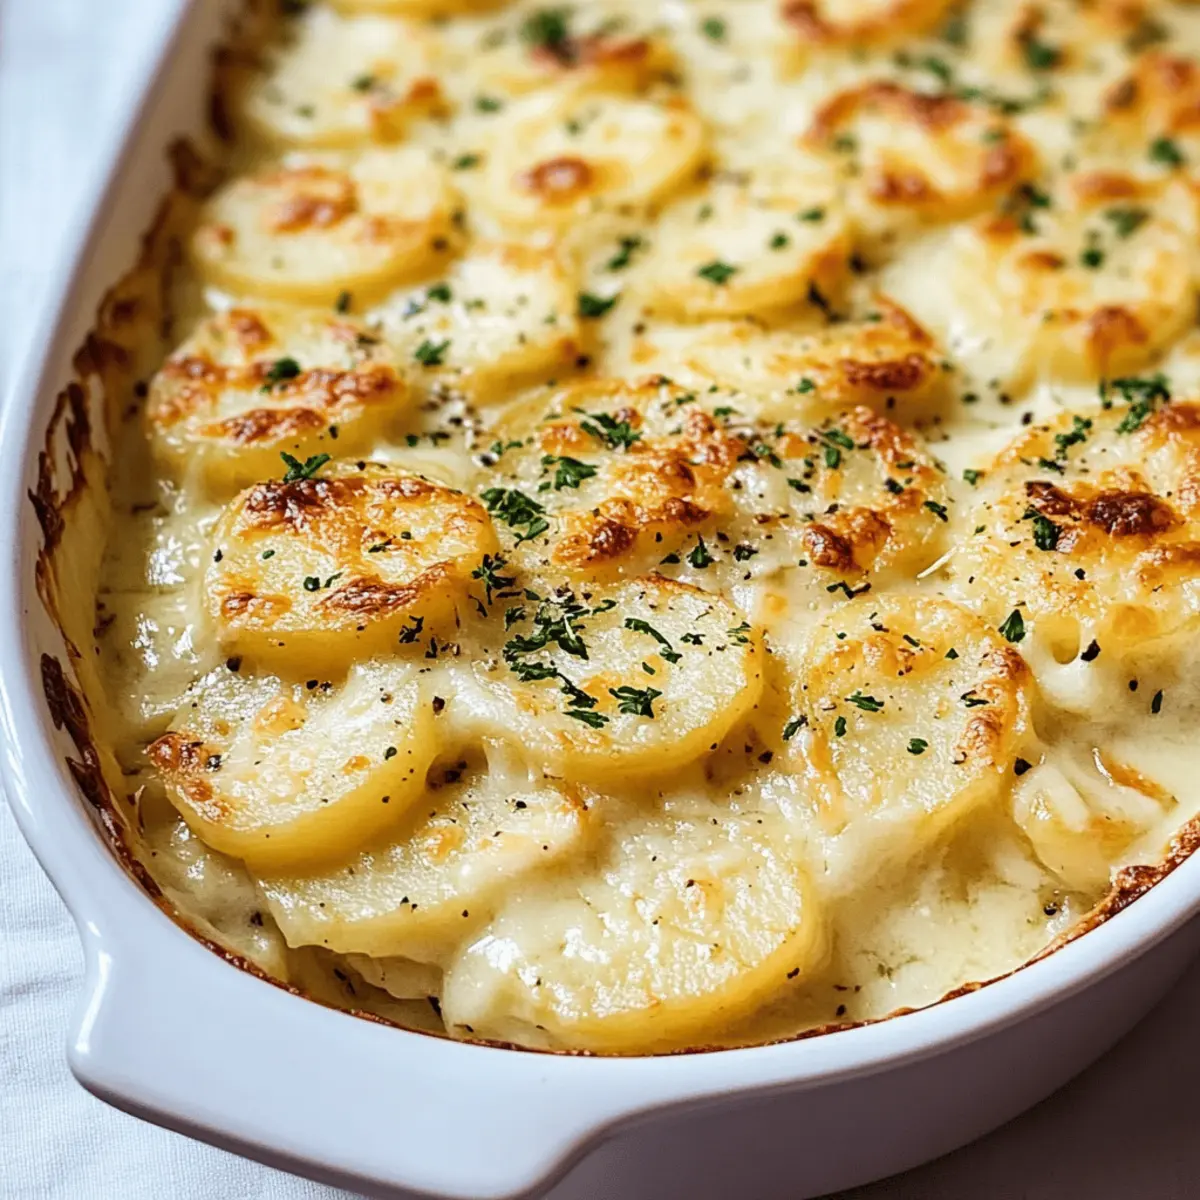
As I stood in my kitchen, the alluring aroma of garlic wafted through the air, instantly transporting me to comforting family dinners of my childhood. Today, I’m whipping up Cheesy Garlic Scalloped Potatoes—a side dish that warms not just the belly but the soul. With layers of thinly sliced Yukon Gold potatoes drenched in a creamy, garlic-infused cheese sauce, this delightful recipe is perfect for cozy weeknight meals or festive gatherings. Not only is it incredibly easy to prepare in advance, but it pairs beautifully with just about anything, making it a versatile crowd-pleaser. Trust me, the moment this dish emerges from the oven, golden and bubbling, it will steal the show on your dinner table. Are you ready to dig in and create your own perfect potato masterpiece?
Why Are Cheesy Garlic Scalloped Potatoes a Must-Try?
Comforting, creamy goodness is the hallmark of these Scalloped Potatoes, bringing warmth and nostalgia to any meal. Easy make-ahead preparation means you can enjoy delicious flavors without the last-minute chaos. Versatile pairings allow them to shine alongside roasted meats, fresh salads, or grilled veggies. Don’t forget, this recipe is adaptable; consider adding herbs from your garden or a spicy twist with hot peppers. Whether it’s a cozy weeknight dinner or a festive gathering, these potatoes are sure to be a hit—just like my Garlic Bread Air or those easy smashed Broccoli Parmesan Cheesy bites!
Cheesy Garlic Scalloped Potatoes Ingredients
For the Potatoes
• Yukon Gold Potatoes – Ideal for a creamy texture; you can also use Russet potatoes, though they yield a firmer bite.
For the Sauce
• Butter – Ensures richness and depth of flavor in your cheese sauce.
• Onion – Adds a savory undertone; substitute shallots for a milder sweetness.
• Garlic – Use fresh minced garlic for an aromatic punch in your sauce.
• All-Purpose Flour – This is your thickening agent for that luscious creamy consistency.
• Milk – The base of your sauce; opt for heavy cream for extra indulgence or non-dairy alternatives for a lactose-free version.
• Chicken Broth – Enhances the overall flavor; vegetable broth works great for a vegetarian take.
• Thyme – Bumps up the herbal aroma; oregano or sage can make delightful substitutes.
For the Cheesy Layer
• Cheddar Cheese – The star of the dish that melts beautifully; feel free to mix in different melting cheeses for varied flavors.
• Mozzarella Cheese – Adds creaminess and that stretchy texture we all love.
• Parmesan Cheese – Infuses a sharp, nutty flavor; Pecorino Romano is a nice alternative if you’re looking for a slight twist.
For Seasoning
• Salt – Essential for bringing out the flavors; adjust to your taste preference.
Creating Cheesy Garlic Scalloped Potatoes is not just about assembling ingredients; it’s a journey to flavorful bliss with each layer bringing something special to the table!
Step‑by‑Step Instructions for Cheesy Garlic Scalloped Potatoes
Step 1: Preheat the Oven
Begin by preheating your oven to 350°F (175°C). This step creates a perfect cooking environment for the Cheesy Garlic Scalloped Potatoes, allowing them to bake evenly. Take a moment to gather your ingredients and equipment, ensuring everything is ready for assembly.
Step 2: Prepare the Potatoes
Wash and slice the Yukon Gold potatoes into 1/8-inch rounds. Using a sharp knife or mandoline will ensure uniform thickness, which is key for even cooking. Set the prepared potato slices aside in a bowl of cold water to prevent browning while you prepare the delicious cheese sauce.
Step 3: Sauté Aromatics
In a medium saucepan, melt 4 tablespoons of butter over medium heat. Add the diced onion and minced garlic, sautéing for 1-2 minutes until they are fragrant and softened. Be careful not to brown the garlic, as this can introduce bitterness to your Cheesy Garlic Scalloped Potatoes.
Step 4: Make the Roux
Sprinkle in 1/4 cup of all-purpose flour, stirring constantly for about 1 minute to form a roux. Gradually pour in 2 cups of milk and 1 cup of chicken broth while whisking vigorously, ensuring there are no lumps. Continue cooking until the mixture thickens slightly, about 3-5 minutes.
Step 5: Add Seasonings
Once thickened, stir in 1 teaspoon of dried thyme and salt to taste. Bring the sauce to a gentle boil, watching for steaming bubbles. This will deepen the flavors in your creamy base, which is essential for crafting the famous Cheesy Garlic Scalloped Potatoes.
Step 6: Incorporate the Cheese
Turn off the heat and gradually mix in 1 cup of shredded cheddar cheese, 1 cup of shredded mozzarella cheese, and 1/2 cup of grated Parmesan cheese. Stir until the cheese is completely melted and the sauce is smooth, creating a decadent cheese mixture that will envelop your potatoes beautifully.
Step 7: Layer the Dish
In a greased 9×13 casserole dish, start layering your ingredients. Begin with a layer of potato slices, then pour a generous amount of the cheese sauce over them. Repeat the layering process two more times, finishing with a layer of cheese sauce on top for that beautiful, bubbling effect.
Step 8: Bake the Potatoes
Cover the casserole dish with aluminum foil and place it in the preheated oven. Bake for 30 minutes to allow the potatoes to start cooking through. After this time, carefully remove the foil and bake for an additional 35-45 minutes, until the top is golden brown and the potatoes are fork-tender.
Step 9: Rest Before Serving
Once out of the oven, allow your Cheesy Garlic Scalloped Potatoes to rest for about 10 minutes. This resting time enhances the layering and makes serving easier, as the dish will firm up slightly, making it a delicious and beautiful side for your meals.

What to Serve with Cheesy Garlic Scalloped Potatoes
Every bite of these creamy scalloped potatoes calls for delightful accompaniments that balance their rich flavors and textures.
-
Roasted Chicken: The savory, crispy skin and juicy meat make for a wonderful contrast to the creamy potatoes, adding heartiness to your meal.
-
Grilled Asparagus: This tender, slightly crunchy vegetable adds a pop of freshness and vibrant color, perfectly complementing the richness of the dish.
-
Mixed Green Salad: A bright, zesty salad brings lightness to the table and offers a refreshing bite, enhancing your dining experience as a delightful contrast.
-
Honey-Glazed Carrots: Their natural sweetness and vibrant color not only harmonize with the scalloped potatoes but also add a lovely earthy note that elevates your meal.
-
Steamed Broccoli: These crisp green florets bring texture and nutrition, with a lightness that pairs wonderfully with the creamy, indulgent potatoes.
-
Apple Cider Sangria: Crisp, fruity, and refreshing, this drink offers a bright contrast to the richness and keeps your palate refreshed.
-
Chocolate Lava Cake: For a sweet finish, the warm, gooey center of this dessert provides decadence that complements the savory scalloped potatoes perfectly.
Embrace these pairings to craft a memorable meal that captures the cozy essence of home-cooked comfort!
Cheesy Garlic Scalloped Potatoes Variations
Feel free to let your creative spirit flourish as you customize these delightful potatoes for a truly unique dining experience!
-
Spicy Kick: Add crushed red pepper flakes or diced jalapeños to the cheese sauce for tantalizing heat. The spicy elements contrast beautifully with the creamy goodness, making each bite a flavor explosion.
-
Herb-Infused: Incorporate fresh herbs like rosemary or parsley. This twist adds a bright, fragrant quality to the dish, enhancing its overall aroma and depth of flavor. Consider mixing the herbs directly into the cheese sauce for an enticing herbal note.
-
Creamy Alternative: Swap out half the milk for heavy cream to create an even richer sauce. This indulgent upgrade takes the creamy texture to new heights, making it utterly irresistible!
-
Vegetable Boost: Mix in blanched broccoli florets or sautéed mushrooms between the potato layers. Adding veggies brings both nutrition and extra texture, creating a comforting dish that feels more like a hearty meal.
-
Cheesy Swaps: Experiment with different cheeses like Gruyère or Fontina for a unique flavor profile. Each cheese brings its own special characteristics, allowing you to fine-tune the dish to your liking—or even create a blend of your favorites!
-
Sweet Twist: For a different flavor experience, layer in thinly sliced sweet potatoes alongside regular potatoes. The sweetness contrasts beautifully with the savory cheese sauce, adding complexity to every bite.
-
Nutty Flavor: Replace Parmesan with Pecorino Romano for a distinct nutty flavor that gives a delightful twist to the classic recipe. This variation offers a rich complexity that enhances the overall experience of the dish.
-
Garnished Delight: Top with crispy bacon bits or buttery breadcrumbs before serving for added crunch. These toppings provide a delightful texture contrast and a gourmet touch to your homemade comfort food.
These variations not only complement your Cheesy Garlic Scalloped Potatoes perfectly but also allow for enjoyable experimentation. And for more sensational side dishes, check out my guide on Making Air Potatoes or try the delectable Cheesy Gordita Crunch!
Make Ahead Options
These Cheesy Garlic Scalloped Potatoes are an excellent choice for busy home cooks looking to save time during the week! You can prepare the potato and cheese layers up to 24 hours in advance and store the assembled dish, covered, in the refrigerator. To maintain the dish’s creamy texture and flavor, cover the casserole tightly with foil or plastic wrap. When you’re ready to serve, simply bake it in a preheated oven at 350°F (175°C) for about 45 to 55 minutes until golden and bubbly—allowing for some additional time due to the cold ingredients. Trust me, these Cheesy Garlic Scalloped Potatoes will be just as delicious as if you made them fresh!
How to Store and Freeze Cheesy Garlic Scalloped Potatoes
Fridge: Store leftover Cheesy Garlic Scalloped Potatoes in an airtight container in the fridge for up to 3 days. Reheat in the oven or microwave, adding a splash of milk to revive creaminess.
Freezer: To freeze, let the dish cool completely, then wrap tightly in plastic wrap and foil. Store for up to 3 months. Thaw overnight in the fridge before reheating.
Reheating: For the best texture, reheat in the oven at 350°F for about 20-30 minutes until warmed through. You can cover with foil to prevent drying out.
Make-Ahead: Prepare the dish a day in advance and store it covered in the fridge. Baking when ready ensures fresh, bubbling Cheesy Garlic Scalloped Potatoes at mealtime.
Expert Tips for Cheesy Garlic Scalloped Potatoes
- Uniform Slices: Ensure all potato slices are of equal thickness (about 1/8-inch) for even cooking and the perfect creamy texture.
- Avoid Bitter Garlic: Sauté garlic only until fragrant, about 1-2 minutes, to prevent it from browning and turning bitter in the Cheesy Garlic Scalloped Potatoes.
- Let It Rest: Allow the dish to rest for at least 10 minutes after baking; this helps the layers set and makes serving easier.
- Season the Sauce: Don’t forget to taste your cheese sauce before layering; adjust the salt and thyme to cater to your taste buds for optimal flavor.
- Make-Ahead Magic: Prepare the Cheesy Garlic Scalloped Potatoes a day in advance and store in the fridge—just bake when ready to serve for a deliciously fresh result.
Cheesy Garlic Scalloped Potatoes Recipe FAQs
What type of potatoes should I use?
For the richest and creamiest texture, I recommend using Yukon Gold potatoes. However, if you prefer a firmer texture or if that’s what you have on hand, Russet potatoes make a fine substitution. Just keep in mind the difference in texture, as Russets tend to be drier.
How long can I store leftover Cheesy Garlic Scalloped Potatoes?
You can safely store leftover scalloped potatoes in an airtight container in the fridge for up to 3 days. When you’re ready to enjoy them again, reheating in the oven or microwave works well. If the dish seems dry, add a splash of milk or broth to bring back its creamy goodness!
Can I freeze Cheesy Garlic Scalloped Potatoes?
Absolutely! To freeze, allow the dish to cool completely after baking. Then, wrap it tightly in plastic wrap and aluminum foil. You can freeze it for up to 3 months. When you’re ready to enjoy it, thaw it overnight in the fridge before reheating in the oven for the best texture.
What should I do if my scalloped potatoes are not cooking evenly?
If your potatoes aren’t cooking evenly, double-check that they are all sliced uniformly to about 1/8-inch thickness. This ensures consistent cooking. Additionally, during baking, make sure to cover the dish with foil initially to trap steam and help the potatoes begin to cook through before browning.
Are Cheesy Garlic Scalloped Potatoes suitable for gluten-free diets?
Yes! You can easily make this recipe gluten-free by substituting the all-purpose flour with a gluten-free flour blend, cornstarch, or even rice flour. Just ensure your chicken broth is gluten-free, or use vegetable broth instead for a vegetarian option.
Can I prepare Cheesy Garlic Scalloped Potatoes ahead of time?
Definitely! You can prepare the dish a day in advance by assembling all components and storing it covered in the fridge. This make-ahead tip cuts down on the last-minute hassle, allowing you to bake it just before serving, ensuring fresh, bubbling Cheesy Garlic Scalloped Potatoes at mealtime.
Cheesy Garlic Scalloped Potatoes for Ultimate Comfort Bliss
Ingredients
Equipment
Method
- Preheat your oven to 350°F (175°C).
- Wash and slice the Yukon Gold potatoes into 1/8-inch rounds and set aside in a bowl of cold water.
- In a medium saucepan, melt the butter over medium heat and sauté the onion and minced garlic for 1-2 minutes until fragrant.
- Sprinkle in flour, stirring for about 1 minute to form a roux. Gradually add milk and chicken broth while whisking until thickened, about 3-5 minutes.
- Stir in thyme and salt to taste, bringing the sauce to a gentle boil.
- Turn off the heat and mix in the cheddar, mozzarella, and parmesan cheese until melted and smooth.
- In a greased 9x13 casserole dish, layer potato slices and pour cheese sauce over, repeating two more times.
- Cover with foil and bake for 30 minutes; then uncover and bake for an additional 35-45 minutes until golden brown and fork-tender.
- Let the dish rest for about 10 minutes before serving.
")