")
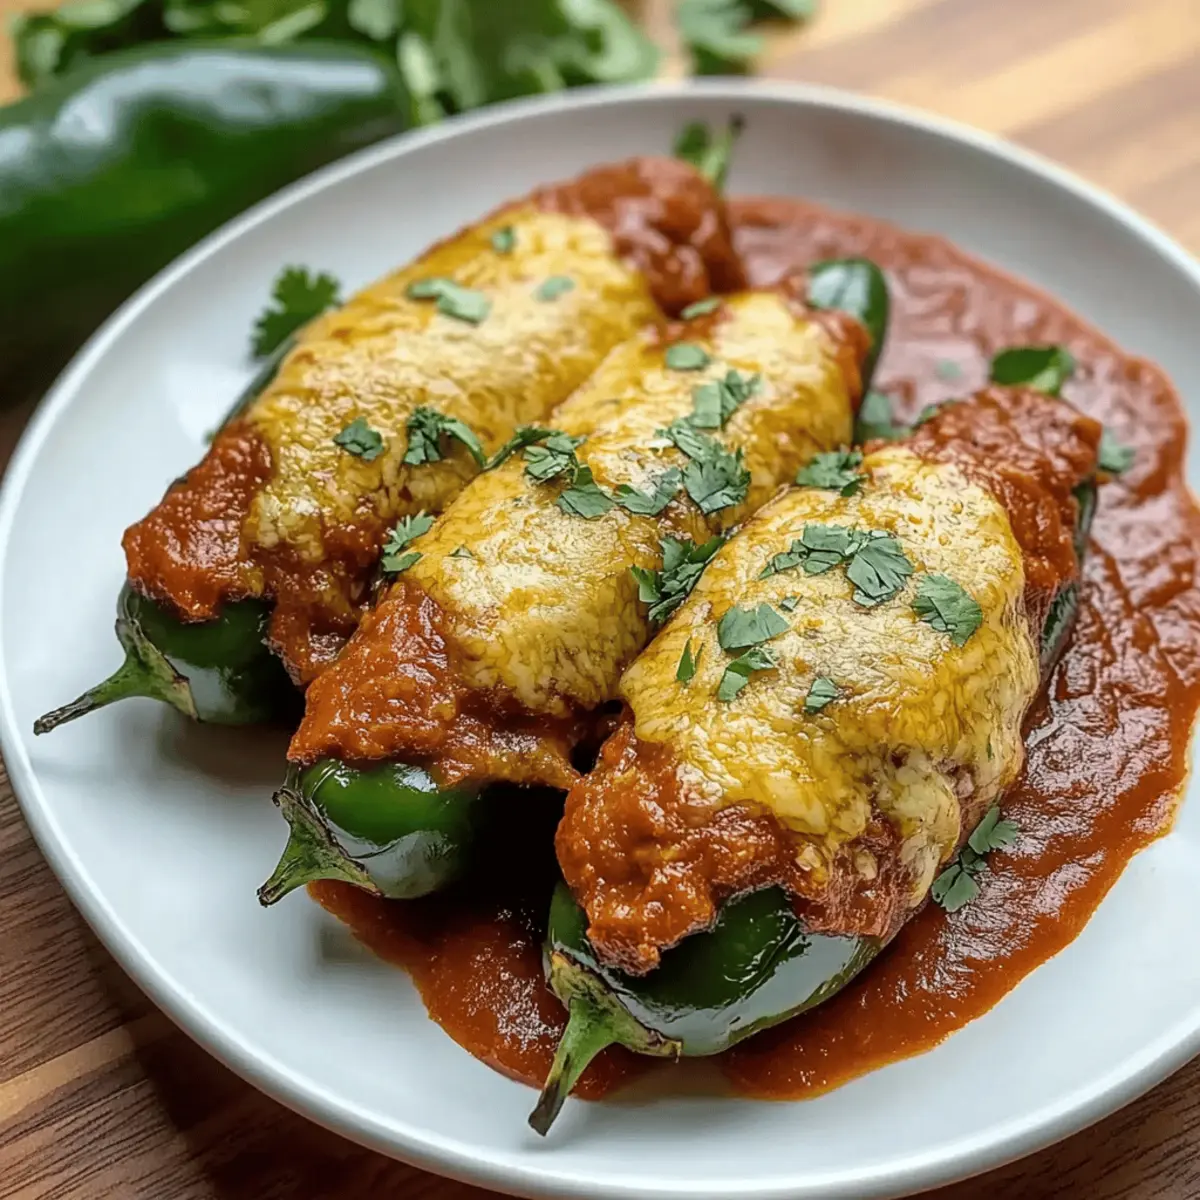
As I stood in my kitchen, the air filled with the tantalizing aroma of roasted peppers, I was transported to a vibrant Mexican market bustling with flavors. This recipe for Cheesy Hatch Chile Rellenos brings that joyful experience home, showcasing nestled poblano peppers oozing with creamy Oaxaca cheese, all enveloped in a light and crispy batter. Not only is this comfort food a feast for the senses, but it’s also incredibly customizable; you can adjust the heat level to suit your taste and even make it gluten-free with a simple flour swap. Best of all, these delightful chiles are a guaranteed crowd-pleaser, perfect for family dinners or casual gatherings. Curious about how to whip up this savory dish? Let’s dive into the comforting world of Cheesy Hatch Chile Rellenos!
Why are Cheesy Hatch Chile Rellenos irresistible?
Ultimate Comfort Food: This dish combines roasted poblano peppers and creamy Oaxaca cheese for an unmatchable comfort experience. Crispy on the Outside: The light batter creates a delightful crunch that perfectly contrasts the gooey interior. Customize to Your Taste: Adjust the spice level with jalapenos or substitute cheeses for personal flair. Quick and Easy: With simple steps, you can whip these up in no time! A Crowd Favorite: These rellenod are sure to wow guests at your next gathering, reminiscent of my popular Cheesy Gordita Crunch or the savory flavors in my Broccoli Parmesan Cheesy recipe.
Cheesy Hatch Chile Rellenos Ingredients
• Get ready to create this delectable comfort food with flavorful ingredients!
For the Peppers
- Hatch Green Chiles – These provide the smoky flavor and varying heat; if unavailable, poblano peppers are a great substitute.
- Oaxaca Cheese (or Monterey Jack) – This gives the dish its creamy, melting quality; you can also use Mozzarella if preferred.
For the Batter
- Eggs – Separate the whites and yolks; whipped whites create a fluffy batter that’s vital for a light texture.
- All-Purpose Flour (or gluten-free flour) – Essential for creating the crispy coating; gluten-free flour can make this dish suitable for gluten-sensitive diets.
- Salt – Use in both the batter and sauce to enhance the flavors.
- Garlic Powder – Adds a delightful depth of flavor to the batter.
For Frying
- Vegetable Oil – Choose a neutral oil with a high smoke point for frying to keep the flavors pure.
For the Sauce
- Tomatoes (5 medium, Roma or fresh) – The heart of the sauce; roasting them can intensify the flavors.
- White Onion (1 small) – Adds sweetness; can be replaced with shallots for a milder flavor.
- Garlic Cloves (5) – They enhance the sauce’s flavor profile beautifully.
- Chopped Cilantro (2 tbsp) – Imparts refreshing brightness to the sauce.
- Salt (for sauce) – Season to taste for the best flavor enhancement.
- Sliced Jalapenos (1/4 cup, optional) – Adds heat if you’re feeling adventurous; feel free to substitute with milder peppers for less spice.
With these ingredients in hand, you’re all set to embark on your flavorful journey of making Cheesy Hatch Chile Rellenos! The combination of textures and flavors is sure to delight both your palate and your loved ones.
Step‑by‑Step Instructions for Cheesy Hatch Chile Rellenos
Step 1: Roast the Chiles
Preheat your broiler to high. Place the Hatch chiles on a baking sheet and roast them under the broiler for 10 to 20 minutes, turning occasionally, until the skins are blistered and charred all around. Keep a close eye on them to avoid burning, and once they’re beautifully blistered, remove them from the oven and let them sit.
Step 2: Steam to Peel
Transfer the hot roasted chiles into a ziplock bag and seal it tightly. Allow them to steam for 10 to 15 minutes. This steaming process helps to loosen the skins, making them easier to peel. Once cooled slightly, you’ll notice the skins lift off effortlessly—perfect for your Cheesy Hatch Chile Rellenos!
Step 3: Prepare the Chiles
After peeling the skins, slice open each chile lengthwise and carefully remove the seeds, ensuring you don’t tear the flesh too much. Stuff each chile generously with Oaxaca cheese, about 1 ounce per pepper, and use toothpicks to secure the openings. This step is crucial to keep the delicious filling intact during frying.
Step 4: Make the Batter
In a mixing bowl, separate the egg whites from the yolks. Using a mixer, whip the egg whites until they form stiff peaks—this will create a light batter for your Cheesy Hatch Chile Rellenos. Gently fold in the yolks, ensuring to retain the airiness from the whipped whites for that perfect crispy coating.
Step 5: Dredge the Chiles
In a separate shallow dish, combine the all-purpose flour with salt and garlic powder. Take each stuffed chile and lightly coat them in the flour mixture, shaking off any excess. Next, dip each floured chile into the egg batter, ensuring they’re evenly coated to achieve a crispy, flawless exterior when fried.
Step 6: Fry
Heat vegetable oil in a deep skillet over medium heat, reaching a temperature of 350°F. Carefully add the coated chiles in batches, frying them for about 2 to 3 minutes per side until they turn golden brown and crispy. Use a slotted spoon to transfer the fried chiles to a plate lined with paper towels to drain excess oil.
Step 7: Make the Sauce
While frying, prepare the sauce by blending together the tomatoes, white onion, garlic, cilantro, and salt in a blender until smooth. Pour the mixture into a saucepan and bring it to a boil over medium heat. Reduce the heat and let it simmer for about 10 minutes until thickened, allowing the flavors to meld beautifully.
Step 8: Serve
To serve your Cheesy Hatch Chile Rellenos, place the hot, stuffed chiles on a plate and generously spoon the warm tomato sauce over them. You may also add optional toppings like sliced jalapenos, fresh cilantro, or a drizzle of crema for an extra touch. Enjoy the delightful combination of crispy, cheesy goodness!

Expert Tips for Cheesy Hatch Chile Rellenos
- Roasting Technique: Ensure even charring of the chiles for easier skin removal; keep an eye on them to avoid burning.
- Filling Amount: Aim for about 1 ounce of cheese per chile to prevent bursting during frying.
- Batter Consistency: Don’t let the egg batter sit too long, or it may lose its fluffiness, impacting the texture of your Cheesy Hatch Chile Rellenos.
- Oil Temperature: Maintain a consistent oil temperature for perfectly crispy coatings; frying in small batches helps to regulate heat.
- Sauce Flavor Boost: Consider roasting the sauce ingredients beforehand for deeper flavor and a touch of smokiness.
What to Serve with Cheesy Hatch Chile Rellenos
Elevate your dining experience with delicious accompaniments that enhance the flavors of your cheesy, spicy creation.
-
Warm Tortillas: These are perfect for wrapping around the chiles, adding a delightful softness that contrasts the crispy exterior.
-
Mexican Rice: Fluffy, seasoned rice complements the richness of the cheese and balances the heat, creating a comforting plate.
-
Fresh Salad with Avocado: A light salad with creamy avocado provides a refreshing crunch that offsets the richness of the dish.
-
Refried Beans: Creamy refried beans add a satisfying texture and a deliciously earthy flavor that harmonizes beautifully with the chiles.
-
Pico de Gallo: This fresh salsa, zesty with lime and cilantro, elevates the dish with a vibrant pop of flavor, perfect for drizzling or spooning.
-
Crema or Sour Cream: A dollop of crema adds a cooling counterpoint to the spice, making each bite more enjoyable.
Serve your Cheesy Hatch Chile Rellenos with these delightful sides, and watch your meal transform into a fiesta of flavors!
Cheesy Hatch Chile Rellenos Variations
Feel free to delight in customizing these Cheesy Hatch Chile Rellenos to suit your palate and preferences!
-
Cheese Switch: Use Monterey Jack or Cheddar cheese for different flavors. Each cheese brings its unique twist and wonderful creaminess.
-
Spicy Kick: Add diced jalapenos to the cheese filling for an extra heat boost that’ll awaken your taste buds with every bite!
-
Vegetarian Twist: Include sautéed mushrooms or bell peppers in the filling for added texture and flavor. They’re delicious and add a splendid earthiness to your dish.
-
Meaty Goodness: Mix in cooked chorizo or shredded chicken to the cheese filling. The added protein creates a heartier dish that’s sure to satisfy.
-
Tomato Roasting: Roast the tomatoes and onions before blending for the sauce. This enhances the richness and adds depth to the flavor, making it irresistible.
-
Gluten-Free Delight: Swap all-purpose flour for your favorite gluten-free flour blend to create a crispy exterior without the gluten, allowing everyone to enjoy!
-
Herb Infusion: Stir in fresh herbs like basil or oregano into the filling or sauce. This earthy addition will create a beautiful melody of flavors.
-
Creamy Finish: Top with a drizzle of crema or a scoop of sour cream for a cool, creamy contrast that elevates the dish and offers a delightful balance to the heat.
With all these sumptuous variations, you’ll be ready to explore a world of flavors. Each one complements the comforting elements of this classic recipe, making your Cheesy Hatch Chile Rellenos a scrumptious centerpiece for any meal!
Storage Tips for Cheesy Hatch Chile Rellenos
- Refrigerate: Store leftovers in an airtight container for up to 3 days. Placing a paper towel inside helps absorb excess moisture, keeping your Cheesy Hatch Chile Rellenos fresh.
- Freeze: For longer storage, freeze uncooked stuffed chiles for up to 2 months. They can be cooked directly from frozen; just add extra frying time for the best results.
- Warm Up: Reheat in a 350°F oven for 10-15 minutes to restore the crispy exterior while warming the cheesy interior perfectly.
Make Ahead Options
These Cheesy Hatch Chile Rellenos are perfect for busy home cooks looking to save time! You can roast and stuff the chiles up to 24 hours in advance, just seal them tightly in the refrigerator after completing that step to keep them fresh. For added convenience, the sauce can also be prepared up to 3 days ahead; simply refrigerate it in an airtight container. When you’re ready to enjoy them, just fry the stuffed chiles directly from the refrigerator and reheat the sauce on the stovetop until hot. This way, you’ll have delicious, homemade comfort food without all the last-minute hassle, making mealtime a breeze!

Cheesy Hatch Chile Rellenos Recipe FAQs
What kind of chiles should I use for this recipe?
Absolutely! The star of this dish is the Hatch Green Chile, known for its smoky flavor and varying heat levels. If they’re not available, poblano peppers are a fantastic alternative. Look for firm, unblemished chiles, avoiding those with dark spots or wrinkles.
How should I store leftovers?
Great question! Leftover Cheesy Hatch Chile Rellenos can be stored in an airtight container in the refrigerator for up to 3 days. I recommend placing a paper towel underneath to absorb excess moisture, keeping them fresh and delicious.
Can I freeze the Cheesy Hatch Chile Rellenos?
Yes, you can! To freeze, stuff the chiles and place them on a baking sheet in a single layer until frozen solid. Then transfer them to a freezer-safe bag or container, and they can be stored for up to 2 months. When you’re ready to cook, just fry them straight from frozen, adding a couple of extra minutes to the frying time.
What if my batter isn’t fluffy like it should be?
No worries! If your batter isn’t achieving the right fluffiness, check the egg whites. They should be whipped to stiff peaks before folding in the yolks. Ensure you’re mixing gently to maintain that airiness, as over-mixing can deflate the batter. Also, try to cook the chiles right after preparing the batter for the best texture.
Are there any dietary considerations for this recipe?
Very much so! While this recipe is naturally gluten-free if you substitute all-purpose flour with gluten-free flour, always check labels for any potential allergens. Additionally, if you’re preparing for pets, keep in mind that the spiciness of chiles can upset their stomachs, so consider adjusting the heat accordingly.
What toppings work best with Cheesy Hatch Chile Rellenos?
The more the merrier! Serving your Cheesy Hatch Chile Rellenos with a drizzle of crema, some fresh cilantro, or even a side of salsa verde elevates both flavor and presentation. Feel free to experiment with different toppings that you love for a personal touch!

Cheesy Hatch Chile Rellenos: A Spicy Comfort Food Gem
Ingredients
Equipment
Method
- Preheat your broiler to high. Place the Hatch chiles on a baking sheet and roast them under the broiler for 10 to 20 minutes, turning occasionally, until the skins are blistered.
- Transfer the hot roasted chiles into a ziplock bag and seal it tightly. Allow them to steam for 10 to 15 minutes to loosen the skins.
- After peeling, slice open each chile lengthwise and remove the seeds. Stuff each chile with Oaxaca cheese, about 1 ounce per pepper, and secure openings with toothpicks.
- In a mixing bowl, separate egg whites from yolks. Whip egg whites until stiff peaks form, then gently fold in the yolks.
- Combine all-purpose flour with salt and garlic powder in a shallow dish. Lightly coat each stuffed chile in the flour mixture, then dip into the egg batter.
- Heat vegetable oil in a deep skillet over medium heat. Carefully add coated chiles in batches, frying for about 2 to 3 minutes per side until golden brown.
- Blend tomatoes, onion, garlic, cilantro, and salt in a blender until smooth. Pour into a saucepan and bring to a boil, then simmer for about 10 minutes.
- Serve the hot stuffed chiles on a plate and spoon warm tomato sauce over them. Optionally add sliced jalapenos or cilantro.
")