")
Introduction to Cherry Pie Bites
There’s something magical about the aroma of baked goods wafting through the house.
Cherry Pie Bites are a delightful way to bring that warmth into your kitchen without spending hours slaving away.
These little treats are perfect for a quick dessert after dinner or a sweet surprise for your loved ones.
With just a handful of ingredients and a bit of time, you can whip up these delicious bites that are sure to impress.
Whether you’re a seasoned chef or a kitchen novice, this recipe is your ticket to a sweet escape.
Why You’ll Love This Cherry Pie Bites
Cherry Pie Bites are the ultimate solution for those busy days when you crave something sweet but don’t have hours to spare.
They’re quick to make, taking just about 55 minutes from start to finish.
The flaky crust and luscious cherry filling create a flavor explosion that will have everyone coming back for more.
Plus, they’re perfect for sharing at gatherings or enjoying solo with a cup of coffee.
Ingredients for Cherry Pie Bites
Creating Cherry Pie Bites is a breeze with just a few simple ingredients.
Here’s what you’ll need to gather:
- All-purpose flour: The backbone of your crust, providing structure and flakiness.
- Granulated sugar: Adds sweetness to the dough and balances the tartness of the cherries.
- Salt: A pinch enhances the flavors, making everything taste better.
- Unsalted butter: Cold and cubed, it’s essential for that rich, flaky texture.
- Ice water: Helps bring the dough together without melting the butter, keeping it flaky.
- Cherry pie filling: The star of the show! You can use canned or homemade for convenience.
- Egg: Beaten, for brushing on top to give your bites a beautiful golden finish.
- Coarse sugar: Sprinkled on top for a delightful crunch and extra sweetness.
Feel free to get creative!
You can swap the cherry filling for blueberry or apple if you’re in the mood for something different.
A sprinkle of cinnamon in the dough can also add a warm, inviting flavor.
For exact measurements, check the bottom of the article where you can find everything listed for easy printing.
How to Make Cherry Pie Bites
Making Cherry Pie Bites is a fun and rewarding experience.
Follow these simple steps, and you’ll have a batch of delightful treats ready to impress.
Let’s dive into the process!
Step 1: Preheat and Prepare
Start by preheating your oven to 375°F (190°C).
While that’s heating up, line a baking sheet with parchment paper.
This will prevent sticking and make cleanup a breeze.
Trust me, your future self will thank you!
Step 2: Make the Dough
In a mixing bowl, combine the all-purpose flour, granulated sugar, and salt.
Next, add the cold, cubed unsalted butter.
Use a pastry cutter or your fingers to mix until the mixture resembles coarse crumbs.
Gradually add the ice water, mixing until the dough comes together.
You might not need all the water, so add it slowly!
Step 3: Chill the Dough
Once your dough is formed, turn it out onto a lightly floured surface.
Knead it gently until smooth, but don’t overdo it.
Wrap the dough in plastic wrap and refrigerate for about 30 minutes.
Chilling makes it easier to roll out later and helps achieve that flaky texture.
Step 4: Roll and Cut
After chilling, roll out the dough to about 1/8 inch thick.
Use a 3-inch round cutter to cut out circles.
You should get about 24 circles, so you’ll have enough for filling and sealing.
Place half of the circles on your prepared baking sheet, leaving space between them.
Step 5: Fill and Seal
Now comes the fun part!
Spoon about 1 tablespoon of cherry pie filling onto the center of each dough circle.
Be careful not to overfill, or they’ll burst while baking.
Top each filled circle with another dough circle.
Press the edges to seal, and crimp them with a fork for a decorative touch.
Step 6: Bake
Brush the tops of your Cherry Pie Bites with the beaten egg.
This gives them that beautiful golden finish.
Sprinkle a little coarse sugar on top for added sweetness and crunch.
Bake in your preheated oven for 20-25 minutes, or until they’re golden brown.
Let them cool slightly before serving, and enjoy the delightful aroma filling your kitchen!
Tips for Success
- Keep your butter cold for a flakier crust; it’s key to the texture.
- Don’t skip the chilling step; it makes rolling out the dough much easier.
- Use a fork to crimp the edges; it seals in the filling and adds a nice touch.
- Experiment with different fillings for variety; the possibilities are endless!
- Let the bites cool slightly before serving to avoid burns and enhance flavor.
Equipment Needed
- Mixing bowl: A large bowl for combining ingredients. A sturdy pot can work in a pinch.
- Rolling pin: Essential for rolling out dough. A wine bottle can serve as a fun alternative.
- 3-inch round cutter: For cutting dough circles. A glass or jar can do the trick.
- Baking sheet: To hold your Cherry Pie Bites. Any flat oven-safe dish will suffice.
- Parchment paper: For easy cleanup. Aluminum foil can be used if needed.
Variations
- Fruit Filling Swap: Try using blueberry, apple, or even peach filling for a different flavor profile.
- Gluten-Free Option: Substitute all-purpose flour with a gluten-free blend to accommodate dietary needs.
- Vegan Twist: Replace butter with coconut oil and use a flax egg instead of a regular egg for a plant-based version.
- Spiced Dough: Add a teaspoon of cinnamon or nutmeg to the dough for a warm, aromatic touch.
- Chocolate Drizzle: After baking, drizzle melted chocolate over the cooled bites for an indulgent treat.
Serving Suggestions
- Pair your Cherry Pie Bites with a scoop of vanilla ice cream for a delightful contrast.
- Serve with a dollop of whipped cream on the side for added indulgence.
- Enjoy with a hot cup of coffee or tea to balance the sweetness.
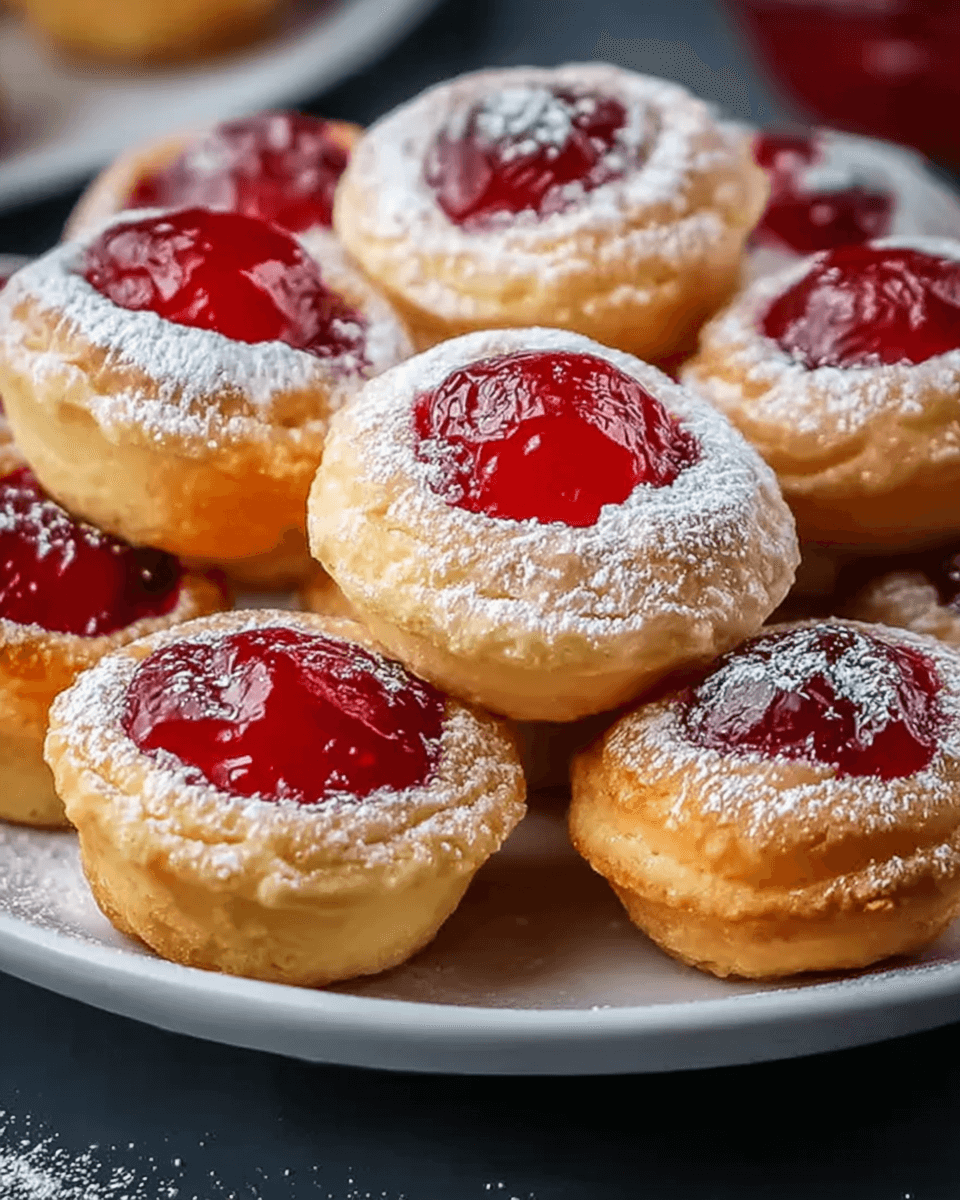
- Present on a colorful platter, dusted with powdered sugar for an elegant touch.
FAQs about Cherry Pie Bites
Can I use fresh cherries instead of cherry pie filling?
Absolutely! If you have fresh cherries, you can make your own filling. Just pit and chop them, then cook with a bit of sugar and cornstarch until thickened. It’s a great way to elevate your Cherry Pie Bites!
How do I store leftover Cherry Pie Bites?
Store any leftovers in an airtight container at room temperature for up to two days. If you want to keep them longer, refrigerate them for up to a week. Just reheat in the oven for a few minutes to regain that fresh-baked taste.
Can I freeze Cherry Pie Bites?
Yes! You can freeze unbaked Cherry Pie Bites. Just assemble them, place them on a baking sheet, and freeze until solid. Then transfer to a freezer bag. Bake from frozen, adding a few extra minutes to the baking time.
What can I substitute for the egg wash?
If you’re looking for an egg wash alternative, try brushing the tops with milk or a mixture of water and cornstarch. This will help achieve a nice golden color without using eggs.
Can I make these Cherry Pie Bites ahead of time?
Definitely! You can prepare the dough and filling in advance. Assemble the bites and refrigerate them until you’re ready to bake. This makes it easy to whip up a fresh dessert whenever you need it!
Final Thoughts
Creating Cherry Pie Bites is more than just baking; it’s about crafting sweet memories.
The joy of pulling a tray of golden, flaky bites from the oven is unmatched.
Each bite bursts with cherry goodness, making it a perfect treat for any occasion.
Whether you’re sharing them with friends or savoring them solo, these little delights bring a smile to your face.
So, roll up your sleeves and dive into this easy recipe.
You’ll not only satisfy your sweet tooth but also create a moment of happiness in your kitchen.
Happy baking!
PrintCherry Pie Bites: Discover the Easy Recipe Today!
- Total Time: 55 minutes
- Yield: 12 servings
- Diet: Vegetarian
Description
Delicious and easy-to-make Cherry Pie Bites, perfect for a sweet treat.
Ingredients
- 1 cup all-purpose flour
- 1/4 cup granulated sugar
- 1/4 teaspoon salt
- 1/2 cup unsalted butter, cold and cubed
- 1/4 cup ice water
- 1 cup cherry pie filling (canned or homemade)
- 1 egg, beaten (for egg wash)
- 1 tablespoon coarse sugar (for topping)
Instructions
- Preheat your oven to 375°F (190°C). Line a baking sheet with parchment paper.
- In a mixing bowl, combine the flour, granulated sugar, and salt. Add the cold, cubed butter and mix until the mixture resembles coarse crumbs.
- Gradually add the ice water, mixing until the dough comes together. You may not need all the water.
- Turn the dough out onto a lightly floured surface and knead gently until smooth. Wrap in plastic wrap and refrigerate for 30 minutes.
- Roll out the dough to about 1/8 inch thick. Cut out circles using a 3-inch round cutter.
- Place half of the circles on the prepared baking sheet. Spoon about 1 tablespoon of cherry pie filling onto the center of each circle.
- Top each filled circle with another dough circle. Press the edges to seal and crimp with a fork.
- Brush the tops with the beaten egg and sprinkle with coarse sugar.
- Bake for 20-25 minutes or until golden brown. Allow to cool slightly before serving.
Notes
- For a twist, substitute cherry filling with blueberry or apple filling.
- Add a sprinkle of cinnamon to the dough for extra flavor.
- Prep Time: 30 minutes
- Cook Time: 25 minutes
- Category: Dessert
- Method: Baking
- Cuisine: American
Nutrition
- Serving Size: 1 bite
- Calories: 150
- Sugar: 5g
- Sodium: 100mg
- Fat: 7g
- Saturated Fat: 4g
- Unsaturated Fat: 3g
- Trans Fat: 0g
- Carbohydrates: 18g
- Fiber: 1g
- Protein: 2g
- Cholesterol: 20mg
")


