Chocolate Covered Cheesecake Bites are the ultimate bite-sized dessert for any occasion. Imagine the smooth, creamy cheesecake paired with a buttery graham cracker crust and coated in a rich chocolate shell. These irresistible treats are perfect for parties, family gatherings, or even just a little indulgence for yourself. The best part? They’re easy to make, store well, and can be customized to fit your style.
Here’s how you can whip up these delectable bites that everyone will rave about.
Why You’ll Love Chocolate Covered Cheesecake Bites
- Perfect Party Dessert: These bites are small, portable, and easy to serve, making them ideal for events or gatherings.
- Rich and Creamy: The combination of cheesecake filling, chocolate coating, and graham cracker crust makes for a heavenly dessert.
- Make Ahead: You can prepare these in advance, so there’s no last-minute stress.
- Customizable: Switch up the chocolate or crust to suit your taste, or add toppings for a personal twist.
- Freezer-Friendly: These bites can be frozen for up to two weeks, making them a convenient treat to have on hand.
Ingredients
For the Crust
| Ingredient | Quantity |
|---|---|
| Graham cracker sheets | 9 whole sheets |
| Butter, melted | ½ cup (1 stick) |
For the Cheesecake Filling
| Ingredient | Quantity |
|---|---|
| Cream cheese, softened | 16 oz |
| Granulated sugar | ½ cup |
| Sour cream | ¼ cup |
| Eggs | 2 large |
| Vanilla extract | 2 teaspoons |
| All-purpose flour | 1 tablespoon |
| Salt | ½ teaspoon |
For the Chocolate Coating
| Ingredient | Quantity |
|---|---|
| Semi-sweet chocolate, chopped | 16 oz |
| Coconut oil | 4 tablespoons |
Step-by-Step Instructions
Step 1: Prepare the Crust
- Preheat the Oven: Start by preheating your oven to 325°F (160°C). Line an 8×8-inch square baking pan with parchment paper, leaving an overhang on the sides for easy removal.
- Crush the Graham Crackers: Use a food processor or place the graham crackers in a zip-top bag and crush them into fine crumbs.
- Mix the Crust: In a medium bowl, combine the graham cracker crumbs and melted butter. Stir until the crumbs are well-coated and resemble wet sand.
- Form the Crust: Press the mixture evenly into the bottom of the prepared pan to create a firm crust layer. Use the back of a spoon or the bottom of a glass to press it down tightly.
- Bake: Bake the crust for 10 minutes. Remove it from the oven and allow it to cool while you prepare the filling.
Step 2: Make the Cheesecake Filling
- Beat the Cream Cheese: In a large bowl, use an electric mixer to beat the softened cream cheese and granulated sugar together until smooth and creamy.
- Add Remaining Ingredients: Mix in the sour cream, eggs, vanilla extract, flour, and salt. Beat on low speed until just combined. Be careful not to overmix, as this can cause cracks in the cheesecake.
- Pour the Filling: Pour the cheesecake mixture over the baked crust and spread it out evenly.
Step 3: Bake the Cheesecake
- Bake: Bake the cheesecake for 30–35 minutes, or until the center is set and only slightly jiggles when the pan is gently shaken.
- Cool the Cheesecake: Remove the pan from the oven and let the cheesecake cool completely.
- Chill: Once the cheesecake has cooled, refrigerate it for at least 2 hours, or until firm.
Step 4: Cut and Freeze the Cheesecake Bites
- Lift the Cheesecake Out: Use the parchment paper overhang to carefully lift the cheesecake out of the pan.
- Cut into Squares: Place the cheesecake on a cutting board and use a sharp knife to cut it into bite-sized squares.
- Freeze: Arrange the squares on a parchment-lined baking sheet and freeze them for at least 1 hour. Freezing ensures that the cheesecake doesn’t fall apart when dipped in chocolate.
Step 5: Prepare the Chocolate Coating
- Melt the Chocolate: Combine the chopped semi-sweet chocolate and coconut oil in a microwave-safe bowl. Microwave in 20–30 second intervals, stirring after each, until the chocolate is fully melted and smooth.
Step 6: Coat the Cheesecake Bites
- Dip the Bites: Working one at a time, use a fork to dip each frozen cheesecake bite into the melted chocolate. Ensure the bite is completely coated.
- Let Excess Chocolate Drip Off: Gently tap the fork against the edge of the bowl to remove any excess chocolate.
- Place on Baking Sheet: Place the coated cheesecake bite back onto the parchment-lined baking sheet.
- Repeat: Repeat the process with the remaining bites.
- Set the Coating: Return the coated bites to the freezer for 15 minutes, or until the chocolate is fully set.
Step 7: Serve and Store
- Serve: Enjoy the cheesecake bites chilled for the best flavor and texture.
- Store: Store any leftovers in an airtight container in the freezer for up to two weeks.
Pro Tips for Perfect Cheesecake Bites
- Room Temperature Ingredients: Bring the cream cheese, sour cream, and eggs to room temperature to ensure a smooth filling.
- Firm Crust: Press the graham cracker crust tightly into the pan to avoid crumbling when cutting.
- Clean Slices: Dip your knife in warm water and wipe it clean between cuts for neat, even squares.
- Choose the Right Chocolate: Use high-quality semi-sweet chocolate for the best flavor and texture.
- Add Toppings: Sprinkle crushed nuts, sprinkles, or sea salt onto the chocolate coating before it sets for added flair.
Nutritional Information (Per Bite, Based on 24 Bites)
| Nutrient | Amount |
|---|---|
| Calories | 150 |
| Total Fat | 10 g |
| Saturated Fat | 6 g |
| Carbohydrates | 12 g |
| Sugar | 9 g |
| Protein | 2 g |
FAQs About Chocolate Covered Cheesecake Bites
1. Can I use a different crust?
Yes, you can substitute the graham cracker crust with crushed Oreos, digestive biscuits, or a gluten-free alternative.
2. Can I use milk or dark chocolate for the coating?
Absolutely! Choose your favorite type of chocolate, but keep in mind that semi-sweet chocolate provides a balanced sweetness.
3. Can I skip the coconut oil?
You can use vegetable oil instead of coconut oil, or skip it entirely. However, coconut oil helps create a smooth and shiny chocolate coating.
4. Can I freeze these bites long-term?
Yes, these cheesecake bites can be frozen for up to two weeks. Just store them in an airtight container.
5. How can I make these gluten-free?
Use gluten-free graham crackers or cookies for the crust.
6. What’s the best way to serve these bites?
Serve them chilled directly from the freezer for the best texture and flavor.
Final Thoughts
These Chocolate Covered Cheesecake Bites: A Perfect Mini Dessert are everything you want in a dessert—rich, creamy, chocolatey, and perfectly bite-sized. Whether it’s for a party, a holiday celebration, or just because you’re craving something sweet, these cheesecake bites will never disappoint.
So, gather your ingredients and start creating this irresistible dessert. You’ll not only satisfy your sweet tooth but also impress anyone lucky enough to try them!
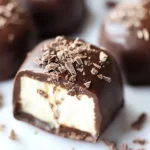
Chocolate Covered Cheesecake Bites: A Perfect Mini Dessert
- Total Time: 4 hours (includes freezing and setting)
- Yield: 24 bites
Description
These Chocolate Covered Cheesecake Bites are bite-sized morsels of indulgence. With a buttery graham cracker crust, creamy cheesecake filling, and a rich chocolate coating, they’re the perfect dessert for any occasion. These no-fuss treats are freezer-friendly and great for parties, holidays, or a delicious personal indulgence.
Ingredients
-
For the Crust:
- 9 whole graham cracker sheets, crushed into fine crumbs
- ½ cup butter, melted (1 stick)
-
For the Cheesecake Filling:
- 16 oz cream cheese, softened
- ½ cup granulated sugar
- ¼ cup sour cream
- 2 large eggs
- 2 teaspoons vanilla extract
- 1 tablespoon all-purpose flour
- ½ teaspoon salt
-
For the Chocolate Coating:
- 16 oz semi-sweet chocolate, chopped
- 4 tablespoons coconut oil
Instructions
Prepare the Crust
- Preheat your oven to 325°F (160°C). Line an 8×8-inch square baking pan with parchment paper, leaving an overhang on the sides for easy removal.
- In a medium bowl, combine the graham cracker crumbs and melted butter. Stir until the crumbs are evenly coated.
- Press the mixture firmly into the bottom of the prepared pan to form an even crust.
- Bake the crust for 10 minutes, then set it aside to cool while preparing the filling.
Make the Cheesecake Filling
- In a large mixing bowl, beat the softened cream cheese and sugar together until smooth and creamy.
- Add sour cream, eggs, vanilla extract, flour, and salt. Mix on low speed until just combined. Avoid overmixing to prevent cracks in the cheesecake.
- Pour the cheesecake mixture over the cooled crust, spreading it evenly.
Bake the Cheesecake
- Bake for 30–35 minutes, or until the center is set and only slightly jiggles when shaken.
- Let the cheesecake cool completely at room temperature. Then refrigerate it for at least 2 hours, or until firm.
Cut and Freeze the Cheesecake Bites
- Use the parchment overhang to lift the cheesecake out of the pan. Place it on a cutting board and cut into bite-sized squares.
- Arrange the cheesecake squares on a parchment-lined baking sheet. Freeze them for at least 1 hour to make dipping easier.
Prepare the Chocolate Coating
- In a microwave-safe bowl, combine the chopped chocolate and coconut oil. Microwave in 20–30 second intervals, stirring after each, until fully melted and smooth.
Coat the Cheesecake Bites
- Dip each frozen cheesecake bite into the melted chocolate, ensuring it’s completely coated. Use a fork to lift it out and let the excess chocolate drip off.
- Place the coated bites back onto the parchment-lined baking sheet.
- Repeat with all bites, then freeze for an additional 15 minutes, or until the chocolate is set.
Serve and Store
- Serve the cheesecake bites chilled for the best flavor and texture.
- Store leftovers in an airtight container in the freezer for up to 2 weeks.
Notes
- Ensure all filling ingredients are at room temperature to avoid lumps in the batter.
- Use a sharp knife dipped in warm water for clean slices.
- Customize the chocolate coating with white chocolate, dark chocolate, or sprinkles for a festive touch.
- Prep Time: 25 minutes
- Cook Time: 35 minutes
- Category: Dessert
- Method: Baking + Freezing
- Cuisine: American


