")
As I watched the chocolate chips melt into a gooey center, I couldn’t help but smile, anticipating the magic of my Chocolate Hazelnut Thumbprint Cookies. The process of creating these treats is almost an art form, where buttery dough transforms into decadent cookies rolled in crunchy hazelnuts. Not only do they deliver an irresistible combination of textures, but they also offer the kind of rich flavor that reminds us why we love homemade treats. Perfect for both festive gatherings and a sweet everyday indulgence, these cookies are sure to impress. Plus, with easy variations to play with, like swapping in caramel or fruit jams, there’s room for creativity and personalization. So, are you ready to whip up a batch that will make your kitchen smell heavenly?
Why Will You Crave These Cookies?
Irresistible Flavors: The blend of rich chocolate and nutty hazelnuts makes every bite a heavenly experience.
Easy to Make: With straightforward steps, you can whip these cookies up in no time, even as a beginner.
Versatile Variations: Feel free to experiment! Try filling them with fruit jams or caramel for a delightful twist.
Crowd Pleaser: Perfect for gatherings, these cookies are sure to impress family and friends, much like the delightful Millies Cookies Bake experience.
Beautiful Presentation: Their charming thumbprint design and toppings make them visually stunning, ideal for festive occasions.
Long-Lasting Treats: Store these cookies easily, ensuring your sweet cravings are satisfied for days to come. Enjoy your homemade indulgence!
Chocolate Hazelnut Thumbprint Ingredients
For the Dough
- Unsalted Butter – Provides richness and moisture for a tender cookie. Ensure it is softened for easy mixing.
- Granulated Sugar – Adds sweetness to balance the cocoa’s bitterness. Can be substituted with brown sugar for a deeper flavor.
- Vanilla Extract – Enhances the overall flavor profile. Use pure vanilla for the best taste.
- All-Purpose Flour – The main structural component of the cookie. Substitute with gluten-free flour blend if needed.
- Cocoa Powder – Adds chocolate flavor and a dark color to the dough. Use unsweetened cocoa for the best results.
- Salt – Enhances flavor by balancing sweetness. Do not omit, as it is essential for taste.
For the Coating
- Finely Chopped Hazelnuts – Coating that adds crunch and a nutty flavor. Substitute with chopped almonds or walnuts if desired.
For the Filling
- Chocolate Hazelnut Spread (such as Nutella) – The decadent filling that defines the cookie. For variation, use fruit jams like raspberry or strawberry.
- Whole Hazelnuts (optional) – For garnish and added texture. Consider toasting for enhanced flavor.
Step‑by‑Step Instructions for Chocolate Hazelnut Thumbprint Cookies
Step 1: Prep the Dough
Begin by creaming together 1 cup of softened unsalted butter and 1 cup of granulated sugar in a mixing bowl until the mixture is light and fluffy, about 3-5 minutes. Then, blend in 1 teaspoon of pure vanilla extract for a fragrant touch. This forms the foundation of your Chocolate Hazelnut Thumbprint Cookies.
Step 2: Combine Dry Ingredients
In a separate bowl, sift together 2 cups of all-purpose flour, ½ cup of unsweetened cocoa powder, and ½ teaspoon of salt. Gradually add this dry mixture to the creamed butter and sugar, mixing until a soft dough forms. It should be cohesive yet slightly sticky, perfect for rolling into balls.
Step 3: Roll the Cookies
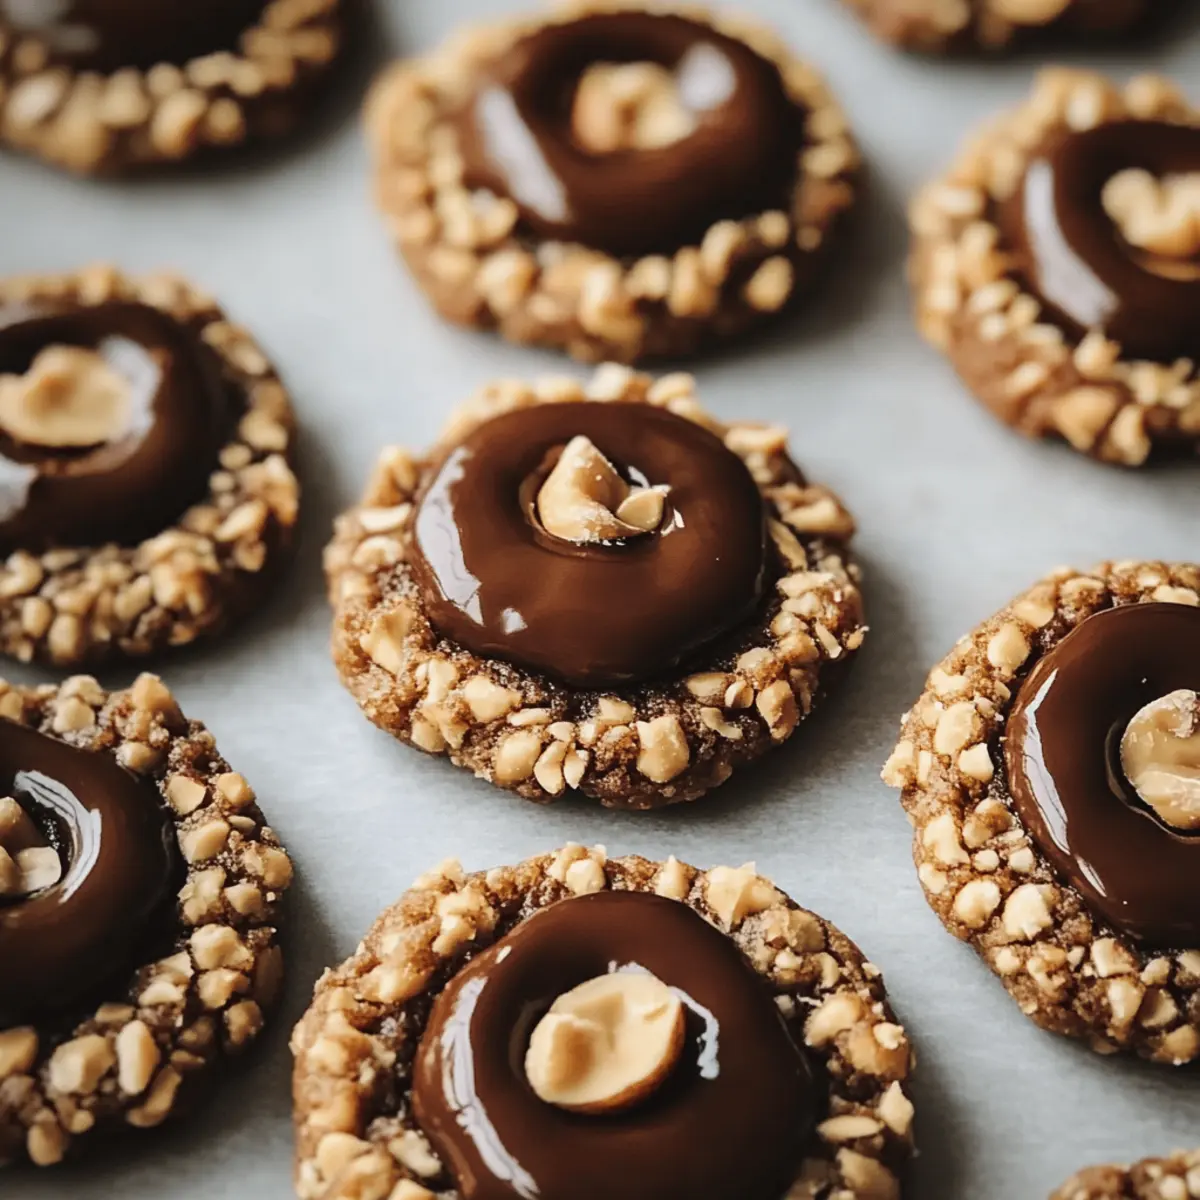
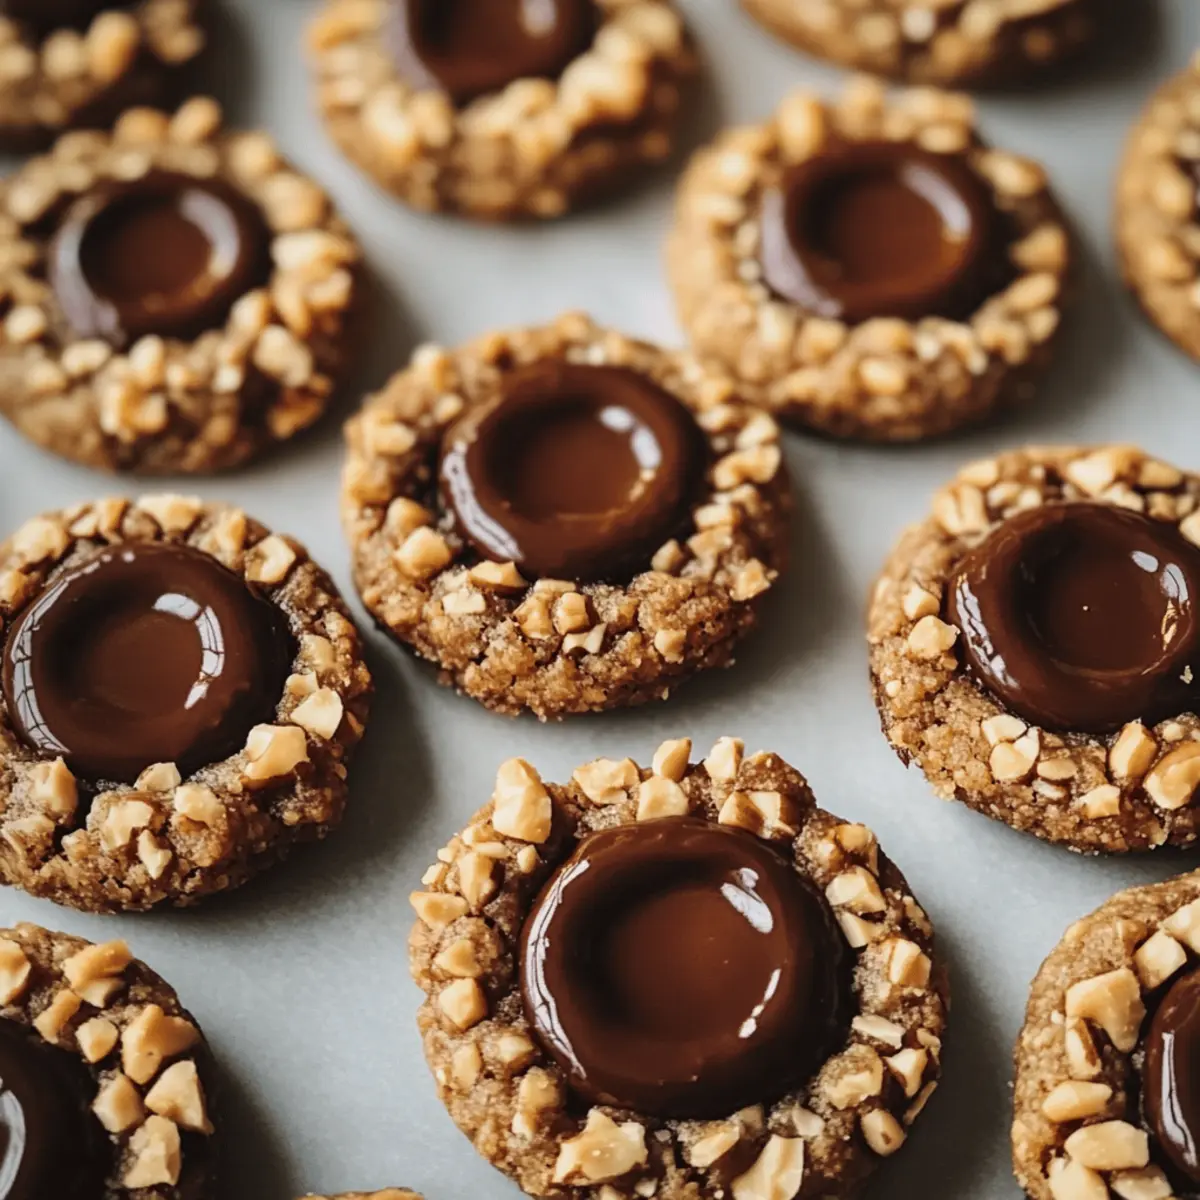
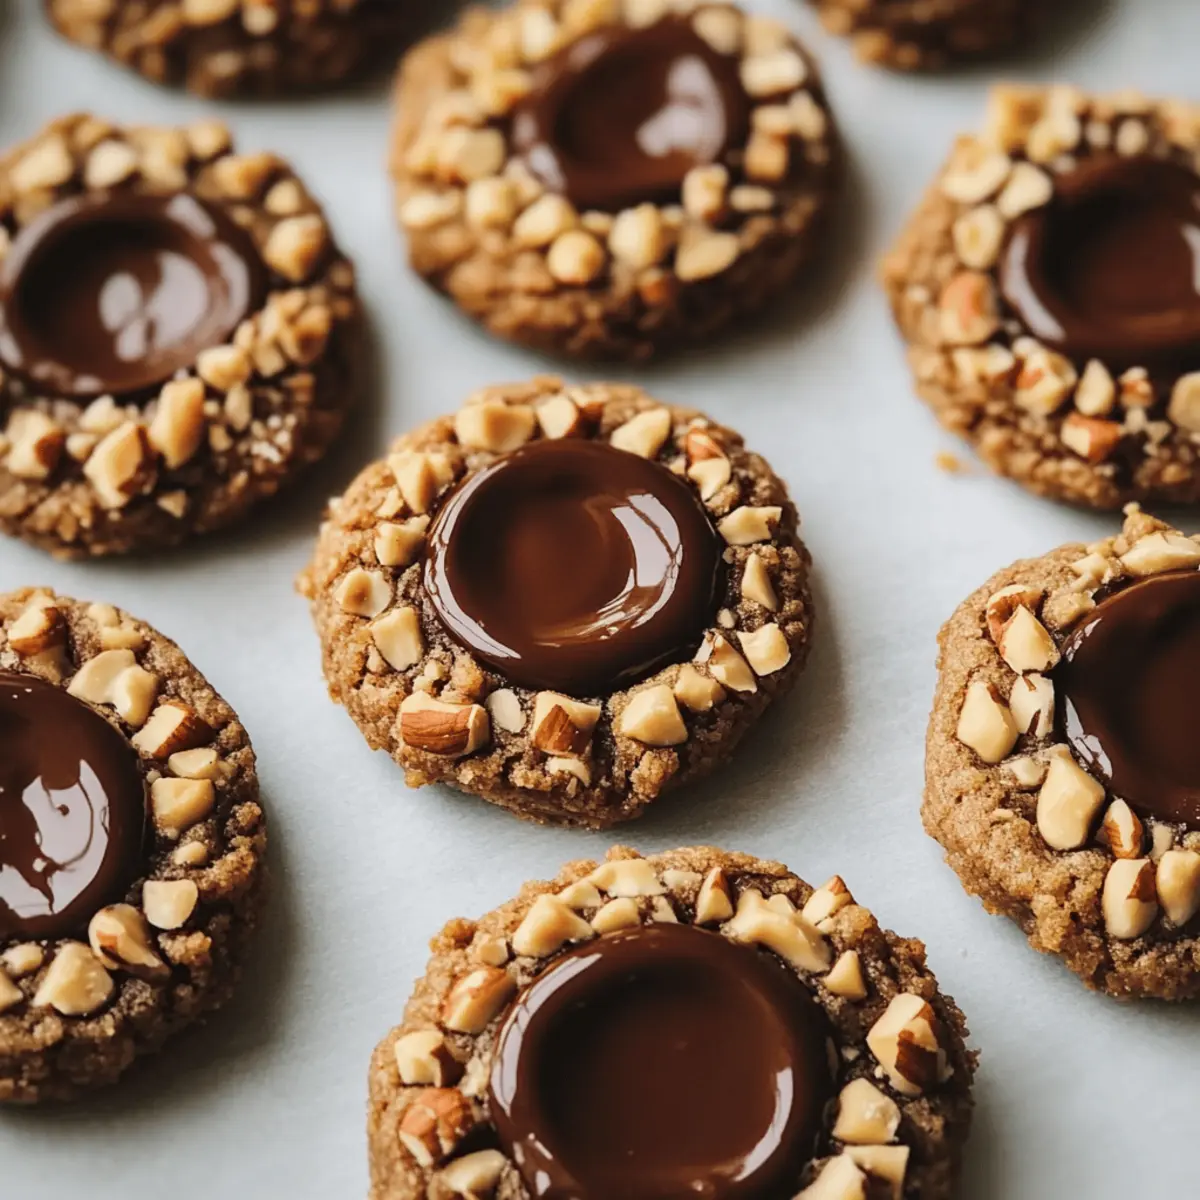
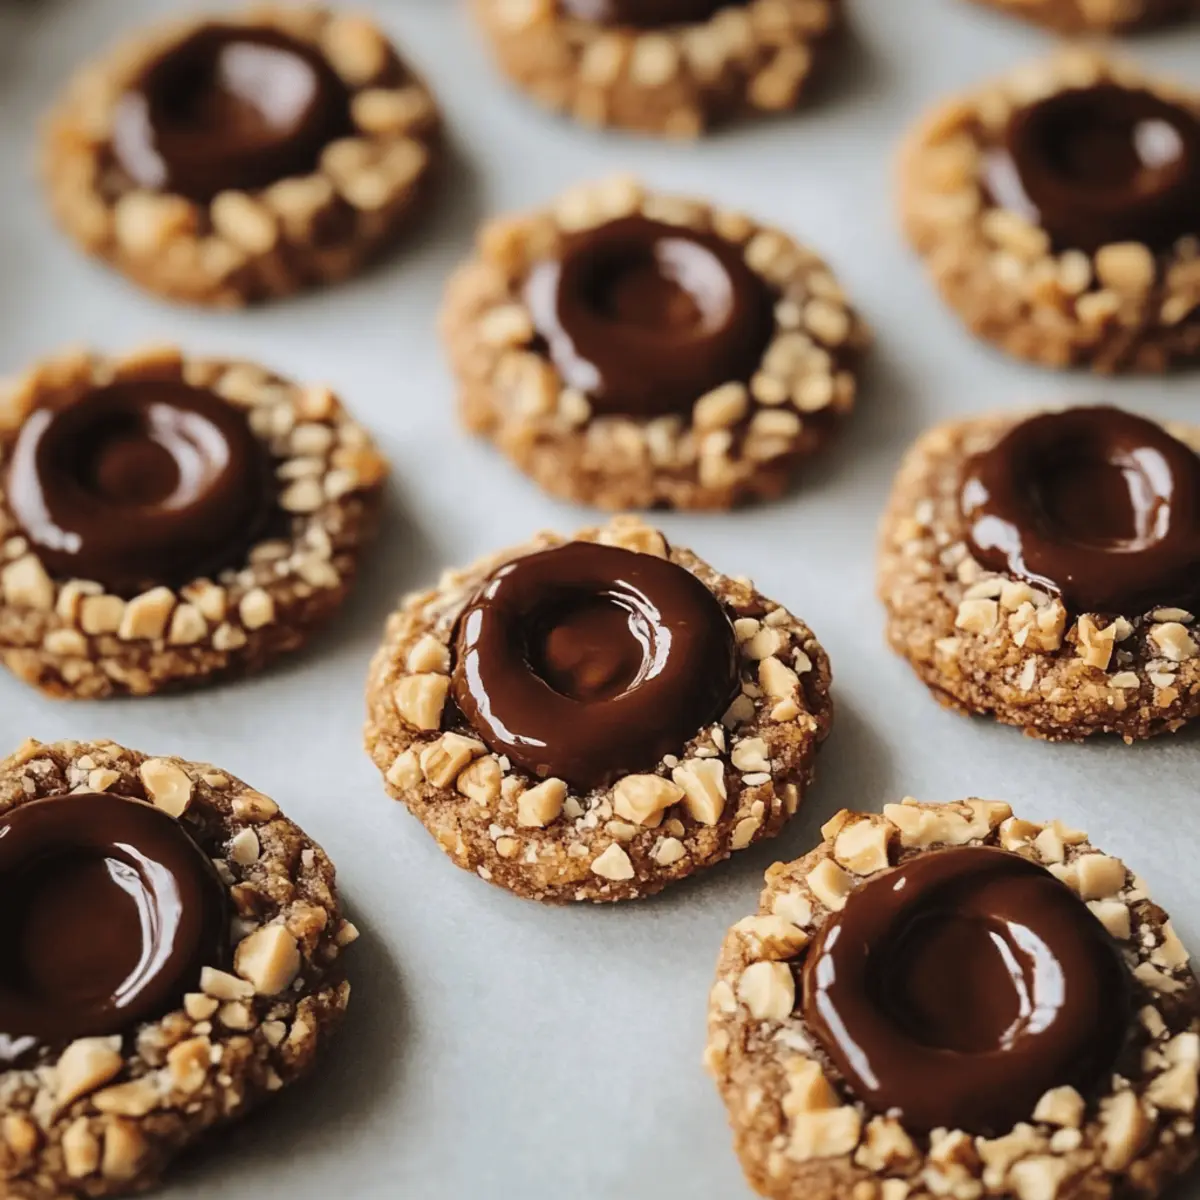
Preheat your oven to 350°F (175°C) and line a baking sheet with parchment paper. Take small portions of the dough and roll them into 1-inch balls. Then, gently roll each ball in finely chopped hazelnuts, ensuring they are well-coated. This adds a delightful crunch to your Chocolate Hazelnut Thumbprint Cookies.
Step 4: Create Indentations
Using the back of a rounded measuring spoon or a melon baller, press a thumbprint into each dough ball. Aim for a deep enough indentation to accommodate a generous filling later on. This step is crucial for creating the signature look of your Chocolate Hazelnut Thumbprint Cookies.
Step 5: Bake
Place the prepared cookies on the lined baking sheet, spacing them about 2 inches apart. Bake in your preheated oven for 10-12 minutes, or until set but still soft in the center. After removing them from the oven, re-press the thumbprint with the scoop tool while they are warm for perfect pockets.
Step 6: Fill
Allow the cookies to cool for about 5 minutes on the baking sheet before transferring them to a wire rack. Once slightly cooled, fill each thumbprint with your favorite chocolate hazelnut spread, ensuring each center is generously filled and beautifully glossy.
Step 7: Garnish (if desired)
For an extra touch of elegance, gently press a whole hazelnut into the center of each filled thumbprint cookie. This not only enhances the visual appeal but also adds a wonderful crunch, making your Chocolate Hazelnut Thumbprint Cookies even more irresistible.
Expert Tips for Chocolate Hazelnut Thumbprint Cookies
-
Butter Consistency: Make sure your butter is softened properly for easy mixing and to achieve the right dough consistency. Cold butter can lead to a dense cookie.
-
Chop Hazelnuts Finely: For the best coverage, chop your hazelnuts finely; this ensures they adhere well to the dough and add that perfect crunch.
-
Repress Indentations: If the thumbprints flatten during baking, simply repress them while still warm. This ensures a deep enough pocket for the chocolate hazelnut spread.
-
Cool Before Filling: Allow the cookies to cool slightly before filling them with the chocolate hazelnut spread. This prevents the filling from melting too much and helps maintain a nice texture.
-
Storage for Freshness: Store your Chocolate Hazelnut Thumbprint Cookies in an airtight container at room temperature. For optimal freshness, freeze them in a single layer before transferring to a container.
What to Serve with Irresistible Chocolate Hazelnut Thumbprint Cookies
Indulging in these cookies doesn’t just stop at the last bite; imagine a complete dessert experience awaiting you!
- Classic Milk: The rich, creamy texture of cold milk perfectly balances the decadent chocolate filling, enhancing every mouthful.
- Fresh Berries: Add a pop of freshness alongside your cookies with strawberries or raspberries, which contrast beautifully with the sweet chocolate. Their tartness provides a delightful surprise!
- Vanilla Ice Cream: A scoop of velvety vanilla ice cream atop your cookie creates a heavenly combo, especially as the chocolate hazelnut spread warms slightly from the cookie’s heat.
- Espresso: For those who appreciate a caffeine kick, a shot of espresso offers a bold flavor that complements the chocolate, elevating the entire experience.
- Caramel Sauce: Drizzle warm caramel sauce over your cookies for an extra layer of indulgence. The smooth and buttery caramel pairs excellently with the nuttiness of hazelnuts.
- Whipped Cream: Light and airy whipped cream adds a fluffy texture to the rich cookies. Consider serving it alongside for a delightful contrast in each bite!
- Nutty Hot Chocolate: A steaming cup of nutty hot chocolate echoes the flavors in your cookies, wrapping up your treat with warmth and nostalgia.
- Fruit Jam: Serve your cookies with a side of raspberry or strawberry jam for dipping. The sweetness and acidity of the jam elevate the flavors beautifully.
Make Ahead Options
These Chocolate Hazelnut Thumbprint Cookies are a fantastic choice for meal prep, saving you valuable time during busy weeks! You can prepare the cookie dough up to 24 hours in advance by wrapping it tightly in plastic wrap and refrigerating it, which helps enhance the flavors as it chills. Additionally, you can roll the cookie balls and coat them in finely chopped hazelnuts up to 3 days ahead. When you’re ready to bake, simply follow the baking instructions and fill them with chocolate hazelnut spread once cooled. To keep the cookies just as delicious, store them in an airtight container at room temperature for up to a week, ensuring they maintain their tender texture. Enjoy the convenience of having these lovely treats ready to go!
How to Store and Freeze Chocolate Hazelnut Thumbprint Cookies
Room Temperature: Keep your cookies in an airtight container at room temperature for up to 1 week to maintain freshness and flavor.
Freezer: For longer storage, freeze the cookies in a single layer on a baking sheet before placing them in an airtight container. They can last up to 3 months.
Thawing: When you’re ready to enjoy the cookies again, simply thaw them at room temperature for about 30 minutes before serving.
Reheating: For a warm, melty experience, you can pop the cookies in the microwave for about 10-15 seconds. Enjoy the rich chocolate hazelnut goodness!
Chocolate Hazelnut Thumbprint Cookies Variations
Feel free to explore these delightful twists on your Chocolate Hazelnut Thumbprint Cookies adventure, enhancing flavors and textures to suit your tastes!
-
Jam-Filled: Swap chocolate hazelnut spread for fruit jams like raspberry or strawberry for a fruity zing. The tart sweetness works beautifully with the buttery cookie base.
-
Caramel Delight: Use caramel or dulce de leche as the filling instead, and sprinkle a pinch of sea salt on top for a sweet and savory contrast. This decadent switch gives an indulgent layer to your cookies.
-
Nut Alternatives: Replace finely chopped hazelnuts with chopped almonds or walnuts for a different nutty essence. Almonds add a slightly sweeter flavor, while walnuts bring a hearty crunch.
-
Coconut Twist: Roll the cookie balls in shredded coconut before baking for an exotic flavor profile. This adds both sweetness and texture, turning each bite into a tropical delight.
-
Chocolate Coating: After filling with chocolate hazelnut spread, dip the tops of the cookies in melted chocolate for extra richness. You’ll create a dreamy, chocolate-laden treat everyone will adore.
-
Spiced Up: Add a pinch of cinnamon or nutmeg to the dough for a warm, comforting spice blend. This subtle addition elevates the flavor, embracing cozy vibes with every bite.
-
Gluten-Free: Substitute all-purpose flour with a gluten-free baking blend to accommodate dietary needs while still achieving a delicious texture. Everyone can enjoy these treats!
Feeling inspired? If you enjoy baking cookies, you might want to try our delightful Millies Cookies Bake or whip up a batch of indulgent Chocolate Chips Cookies for a classic experience!
Chocolate Hazelnut Thumbprint Cookies Recipe FAQs
How do I choose ripe ingredients for this recipe?
Absolutely! When selecting your hazelnuts, look for whole hazelnuts that are firm and plump, without any dark spots or blemishes. If you’re using fruit jams for a filling, opt for those with vibrant colors and no added preservatives to preserve the natural flavors.
How should I store my cookies, and how long will they last?
You can keep your Chocolate Hazelnut Thumbprint Cookies in an airtight container at room temperature for up to one week. They maintain their delightful texture! If you want to store them longer, consider freezing them for optimal freshness.
Can I freeze Chocolate Hazelnut Thumbprint Cookies? How?
Very! To freeze, lay your cookies in a single layer on a baking sheet for about 2 hours until firm. Then, transfer them to an airtight container or freezer bag. They’ll stay fresh for up to three months! When you’re ready to enjoy them, simply thaw them at room temperature for about 30 minutes.
What if my cookies spread too much while baking?
If your cookies spread out more than you’d like, this could be due to the butter being too warm or not enough flour. For the perfect consistency, ensure your butter is soft but not melted. If the dough feels sticky, chilling it in the fridge for about 15-30 minutes before baking can help create a firmer dough.
Are these cookies safe for those with nut allergies?
Not necessarily! This recipe includes hazelnuts and chocolate hazelnut spread, which can be problematic for those with nut allergies. I recommend using a nut-free chocolate spread and omitting the nuts altogether or substituting with seeds like sunflower seeds if you want a similar texture while keeping it safe.
Can I replace the chocolate hazelnut spread with something else?
Absolutely! If you’re looking for variations, you can fill your thumbprints with fruit jams, like raspberry or strawberry, or even try caramel or dulce de leche topped with a sprinkle of sea salt. The more the merrier!
Delicious Chocolate Hazelnut Thumbprint Cookies You’ll Love
Ingredients
Equipment
Method
- Cream together 1 cup of softened unsalted butter and ¾ cup of granulated sugar in a large mixing bowl. Use an electric mixer on medium speed until light and fluffy, about 2-3 minutes. Beat in 1 teaspoon of vanilla extract.
- In a separate bowl, sift together 2 cups of all-purpose flour, ½ cup of unsweetened cocoa powder, and ½ teaspoon of salt. Gradually add this to the creamed mixture, stirring until a soft dough forms.
- Roll about 1 tablespoon of dough into a ball, then roll in 1 cup of finely chopped hazelnuts. Place on a parchment-lined baking sheet, leaving 2 inches between them.
- Press a deep indentation into each cookie ball using a rounded spoon or your thumb.
- Preheat oven to 350°F (175°C) and bake cookies for about 12-15 minutes. Check towards the end and gently repress the indentations if needed.
- Let baked cookies cool on the sheet for about 5 minutes, then fill each thumbprint with a teaspoon of chocolate hazelnut spread.
- If desired, press a whole hazelnut into the center of each filled thumbprint while the spread is still warm.
")