")
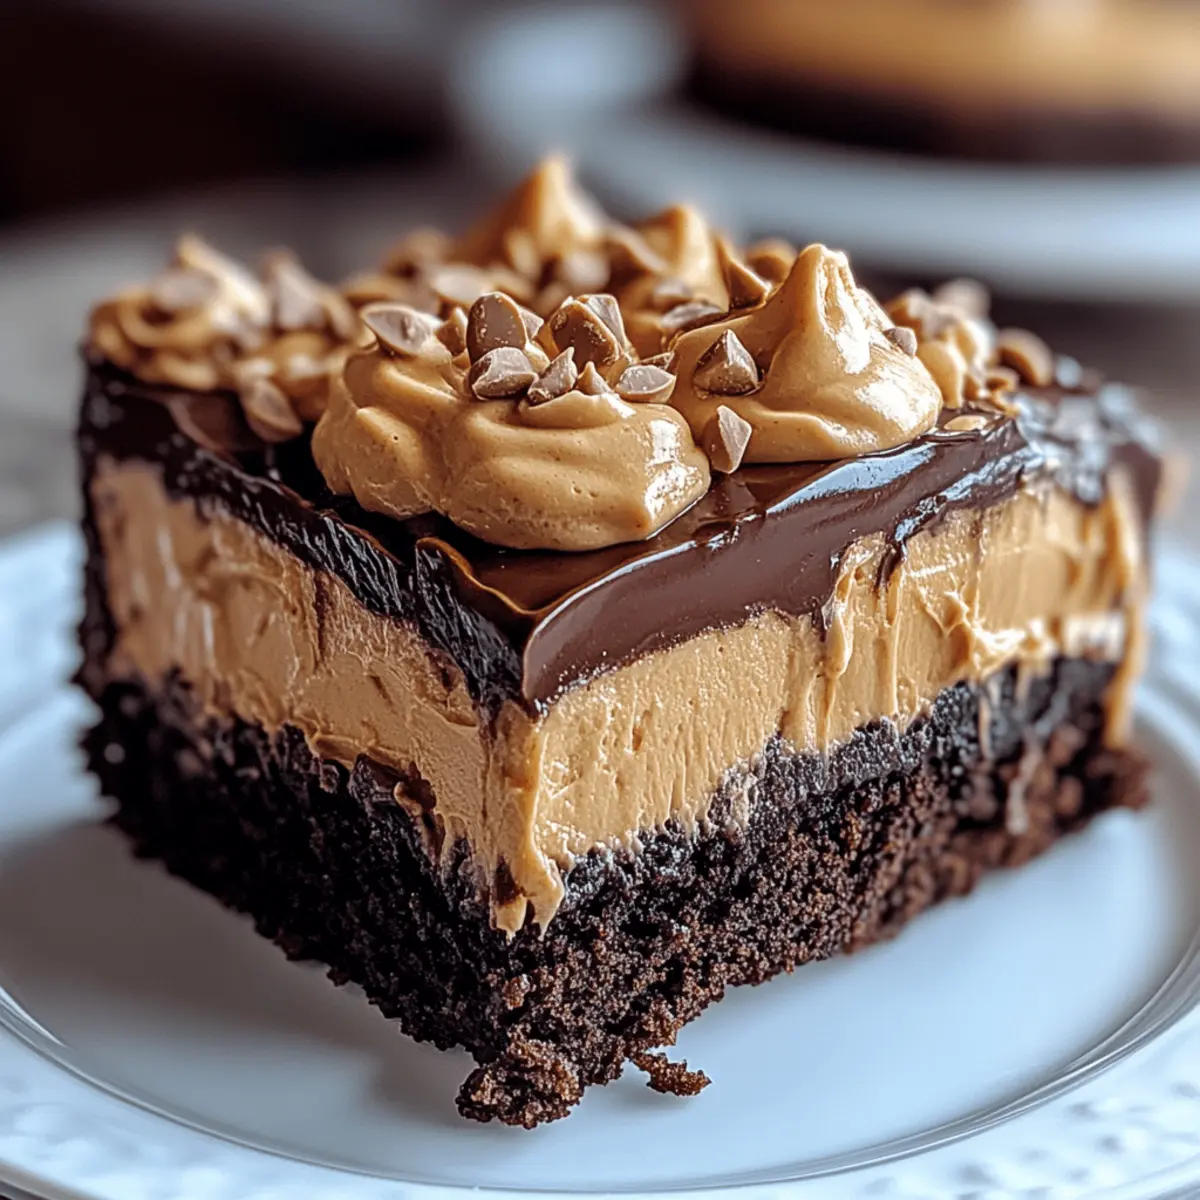
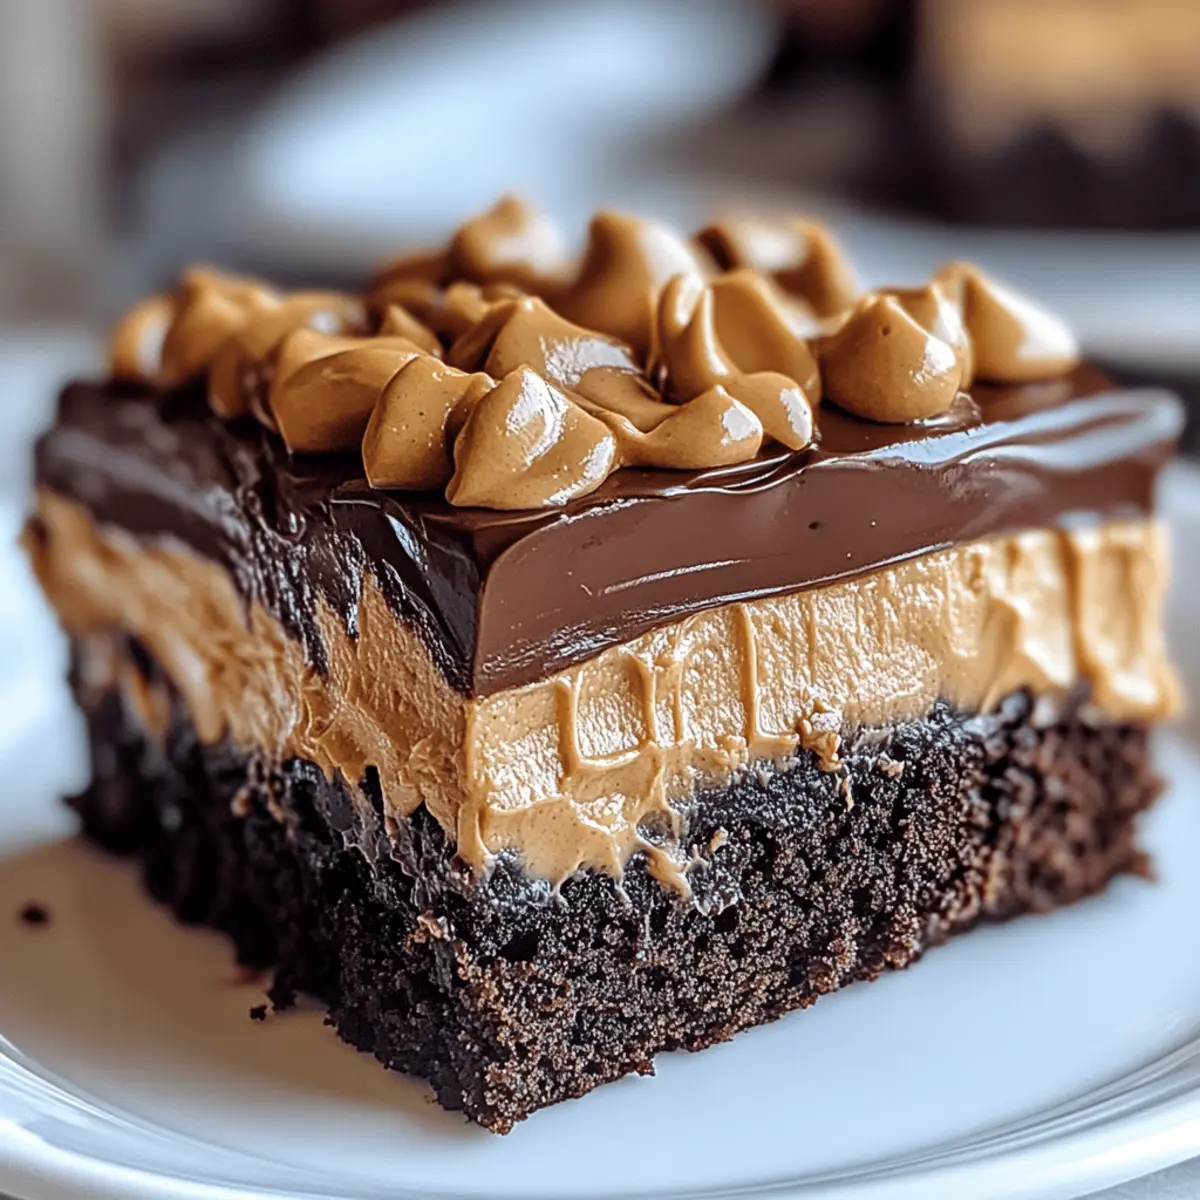
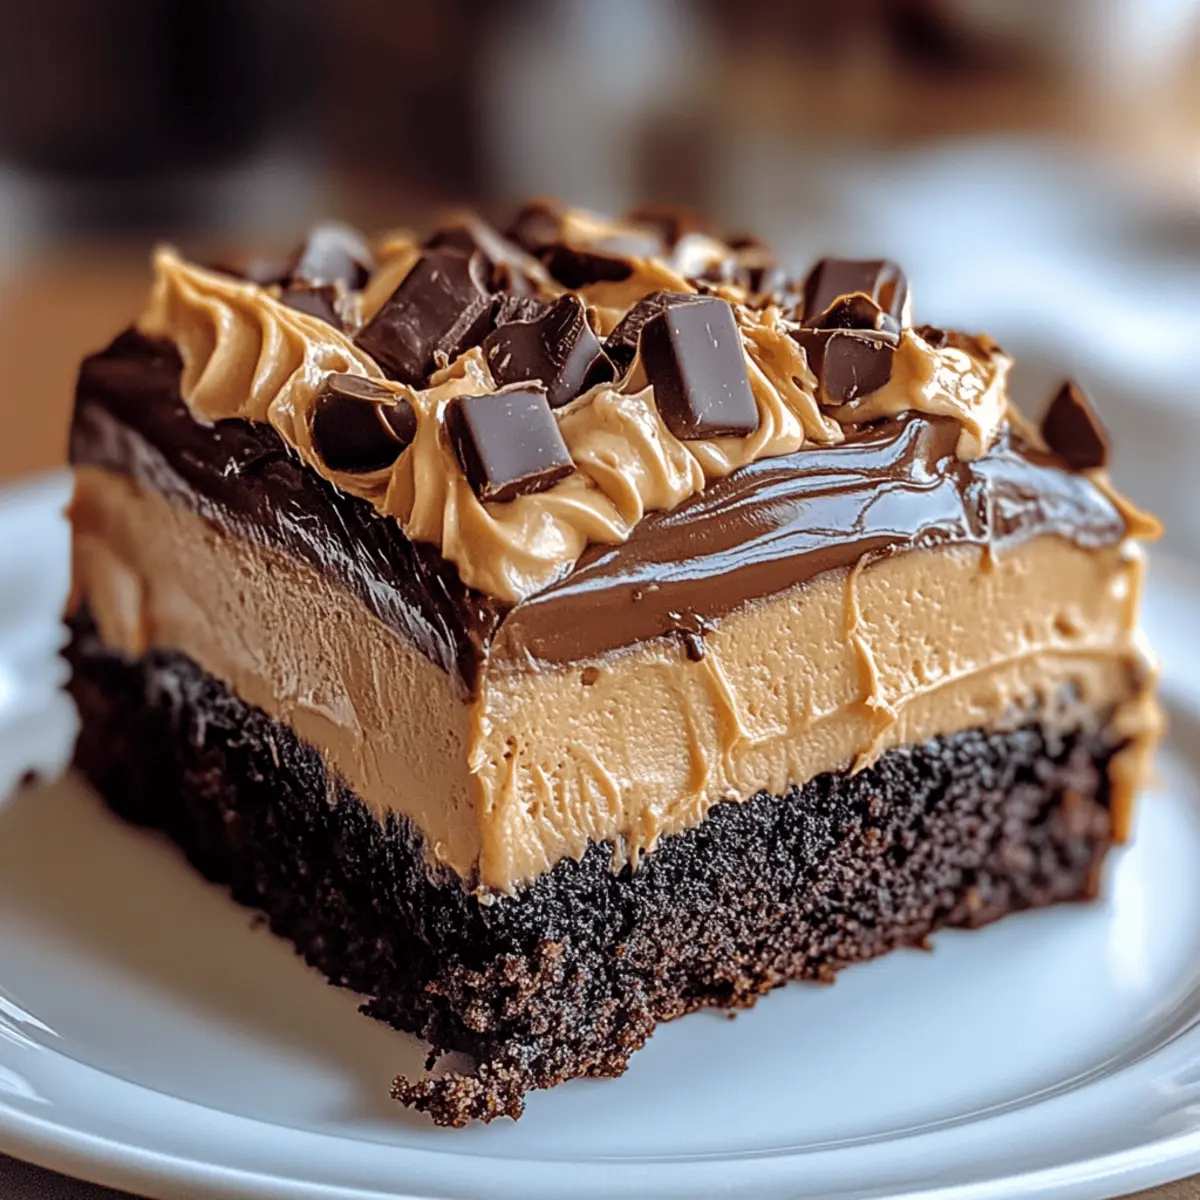
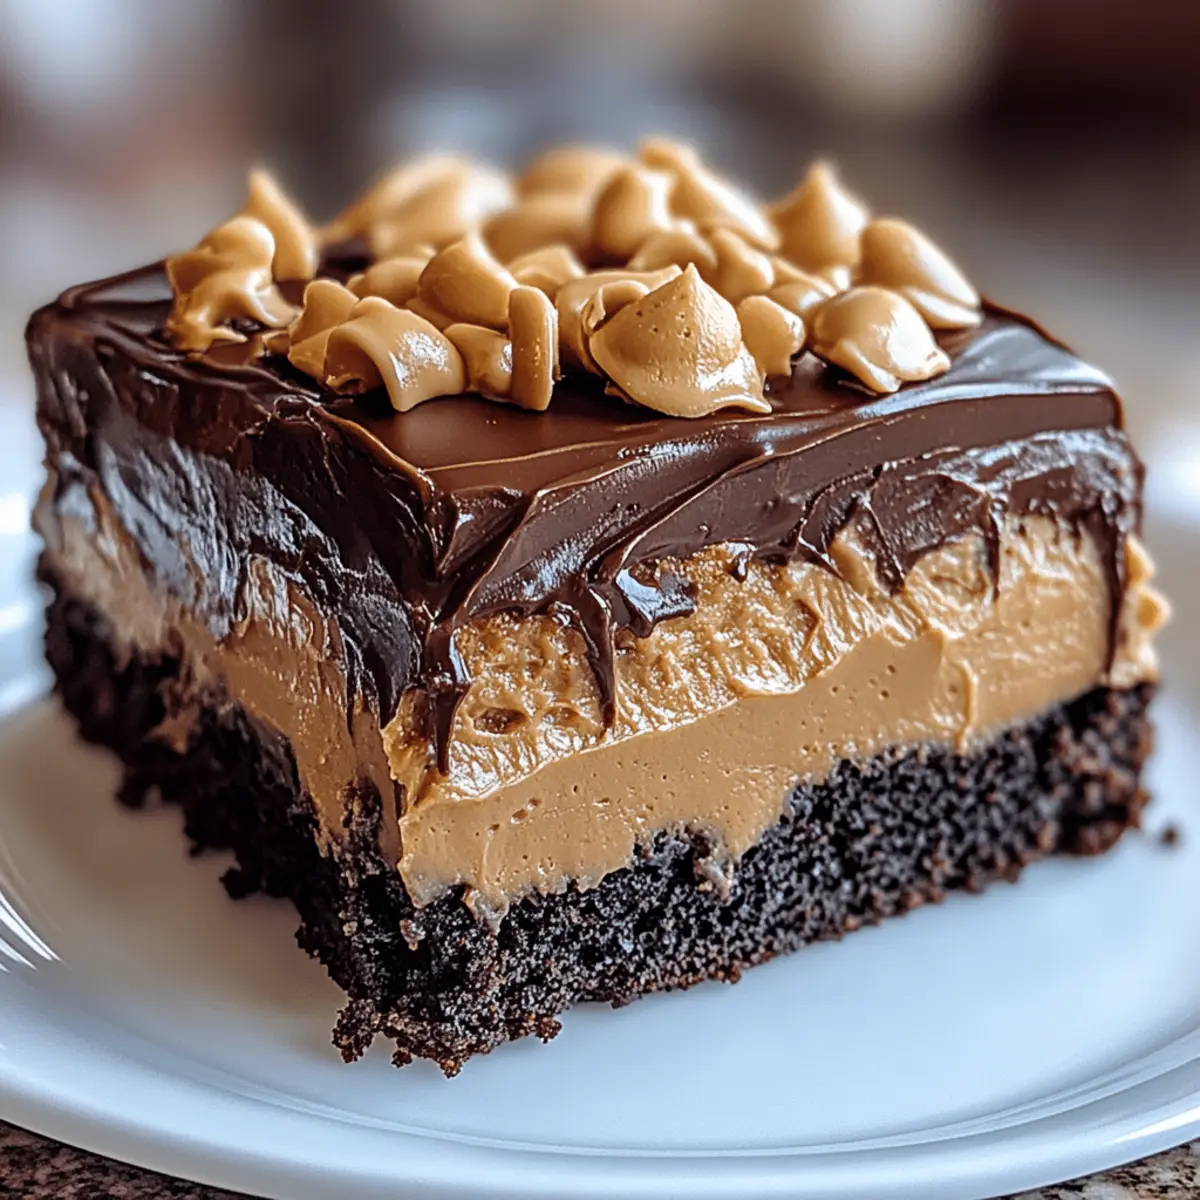
As the aroma of chocolate wafts through my kitchen, I can’t help but feel a spark of excitement—it’s like a warm hug for the senses. Today, I’m sharing my go-to recipe for a Chocolate Peanut Butter Poke Cake that has quickly become a family favorite. This dessert not only has the comforting richness of chocolate and the nostalgic taste of peanut butter but also features the magic of texture, creating a delightful balance in every bite. It’s a breeze to whip up and perfect for those who want a show-stopping treat without spending hours in the kitchen. Plus, it’s easily customizable—whether you want to make it gluten-free or switch up the frosting, the possibilities are endless. What fun twist will you add to make it uniquely yours?
Why is This Cake So Irresistible?
Simplicity at Its Best: The Chocolate Peanut Butter Poke Cake is incredibly easy to make, requiring minimal effort and time in the kitchen.
Decadent Flavor Explosion: The marriage of rich chocolate with creamy peanut butter creates a heavenly blend that will leave your taste buds dancing.
Customizable Goodness: Whether you prefer a gluten-free version or a different frosting, this cake adapts to your dietary needs and preferences effortlessly.
Make-Ahead Magic: Make this cake in advance, allowing flavors to meld for a truly indulgent treat perfect for gatherings or a cozy family night.
Crowd-Pleasing Appeal: Serve this show-stopper at parties and watch as friends and family come back for seconds! Trust me, it’s a dessert that brings everyone together, just like my Peanut Butter Crackers or my decadent Chocolate Chalet Cake.
Chocolate Peanut Butter Poke Cake Ingredients
• For the Cake
- Chocolate Cake Mix – This serves as the base of your cake; opt for a box mix for convenience or a homemade version for a personal touch.
- Eggs – Essential for binding the cake together and adding moisture; select free-range eggs for enhanced flavor.
• For the Filling
- Peanut Butter – Provides a creamy and rich flavor; choose between creamy or crunchy based on your texture preference.
- Sweetened Condensed Milk – This adds a delightful sweetness and creaminess; swap it for a dairy-free sweetened alternative for a vegan treat.
- Whole Milk – Ensures a smooth consistency in the filling; you can replace it with nut milk for a dairy-free option.
• For the Topping
- Heavy Cream – Ideal for whipping into a luscious topping; higher fat content yields better results.
- Powdered Sugar – Sweetens the whipped cream; feel free to reduce the amount or use a sugar alternative if desired.
• For Garnishing
- Chopped Reese’s Cups – Adds a fun texture and chocolate element on top; switch it out for any of your favorite chocolate candies for excitement.
- Crushed Peanuts – Delivers a delightful crunch; omit this for a nut-free version, or swap with seeds.
- Melted Chocolate – Perfect for drizzling over the top to elevate the cake’s appearance; opt for dairy-free chocolate for a vegan dessert.
This Chocolate Peanut Butter Poke Cake is not just a dessert; it’s a warm embrace of sweet nostalgia that’s bound to impress your guests!
Step‑by‑Step Instructions for Chocolate Peanut Butter Poke Cake
Step 1: Preheat the Oven
Begin by preheating your oven to 350°F (175°C) so it’s ready to bake your Chocolate Peanut Butter Poke Cake. This ensures even baking, resulting in a perfectly moist cake. While the oven warms up, gather your 9×13-inch baking dish and grease it with non-stick spray or butter for easy removal later on.
Step 2: Prepare the Cake Batter
In a large mixing bowl, prepare the chocolate cake mix according to the package instructions. If you’d like a little extra flavor, consider adding a teaspoon of vanilla extract to the batter. Make sure to mix thoroughly until you achieve a smooth consistency—this should only take a couple of minutes to ensure no lumps remain.
Step 3: Bake the Cake
Pour the prepared chocolate cake batter into the greased baking dish, using a spatula to spread it evenly. Place the dish in the oven and bake for 25–30 minutes. Check for doneness by inserting a toothpick into the center; it should come out clean or with just a few moist crumbs. Once done, remove the cake from the oven and allow it to cool for about 10 minutes.
Step 4: Prepare the Peanut Butter Filling
While the cake is cooling, grab a medium bowl and whisk together the peanut butter, sweetened condensed milk, and whole milk until the mixture is smooth and creamy. This filling will create a luscious layer in your Chocolate Peanut Butter Poke Cake, so take your time to ensure everything is well combined.
Step 5: Poke Holes in the Cake
Using the handle of a wooden spoon or a similar tool, poke holes evenly across the surface of the warm cake. This step is crucial as it allows the peanut butter filling to soak in, enhancing the flavor throughout the cake. Aim for a few holes in each section, being careful not to poke through the bottom.
Step 6: Pour the Filling
Slowly pour the creamy peanut butter mixture over the poked cake, allowing it to seep into the holes. Don’t rush this step; let the filling absorb naturally for the best results. This delicious filling infuses the cake with flavor, ensuring every bite is rich and rewarding.
Step 7: Prepare the Whipped Topping
For the topping, take a chilled mixing bowl and combine the heavy cream and powdered sugar. Using an electric mixer, whip the mixture until soft peaks begin to form. This typically takes about 2-3 minutes. Look for a light and fluffy texture that will beautifully crown your Chocolate Peanut Butter Poke Cake.
Step 8: Add Peanut Butter to the Topping
Once you’ve achieved those soft peaks, gently fold in the creamy peanut butter into the whipped cream. Continue to beat until the mixture is smooth and fluffy, which should take just another minute. This will create a light yet rich topping that complements the moist cake beautifully.
Step 9: Spread the Whipped Topping
Once the cake has cooled completely, it’s time to spread the whipped peanut butter topping over the surface. Use an offset spatula to create an even layer, ensuring you cover every inch of the cake. The fluffy topping adds a delightful contrast to the moistness of the cake.
Step 10: Garnish the Cake
To elevate your Chocolate Peanut Butter Poke Cake, sprinkle chopped Reese’s cups and crushed peanuts on top. You can also drizzle melted chocolate and peanut butter for an extra indulgent touch. This decadent garnish not only looks appealing but adds delightful crunch and flavor to your dessert.
Step 11: Chill Before Serving
Finally, refrigerate your beautifully assembled cake for at least 1 hour before serving. Chilling allows the flavors to meld together, creating a more harmonious dessert. Once chilled, slice and serve—your guests will be thrilled with this wonderful Chocolate Peanut Butter Poke Cake!
What to Serve with Chocolate Peanut Butter Poke Cake?
As you prepare to indulge in this decadent dessert, think about delightful accompaniments that will elevate your meal experience.
-
Vanilla Ice Cream: The creamy sweetness of vanilla ice cream balances the rich flavors of the cake, providing a cool contrast that melts beautifully.
-
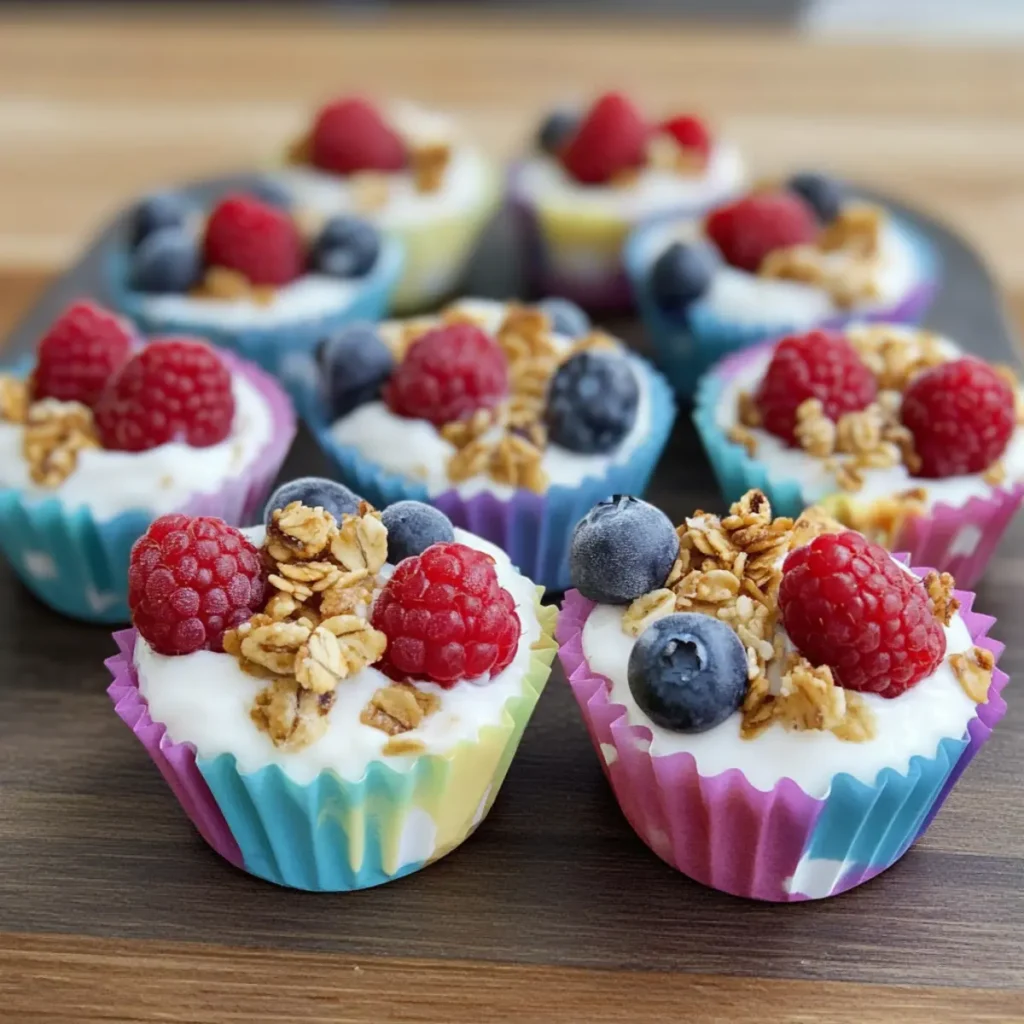
Fresh Berries: A medley of raspberries, strawberries, and blueberries adds a fresh, tart element that cuts through the sweetness, enhancing every bite of the cake.
-
Chocolate Sauce: A drizzle of warm chocolate sauce not only elevates the dessert visually but also intensifies the chocolatey bliss, making it a true chocoholic’s dream!
-
Coffee or Espresso: The bold, roasted flavors of coffee can enhance the dessert experience, creating a warm, cozy vibe perfect for gatherings or a quiet night in.
-
Nutty Whipping Cream: A dollop of whipped cream infused with crushed nuts can add delightful texture, merging flavor profiles while enriching the overall dessert experience.
-
Peanut Butter Smoothie: A light peanut butter smoothie can be a unique accompaniment, balancing the richness of the cake with a creamy, refreshing twist.
-
Caramel Sauce: The buttery sweetness of caramel drizzled over a slice of cake offers a luxurious touch, balancing the chocolate and peanut butter magnificently.
Picture a table filled with these delicious options, ready to complement your Chocolate Peanut Butter Poke Cake and create an unforgettable gathering.
Storage Tips for Chocolate Peanut Butter Poke Cake
Fridge: Store leftover Chocolate Peanut Butter Poke Cake in an airtight container for up to 3-4 days. This will keep the cake moist while preserving its delightful flavors.
Make-Ahead: Feel free to prepare the cake a day in advance; the flavors improve as they meld together in the fridge, creating an even more indulgent treat.
Freezer: If you have extra cake, freeze individual slices wrapped tightly in plastic wrap and aluminum foil for up to 2 months. Allow the cake to thaw in the fridge before serving.
Reheating: To enjoy a slice warm, gently microwave it for 10-15 seconds. Add a dollop of fresh whipped cream or peanut butter on top for an extra touch of decadence!
Chocolate Peanut Butter Poke Cake Variations
Feel free to put your own spin on this delightful dessert to make it truly yours!
-
Nut-Free: Omit peanuts and substitute with sunflower seed butter for a safe, allergy-friendly option. Enjoy the nutty richness without the worry!
-
Gluten-Free: Swap the chocolate cake mix for a gluten-free alternative, ensuring the same deliciousness while accommodating dietary needs. Your gluten-free friends will thank you!
-
Vegan Delight: Use plant-based milk, coconut cream, and a vegan chocolate cake mix to create a lovable vegan version. It’s just as rich and satisfying!
-
Flavor Adventure: Experiment with almond butter or cashew butter instead of peanut butter for a fun flavor twist. Each nut butter brings a unique taste to this indulgent treat.
-
Frosting Options: Instead of traditional whipped topping, try cream cheese frosting or rich chocolate ganache for a decadent alternative. These options can take your cake to the next level!
-
Extra Crunch: Add crushed pretzels or caramel popcorn as a topping for a delightful sweet and salty crunch. These unexpected choices will surprise your guests!
-
Fruity Twist: Top with sliced bananas or strawberries to add a fruity contrast to the rich cake. This adds freshness and a pop of color to your dessert!
-
Spicy Kick: Incorporate a dash of cayenne pepper or cinnamon into the peanut butter filling for a surprising heat element. It’s a bold twist that chocolate lovers will adore!
No matter which variation you choose, this Chocolate Peanut Butter Poke Cake is sure to be the star of any gathering! For more delightful ideas, check out my other recipes like Salted Caramel Kentucky Butter and Easy Coconut Cake Vape.
Expert Tips for Chocolate Peanut Butter Poke Cake
Make-Ahead Delight: Prepare the cake a day in advance. Allowing it to sit overnight makes the flavors meld beautifully, enhancing its richness.
Avoid Sogginess: Ensure the peanut butter filling is evenly poured and absorbed into the holes without overwhelming the cake, or it may become too soggy.
Gluten-Free Option: Easily adapt this recipe by using a gluten-free chocolate cake mix. Your guests won’t even notice the difference!
Personalize Your Toppings: Experiment with various frostings and garnishes—consider cream cheese frosting or different chocolate candies to uniquely customize your Chocolate Peanut Butter Poke Cake.
Freshness Counts: Always use fresh ingredients, particularly eggs and milk, to ensure the best flavor and texture in your dessert.
Make Ahead Options
These Chocolate Peanut Butter Poke Cake preparations are ideal for busy home cooks looking to save time! You can bake the cake up to 24 hours in advance and keep it covered at room temperature to maintain its moisture level. Prepare the peanut butter filling and chill it in the refrigerator, ensuring it’s stored in an airtight container to prevent it from drying out. When you’re ready to serve, simply poke holes in the cooled cake, pour the filling, and finish with the whipped topping. For best results, refrigerate the assembled cake for at least 1 hour to allow flavors to meld before serving. With these make-ahead tips, you can enjoy a delicious dessert without the last-minute rush!
Chocolate Peanut Butter Poke Cake Recipe FAQs
How do I choose ripe ingredients for this cake?
Absolutely! For the best flavor and texture, choose high-quality ingredients. When selecting peanut butter, aim for a brand with minimal additives; fresh, natural peanut butter will give the most delicious result. As for the eggs, free-range eggs provide superior taste and freshness, which greatly impacts the overall flavor of the cake.
How should I store leftover Chocolate Peanut Butter Poke Cake?
To keep your Chocolate Peanut Butter Poke Cake fresh, store it in an airtight container in the fridge for up to 3-4 days. Just like a warm hug in the fridge, it will maintain its moisture and flavor nicely. If you slice it, ensure each piece is covered to prevent it from drying out!
Can I freeze Chocolate Peanut Butter Poke Cake?
Yes, you can! For best results, freeze individual slices tightly wrapped in plastic wrap and then in aluminum foil. This technique allows them to stay fresh for up to 2 months. When you’re ready to indulge again, simply let the slices thaw in the fridge overnight, and then heat them gently in the microwave for about 10-15 seconds to revive that fresh-out-of-the-oven warmth.
What should I do if my cake is too soggy?
If you find that your Chocolate Peanut Butter Poke Cake turns out too soggy, it may be due to an overabundance of filling or not allowing time for the cake to absorb the filling adequately. To troubleshoot, poke holes slightly less deep next time and pour the filling slowly. This allows the cake to soak in the flavors without becoming overwhelmed. Always aim for even pouring to avoid sogginess.
Is this cake suitable for people with allergies?
You certainly can customize this recipe! If you or your guests have nut allergies, feel free to swap the peanut butter with sunflower seed butter or omit it entirely. To ensure it’s gluten-free, opt for a gluten-free chocolate cake mix, and verify that all other ingredients are safe for those with dietary restrictions. Always check labels for hidden allergens!
Can this cake be made dairy-free?
Very! To make a delicious dairy-free version of the Chocolate Peanut Butter Poke Cake, simply substitute the whole milk with a nut milk, such as almond or cashew milk, and use coconut cream in place of the heavy cream for the topping. Most brands of sweetened condensed milk offer dairy-free options as well, so check those for an easy swap!
Ultimate Chocolate Peanut Butter Poke Cake That Wow Your Guests
Ingredients
Equipment
Method
- Preheat your oven to 350°F (175°C) and grease a 9x13-inch baking dish.
- Prepare the chocolate cake mix according to the package instructions, mixing until smooth.
- Pour the batter into the baking dish and bake for 25-30 minutes until a toothpick comes out clean. Allow to cool for 10 minutes.
- Whisk together peanut butter, sweetened condensed milk, and whole milk until smooth.
- Poke holes in the cooled cake using a wooden spoon handle.
- Pour the peanut butter filling over the cake, allowing it to seep into the holes.
- Whip heavy cream and powdered sugar until soft peaks form.
- Fold in peanut butter into the whipped cream until smooth.
- Spread the whipped peanut butter topping evenly over the cooled cake.
- Garnish with chopped Reese’s cups, crushed peanuts, and drizzle with melted chocolate.
- Refrigerate for at least 1 hour before serving.
")