")
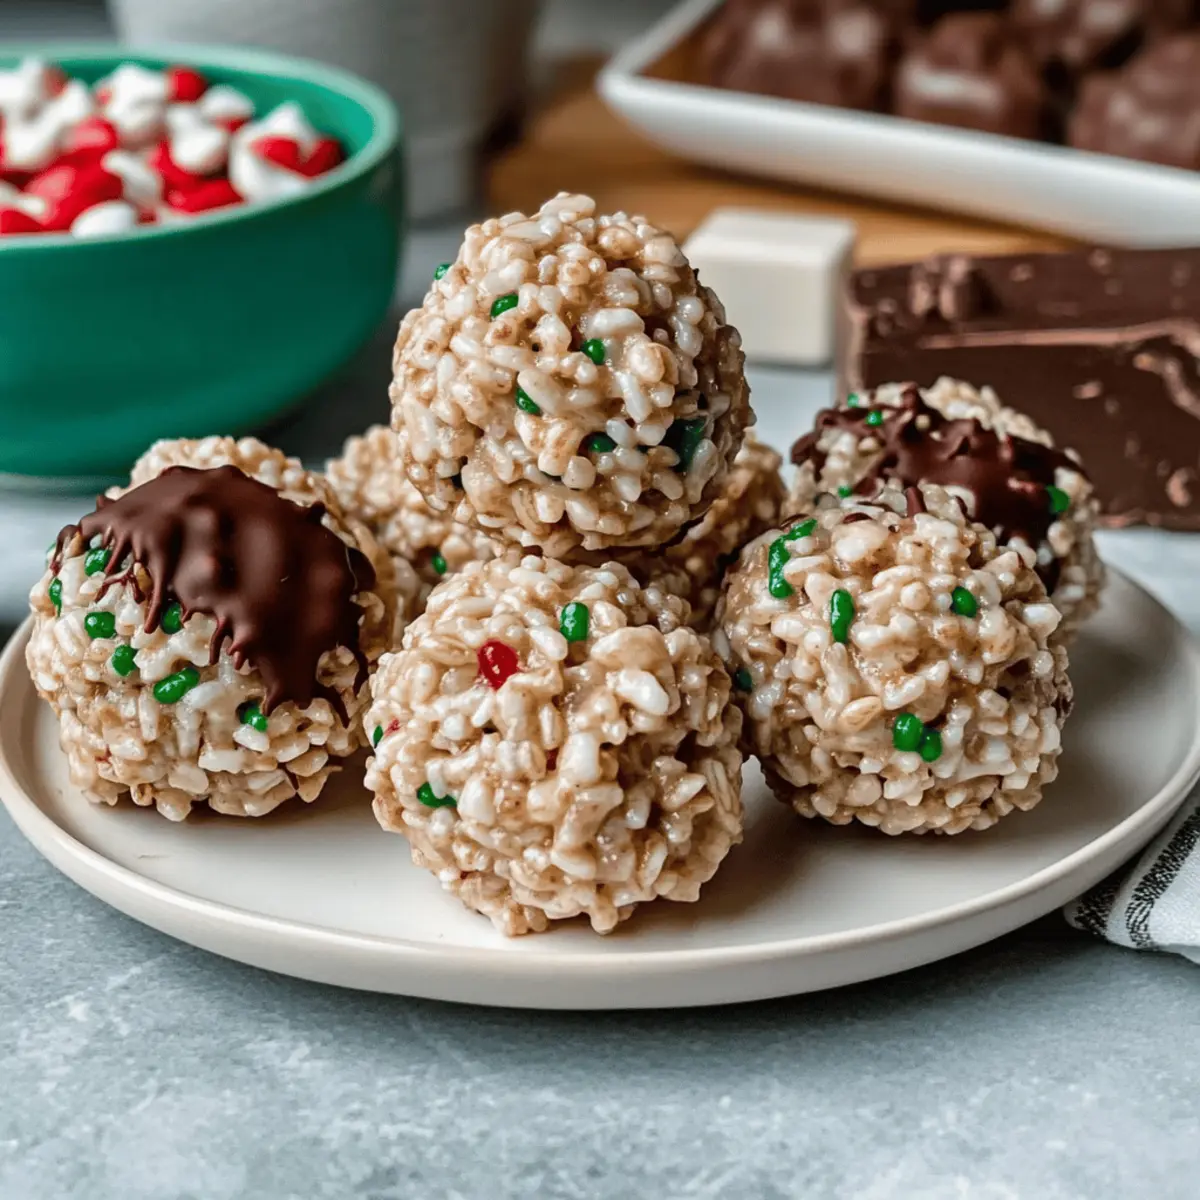
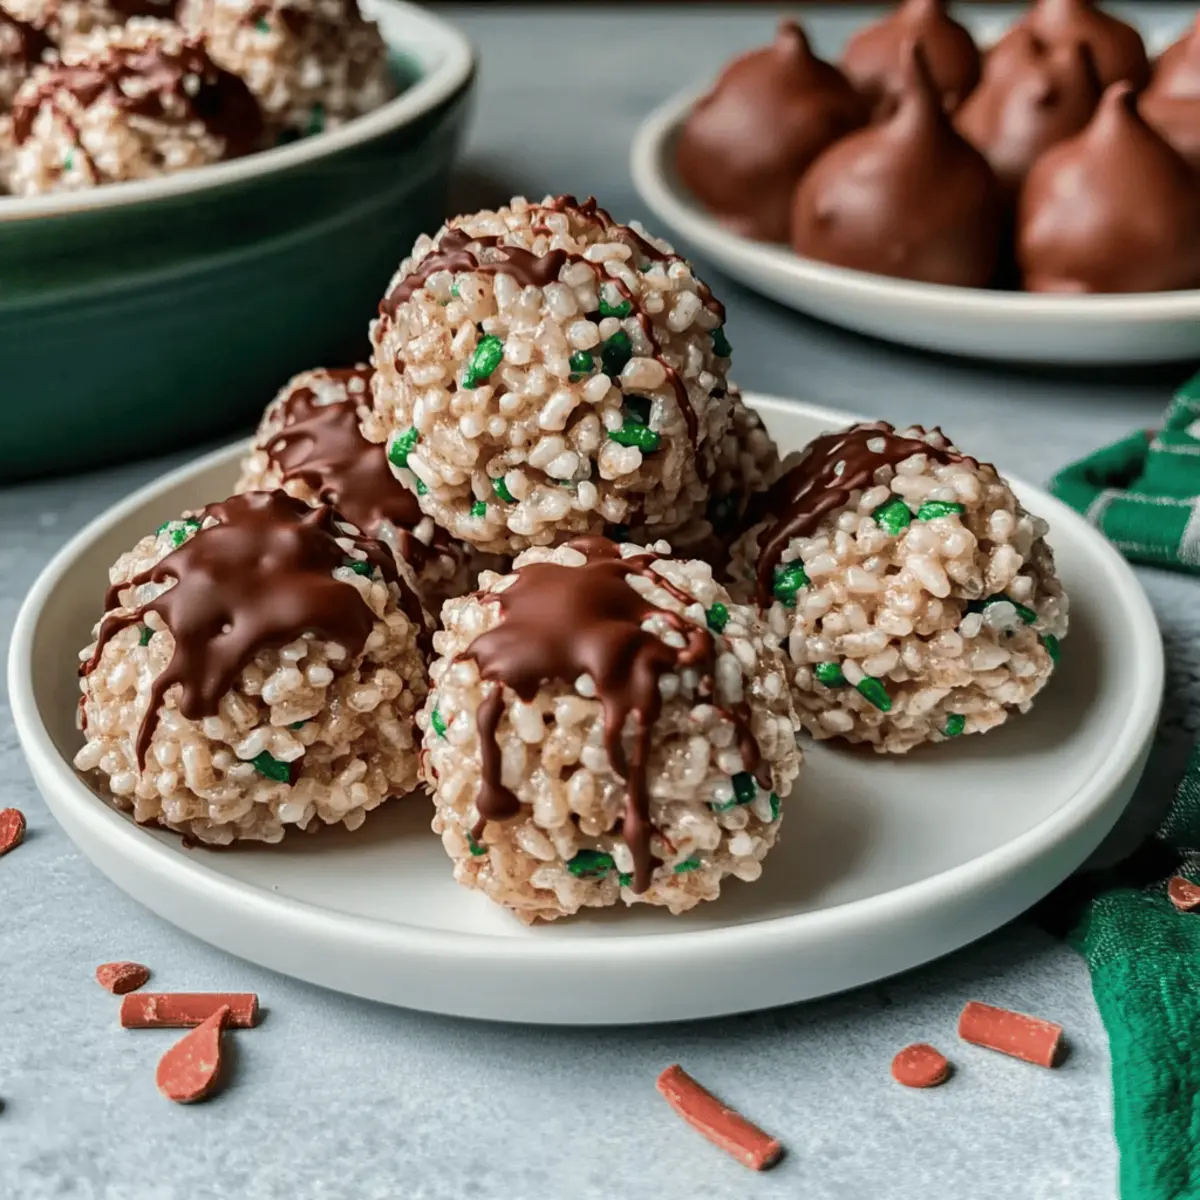
As the holidays beckon and the air turns crisp, the idea of quick, homemade treats dances in my mind. Enter Chocolate Rice Krispie Balls, the ultimate no-bake indulgence! These delightful morsels of creamy peanut butter and crunchy rice cereal wrapped in smooth chocolate can be made in just minutes, making them an ideal addition to any festive gathering. Not only do they satisfy that sweet tooth, but they also bring joy as they are perfectly customizable—add your favorite toppings or chocolate variations for a personal touch. Whether you’re looking to impress at parties or searching for the perfect gift from the kitchen, these little bites are sure to be a hit. Ready to make some magic happen in your kitchen?
Why are Chocolate Rice Krispie Balls a must-try?
Irresistible Flavor: Each bite bursts with creamy peanut butter and rich chocolate, creating a decadent treat that’s hard to resist.
Quick and Easy: These no-bake treats can be whipped up in just minutes, making them perfect for last-minute gatherings or surprise cravings.
Customizable Delight: Want to switch things up? Add your favorite toppings or chocolate variations to make each batch unique!
Perfect for Gifting: Beautifully packaged, these bites make for thoughtful homemade gifts that are guaranteed to impress friends and family.
If you’re in the mood for more sweet treats, check out my easy Chocolate Chips Cookies recipe or explore the festive fun of Baby Shower Meatballs.
Chocolate Rice Krispie Balls Ingredients
For the Base
• Peanut Butter – Adds creaminess and rich flavor; can substitute with almond or cashew butter for a different taste.
• Unsalted Butter – Binds the mixture together for the perfect texture; optional vegan alternative: coconut oil.
• Powdered Sugar – Provides sweetness and structure; use less for a lower-sugar version.
• Vanilla Extract – Enhances flavor depth; can be omitted or replaced with almond extract for a twist.
• Crispy Rice Cereal – Gives the balls their crunch; ensure it’s gluten-free if necessary.
For the Chocolate Coating
• Chocolate Coating (semi-sweet or dark) – Offers a rich finish; try white chocolate or Stevia-sweetened chocolate for lower sugar.
Enjoy making these delightful Chocolate Rice Krispie Balls as the perfect no-bake treat for any occasion!
Step‑by‑Step Instructions for Chocolate Rice Krispie Balls
Step 1: Mix the Base
In a large mixing bowl, combine 1 cup of creamy peanut butter and 2 tablespoons of unsalted butter. Use a spatula to blend them together until the mixture is smooth and homogenous. Then, stir in 1 tablespoon of vanilla extract for an extra touch of flavor. This forms a luscious base for your Chocolate Rice Krispie Balls.
Step 2: Add Sweetness and Cereal
Gradually sift in ½ cup of powdered sugar into the peanut butter mixture, stirring continuously until it thickens. Once well combined, gently fold in 3 ½ cups of crispy rice cereal until all the cereal is uniformly coated. This mixture should become thick and sticky, forming the perfect consistency for shaping your no-bake treats.
Step 3: Shape the Balls
Using your hands or a cookie scoop, shape the mixture into 1-inch balls and place them on a parchment-lined baking sheet. Ensure they are evenly spaced to avoid sticking together as they chill. Once formed, pop the baking sheet into the freezer and let them chill for about 20 minutes—this will help firm them up nicely for coating.
Step 4: Melt the Chocolate
While the balls are chilling, prepare the chocolate coating. Melt 9 ounces of semi-sweet or dark chocolate in a double boiler or microwave until smooth, stirring frequently. If the melted chocolate appears too thick, add 1-2 teaspoons of vegetable oil to achieve a silky consistency. This coating will give your Chocolate Rice Krispie Balls their delicious finish.
Step 5: Coat the Balls
Once the chocolate is melted and the balls are firm, quickly dip each ball into the chocolate, allowing the excess to drip off. Use a fork or your fingers to ensure even coating. Return the coated balls to the parchment-lined baking sheet. This process will create a delightful, rich shell around each Chocolate Rice Krispie Ball.
Step 6: Set and Store
Allow the chocolate to set at room temperature for about 30 minutes, or place the baking sheet in the fridge for quicker setting. Once set, your homemade Chocolate Rice Krispie Balls can be stored in an airtight container at room temperature for up to two weeks. Enjoy the crunchy, sweet treats as a perfect addition to any gathering!
Make Ahead Options
These Chocolate Rice Krispie Balls are perfect for meal prep enthusiasts! You can prepare the base mixture up to 24 hours in advance by mixing together the peanut butter, butter, vanilla, powdered sugar, and crispy rice cereal. Shape the mixture into balls and store them in an airtight container in the refrigerator to maintain their delicious texture. When you’re ready to serve or need a quick treat, simply melt your chocolate coating and dip the pre-shaped balls. This way, you save time on busy weeknights, and your Chocolate Rice Krispie Balls will be just as scrumptious as when freshly made!
Chocolate Rice Krispie Balls Variations
Feel free to make these delightful treats truly your own with creative variations that will excite your taste buds!
-
Nut-Free: Substitute peanut butter with sunflower seed butter to create a delicious nut-free option that’s just as creamy and satisfying.
-
Chocolate Variety: Experiment with different chocolate types, such as white or milk chocolate. Each variation brings a unique twist and delicious flavor, perfect for any chocolate lover.
-
Crunchy Toppings: Add crushed pretzels, peanuts, or even granola for an added crunch that beautifully contrasts with the smooth chocolate coating.
-
Spiced Flavor: Sprinkle in a touch of cinnamon or pumpkin spice to the base mixture for a warm, cozy flavor profile that’s perfect for autumn gatherings.
-
Coconut Bliss: Roll your finished balls in shredded coconut flakes before the chocolate coating to add a tropical flair and extra texture—perfect for coconut enthusiasts!
-
Colorful Fun: Use colorful sprinkles or decorative sugar on top of the chocolate coating to make your treats more festive. Great for parties or holiday gifting!
-
Flavor Infusion: Swap out vanilla extract for almond extract for a nutty, sweet flavor variation that enhances the overall taste of these delicious bites.
For even more inspiration, consider pairing these treats with a classic recipe for Swiss Chocolate Chalet or whip up some delectable Baby Shower Meatballs. Enjoy making these sweet creations your own!
Expert Tips for Chocolate Rice Krispie Balls
-
Mix Well: Ensure the peanut butter and butter are thoroughly mixed to avoid lumps in your Chocolate Rice Krispie Balls, leading to a smoother texture.
-
Use a Cookie Scoop: For even-sized balls, using a cookie scoop helps provide uniformity, ensuring they coat evenly in chocolate without any fuss.
-
Flash Freeze: Quick freezing the balls for 10 minutes before dipping them in chocolate helps maintain their shape and makes them easier to handle during the coating process.
-
Coating Consistency: If your melted chocolate is too thick, adding 1-2 teaspoons of vegetable oil makes it easier to dip. This results in a beautiful, shiny finish.
-
Keep Fresh: Store your Chocolate Rice Krispie Balls in an airtight container to maintain their freshness, and they’ll stay delicious for up to two weeks!
Storage Tips for Chocolate Rice Krispie Balls
Room Temperature: Store your Chocolate Rice Krispie Balls in an airtight container at room temperature for up to 2 weeks to maintain their delightful crunch.
Fridge: For extended freshness, refrigerate the balls in a sealed container for another week. This keeps them cool and yummy!
Freezer: If you want to save them for later, freeze the Chocolate Rice Krispie Balls for up to 3 months. Thaw them at room temperature before enjoying.
Reheating: These treats are best served chilled or at room temperature, so no need for reheating! Just let them come to a cozy temperature before serving.
What to Serve with Chocolate Rice Krispie Balls?
As the sweet aroma of rich chocolate fills your kitchen, the joy of pairing your delightful treats with perfect accompaniments enhances every gathering.
- Fresh Berries: The tartness of raspberries or strawberries complements the sweetness of chocolate, creating a refreshing contrast that balances each bite.
- Creamy Vanilla Ice Cream: A scoop of smooth vanilla ice cream adds a cold, creamy element, making each mouthful a delightful pairing of flavors and textures.
- Nutty Trail Mix: Providing a crunchy and savory element, trail mix made with almonds and cashews successfully rounds out the sweetness of your Chocolate Rice Krispie Balls.
- Hot Chocolate Bar: Set up a cozy hot chocolate station with whipped cream, marshmallows, and sprinkles; it turns snack time into a festive experience that everyone will adore!
- Coffee or Espresso: The complex flavors of a rich coffee or espresso provide a great balance to the sweetness of the balls, making them a perfect afternoon treat.
- Sparkling Water with Lemon: Refreshing sparkling water with a hint of lemon adds a zesty twist, cleansing your palate between each indulgent bite.
These pairings promise to elevate your Chocolate Rice Krispie Balls experience, making every occasion a sweet memory.
Chocolate Rice Krispie Balls Recipe FAQs
How do I choose the best peanut butter for this recipe?
Absolutely! Opt for a creamy peanut butter for the best texture. Look for brands that use minimal ingredients—ideally just peanuts and salt. If you prefer a different flavor, almond or cashew butter can also work well. Just make sure they’re creamy to bind the mixture properly.
What’s the best way to store Chocolate Rice Krispie Balls?
To maintain freshness, keep your Chocolate Rice Krispie Balls in an airtight container at room temperature for up to 2 weeks. If you want them to last longer, refrigerate them for an additional week. I often find that refrigerating enhances the flavor, making them taste even better!
Can I freeze these treats?
Definitely! To freeze your Chocolate Rice Krispie Balls, place them in a single layer on a baking sheet and pop them in the freezer for about an hour until firm. Then transfer them to a freezer-safe container or bag, separating layers with parchment paper to avoid sticking. They’ll stay fresh for up to 3 months. When you’re ready to enjoy, simply let them thaw at room temperature for about 30 minutes.
What if my chocolate coating is too thick?
Very! If your melted chocolate is too thick, simply stir in 1-2 teaspoons of vegetable oil or coconut oil to thin it out. This not only improves texture but also gives your Chocolate Rice Krispie Balls a nice shiny finish.
Are there any dietary considerations I should keep in mind?
Of course! For those with nut allergies, consider substituting the peanut butter with sunflower butter for a nut-free version. Additionally, if you’re watching your sugar, you can use Stevia-sweetened chocolate for the coating and reduce the amount of powdered sugar in the mixture. Always check ingredient labels for any hidden allergens.
Can I use different toppings on my Chocolate Rice Krispie Balls?
Absolutely! The sky’s the limit here! You can sprinkle crushed peanuts, colored sprinkles, or toasted coconut flakes on top after coating them with chocolate. Get creative and personalize each batch for a delightful touch!
Delightful Chocolate Rice Krispie Balls: Easy No-Bake Treats
Ingredients
Equipment
Method
- In a large mixing bowl, combine creamy peanut butter and unsalted butter. Blend until smooth. Stir in vanilla extract.
- Gradually sift in powdered sugar and stir until thick. Gently fold in crispy rice cereal until uniformly coated.
- Shape the mixture into 1-inch balls and place on a parchment-lined baking sheet. Chill in the freezer for about 20 minutes.
- Melt chocolate coating in a double boiler or microwave until smooth. Add vegetable oil if needed for consistency.
- Dip each ball into the melted chocolate, allowing excess to drip off, and return to the baking sheet.
- Allow chocolate to set at room temperature for about 30 minutes or refrigerate for quicker setting.
")