")
Introduction to Crispy Chicken Tenders Recipe
Welcome to the world of crispy chicken tenders! This delightful dish is a favorite for many, and it’s easy to see why. With their golden-brown exterior and juicy interior, chicken tenders are perfect for any occasion. Whether you’re hosting a family dinner, preparing a game-day snack, or simply craving something delicious, this crispy chicken tenders recipe is sure to impress.
But what truly makes a great chicken tender? It’s all about the balance of flavors and textures. A perfect chicken tender should be crispy on the outside while remaining tender and juicy on the inside. The secret lies in the marinating process, the right breading, and the cooking method. Let’s dive deeper into what makes these tenders so special!
What Makes a Great Chicken Tender?
First and foremost, the quality of the chicken is essential. Using fresh, boneless, skinless chicken breasts ensures that your tenders are both tender and flavorful. Next, marinating the chicken in buttermilk adds moisture and enhances the taste. The buttermilk not only tenderizes the meat but also helps the breading stick better.
Speaking of breading, the combination of flour and breadcrumbs is key. Using panko breadcrumbs gives an extra crunch that elevates the texture. Additionally, seasoning the breading mixture with garlic powder, onion powder, and paprika adds depth to the flavor profile. This combination creates a mouthwatering experience with every bite.
Finally, the cooking method plays a crucial role. Frying the chicken tenders in hot oil ensures they cook evenly and develop that irresistible crispy crust. However, if you prefer a healthier option, baking is also a great choice. Regardless of the method, the goal is to achieve that perfect golden-brown color.
Now that you know what makes a great chicken tender, let’s gather our ingredients and get started on this delicious crispy chicken tenders recipe!
Ingredients for Crispy Chicken Tenders Recipe
To create the perfect crispy chicken tenders, you’ll need a few simple ingredients. Each component plays a vital role in achieving that delightful crunch and flavor. Here’s what you’ll need:
- 1 pound boneless, skinless chicken breasts: Cut into strips for easy cooking and eating.
- 1 cup buttermilk: This ingredient helps tenderize the chicken and adds moisture.
- 1 teaspoon garlic powder: Adds a savory flavor that enhances the overall taste.
- 1 teaspoon onion powder: Complements the garlic and adds depth to the flavor.
- 1 teaspoon paprika: Provides a subtle smokiness and a beautiful color.
- 1 teaspoon salt: Essential for seasoning the chicken and enhancing flavors.
- 1/2 teaspoon black pepper: Adds a hint of spice to the dish.
- 1 cup all-purpose flour: This is the base for the breading, giving it structure.
- 1 cup breadcrumbs: Preferably panko for that extra crunch!
- Vegetable oil: For frying the chicken tenders to golden perfection.
These ingredients come together to create a mouthwatering dish that everyone will love. Make sure to gather everything before you start cooking. This way, you’ll have a smooth and enjoyable cooking experience. Now that you have your ingredients ready, let’s move on to the step-by-step preparation of your crispy chicken tenders!
Step-by-Step Preparation of Crispy Chicken Tenders Recipe
Now that you have all your ingredients ready, it’s time to dive into the step-by-step preparation of your crispy chicken tenders. Following these steps will ensure that your tenders turn out perfectly crispy and delicious. Let’s get started!
Step 1: Preparing the Chicken
First, take your boneless, skinless chicken breasts and cut them into strips. Aim for uniform sizes, about 1 to 1.5 inches wide. This helps them cook evenly. Next, in a large bowl, combine the buttermilk, garlic powder, onion powder, paprika, salt, and black pepper. Stir well to mix all the ingredients.
Once your marinade is ready, add the chicken strips to the bowl. Make sure each piece is fully submerged in the buttermilk mixture. This step is crucial as it tenderizes the chicken and infuses it with flavor. Cover the bowl with plastic wrap and refrigerate for at least 1 hour. For the best results, let it marinate overnight. The longer, the better!
Step 2: Creating the Breading Mixture
While the chicken is marinating, it’s time to prepare the breading mixture. In a separate shallow dish, combine the all-purpose flour and breadcrumbs. If you’re using panko breadcrumbs, you’ll get that extra crunch that everyone loves. Mix them together well to ensure an even distribution of texture.
Feel free to add a pinch of salt or additional spices to the breading mixture if you want to enhance the flavor even more. This is your chance to get creative! Once mixed, set the dish aside until the chicken is ready.
Step 3: Coating the Chicken
After the chicken has marinated, it’s time to coat it. Remove the chicken strips from the buttermilk mixture, allowing any excess liquid to drip off. Then, take each piece and dredge it in the flour-breadcrumb mixture. Make sure to press gently to help the coating stick well.
Coating each piece thoroughly is essential for that crispy texture. Once all the chicken strips are coated, place them on a plate or a baking sheet. This will make it easier to transfer them to the frying pan later.
Step 4: Frying the Chicken Tenders
Now comes the exciting part—frying the chicken tenders! In a large skillet, heat about 1 inch of vegetable oil over medium-high heat. Use a thermometer to check the oil temperature; it should reach around 350°F. This is the perfect temperature for frying.
Carefully add the chicken strips to the hot oil in batches. Avoid overcrowding the pan, as this can lower the oil temperature and result in soggy tenders. Fry each batch for about 4-5 minutes on each side, or until they turn golden brown and crispy. Use a meat thermometer to ensure the internal temperature reaches 165°F.
Once cooked, transfer the chicken tenders to a paper towel-lined plate to drain any excess oil. This will keep them crispy and delicious. Now, your crispy chicken tenders are ready to be served!
Variation of Crispy Chicken Tenders Recipe
While the classic crispy chicken tenders are a hit, there are many ways to add a twist to this beloved dish. Here are two delicious variations that you can try: spicy crispy chicken tenders and baked crispy chicken tenders. Each option offers a unique flavor profile, ensuring that you can enjoy chicken tenders in different ways!
Spicy Crispy Chicken Tenders
If you love a little heat, then spicy crispy chicken tenders are the way to go! To make this variation, simply add some hot sauce to your buttermilk marinade. You can use your favorite brand or even make your own. A tablespoon or two should do the trick, but feel free to adjust based on your spice preference.
Additionally, consider adding cayenne pepper or crushed red pepper flakes to the flour and breadcrumb mixture. This will give your tenders an extra kick! The combination of the spicy marinade and seasoned breading creates a mouthwatering experience that will satisfy any heat lover.
Once you’ve marinated and coated your chicken strips, follow the same frying instructions as the original recipe. The result will be crispy chicken tenders with a delightful spicy flavor that pairs perfectly with cooling dipping sauces like ranch or blue cheese.
Baked Crispy Chicken Tenders
If you’re looking for a healthier option, baked crispy chicken tenders are a fantastic choice. To make this variation, preheat your oven to 400°F. Instead of frying, you’ll bake the chicken tenders for a lighter yet still delicious result.
After coating the chicken strips in the flour-breadcrumb mixture, place them on a baking sheet lined with parchment paper. For added crispiness, spray the tenders lightly with cooking spray or drizzle a little olive oil over them. This helps achieve that golden-brown color without the need for frying.
Bake the chicken tenders for about 20-25 minutes, flipping them halfway through to ensure even cooking. Keep an eye on them, as oven temperatures can vary. You’ll know they’re done when they reach an internal temperature of 165°F and are beautifully golden.
These baked crispy chicken tenders are perfect for a healthier meal option while still being packed with flavor. Serve them with your favorite dipping sauces for a satisfying treat!
Cooking Note for Crispy Chicken Tenders Recipe
When it comes to cooking crispy chicken tenders, a few important notes can help you achieve the best results. These tips will ensure that your tenders are not only delicious but also perfectly cooked every time.
First, always use a meat thermometer to check the internal temperature of the chicken. This is crucial for food safety. Chicken should reach an internal temperature of 165°F to be safe to eat. Undercooked chicken can lead to foodborne illnesses, so it’s better to be safe than sorry!
Next, pay attention to the oil temperature when frying. If the oil is too hot, the outside of the chicken will burn before the inside cooks through. Conversely, if the oil is not hot enough, the chicken will absorb too much oil and become greasy. A temperature of 350°F is ideal for frying chicken tenders. Using a thermometer can help you maintain the right temperature throughout the cooking process.
Additionally, consider using a deep-frying thermometer or a candy thermometer to monitor the oil temperature accurately. This will help you avoid any mishaps and ensure that your chicken tenders come out crispy and golden every time.
Lastly, remember to let the chicken tenders rest for a few minutes after frying. This allows the juices to redistribute, making the chicken even more tender and flavorful. Plus, it gives you a moment to prepare your dipping sauces and side dishes!
By following these cooking notes, you’ll be well on your way to mastering the art of crispy chicken tenders. Enjoy the process, and don’t forget to share your delicious creations with family and friends!
Serving Suggestions for Crispy Chicken Tenders Recipe
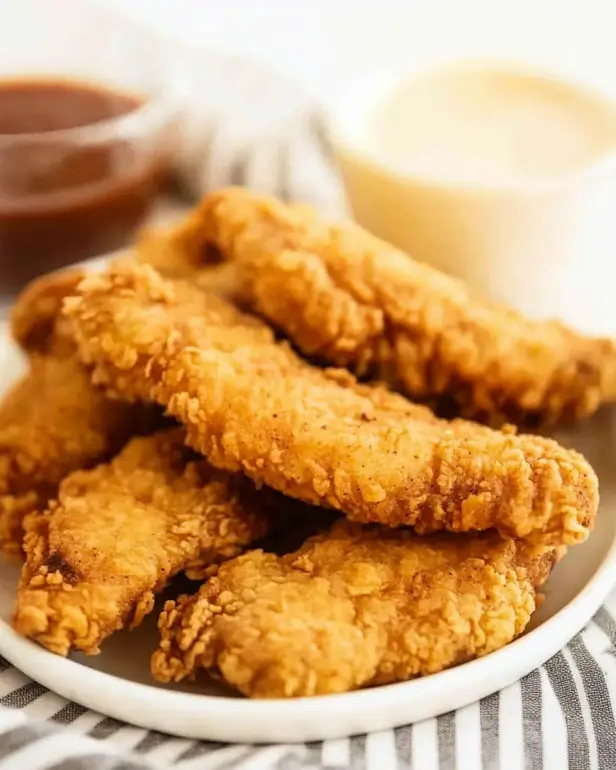
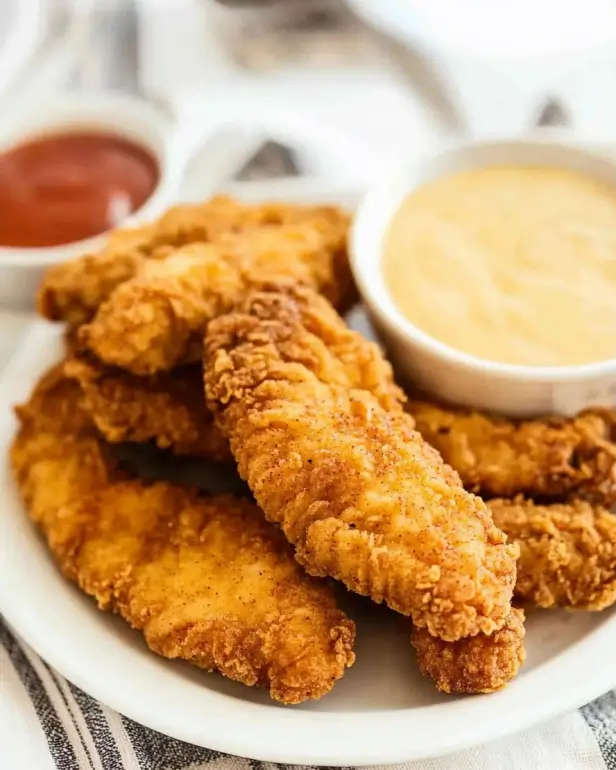
Now that your crispy chicken tenders are ready, it’s time to think about how to serve them! The right accompaniments can elevate your dish and make it even more enjoyable. Here are some delicious dipping sauces and side dishes that pair perfectly with your crispy chicken tenders.
Dipping Sauces to Pair with Chicken Tenders
Dipping sauces are a must when serving chicken tenders. They add flavor and excitement to each bite. Here are some popular options:
- Ranch Dressing: A classic choice, ranch dressing is creamy and flavorful. It complements the crispy texture of the tenders beautifully.
- Honey Mustard: This sweet and tangy sauce is a favorite for many. The honey adds a touch of sweetness that pairs well with the savory chicken.
- Barbecue Sauce: For a smoky flavor, barbecue sauce is an excellent option. It adds a nice kick and enhances the overall taste of the tenders.
- Buffalo Sauce: If you love heat, try buffalo sauce! It adds a spicy kick that will satisfy your cravings for something bold.
- Blue Cheese Dressing: This rich and tangy sauce is perfect for those who enjoy a stronger flavor. It pairs wonderfully with spicy chicken tenders.
Feel free to mix and match these sauces to find your favorite combination. You can even create a dipping sauce bar for a fun and interactive meal!
Side Dishes that Complement Crispy Chicken Tenders
To round out your meal, consider serving your crispy chicken tenders with some tasty side dishes. Here are a few ideas:
- French Fries: A classic pairing, crispy French fries are always a hit. You can also try sweet potato fries for a healthier twist.
- Coleslaw: This crunchy and refreshing side adds a nice contrast to the warm chicken tenders. It’s a great way to add some veggies to your meal!
- Macaroni and Cheese: For a comforting option, serve your tenders with creamy macaroni and cheese. It’s a crowd-pleaser!
- Vegetable Sticks: Carrot and celery sticks with dip are a light and healthy option. They add a nice crunch and balance out the meal.
- Salad: A simple green salad with a light vinaigrette can provide a fresh and healthy contrast to the crispy chicken.
These side dishes will not only complement your crispy chicken tenders but also create a well-rounded meal that everyone will enjoy. So, gather your family and friends, and dig into this delicious feast!
Tips for Perfecting Your Crispy Chicken Tenders Recipe
To truly master the art of making crispy chicken tenders, a few helpful tips can make all the difference. These suggestions will ensure that your tenders are not only delicious but also perfectly crispy every time. Let’s explore some key tips to elevate your cooking game!
First, always start with high-quality chicken. Fresh, boneless, skinless chicken breasts are ideal. They provide the best flavor and texture. If possible, choose organic or free-range chicken for an even better taste.
Next, don’t skip the marinating step. Soaking the chicken in buttermilk is essential. It tenderizes the meat and infuses it with flavor. For maximum flavor, let the chicken marinate overnight. If you’re short on time, aim for at least one hour.
When it comes to the breading, make sure to coat the chicken evenly. Press the flour-breadcrumb mixture onto the chicken strips firmly. This helps the coating stick better during frying. A well-coated tender will have that perfect crunch!
Temperature is crucial when frying. Use a thermometer to ensure the oil is at 350°F. If the oil is too hot, the outside will burn before the inside cooks. If it’s too cool, the chicken will absorb too much oil and become greasy. Maintaining the right temperature is key to achieving crispy chicken tenders.
Fry in small batches to avoid overcrowding the pan. This allows the oil to maintain its temperature and ensures even cooking. Overcrowding can lead to soggy tenders, which we want to avoid at all costs!
After frying, let the chicken tenders rest on a paper towel-lined plate. This helps drain excess oil and keeps them crispy. If you want to keep them warm while frying the rest, place them on a wire rack in a warm oven.
Lastly, don’t forget to experiment! Feel free to add your favorite spices to the breading mixture or try different marinades. The beauty of cooking is in the creativity. With these tips, you’ll be well on your way to perfecting your crispy chicken tenders recipe!
Breakdown of Time for Crispy Chicken Tenders Recipe
Understanding the time required for each step in the crispy chicken tenders recipe can help you plan your cooking session better. Here’s a detailed breakdown of the time you’ll need for preparation and cooking.
Prep Time
The prep time for this crispy chicken tenders recipe is approximately 10 minutes. This includes cutting the chicken into strips and mixing the marinade. However, remember that marinating the chicken takes additional time. For the best flavor, it’s recommended to marinate the chicken for at least 1 hour, or even overnight if you have the time.
Cooking Time
Once your chicken has marinated, the cooking time is about 15-20 minutes. This includes:
- Coating the chicken strips (about 5 minutes).
- Frying the chicken in batches (approximately 10-15 minutes, depending on how many strips you fry at once).
Make sure to keep an eye on the oil temperature and the chicken’s internal temperature to ensure perfect results!
Total Time
In total, the time for this crispy chicken tenders recipe can vary based on marinating time. If you marinate for 1 hour, the total time will be around 1 hour and 30 minutes. If you choose to marinate overnight, the total time will be about 10-15 minutes for prep and cooking, plus the overnight marinating time.
So, whether you’re in a hurry or planning ahead, this recipe can fit into your schedule. Enjoy the process and the delicious results!
Nutritional Information for Crispy Chicken Tenders Recipe
Understanding the nutritional content of your food is essential, especially when preparing a delicious dish like crispy chicken tenders. This section will provide you with key nutritional information to help you make informed choices. Here’s a breakdown of the calories, protein, and sodium content per serving of this crispy chicken tenders recipe.
Calories
Each serving of crispy chicken tenders contains approximately 350 calories. This calorie count includes the chicken, breading, and oil used for frying. While this dish is indulgent, it can fit into a balanced diet when enjoyed in moderation. Pairing it with healthy sides can also help create a more nutritious meal.
Protein
One of the standout features of this crispy chicken tenders recipe is its protein content. Each serving provides about 30 grams of protein. Chicken is an excellent source of lean protein, which is essential for muscle growth and repair. Including protein in your meals can help keep you feeling full and satisfied.
Sodium
The sodium content in each serving of crispy chicken tenders is approximately 800 milligrams. This amount can vary based on the specific ingredients used, such as the type of salt and any additional seasonings. If you’re watching your sodium intake, consider using less salt in the breading or opting for low-sodium alternatives.
By being aware of the nutritional information, you can enjoy your crispy chicken tenders while keeping your dietary goals in mind. Remember, balance is key! Enjoy this delicious dish as part of a varied and healthy diet.
FAQs about Crispy Chicken Tenders Recipe
Can I make Crispy Chicken Tenders Recipe ahead of time?
Absolutely! You can prepare your crispy chicken tenders ahead of time. After marinating the chicken, you can coat it in the flour-breadcrumb mixture and place it on a baking sheet. Cover the sheet with plastic wrap and refrigerate for up to 24 hours. This way, when you’re ready to cook, all you need to do is heat the oil and fry them. This makes it super convenient for busy days or when hosting guests!
What is the best way to store leftover chicken tenders?
If you have leftover chicken tenders, store them in an airtight container. Allow them to cool completely before sealing to prevent moisture buildup. You can keep them in the refrigerator for up to 3 days. For longer storage, consider freezing them. Place the cooled tenders in a freezer-safe bag, separating layers with parchment paper. They can last up to 3 months in the freezer. When ready to eat, reheat in the oven for the best texture!
How can I make my chicken tenders extra crispy?
To achieve extra crispy chicken tenders, there are a few tricks you can try. First, ensure your oil is hot enough—around 350°F is ideal. This helps create a crispy crust without absorbing too much oil. Second, double-dip your chicken! After the first coating, dip the tenders back into the buttermilk and then into the flour-breadcrumb mixture again. This adds an extra layer of crunch. Lastly, using panko breadcrumbs instead of regular breadcrumbs will give you that delightful crunch you’re looking for!
Conclusion on Crispy Chicken Tenders Recipe
In conclusion, the crispy chicken tenders recipe is a delightful dish that brings joy to any meal. With its perfect balance of crunch and tenderness, it’s no wonder that chicken tenders are a beloved favorite among both kids and adults. By following the steps outlined in this article, you can create a batch of delicious tenders that are sure to impress your family and friends.
Remember, the key to achieving that perfect crispy texture lies in the marinating process, the right breading, and maintaining the correct oil temperature while frying. Whether you choose to stick with the classic recipe or experiment with spicy or baked variations, the possibilities are endless. Each bite promises a burst of flavor that will leave everyone wanting more!
As you serve your crispy chicken tenders, don’t forget to pair them with your favorite dipping sauces and side dishes. This will elevate your meal and create a memorable dining experience. So, gather your ingredients, roll up your sleeves, and get ready to enjoy a delicious homemade treat that’s perfect for any occasion.
Happy cooking, and may your crispy chicken tenders always be golden, crunchy, and utterly delicious!
")