There’s something undeniably magical about sponge cakes. Their airy, melt-in-your-mouth texture paired with endless decorating possibilities makes them the perfect centerpiece for any celebration. Whether you’re crafting an elaborate birthday cake, a simple tea-time treat, or an elegant dessert for a special event, sponge cakes provide the perfect canvas for your creativity. Light, fluffy, and endlessly versatile, these cakes are as delightful to eat as they are to make.
Are you ready to take your sponge cake game to the next level? Let’s dive into the details of creating these show-stopping desserts!
Why Sponge Cakes Are Special
Sponge cakes are more than just another dessert—they’re a symbol of celebration and creativity. Here’s why they stand out:
- Light and Fluffy Texture: Achieved through precise mixing and folding techniques, sponge cakes are known for their delicate crumb.
- Versatile Base: These cakes can be paired with endless fillings, frostings, and decorations to suit any occasion.
- Beginner-Friendly: With the right guidance, even a novice baker can create a stunning sponge cake.
- Perfect for Custom Designs: Their structure makes sponge cakes ideal for carving and shaping into intricate designs.
Whether you’re aiming for a minimalistic look or an elaborate masterpiece, sponge cakes can do it all.
Ingredients for Designed Sponge Cakes
To create the perfect sponge cake, you’ll need a few simple yet essential ingredients:
| Ingredient | Quantity |
|---|---|
| Egg yolks (room temperature) | 12 |
| Sugar | 1/2 cup |
| Vegetable oil | 1/2 cup |
| Whole milk | 1/2 cup |
| Vanilla extract | 4 tsp |
| All-purpose flour | 2 cups |
| Cornstarch | 1/4 cup |
Step-by-Step Guide to Creating Designed Sponge Cakes
1. Prepare Your Baking Equipment
- Preheat your oven to 350°F (175°C).
- Prepare your cake pans or molds based on your desired design. Whether you’re using round pans, sheet pans, or intricate molds, ensure they are lined with parchment paper or greased lightly with butter to prevent sticking.
2. Whisk the Egg Yolks and Sugar
- In a large mixing bowl, whisk together the 12 egg yolks and 1/2 cup sugar.
- Whisk until the mixture is pale, thick, and forms ribbons when lifted. This step is critical to achieving the signature lightness of sponge cakes.
3. Incorporate the Wet Ingredients
- Gradually whisk in the vegetable oil and whole milk.
- Add the vanilla extract to enhance the flavor of your sponge cake. The combination of these wet ingredients ensures the cake remains moist and tender.
4. Sift and Fold the Dry Ingredients
- In a separate bowl, sift together the all-purpose flour and cornstarch.
- Gently fold the dry ingredients into the wet mixture. Take care to fold slowly and carefully to maintain the airiness of the batter. Overmixing can lead to dense cakes.
5. Fill the Cake Pans
- Pour the batter into your prepared cake pans or molds. For custom-designed molds, ensure you fill them evenly to capture the intricate details.
- Lightly tap the pans on the counter to release any air bubbles.
6. Bake the Sponge Cakes
- Place the pans in the preheated oven and bake for 20-25 minutes.
- Check for doneness by inserting a toothpick into the center—it should come out clean. The cakes should be golden brown, with a soft and bouncy texture.
7. Cool and Decorate
- Allow the cakes to rest in their pans for 10 minutes before transferring them to a wire rack to cool completely.
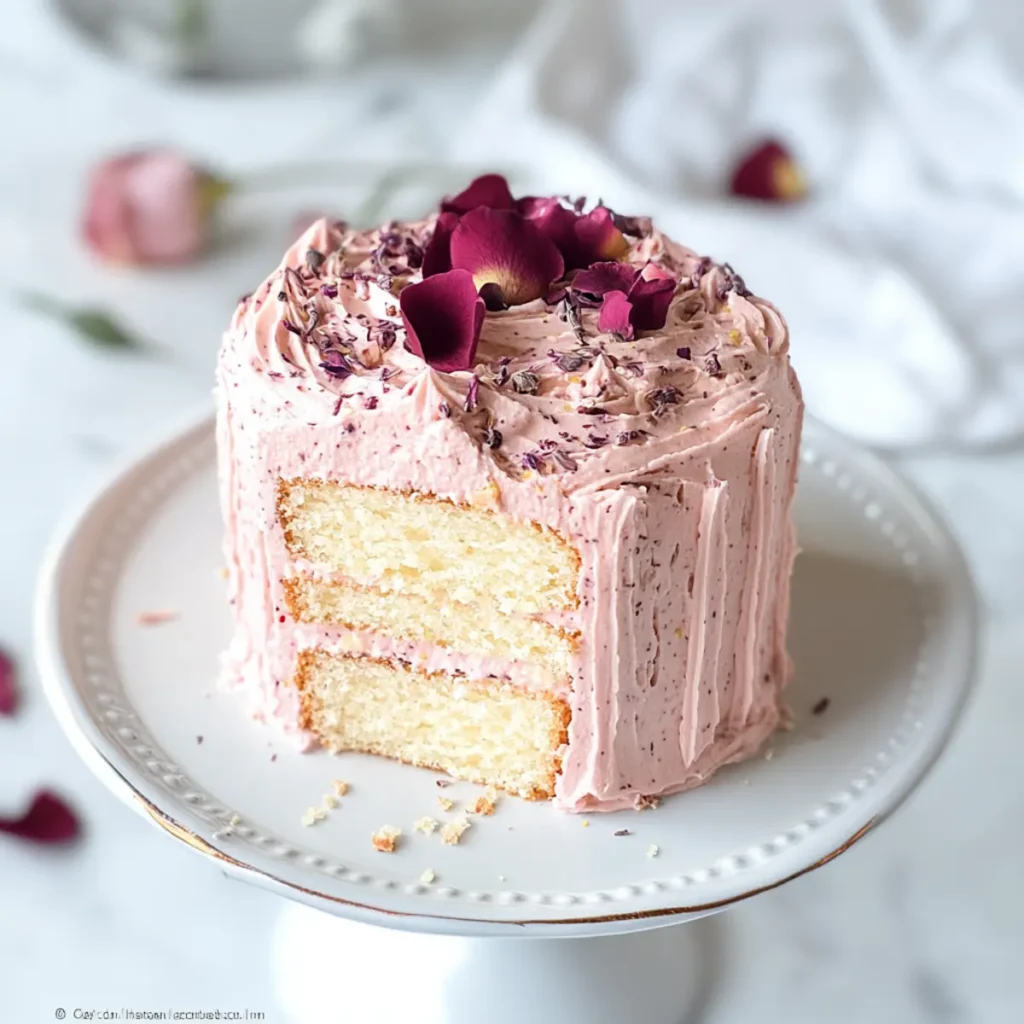
- Once cooled, let your imagination run wild with decorations—frosting, whipped cream, fruits, edible flowers, or intricate designs!
Nutritional Information (Per Serving)
| Nutrient | Value |
|---|---|
| Calories | 180 |
| Total Fat | 10 g |
| Saturated Fat | 2 g |
| Cholesterol | 90 mg |
| Carbohydrates | 20 g |
| Protein | 4 g |
| Fiber | 1 g |
What Makes Designed Sponge Cakes Unique?
- Airy Texture: The egg yolk-sugar mixture gives sponge cakes their signature lightness.
- Adaptable Base: From fresh fruit to rich ganache, sponge cakes pair beautifully with a variety of toppings.
- Elegant Simplicity: Even a plain sponge cake can look sophisticated with minimal decoration.
- Show-Stopping Designs: Perfect for custom molds, these cakes hold intricate designs beautifully.
Creative Variations for Designed Sponge Cakes
- Chocolate Sponge Cake: Add 1/4 cup of cocoa powder to the dry ingredients for a rich, chocolatey flavor.
- Lemon Zest: Incorporate fresh lemon zest into the batter for a refreshing citrus twist.
- Matcha Magic: Add 2 tablespoons of matcha powder for a green tea-infused sponge cake.
- Vanilla Bean: Use vanilla bean paste instead of vanilla extract for a more intense flavor.
- Fruit-Filled Delight: Add a layer of fruit jam or fresh fruit slices between the cake layers for extra flavor.
Tips for the Perfect Sponge Cake
- Room-Temperature Ingredients: Ensuring your eggs and other ingredients are at room temperature helps create a smoother batter.
- Don’t Overmix: Gentle folding is key to maintaining the airiness of your batter.
- Preheat the Oven: A consistent oven temperature is crucial for even baking.
- Cool Completely: Let the cakes cool completely before decorating to avoid melted frosting or uneven layers.
- Use High-Quality Ingredients: Fresh eggs, pure vanilla extract, and good-quality flour make all the difference.
FAQ: Designed Sponge Cakes
1. Can I use egg substitutes for sponge cakes?
Yes, but the texture might differ slightly. Aquafaba or flaxseed eggs can work for a vegan version.
2. How do I prevent my sponge cake from deflating?
Be gentle while folding the ingredients to maintain the air in the batter. Avoid opening the oven door during baking.
3. Can I freeze sponge cakes?
Absolutely! Wrap the cooled cakes tightly in plastic wrap and store them in an airtight container in the freezer for up to 3 months.
4. What’s the best way to cut sponge cakes into layers?
Use a serrated knife or a cake leveler for even layers. Chill the cake slightly before cutting for cleaner slices.
5. How do I keep my cake moist?
Avoid overbaking, and brush the cake layers with simple syrup before adding fillings or frostings.
6. Can I use gluten-free flour?
Yes, substitute with a gluten-free flour blend, but ensure it’s suitable for baking to achieve the best texture.
Conclusion: Light, Fluffy, and Perfect for Any Occasion
Designed sponge cakes are a testament to how simple ingredients can create extraordinary desserts. With their soft, airy texture and endless possibilities for customization, they’re the ideal choice for birthdays, weddings, or even casual afternoons. Whether you’re a seasoned baker or just starting out, this recipe provides the perfect foundation for your creativity.
So, grab your ingredients, preheat your oven, and let’s bake some magic. Your sponge cake masterpiece awaits!
Print
Designed Sponge Cakes: Light and Fluffy Creations for Every Occasion
- Total Time: 45 minutes
- Yield: 2 medium sponge cakes
Description
Sponge cakes are a delightful baking classic, known for their airy, melt-in-your-mouth texture. Whether you’re crafting a simple tea-time treat or a beautifully designed centerpiece for a special occasion, these cakes are versatile and delicious. Follow this easy recipe to create light and fluffy sponge cakes that can be customized to suit any celebration.
Ingredients
- 12 egg yolks (room temperature)
- 1/2 cup sugar
- 1/2 cup vegetable oil
- 1/2 cup whole milk
- 4 teaspoons vanilla extract
- 2 cups all-purpose flour
- 1/4 cup cornstarch
Instructions
1. Prepare Your Baking Equipment
- Preheat your oven to 350°F (175°C).
- Grease your cake pans or molds with butter or line them with parchment paper to ensure easy release. Choose molds or pans based on the design you want to achieve.
2. Whisk the Egg Yolks and Sugar
- In a large mixing bowl, whisk together the egg yolks and sugar until the mixture is pale and thick. This step creates the light, airy base of the sponge cake.
3. Add the Wet Ingredients
- Gradually pour in the vegetable oil and milk while continuing to whisk.
- Stir in the vanilla extract to infuse your cake with a warm, aromatic flavor.
4. Sift and Fold the Dry Ingredients
- Sift the all-purpose flour and cornstarch into a separate bowl to ensure even distribution.
- Gently fold the dry ingredients into the wet mixture using a spatula. Be careful not to overmix—this keeps the batter light and fluffy.
5. Pour and Prepare for Baking
- Divide the batter evenly into your prepared cake pans or molds, filling each one about 2/3 full. Tap the pans gently to release air bubbles.
6. Bake
- Bake in the preheated oven for 20-25 minutes.
- The cakes are done when the tops are golden brown, and a toothpick inserted into the center comes out clean.
7. Cool and Decorate
- Let the cakes cool in their pans for 10 minutes, then transfer them to a wire rack to cool completely.
- Once cooled, you can decorate with frosting, whipped cream, fruit, or any topping of your choice.
Notes
- Customize the Flavor: Add citrus zest, matcha, or cocoa powder to the batter for unique flavor twists.
- Room Temperature Ingredients: Ensure the eggs, milk, and oil are at room temperature for a smoother batter.
- Don’t Overmix: Folding the dry ingredients gently is key to preserving the light texture of the sponge cake.
- Storage: Keep the cakes in an airtight container at room temperature for up to 2 days or in the refrigerator for up to 5 days.
- Prep Time: 20 minutes
- Cook Time: 25 minutes
- Category: Dessert
- Method: Baking
- Cuisine: International


