")
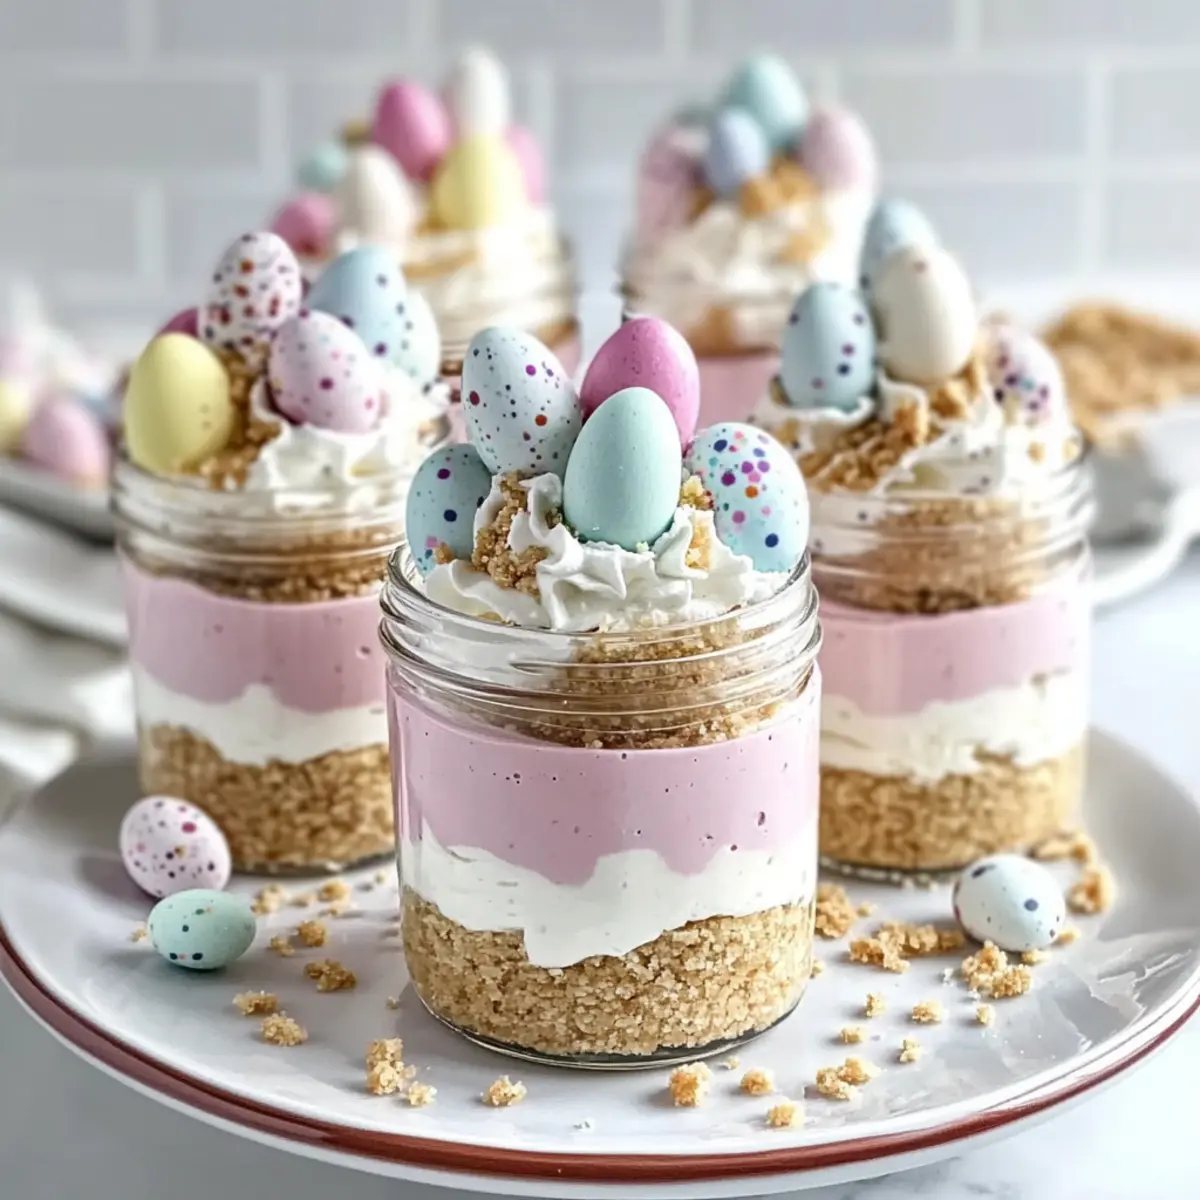
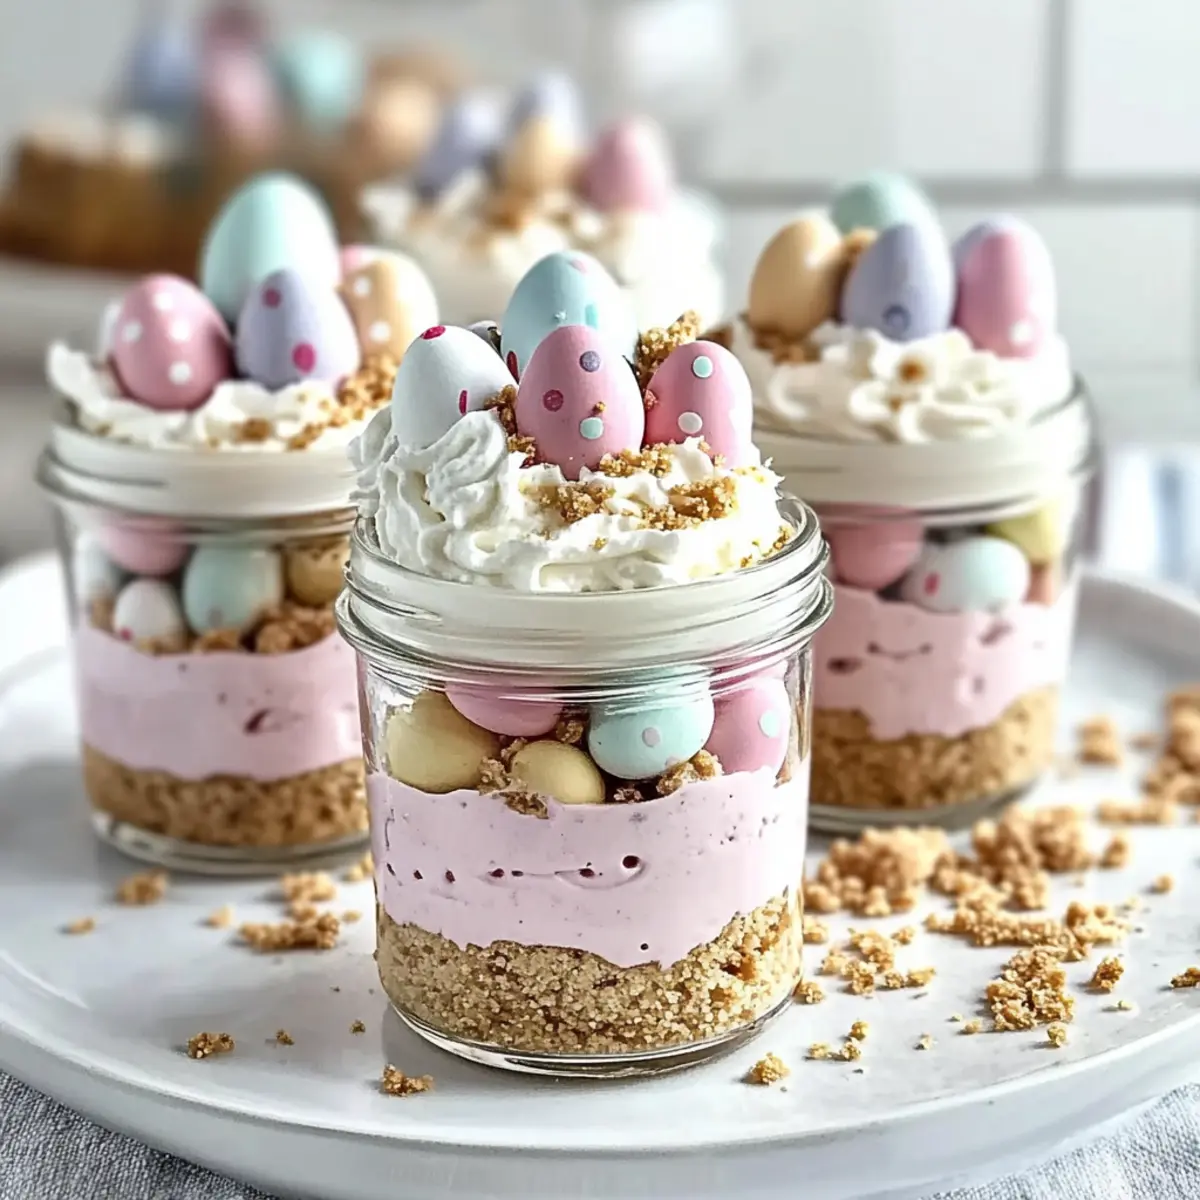
As I carefully arranged the pastel candy eggs atop my freshly whipped cream, a wave of nostalgia washed over me. There’s something magical about Easter; it’s all about the joy of sharing, and what better way to celebrate than with these delightful Easter Egg Cheesecake Jars? This vibrant no-bake dessert is not only easy to whip up, but it also brings smiles all around the table—with each jar resembling a little treasure waiting to be uncovered. The buttery graham cracker crust provides a perfect foundation for the creamy cheesecake filling, making it a crowd-pleaser at any spring gathering. Plus, you can easily customize these jars to match your family’s favorite flavors or toppings! Ready to dive into this fun and festive treat? Let’s get started!
Why Choose Easter Egg Cheesecake Jars?
Delightfully Unique: These jars add a festive twist to traditional cheesecake, making every bite a joyous treat.
Easy No-Bake Dessert: Perfect for those busy days when you want to whip up something special without turning on the oven.
Customizable Fun: Mix and match flavors or toppings to suit everyone’s taste—try using crushed Oreos or fresh berries for a delightful variation!
Crowd-Pleasing Look: With vibrant colors and eye-catching decorations, these jars not only taste great but also make a stunning table centerpiece that elicits smiles.
Make-Ahead Convenience: Prepare them in advance and store them in the fridge, saving you time for those precious spring family gatherings.
For more delightful ideas, check out my post on Making Cheesecake Dip for a fun spin on creamy dessert classics!
Easter Egg Cheesecake Jars Ingredients
For the Crust
• Graham cracker crumbs – Essential for a sturdy base, but feel free to use crushed Oreos for a richer flavor.
• Granulated sugar – Provides the sweetness needed for the crust; adjust to your preference for balance.
• Unsalted butter, melted – This ingredient binds the crust perfectly; avoid salted butter to keep it even.
For the Cheesecake Filling
• Cream cheese, softened – The creamy foundation of the filling; ensure it’s room temperature for easy mixing.
• Powdered sugar – Sweetens and smoothens the filling; sifting is best for optimal texture.
• Vanilla extract – Enhances overall flavor; choose pure extract for a more robust taste.
• Heavy cream – Makes the filling light and airy; whip until stiff peaks form for the best volume.
• Pink gel food coloring or freeze-dried strawberry powder – Optional for adding a festive color; omit for a natural look.
For the Topping
• Whipped cream – Adds a light and fluffy layer; homemade is always the tastiest choice.
• Pastel candy eggs – These delightful treats bring festive cheer, but you can substitute with any small candy.
• Rainbow or pastel sprinkles – Use them as a fun decorative touch; customize to match your theme!
With these ingredients ready, you’re all set to create your delightful Easter Egg Cheesecake Jars and bring a smile to your loved ones’ faces!
Step‑by‑Step Instructions for Easter Egg Cheesecake Jars
Step 1: Prepare the Crust
In a medium bowl, combine graham cracker crumbs, sugar, and melted unsalted butter until the mixture resembles damp sand. Use your fingers to press this crumb mixture firmly into the bottom of small jars or glasses, forming an even layer. Allow this crust to set while you move on to the next step, giving it some time to bind together nicely.
Step 2: Make the Cheesecake Filling
In a large mixing bowl, beat the softened cream cheese using an electric mixer on medium speed until it’s creamy and smooth, about 2 minutes. Gradually add the sifted powdered sugar and vanilla extract, continuing to blend until the mixture becomes light and airy, about 1-2 minutes more. This will create a luscious filling for your Easter Egg Cheesecake Jars.
Step 3: Whip Heavy Cream
In a separate bowl, pour in the heavy cream and whip it using a hand mixer or stand mixer on medium-high speed until stiff peaks form, which should take around 4-5 minutes. Be cautious not to over-whip, or the cream may become grainy. Gently fold the whipped cream into the cream cheese mixture in two parts, ensuring a smooth and fluffy texture for the filling.
Step 4: Color the Cheesecake
To give a festive touch to your cheesecake filling, divide the prepared filling into two bowls. In one bowl, add pink gel food coloring or freeze-dried strawberry powder, and gently mix until the color is evenly incorporated. This step allows you to create a visually appealing two-tone effect for your Easter Egg Cheesecake Jars.
Step 5: Layer the Filling
Using a spoon or a piping bag, layer the pink cheesecake filling over the prepared crust in each jar, smoothing the surface as you go. Follow this by adding an equally thick layer of the white cheesecake filling, creating a beautiful contrast. Opt for a piping bag for clean edges, making your layers look professional and enticing.
Step 6: Prepare for Serving
Once your layers are complete, generously top each jar with homemade whipped cream for that delightful finishing touch. Decorate each jar with pastel candy eggs and rainbow sprinkles, creating a festive and fun appearance. Finally, refrigerate the jars for at least 2 hours to allow the cheesecake filling to firm up before serving, ensuring a delightful treat for your guests.

What to Serve with Easter Egg Cheesecake Jars?
Elevate your dessert experience with delightful pairings that bring out the best in these festive jars.
- Fresh Fruit Salad: This bright medley of seasonal fruits provides a refreshing contrast to the rich cheesecake, cleansing the palate beautifully.
- Creamy Vanilla Ice Cream: A scoop of velvety vanilla ice cream paired with the jars adds an indulgent touch, making each bite even more luxurious.
- Coffee or Espresso: The bold flavors of a steaming cup of coffee or espresso complements the sweetness of the cheesecake, offering a warm, comforting balance.
- Lemon Sorbet: The zesty and refreshing lemon sorbet will invigorate your taste buds, providing a light and tangy counterpoint to the creamy cheesecake.
- Chocolate Decadence: Pairing with chocolate-covered strawberries or mini chocolate truffles adds an extra indulgent element that guests can’t resist.
- Flavored Sparkling Water: For a bit of fizz, consider serving sparkling water with a splash of fruit essence; it’s refreshingly light and celebratory.
Each of these options enhances the playful, delightful experience of enjoying Easter Egg Cheesecake Jars, making your gathering feel extra special.
Easter Egg Cheesecake Jars Variations
Invite your creativity to shine by customizing these delightful jars; each twist brings new joy to your table!
- Dairy-Free: Substitute cream cheese and heavy cream with dairy-free alternatives like coconut cream and vegan cream cheese for a delicious dairy-free version.
- Cookie Crust Variation: Use crushed Oreos for a rich, chocolatey crust that pairs beautifully with the creamy filling and adds a fun twist.
- Fruit-Infused: Fold in pureed strawberries or raspberries into the cheesecake filling for a fruity flavor burst that brightens each jar.
- Nutty Surprise: Add finely chopped nuts like almonds or pecans to the crust for a satisfying crunch and a wonderful flavor depth.
- Zesty Lemon Twist: Incorporate freshly grated lemon zest and a splash of lemon juice into the filling for a refreshing citrus flavor that balances the sweetness beautifully.
- Chocolate Drizzle: Top the whipped cream with a drizzle of chocolate sauce for a decadent addition that chocolate lovers will adore.
- Festive Sprinkles: Switch up your sprinkles to match any holiday or occasion—think red and green for Christmas or orange and black for Halloween!
- Mini Cheesecake Cups: Instead of jars, use mini cups for bite-sized treats, perfect for kids’ parties or any gathering where fun-sized desserts are a hit!
For more cheesecake inspiration, don’t forget to check out my post on Sara Lee Cheesecake for a classic twist on this beloved dessert!
Expert Tips for Easter Egg Cheesecake Jars
Chill Effect: Ensure to chill the jars for at least 2 hours after assembling; this helps the cheesecake filling set and makes serving easier.
Piping Perfection: Use a piping bag for layering the cheesecake mixture; it gives a professional look and ensures neat, even layers.
Room Temperature: Allow cream cheese to soften to room temperature before mixing; this prevents lumps and ensures a smooth filling for your Easter Egg Cheesecake Jars.
Adjust Sweetness: Taste the cheesecake filling before layering; you can adjust the sweetness based on your preference by adding more powdered sugar if necessary.
Customize Colors: If you prefer not to use food coloring, simply layer the plain filling; the colorful toppings will still create a festive look without altering the taste.
Make Ahead Options
These Easter Egg Cheesecake Jars are a perfect choice for meal prep, allowing you to enjoy a refreshing dessert without the last-minute rush. You can prepare the crust and cheesecake filling up to 24 hours in advance. Simply mix the graham cracker crumbs, sugar, and butter for the crust, then press it into the jars. For the cheesecake filling, beat the cream cheese, sugar, and vanilla, and whip the cream separately, folding them together. Store the filled jars in the refrigerator (without toppings) to maintain their delicious texture. When ready to serve, simply top with whipped cream, pastel candy eggs, and sprinkles for a delightful finish that’s just as festive and tasty!
How to Store and Freeze Easter Egg Cheesecake Jars
Fridge: Keep your jars in the refrigerator for up to 3 days for optimal freshness. Ensure they are covered tightly to prevent any drying out or absorption of odors.
Freezer: For longer storage, you can freeze the jars before adding toppings. They can be frozen for up to 2 months. Thaw in the fridge overnight before serving.
Reheating: No reheating is necessary for these jars, as they are best served cold. Just top with fresh whipped cream and decorations right before enjoying!
Easter Egg Cheesecake Jars Recipe FAQs
What kind of graham crackers should I use for the crust?
You should use standard graham cracker crumbs to create a firm yet crumbly crust. If you want to add a twist of flavor, crushed Oreos or shortbread cookies make fantastic substitutes! Just ensure they’re finely crushed for the best texture.
How should I store Easter Egg Cheesecake Jars?
Store your jars in the refrigerator, tightly sealed, for up to 3 days. If they’re not covered properly, they may dry out or absorb other odors in the fridge. I usually cover mine with plastic wrap, ensuring each jar is airtight and fresh.
Can I freeze Easter Egg Cheesecake Jars? How?
Absolutely! To freeze your jars, assemble the cheesecake layers but wait to add the toppings. Cover the jars tightly with lids or plastic wrap and freeze for up to 2 months. When you’re ready to enjoy them, just place them in the fridge overnight to thaw, then add your whipped cream and festive decorations right before serving.
What if my cheesecake filling is too thick? How can I fix it?
If your cheesecake filling turns out thicker than desired, try adding a tablespoon or two of heavy cream and gently folding it in until the texture loosens up. Remember to do this gradually to avoid making it too runny. You want it to be smooth and easily spreadable, ensuring a lovely finish when layered in your jars!
Are there any dietary considerations for these jars?
Yes! If you’re making these jars for someone with allergies, check the ingredients carefully. The cream cheese and whipped cream contain dairy, so consider using dairy-free alternatives. Additionally, if you’re catering to vegans, you can find vegan cream cheese and plant-based whipped cream options in stores. Substitute according to dietary needs to ensure everyone can enjoy these delightful Easter Egg Cheesecake Jars!
Easter Egg Cheesecake Jars: A Fun No-Bake Delight!
Ingredients
Equipment
Method
- In a medium bowl, combine graham cracker crumbs, sugar, and melted unsalted butter until the mixture resembles damp sand. Press the mixture firmly into the bottom of jars to form an even layer. Allow to set.
- In a large bowl, beat softened cream cheese until creamy. Gradually add sifted powdered sugar and vanilla extract until light and airy.
- Whip heavy cream in a separate bowl until stiff peaks form. Fold whipped cream into cream cheese mixture in two parts.
- Divide filling into two bowls. Mix pink gel food coloring or strawberry powder into one bowl until evenly colored.
- Layer pink cheesecake filling over the crust, followed by a layer of white cheesecake filling, smoothing each layer.
- Top each jar with homemade whipped cream, pastel candy eggs, and sprinkles. Refrigerate for at least 2 hours before serving.
")