Sometimes you just need a quick, easy, and irresistible dessert that makes everyone smile. These Easy Frosted Mini Brownie Cups are the perfect treat for any occasion—birthday parties, holiday gatherings, or even a casual movie night at home. With their rich, fudgy centers and luscious chocolate frosting, they’re guaranteed to disappear in no time.
What makes this recipe even better is how simple it is to prepare. Using a box of Ghirardelli brownie mix as the base ensures these brownie cups turn out perfectly every single time. Top them with creamy chocolate frosting and maybe even a few sprinkles, and you’ve got a dessert that’s as fun to make as it is to eat!
Why You’ll Love These Mini Brownie Cups
You’ll love these mini brownie cups because they’re the ideal balance of effort and reward. With just five simple ingredients, you can create rich, decadent bites of brownie bliss. They’re easy to transport, making them great for potlucks and parties, and their small size makes them perfect for portion control (if you can stop at just one!).
Plus, these mini brownie cups are versatile—you can switch up the frosting, add toppings, or even include a surprise filling for a personalized touch. The possibilities are endless!
Ingredients for Easy Frosted Mini Brownie Cups
| Ingredient | Amount |
|---|---|
| Eggs | 2 large |
| Vegetable oil | ½ cup |
| Water | 2 tablespoons |
| Ghirardelli dark chocolate premium brownie mix | 1 (20-ounce) box |
| Chocolate frosting (e.g., Baker’s Corner) | 1 (16-ounce) tub |
Step-by-Step Instructions
1. Preheat and Prepare
- Preheat your oven to 325°F (165°C).
- Grease a mini muffin tin or line it with mini cupcake liners for easy removal.
- Gather all your ingredients to streamline the process.
2. Mix the Batter
- In a large mixing bowl, combine the eggs, vegetable oil, and water. Whisk until well blended.
- Add the Ghirardelli brownie mix to the bowl and stir until the batter is smooth and fully combined.
3. Fill the Muffin Tin
- Use a spoon or small scoop to fill each cup of the mini muffin tin about ¾ full with brownie batter.
4. Bake
- Place the muffin tin in the preheated oven and bake for 12–15 minutes.
- To check for doneness, insert a toothpick into the center of a brownie cup. It should come out with a few moist crumbs, not wet batter.
- Remove the brownies from the oven and let them cool in the tin for about 5 minutes. Then, transfer them to a wire rack to cool completely.
5. Frost the Brownie Cups
- Once the mini brownie cups have cooled completely, frost each one with a spoon or pipe the frosting using a piping bag fitted with a decorative tip.
- Add sprinkles or other decorations for a festive touch, if desired.
Creative Topping Ideas
- Sprinkles: Add a pop of color with rainbow or seasonal sprinkles.
- Chopped Nuts: Sprinkle chopped walnuts, pecans, or almonds for added crunch.
- Mini Marshmallows: Top each brownie cup with a mini marshmallow for a s’mores-inspired twist.
- Candy Pieces: Use mini M&Ms, crushed peppermint candies, or caramel bits.
- Drizzles: Add a drizzle of white chocolate, caramel, or peanut butter on top of the frosting for extra flair.
Tips for Perfect Mini Brownie Cups
- Don’t Overbake: Keep an eye on your brownies to ensure they stay fudgy. Overbaking can lead to dry brownie cups.
- Use a Non-Stick Muffin Tin: This makes it much easier to remove the brownie cups without damaging their shape.
- Let Them Cool Completely: Frosting warm brownie cups can cause the frosting to melt. Be patient and wait until they’re fully cooled.
- Customize the Frosting: Swap chocolate frosting for vanilla, peanut butter, or cream cheese frosting for a fun twist.
Nutritional Information (Per Serving)
| Nutrient | Amount |
|---|---|
| Calories | 150 |
| Carbohydrates | 18g |
| Protein | 1g |
| Fat | 8g |
| Sugar | 12g |
| Sodium | 80mg |
Note: Nutritional values are approximate and may vary depending on the brands of ingredients used.
Why These Mini Brownie Cups Are Perfect for Any Occasion
Mini brownie cups are the ultimate dessert for any occasion because they’re so versatile. Whether you’re hosting a holiday party, looking for a classroom-friendly treat, or need a last-minute dessert for a dinner party, these bite-sized treats are always a hit.
Their small size makes them great for serving a crowd, and they’re easy to customize to match any theme or flavor preference. Plus, they’re fun to make—whether you’re baking solo or with kids, these mini brownie cups are guaranteed to bring joy to your kitchen.
FAQs About Easy Frosted Mini Brownie Cups
1. Can I use a different brownie mix?
Yes! While the Ghirardelli brownie mix adds a rich and fudgy flavor, any brownie mix will work for this recipe.
2. Can I freeze mini brownie cups?
Absolutely. Let the brownie cups cool completely, then freeze them (without frosting) in an airtight container for up to 3 months. Thaw at room temperature before frosting.
3. Can I make these ahead of time?
Yes, you can bake the brownie cups a day ahead and frost them just before serving to keep them fresh.
4. What’s the best way to store leftover brownie cups?
Store leftover brownie cups in an airtight container at room temperature for up to 3 days or in the refrigerator for up to a week.
5. Can I make this recipe gluten-free?
Yes, simply use a gluten-free brownie mix, and ensure that your frosting is gluten-free as well.
6. How do I prevent the brownie cups from sticking to the pan?
Use a non-stick mini muffin tin and grease it well, or line the cups with mini cupcake liners for easy removal.
Final Thoughts and Call to Action
These Easy Frosted Mini Brownie Cups are the perfect combination of fudgy, rich brownies and creamy frosting. They’re quick to make, fun to decorate, and absolutely irresistible. Whether you’re baking for a crowd or just treating yourself, these brownie cups are guaranteed to bring a smile to everyone’s face.
Ready to impress your friends and family with these bite-sized delights? Gather your ingredients, preheat your oven, and start baking today. Don’t forget to get creative with the toppings and share your creations—you’re sure to inspire others to try this fun and easy recipe!
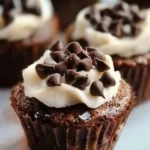
Easy Frosted Mini Brownie Cups
- Total Time: 25 minutes
- Yield: 24 mini brownie cups
Description
These Easy Frosted Mini Brownie Cups are the perfect combination of rich, fudgy brownies and creamy chocolate frosting, all packed into a bite-sized dessert. They’re incredibly easy to make and perfect for parties, potlucks, or simply satisfying your sweet tooth at home. Whether you decorate them with sprinkles, nuts, or candy, these mini brownie cups are sure to bring joy to anyone who takes a bite!
Ingredients
- 2 large eggs
- ½ cup vegetable oil
- 2 tablespoons water
- 1 (20-ounce) box Ghirardelli dark chocolate premium brownie mix (with chocolate chips)
- 1 (16-ounce) tub of chocolate frosting (e.g., Baker’s Corner or any brand of your choice)
Instructions
-
Preheat and Prepare
- Preheat your oven to 325°F (165°C).
- Grease a mini muffin tin or line it with mini cupcake liners for easy removal.
-
Mix the Batter
- In a large mixing bowl, whisk together the eggs, vegetable oil, and water until well combined.
- Add the Ghirardelli brownie mix to the bowl and stir until the batter is smooth and fully incorporated.
-
Fill the Muffin Tin
- Using a spoon or a small cookie scoop, evenly distribute the brownie batter into the mini muffin tin. Fill each cup about ¾ full to ensure they rise evenly without spilling over.
-
Bake
- Place the muffin tin in the preheated oven and bake for 12–15 minutes.
- Check for doneness by inserting a toothpick into the center of a brownie cup. It should come out with a few moist crumbs (not wet batter).
- Once baked, remove the brownie cups from the oven and allow them to cool in the tin for 5 minutes. Transfer them to a wire rack to cool completely.
-
Frost the Brownie Cups
- Once the brownie cups have cooled completely, use a spoon or a piping bag fitted with a decorative tip to frost the tops with chocolate frosting.
- Optional: Add sprinkles, chopped nuts, or mini candies for extra decoration.
Notes
- Make It Ahead: You can bake the brownie cups a day in advance and store them in an airtight container. Frost just before serving for the freshest look and taste.
- Custom Frosting Flavors: Swap the chocolate frosting for cream cheese, vanilla, or peanut butter frosting to switch up the flavors.
- Storage: Store the frosted brownie cups in an airtight container at room temperature for up to 3 days, or refrigerate for up to a week.
- Prep Time: 10 minutes
- Cook Time: 15 minutes
- Category: Dessert
- Method: Baking
- Cuisine: American


