")
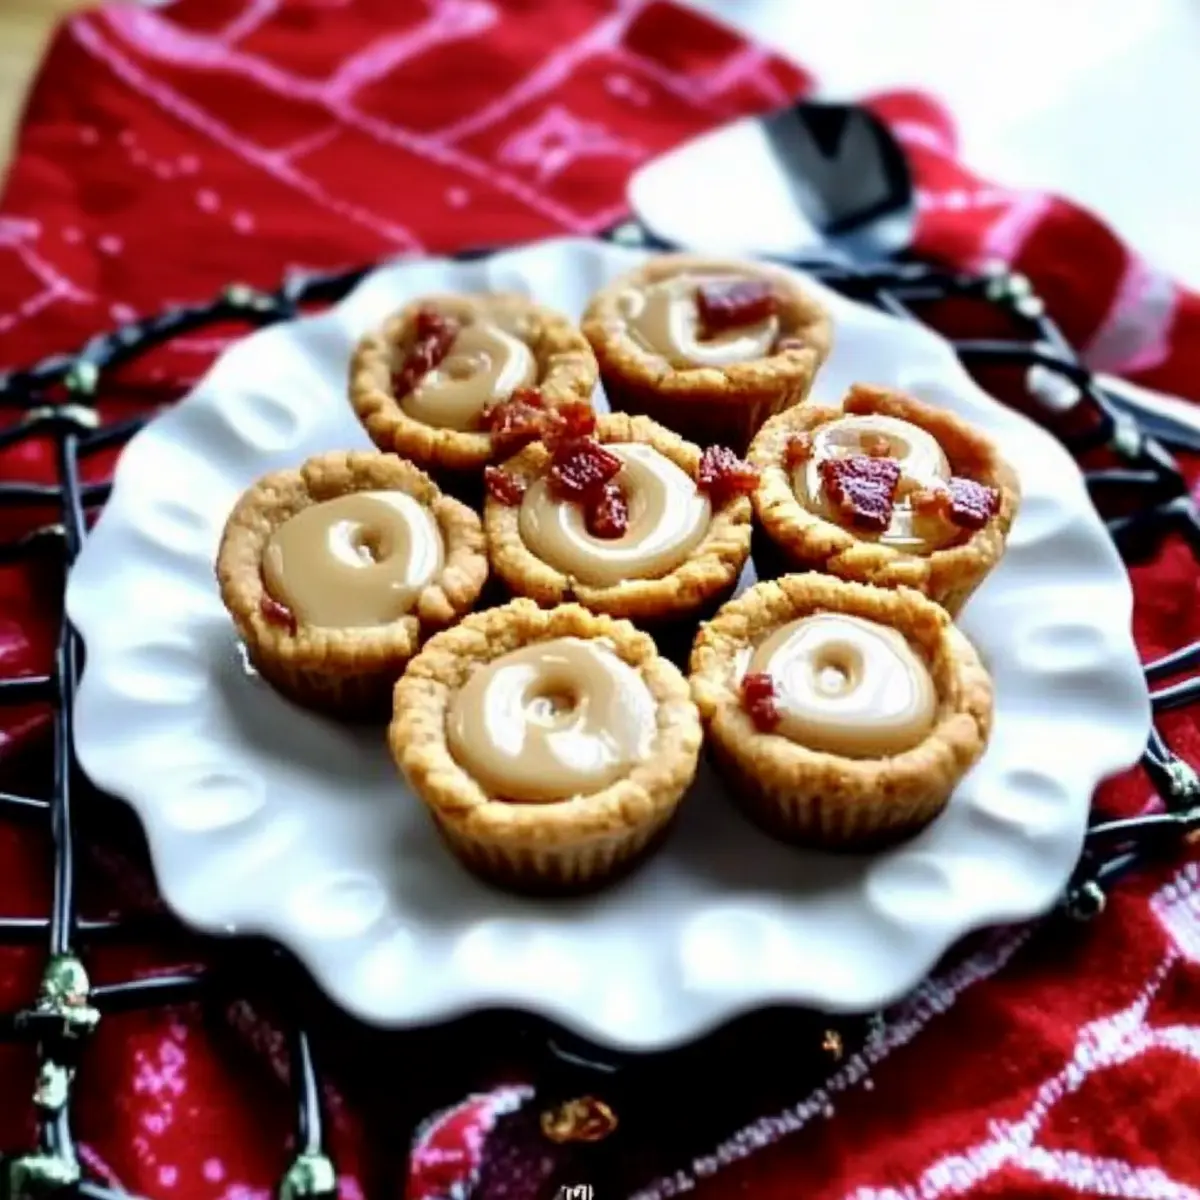
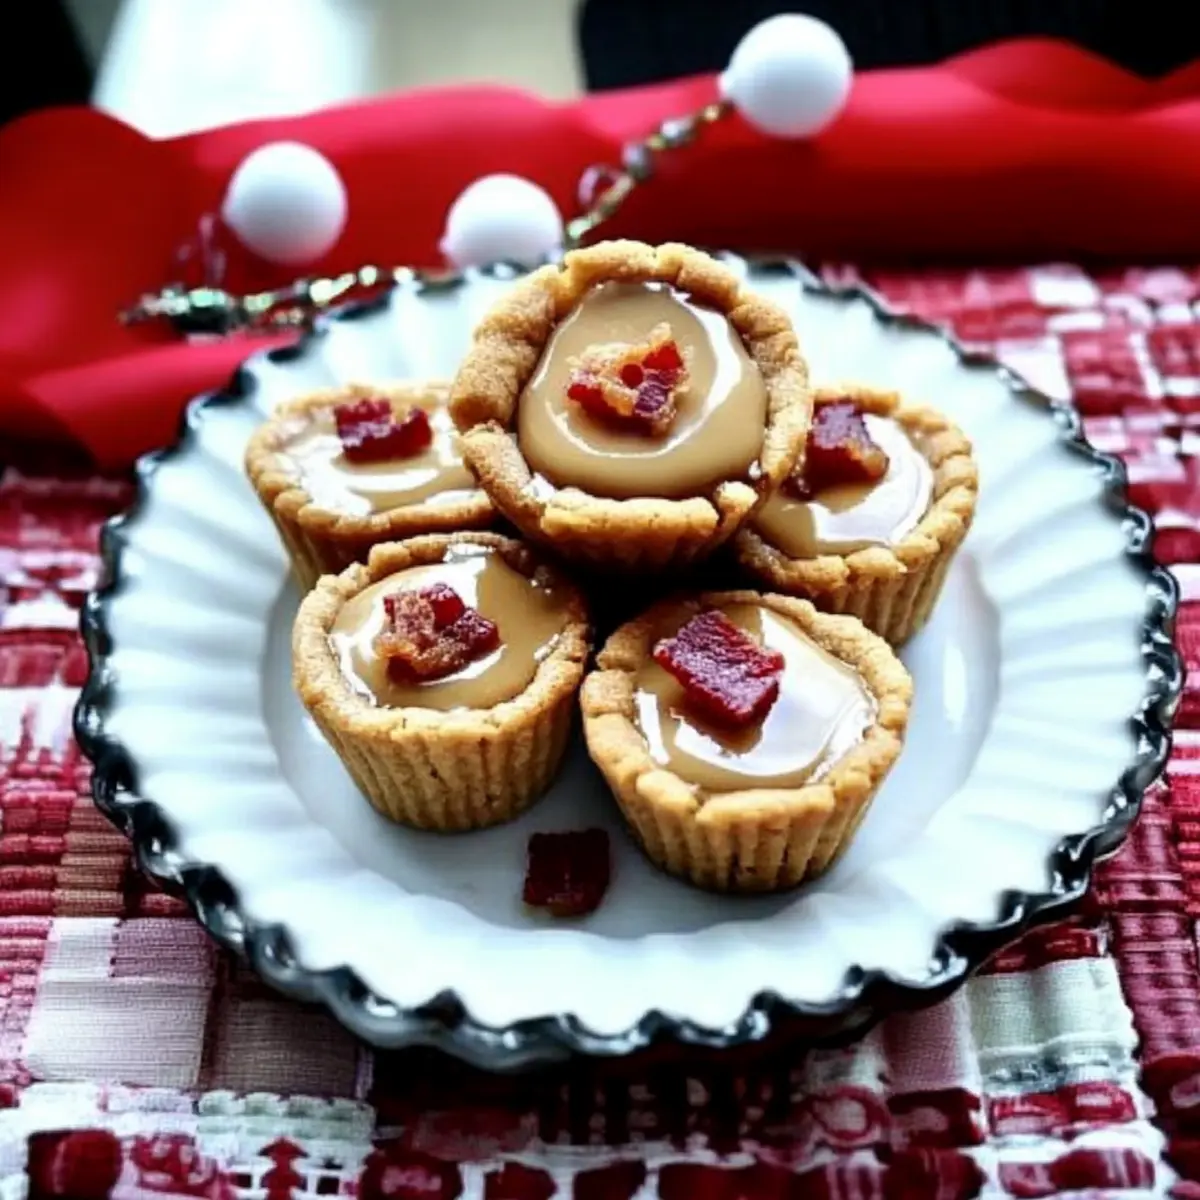
As the scent of warm cookies fills the air, memories of holiday gatherings come rushing back—laughter, sweet treats, and the joyful chaos of family celebrations. This year, I’m excited to introduce you to my Elvis Inspired Cookie Cups, a whimsical twist on classic flavors that combine peanut butter, banana, bacon, and honey. These easy-to-make cookie cups bring incredible sweetness and savory crunch, perfect for impressing guests at your holiday table. Each bite offers a delicious surprise that defies the ordinary—truly a crowd-pleaser! Ready to add a touch of adventure to your baking? Let’s dive into this delightful recipe and create something unforgettable together!
Why are Elvis Inspired Cookie Cups a Must-Try?
Unique Flavor Fusion: These cookie cups combine peanut butter, banana, and bacon, creating a sweet and savory taste explosion that surprises the palate.
Effortless Preparation: With simple ingredients and easy steps, you can whip up these delicious treats without any fuss. Perfect for home bakers and those new to the kitchen!
Ideal for Gatherings: These cookie cups are sure to impress your guests and spark conversation, making them the perfect addition to your holiday dessert table.
Customizable Treats: Feel free to experiment with variations – try using chocolate chips or even Millies Cookies Bake for different flavor profiles!
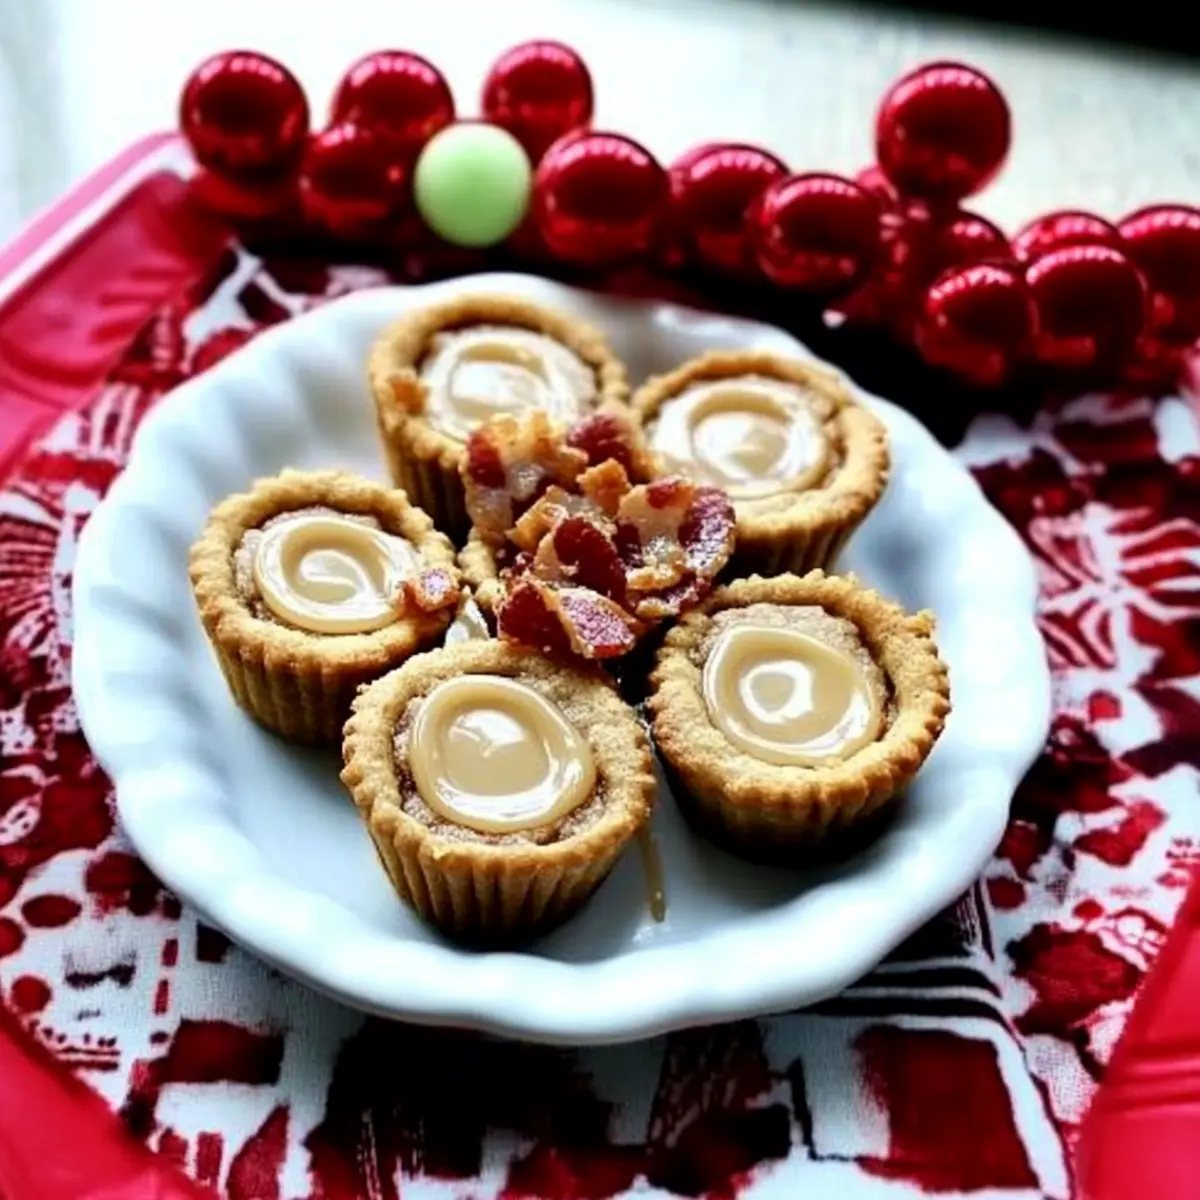
Picture-Perfect Presentation: Their delightful appearance makes them a standout treat that’s as lovely to look at as they are to eat. Prepare to earn those “oohs” and “aahs”!
Elvis Inspired Cookie Cups Ingredients
For the Cookie Base
• All-Purpose Flour – Provides the primary structure for your cookie cups; avoid substitutions for best results.
• Cornstarch – Helps achieve a tender texture and lightness in every bite.
• Salt – Enhances overall flavor, bringing out the sweetness.
• Baking Powder & Baking Soda – These leavening agents create a light and fluffy cookie base.
• Light Brown Sugar – Adds a touch of caramel flavor and moisture; avoid artificial sweeteners for best texture.
• Granulated Sugar – Sweetens the cookie; balances the flavors.
• Unsalted Butter – Creates richness; ensure it’s melted and cooled to achieve the right consistency.
For the Egg Mixture
• Large Egg & Egg Yolks (2) – Provides structure and richness; don’t use whole eggs for a different whipping effect.
• Vanilla Extract – A small splash enhances the overall flavor profile of the cookies.
For the Savory & Sweet Mix-ins
• Precooked Bacon – Adds a savory crunch; opt for quality bacon for the best flavor.
• Dried Banana Chips – Imparts a chewy texture and banana flavor; chop them finely to disperse evenly.
• Honey – Acts as a sweetener that keeps the filling moist; swapping it could change the sweetness levels.
• Peanut Butter Chips – Brings a sweet and nutty flavor to the party, though chocolate chips can be a fun alternative.
For the Creamy Filling
• Heavy Cream – Helps achieve a smooth filling; using full-fat is essential for best results.
• Unsalted Butter – Adds creaminess when melted with other filling ingredients.
• Corn Syrup – Used for creating a silky texture in the filling; don’t skip this for smoothness.
Get ready to indulge in these delightful Elvis Inspired Cookie Cups—a unique blend of flavors that makes holiday baking so much fun!
Step‑by‑Step Instructions for Elvis Inspired Cookie Cups
Step 1: Prepare Dough
In a large mixing bowl, whisk together 2 cups of all-purpose flour, 1 tablespoon of cornstarch, ½ teaspoon of salt, 1 teaspoon of baking powder, and ½ teaspoon of baking soda. In a separate bowl, combine ¾ cup of brown sugar, ½ cup of granulated sugar, and ½ cup of melted unsalted butter. Mix well before adding 1 large egg, 2 egg yolks, and 1 teaspoon of vanilla extract, blending until smooth.
Step 2: Combine Mixtures
Gradually incorporate the dry ingredients into the wet mixture, stirring until just combined to avoid overmixing. Fold in ½ cup of finely chopped precooked bacon and ½ cup of chopped dried banana chips, ensuring even distribution. The dough should be thick and slightly sticky, indicating it’s ready for chilling.
Step 3: Chill Dough
Cover the bowl with plastic wrap and refrigerate the dough for 2-3 hours, or overnight if you have the time. Chilling is crucial for achieving the perfect texture in your Elvis Inspired Cookie Cups, so don’t skip this step! When you’re ready to bake, the dough will be firmer and easier to handle.
Step 4: Preheat Oven
While the dough is chilling, preheat your oven to 350°F (175°C). This ensures your cookies will bake evenly and achieve that golden brown color you’re looking for. Prepare a mini-muffin pan by greasing it lightly with butter to prevent sticking.
Step 5: Shape Cookies
Once the dough has chilled, remove it from the refrigerator. Using a tablespoon, scoop portions of dough and press them into the greased mini-muffin pan cups, covering the bottom and sides. Bake the cookie cups for 15-20 minutes, or until they are golden brown around the edges.
Step 6: Shape Cavities
As soon as the cookie cups come out of the oven, use the handle of a wooden spoon to gently create cavities in each cookie. This step is essential for holding the delicious filling; do it while they are still warm, as it will help maintain shape without cracking.
Step 7: Prepare Filling
In a small saucepan, drizzle honey into the cavities of each cookie cup. Then, melt together ½ cup of heavy cream, ½ cup of unsalted butter, ½ cup of corn syrup, and 1 cup of peanut butter chips over low heat, stirring constantly until smooth and creamy.
Step 8: Fill Cookie Cups
Using a spoon, carefully fill each cavity in the Elvis Inspired Cookie Cups with the rich peanut butter filling. Make sure to fill them generously but don’t overfill to prevent spilling over while cooling.
Step 9: Cool and Set
Allow the filled cookie cups to cool completely at room temperature. This will help the filling firm up perfectly. Once cooled, your Elvis Inspired Cookie Cups will be ready to be devoured, combining savory and sweet in each delightful bite!

Make Ahead Options
These Elvis Inspired Cookie Cups are perfect for busy home cooks looking to save time without sacrificing flavor! You can prepare the cookie dough up to 24 hours in advance by mixing all the ingredients and refrigerating it. Chilling the dough not only enhances the flavor but also makes it easier to work with when you’re ready to bake. The cookie cups can be shaped and baked up to 3 days ahead of time; simply store them in an airtight container at room temperature. When you’re ready to serve, just fill them with the prepared peanut butter filling, and they’ll be just as delicious as if made fresh that day—a real time-saver for entertaining!
Storage Tips for Elvis Inspired Cookie Cups
-
Room Temperature: Store the cookie cups in an airtight container at room temperature for up to 2 days, but keep in mind that the bacon may lose its crispness over time.
-
Fridge: For longer freshness, refrigerate your Elvis Inspired Cookie Cups in a covered container for up to 5 days. This is especially important due to the bacon.
-
Freezer: To freeze, place the filled cookie cups in a single layer on a baking sheet until firm, then transfer them to an airtight container or a freezer-safe bag. They will last for up to 2 months.
-
Reheating: To enjoy warm, reheat the cookie cups straight from the fridge or freezer in a preheated oven at 350°F (175°C) for about 5-10 minutes until warmed through, being cautious not to overbake!
Elvis Inspired Cookie Cups Customization
Get ready to unleash your creativity in the kitchen! These cookie cups invite delicious experimentation that caters to every taste bud.
-
Dairy-Free: Swap heavy cream and butter with coconut cream and coconut oil to keep it creamy without dairy.
-
Sweetener Alternatives: Replace honey with maple syrup for a unique twist, offering a different yet delightful sweetness.
-
Banana Boost: For a stronger banana flavor, incorporate mashed ripe banana in place of dried chips—the moisture will give a lovely texture.
-
Choco Delight: Use chocolate chips instead of peanut butter chips for a rich, decadent twist that chocolate lovers will adore.
-
Heat It Up: Add a pinch of cayenne pepper or some crushed red pepper flakes to the peanut butter filling for unexpected spicy notes.
-
Nutty Flavor: Toss in chopped walnuts or pecans alongside the bacon for an added crunch and nutty essence.
-
Fruity Surprise: Using dried cranberries or raisins can add an extra layer of sweetness and a fruity surprise in every bite.
-
Candied Bacon: For a sweeter experience, try candied bacon instead of regular bacon to elevate those flavors, creating a sweet and savory sensation.
Feel free to play around with these variations! You can discover delightful combinations and new favorites, much like how some love the classic flavors of Mocha Cookie Crumble, while others may prefer savory notes. Happy baking!
What to Serve with Elvis Inspired Cookie Cups
As you bring these whimsical cookie cups into your holiday festivities, consider complementing their unique flavors with a variety of delightful sides and treats.
-
Chocolate Dipped Strawberries: The freshness and light sweetness of strawberries provide a lovely contrast to the rich cookie cups, enhancing the overall experience.
-
Creamy Vanilla Ice Cream: A scoop of smooth vanilla ice cream melts beautifully over the warm cookie cups, creating a luxurious blend of flavors and textures.
-
Maple Roasted Pecans: Their crunchy texture and warm, nutty flavor pair perfectly with the sweet and savory notes in the cookie cups, adding a festive touch to your presentation.
-
Honey Drizzled Biscotti: The intense flavors of biscotti, especially when drizzled with honey, align harmoniously with the cookie cups and serve as a delightful crunch.
-
Fresh Fruit Platter: A variety of seasonal fruits adds brightness and tartness, offering a refreshing balance that cuts through the richness of the dessert.
-
Spiced Hot Chocolate: Cozy up your gathering with a cup of spiced hot chocolate, enhancing the sweet and savory elements of the Elvis Inspired Cookie Cups while providing an indulgent treat.
-
Caramel Sauce: Drizzling a bit of caramel sauce over the cookie cups not only enhances their sweetness but also adds an inviting sticky texture that beckons to be savored.
Let your imagination roam with these delightful pairings that provide a rounded and sumptuous holiday spread!
Expert Tips for Elvis Inspired Cookie Cups
-
Chill for Best Texture: Refrigerate the dough for 2-3 hours; this step ensures your Elvis Inspired Cookie Cups have a perfect structure without spreading too much during baking.
-
Quality Counts: Use good quality bacon for a more flavorful crunch. Off-brand or low-quality bacon can lead to an unappetizing taste.
-
Avoid Overmixing: Gently mix the wet and dry ingredients together. Overmixing can lead to tough cookie cups, ruining that light and tender texture.
-
Measure Ingredients Accurately: Use the proper measurements for all ingredients, especially for flour and sugars, to achieve the best result. A kitchen scale can be very helpful!
-
Don’t Skip the Cavities: Creating the cavities while the cookie cups are still warm helps them maintain their shape. This allows for enough room for the creamy filling.
-
Custom Fillings: Feel free to experiment with different fillings, like chocolate or caramel, if you want to switch up the flavor profile of your Elvis Inspired Cookie Cups!
Elvis Inspired Cookie Cups Recipe FAQs
How do I choose ripe bananas for this recipe?
Absolutely! For this recipe, it’s best to use bananas that are just ripe. Look for bananas that are yellow with a few brown spots—this indicates they are sweet and will mash nicely. Overripe bananas will be mushier than desired and can add excess moisture, which might affect the cookie texture.
What’s the best way to store leftover cookie cups?
Very! You should store your Elvis Inspired Cookie Cups in an airtight container. They’ll keep well in the refrigerator for up to 5 days. Just remember that the bacon might lose some crispness over time, so enjoy them sooner rather than later for the best experience!
Can I freeze these cookie cups? How do I do it?
Definitely! To freeze, place your cookie cups in a single layer on a baking sheet and pop them into the freezer until they’re firm, usually about 1-2 hours. Afterward, transfer them to an airtight container or a freezer-safe bag. They can stay frozen for up to 2 months. When you’re ready to enjoy them, just reheat in a preheated oven at 350°F (175°C) for about 5-10 minutes until warmed through.
What if my cookie cups are too crumbly after baking?
Not to worry! If your Elvis Inspired Cookie Cups are crumbly, this may be due to overmixing or too much flour. Make sure to carefully measure your ingredients, and when mixing, combine just until incorporated. If the dough feels too dry, you can try adding a tablespoon of melted butter or a splash of milk for moisture.
Are these cookie cups safe for pets or anyone with allergies?
Great question! Because they contain peanut butter, bacon, and honey, these cookie cups are not suitable for pets and should be kept away from them. Additionally, if anyone has allergies to nuts, gluten, or dairy, you may want to consider alternatives such as nut-free or dairy-free substitutes. Always check ingredient labels to ensure safety!
Can I use fresh bananas instead of dried banana chips?
Absolutely! If you opt for fresh bananas, you’ll need to reduce the moisture in the dough slightly. Mash the banana and use only half the amount of banana chips, adding a little extra flour (start with a tablespoon) to balance the moisture. This will help maintain the right texture in your cookie cups!
Elvis Inspired Cookie Cups: Sweet & Savory Bliss in Every Bite
Ingredients
Equipment
Method
- In a large mixing bowl, whisk together flour, cornstarch, salt, baking powder, and baking soda.
- In a separate bowl, combine brown sugar, granulated sugar, and melted butter. Mix well and add the egg, egg yolks, and vanilla extract.
- Gradually incorporate the dry ingredients into the wet mixture. Fold in bacon and dried banana chips.
- Cover the bowl with plastic wrap and refrigerate the dough for 2-3 hours.
- Preheat your oven to 350°F (175°C) and prepare a mini-muffin pan by greasing with butter.
- Scoop portions of dough into the greased mini-muffin pan cups and bake for 15-20 minutes.
- Use the handle of a wooden spoon to create cavities in the warm cookie cups.
- Drizzle honey into the cavities of each cookie cup and melt together heavy cream, butter, corn syrup, and peanut butter chips.
- Fill each cookie cup cavity with the rich peanut butter filling.
- Allow the filled cookie cups to cool completely at room temperature.
")