")
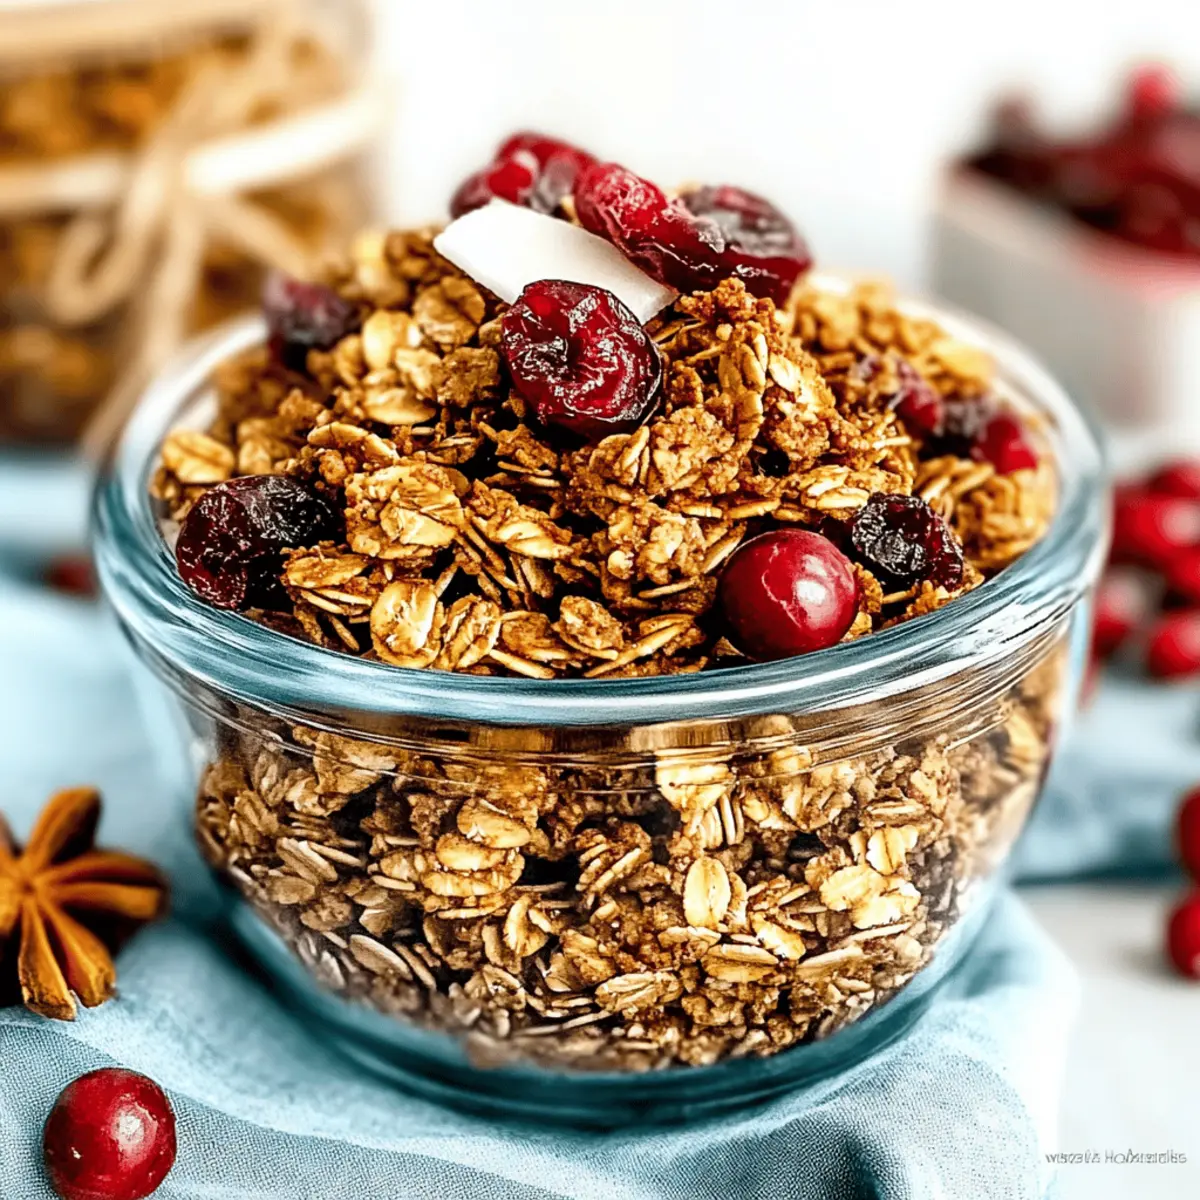
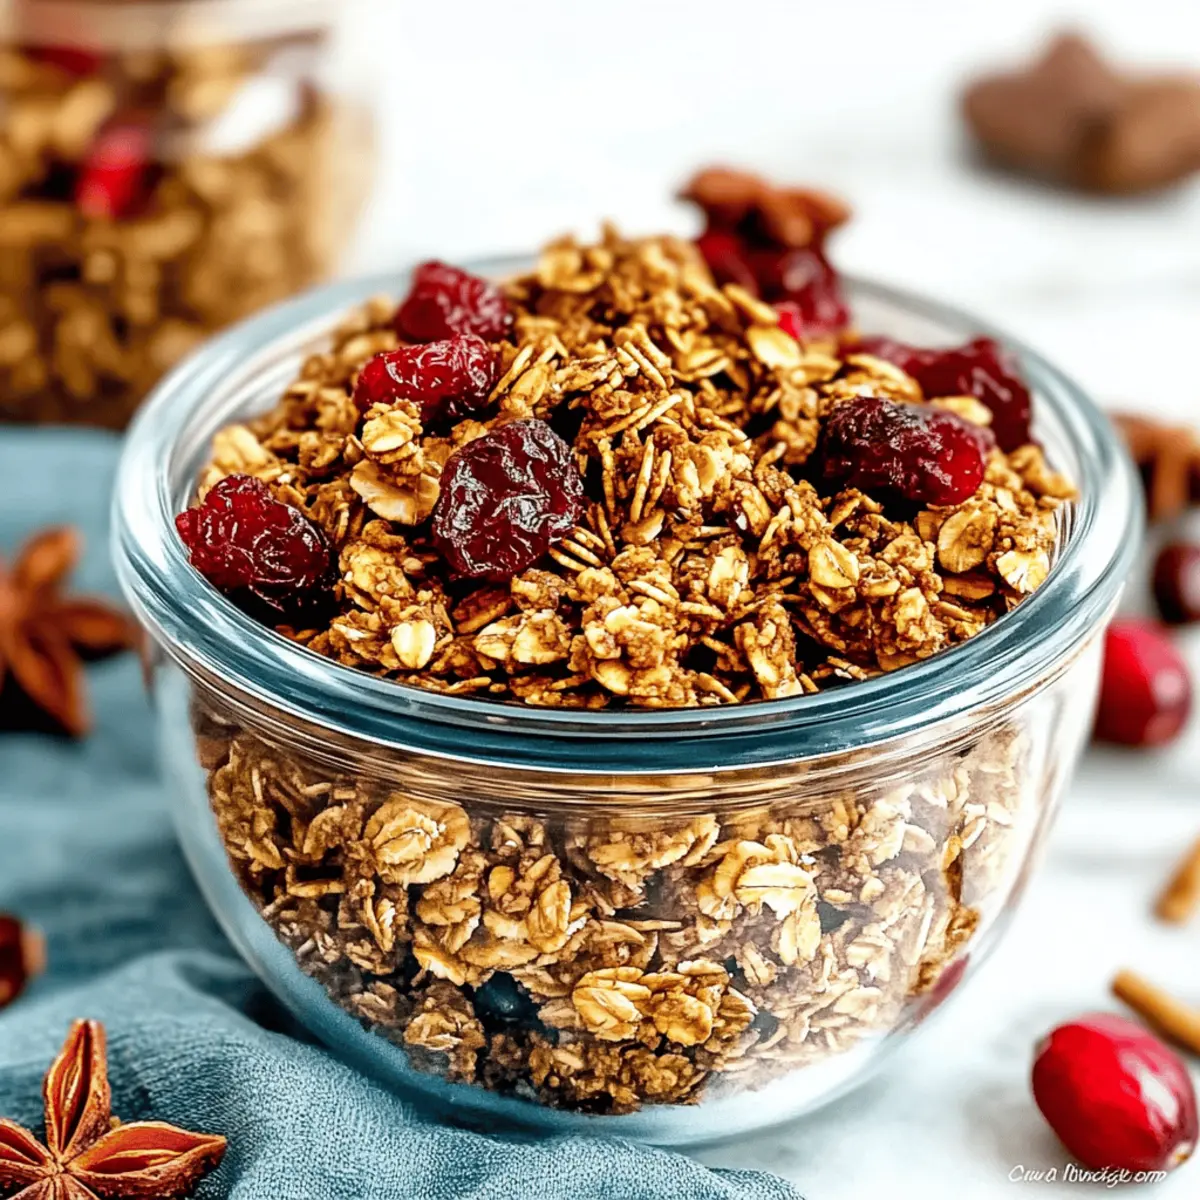
The warm scent of ginger and cinnamon wafting through my kitchen always brings back memories of holiday cheer. This year, I decided to transform that nostalgic aroma into a deliciously healthy treat with my Gingerbread Granola. Not only is this recipe quick and easy to whip up, but it’s also gluten-free and customizable, making it perfect for busy mornings or cozy snacking sessions. Imagine starting your day with a bowl of crunchy oats, nuts, and festive spices that capture the essence of gingerbread cookies without the guilt. Trust me, everyone—friends, family, and even yourself—will adore this wholesome twist on a classic favorite! Curious about how to add a touch of festivity to your breakfast routine? Let’s dive into the recipe!

How can you enjoy gingerbread flavors daily?
Deliciously Healthy: This Gingerbread Granola offers a guilt-free indulgence that captures the festive flavors of the season, making every bite a delight.
Quick to Prepare: With minimal prep time, you can whip up this wholesome breakfast in no time, perfect for busy mornings!
Customizable Options: Whether you prefer nuts, seeds, or dried fruits, this recipe allows for endless variations to please every palate.
Crowd-Pleasing Treat: Serve it at holiday gatherings or as a cozy snack; everyone will love the delightful crunch and sweet-spicy aroma.
Nutritional Boost: Packed with fiber and healthy fats, this granola is not just tasty but also fuels your day with nourishment.
Elevate your breakfast game with this festive treat or sprinkle it over yogurt for an extra flavor twist!
Gingerbread Granola Ingredients
For the Base
• Rolled Oats – Provide the foundation for a crunchy granola; opt for certified gluten-free oats if needed.
• Nuts (e.g., almonds, pecans) – Add healthy fats and a delightful crunch; substitute seeds for nut-free options.
For the Sweetness
• Maple Syrup or Honey – Adds natural sweetness and helps bind the granola together; reduce for a less sweet flavor or swap with nut butter.
• Vanilla Extract – Enhances the overall flavor, giving a warm backdrop to the spices.
For the Flavor
• Spices (cinnamon, nutmeg, ginger, cloves) – Provide that classic gingerbread taste; adjust according to your spice preference for the perfect Gingerbread Granola.
For Texture (Optional)
• Coconut Flakes – Offers a tropical twist and chewy texture; can be left out if desired.
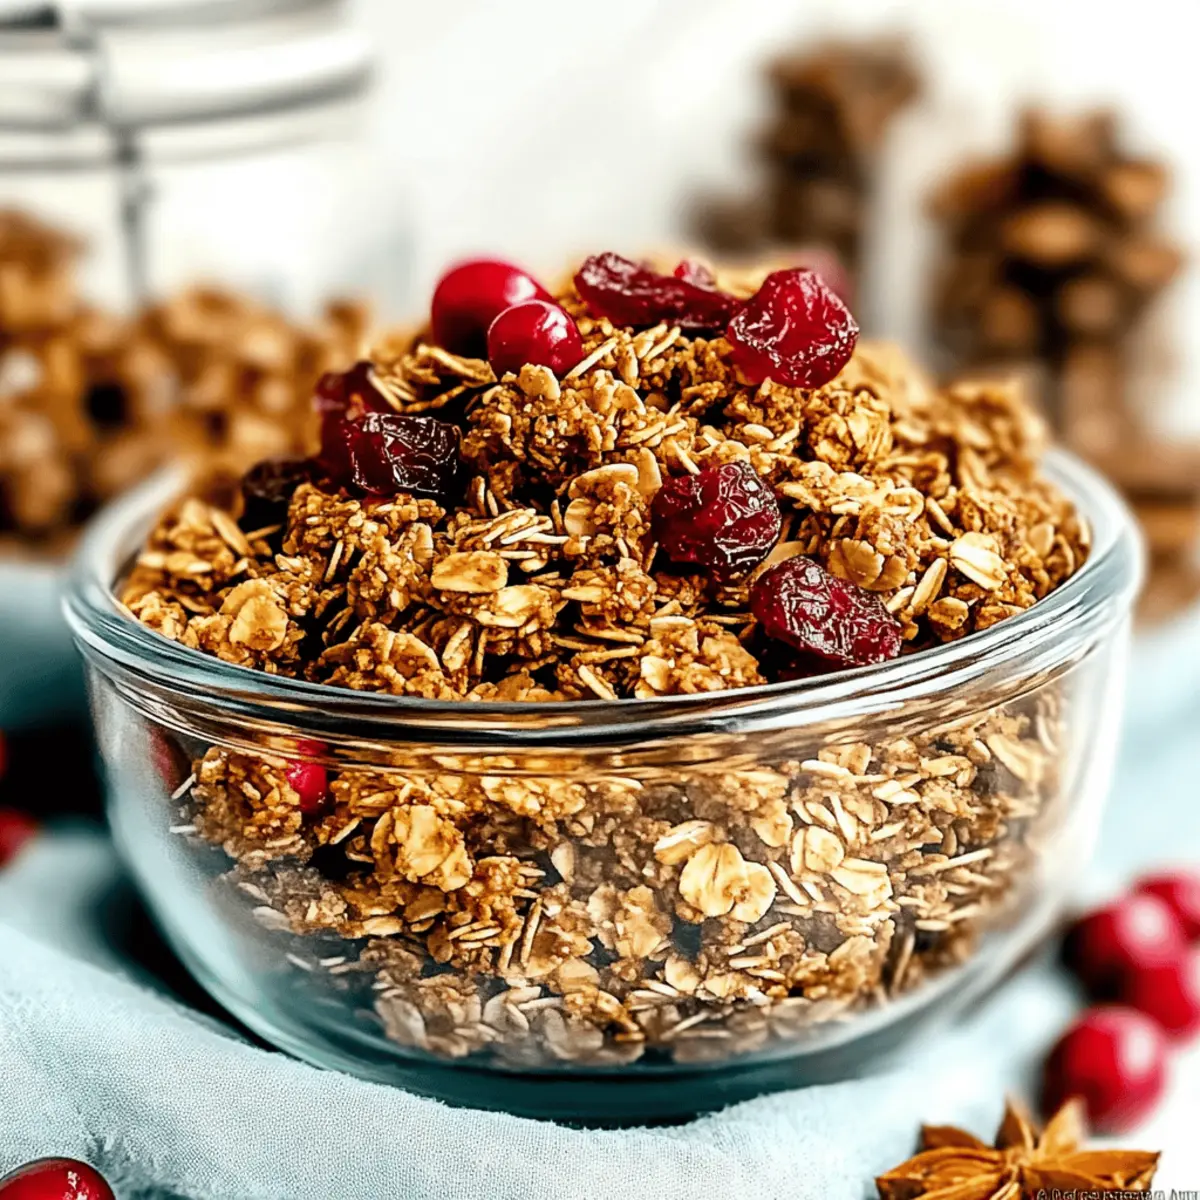
• Dried Fruits (e.g., cranberries or apricots) – Introduces natural sweetness and chewiness; a lovely addition for extra flavor.
• Nut Butter (optional) – Increase moisture and add depth; it can also replace sweeteners if you prefer.
Feel inspired and ready to whip up your batch of Gingerbread Granola? Let’s keep that holiday spirit alive with every delightful handful!
Step‑by‑Step Instructions for Gingerbread Granola
Step 1: Preheat the Oven
Begin by preheating your oven to 350°F (175°C). This temperature is ideal for achieving that perfect golden-brown color while creating a delightful crunch in your Gingerbread Granola. As the oven warms up, ensure you have your baking sheet lined with parchment paper, ready for the granola mixture.
Step 2: Combine Dry Ingredients
In a large mixing bowl, combine rolled oats, your choice of chopped nuts, spices (cinnamon, nutmeg, ginger, and cloves), and a pinch of salt. Mix well until all the dry ingredients are evenly distributed. This creates a flavorful base for your Gingerbread Granola, ensuring that every cluster is packed with that festive taste.
Step 3: Whisk Wet Ingredients
In another bowl, whisk together the maple syrup or honey, vanilla extract, and any nut butter you wish to include until the mixture is smooth and well combined. The wet ingredients add sweetness and help bind the dry mixture together, creating that irresistible sticky factor in your Gingerbread Granola.
Step 4: Combine Mixtures
Pour the wet mixture over the dry ingredients and use a spatula to mix thoroughly. Ensure that every oat and nut is coated evenly, which helps in achieving that crunchy texture you desire. The aroma of spices will start to fill the air, signaling that your Gingerbread Granola is well on its way.
Step 5: Spread and Bake
Spread the combined mixture evenly onto your prepared baking sheet. Make sure it’s in a thin layer to allow for even cooking. Place it in the preheated oven and bake for about 30 minutes, stirring halfway through to promote even browning. You’ll know it’s done when it turns a lovely golden hue and fills your kitchen with a warm, inviting scent.
Step 6: Cool and Store
Once baked, remove the granola from the oven and let it cool completely on the baking sheet. This step is crucial for achieving the desired crunchy texture. Once cool, transfer your Gingerbread Granola to an airtight container for storage. It can be enjoyed for up to two weeks, making it a perfect make-ahead treat for holiday celebrations.
Expert Tips for Gingerbread Granola
• Stirring is Key: Stir the granola halfway through baking to ensure it browns evenly and achieves that desired crunch.
• Spice It Up: Don’t hesitate to taste and adjust the spices before baking; this will ensure your Gingerbread Granola has just the right flavor balance you love.
• Watch the Clock: Keep an eye on your granola in the last few minutes of baking; it can go from golden to burnt quickly, so set a timer!
• Ingredient Substitutions: When swapping ingredients, be mindful of moisture levels. For example, if using seeds instead of nuts, you might need to adjust the liquid ingredients slightly.
• Storage Tip: Store your cooled Gingerbread Granola in an airtight container at room temperature to maintain its crunchiness for weeks to come!
Storage Tips for Gingerbread Granola
Room Temperature: Store your Gingerbread Granola in an airtight container at room temperature for up to two weeks to maintain its crunchy texture and delightful flavor.
Freezer: If you want to keep your granola longer, freeze it in zip-top bags for up to six months. Thaw it at room temperature before enjoying to preserve its consistency.
Reheating: If your granola softens over time, simply spread it on a baking sheet and warm it in a 350°F oven for about 5-10 minutes for that fresh-out-of-the-oven crunch.
Airtight Guidelines: Always ensure your storage container is airtight to prevent moisture and keep the festive flavors intact!
Gingerbread Granola Variations & Substitutions
Feel free to get creative with this Gingerbread Granola recipe, customizing it to suit your taste and dietary needs!
-
Nut-Free: Use sunflower seeds or pumpkin seeds in place of nuts for a similar crunch without the allergens.
Nuts can be fantastic, but seeds also bring their own delightful flavor and nutritional benefits. -
Spice Swap: Add cardamom or allspice to intensify the gingerbread flavor for a festive twist.
Embrace the warmth of the holidays by mixing in these aromatic spices that will enhance your granola experience! -
Lower Sweetener: Reduce maple syrup or honey and substitute with mashed bananas for a natural sweetness boost.
You’ll enjoy the same loving flavors with added nutrition, making it a scrumptious yet guilt-free option. -
Chocolate Indulgence: Toss in dark chocolate or white chocolate chips after baking for a sweet surprise.
Imagine finding a melting morsel as you munch on your crunchy granola—a delight everyone will savor! -
Coconut Love: Incorporate coconut chips for an extra layer of texture and tropical flair, enhancing the granola’s bite.
Coconut adds a lovely chewiness that beautifully contrasts the crunch of the oats and nuts. -
Dried Fruit Medley: Experiment with different dried fruits like cherries or raisins for a chewy texture and added sweetness.
Each bite offers a delightful surprise as fruits infuse your granola with flavor, creating an enjoyable mix. -
Grain-Free Option: Substitute rolled oats with quinoa for a gluten-free and alternative texture twist.
Quinoa not only makes this granola grain-free but also boosts protein content, perfect for a hearty start to your day.
Explore these variations and feel free to mix and match as you create your unique and delicious Gingerbread Granola that will keep you eagerly diving back for more! For even more ideas, check out these tips on perfecting your granola game, or consider enhancing it with yogurt for a wholesome breakfast option.
Make Ahead Options
These Gingerbread Granola snacks are perfect for meal prep enthusiasts! You can mix the dry ingredients (oats, nuts, and spices) up to 3 days in advance and store them in an airtight container to maintain their crunch. For even more convenience, the wet ingredients can be whisked together and refrigerated for up to 24 hours; this helps save time on busy mornings. When ready to bake, simply combine both mixtures, spread on a baking sheet, and bake as directed. The result will be just as delicious and fresh as if made on the spot, providing you with a wholesome, crunchy breakfast or snack whenever you need it!
What to Serve with Irresistible Gingerbread Granola
Indulging in a bowl of this seasonal treat opens the door to endless pairing possibilities that elevate your breakfast or snack time.
- Yogurt Parfait: Layer with creamy yogurt and fresh fruits for a delightful contrast, adding a touch of tanginess to balance the sweetness.
- Warm Milk: Enjoy warm milk poured over the granola for a cozy, comforting breakfast that wraps you in warmth like a favorite sweater.
- Fruit Salad: A vibrant fruit salad adds refreshing juicy textures, complementing the spiced crunch of the granola while brightening your plate.
- Honey Drizzle: A drizzle of honey enhances the sweet notes, making every bite feel like a special occasion, perfect for holiday gatherings.
- Spiced Chai Latte: Pair the granola with a spiced chai latte to deepen the cozy flavors, providing a delicious warming drink alongside your meal.
- Smoothie Bowl: Serve atop a smoothie bowl bursting with vibrant fruits, creating a crunchy element that contrasts beautifully with the creamy base.
- Dried Fruit Medley: Trail mix with dried fruits like cranberries and apricots brings another layer of sweetness and chewy texture to your granola experience.
- Ice Cream Treat: Sprinkle over vanilla or coconut ice cream for a festive dessert that brings the holiday spirit straight to your bowl.
Gingerbread Granola Recipe FAQs
What type of oats should I use for Gingerbread Granola?
Absolutely! Using rolled oats as the base is key for achieving that crunchy texture. For those with gluten sensitivities, I recommend opting for certified gluten-free oats to ensure your Gingerbread Granola suits your dietary needs.
How long can I store Gingerbread Granola?
Your Gingerbread Granola can be stored in an airtight container at room temperature for up to two weeks. For longer storage, keep it in zip-top bags and freeze it for up to six months. Just thaw at room temperature before enjoying it again!
Can I freeze my Gingerbread Granola?
Yes, you can! To freeze, allow the granola to cool completely, then transfer it to airtight zip-top bags. Make sure to remove as much air as possible before sealing. When you’re ready to enjoy it, simply thaw it at room temperature for a few hours or overnight.
What should I do if my granola is too chewy?
If your Gingerbread Granola turns out too chewy, it might be due to insufficient baking time. To fix this, spread it out on a baking sheet and return it to a preheated 350°F oven for another 5-10 minutes until it crisps up nicely. Stir halfway through to ensure even cooking.
Is this granola safe for those with nut allergies?
Absolutely! You can easily make Gingerbread Granola nut-free by replacing nuts with seeds like sunflower or pumpkin seeds. Just be sure to check the labels of any other ingredients to avoid cross-contamination, and adjust the recipe to maintain the right texture.
Can I adjust the spice levels in the recipe?
Very much so! Feel free to customize the spice quantities according to your personal taste. If you want a bolder flavor, you can increase the amounts of cinnamon, ginger, or even add a pinch of cardamom for a unique twist. Taste the mixture before baking to get it just right!
Gingerbread Granola for a Cozy, Festive Breakfast Delight
Ingredients
Equipment
Method
- Preheat your oven to 350°F (175°C) and prepare your baking sheet lined with parchment paper.
- In a large mixing bowl, combine rolled oats, chopped nuts, spices, and a pinch of salt.
- In another bowl, whisk together maple syrup or honey, vanilla extract, and any nut butter until smooth.
- Pour the wet mixture over the dry ingredients and mix thoroughly with a spatula.
- Spread the mixture evenly onto your prepared baking sheet and bake for about 30 minutes, stirring halfway through.
- Once baked, let the granola cool completely on the baking sheet before transferring to an airtight container.
")