The holidays are the perfect time to gather with family and friends, and no holiday party is complete without a dessert that steals the spotlight. This Grinch Lush Dessert – A Festive, No-Bake Treat for the Holidays is as fun to make as it is to eat. With vibrant green layers, a creamy texture, and playful decorations, this dessert is sure to be the talk of your holiday table. Plus, it’s easy to prepare, making it a no-stress option for any holiday gathering.
Let’s dive into how to make this showstopping dessert step by step.
Why You’ll Love This Grinch Lush Dessert
- No-Bake Simplicity: This dessert is entirely no-bake, making it a perfect choice for busy holiday schedules.
- Festive Appearance: The bright green layers and heart-shaped sprinkles are inspired by the Grinch, bringing a playful holiday touch to your table.
- Creamy and Delicious: With layers of cream cheese, pudding, and whipped topping, it’s a treat everyone will love.
- Customizable: Add your favorite toppings or adjust the peppermint flavor to make it your own.
- Make-Ahead Convenience: This dessert sets perfectly in the fridge, so you can make it the day before your event.
Ingredients
For the Crust
| Ingredient | Quantity |
|---|---|
| Golden Oreo sandwich cookies | 36 cookies |
| Salted butter, melted | 6 tablespoons |
For the Layers
| Ingredient | Quantity |
|---|---|
| Cream cheese, softened | 8 ounces |
| Powdered sugar | 1 cup |
| Cool Whip, softened | 16 ounces (divided) |
| Green gel food coloring | As needed |
| Instant vanilla pudding mix | 6.8 ounces (two 3.4-ounce boxes or one large box) |
| Cold milk | 2½ cups |
| Peppermint extract | 1 teaspoon |
| Red gel food coloring | Few drops (for decoration) |
For the Topping (Optional)
| Ingredient | Quantity |
|---|---|
| Green jimmies sprinkles | As desired |
| Heart-shaped sprinkles | As desired |
Step-by-Step Instructions
Step 1: Prepare the Crust
- Crush the Cookies: Place the Golden Oreo cookies in a food processor and pulse until they’re finely crushed.
- Mix the Crust: Add the melted butter to the crushed cookies and pulse until the mixture resembles damp sand.
- Form the Crust: Press the cookie mixture evenly into the bottom of a 9×13-inch dish. Use a spatula or the back of a spoon to press it firmly into place.
- Chill the Crust: Place the dish in the refrigerator to set while you prepare the layers.
Step 2: Make the Cream Cheese Layer
- Combine Ingredients: In a medium bowl, beat the softened cream cheese and powdered sugar until smooth and creamy.
- Fold in Cool Whip: Gently fold in half of the Cool Whip (about 8 ounces) until well combined.
- Add Green Color: Add green gel food coloring, a few drops at a time, and mix until you achieve a vibrant green color.
- Spread the Layer: Spread the cream cheese mixture evenly over the chilled crust.
Step 3: Prepare the Pudding Layer
- Mix the Pudding: In a separate mixing bowl, whisk together the instant vanilla pudding mix, cold milk, and peppermint extract. Whisk for 2-3 minutes until the mixture thickens.
- Add Green Color: Add green gel food coloring to the pudding, a few drops at a time, until it matches the cream cheese layer’s bright green shade.
- Layer the Pudding: Gently spread the pudding mixture over the cream cheese layer, ensuring it’s evenly distributed.
- Chill Again: Return the dish to the refrigerator and chill for 10-15 minutes to allow the layers to set.
Step 4: Add the Whipped Topping
- Spread Cool Whip: Carefully spread the remaining Cool Whip over the pudding layer, creating a smooth and even top layer.
- Decorate (Optional): If desired, add red gel food coloring to a small portion of Cool Whip to create red hearts. Use a piping bag or spoon to place the hearts on the top layer.
Step 5: Decorate and Serve
- Add Sprinkles: Top the dessert with green jimmies sprinkles and heart-shaped sprinkles for a festive Grinch-inspired touch.
- Chill: Cover the dish with plastic wrap and refrigerate for at least 2-4 hours, or overnight, to let the layers firm up.
- Serve: Slice the dessert into squares and serve chilled.
Pro Tips for the Perfect Grinch Lush Dessert
- Press the Crust Firmly: Use the back of a spoon or the bottom of a measuring cup to press the crust firmly into the pan to ensure it holds together when sliced.
- Chill Each Layer: Allow each layer to chill fully before adding the next. This ensures clean, distinct layers.
- Vibrant Colors: Gel food coloring works best for vibrant colors without altering the texture of the layers.
- Make It Ahead: This dessert tastes even better the next day, as the layers have time to set and the flavors meld together.
- Creative Toppings: Add crushed candy canes, edible glitter, or mini marshmallows for extra holiday flair.
Nutritional Information (Per Serving)
| Nutrient | Amount |
|---|---|
| Calories | 350 |
| Total Fat | 18 g |
| Saturated Fat | 10 g |
| Carbohydrates | 40 g |
| Sugar | 25 g |
| Protein | 3 g |
FAQs About Grinch Lush Dessert
1. Can I use regular Oreos instead of Golden Oreos?
Yes, regular Oreos work fine, but the color of the crust will be darker and less neutral compared to Golden Oreos.
2. How do I stabilize homemade whipped cream for this recipe?
To substitute Cool Whip with homemade whipped cream, beat heavy cream with powdered sugar (2 tablespoons per cup of cream) until stiff peaks form.
3. Can I make this dessert without peppermint extract?
Absolutely! You can omit the peppermint extract or replace it with vanilla extract for a milder flavor.
4. Can I freeze this dessert?
It’s not recommended to freeze this dessert as the layers may separate when thawed.
5. How far in advance can I prepare this dessert?
You can prepare the dessert up to two days in advance. Cover tightly and store in the refrigerator until ready to serve.
6. How do I make clean slices when serving?
Use a sharp knife dipped in warm water, wiping it clean between each cut, for neat slices.
Final Thoughts
This Grinch Lush Dessert – A Festive, No-Bake Treat for the Holidays is a delightful way to add some fun and flavor to your holiday celebrations. With its creamy layers, playful green color, and festive decorations, it’s a dessert that’s sure to bring smiles to everyone’s faces—young and old alike. Whether you’re hosting a holiday party or simply looking to treat your family, this dessert is a must-try.
So grab your ingredients, follow these simple steps, and create a dessert that’s as joyful and colorful as the holidays themselves. Happy baking!
Print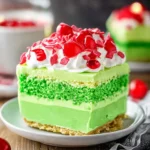
Grinch Lush Dessert – A Festive, No-Bake Treat for the Holidays
- Total Time: 2 hours 25 minutes
- Yield: 12-15 servings
Description
Looking for a show-stopping dessert that’s fun, festive, and perfect for the holidays? This Grinch Lush Dessert is exactly what you need. With its vibrant green layers, a hint of peppermint, and playful decorations, it’s an irresistible treat for kids and adults alike. Best of all? It’s no-bake, so you can spend less time in the kitchen and more time enjoying the holiday cheer.
Ingredients
For the Crust
- 36 Golden Oreo sandwich cookies
- 6 tablespoons salted butter, melted
For the Layers
- 8 ounces cream cheese, softened
- 1 cup powdered sugar
- 16 ounces Cool Whip, softened (divided)
- Green gel food coloring (as needed)
- 6.8 ounces instant vanilla pudding mix (two 3.4-ounce boxes or one large box)
- 2½ cups cold milk
- 1 teaspoon peppermint extract
- Red gel food coloring (optional, for decoration)
For the Topping (Optional)
- Green jimmies sprinkles
- Heart-shaped sprinkles
Instructions
Step 1: Prepare the Crust
- Crush the Golden Oreo cookies in a food processor until they become fine crumbs.
- Add melted butter to the cookie crumbs and pulse until the mixture resembles damp sand.
- Press the mixture evenly into the bottom of a 9×13-inch dish, forming a firm crust. Chill the crust in the refrigerator while preparing the layers.
Step 2: Make the Cream Cheese Layer
- In a medium bowl, beat the softened cream cheese and powdered sugar until smooth and creamy.
- Fold in half (about 8 ounces) of the Cool Whip until well combined.
- Add green gel food coloring, a few drops at a time, until the mixture turns a vibrant green.
- Spread the green cream cheese layer evenly over the chilled crust.
Step 3: Prepare the Pudding Layer
- In a separate bowl, whisk together the instant vanilla pudding mix, cold milk, and peppermint extract until thickened (about 2-3 minutes).
- Add green gel food coloring, a few drops at a time, to achieve the desired “Grinch-green” color.
- Spread the pudding mixture evenly over the cream cheese layer. Chill for 10-15 minutes to set the layers.
Step 4: Add the Whipped Topping
- Spread the remaining Cool Whip over the pudding layer, creating a smooth, even top layer.
- If desired, mix a small portion of Cool Whip with red gel food coloring to pipe small red hearts onto the surface of the dessert.
Step 5: Decorate and Serve
- Sprinkle the top with green jimmies sprinkles and heart-shaped sprinkles for a festive touch.
- Cover the dish with plastic wrap and chill for at least 2-4 hours, or overnight, to allow the layers to set.
- Slice into squares and serve chilled.
Notes
- Make Ahead: This dessert tastes even better when made a day in advance, as the layers firm up and the flavors meld together.
- Custom Toppings: For extra flair, add crushed candy canes, edible glitter, or mini marshmallows.
- Substitute for Cool Whip: You can use homemade whipped cream stabilized with powdered sugar as a substitute for Cool Whip.
- Storage: Store any leftovers in an airtight container in the refrigerator for up to 3 days.
- Prep Time: 25 minutes
- Cook Time: 2 hours
- Category: Dessert
- Method: No-Bake
- Cuisine: American


