")
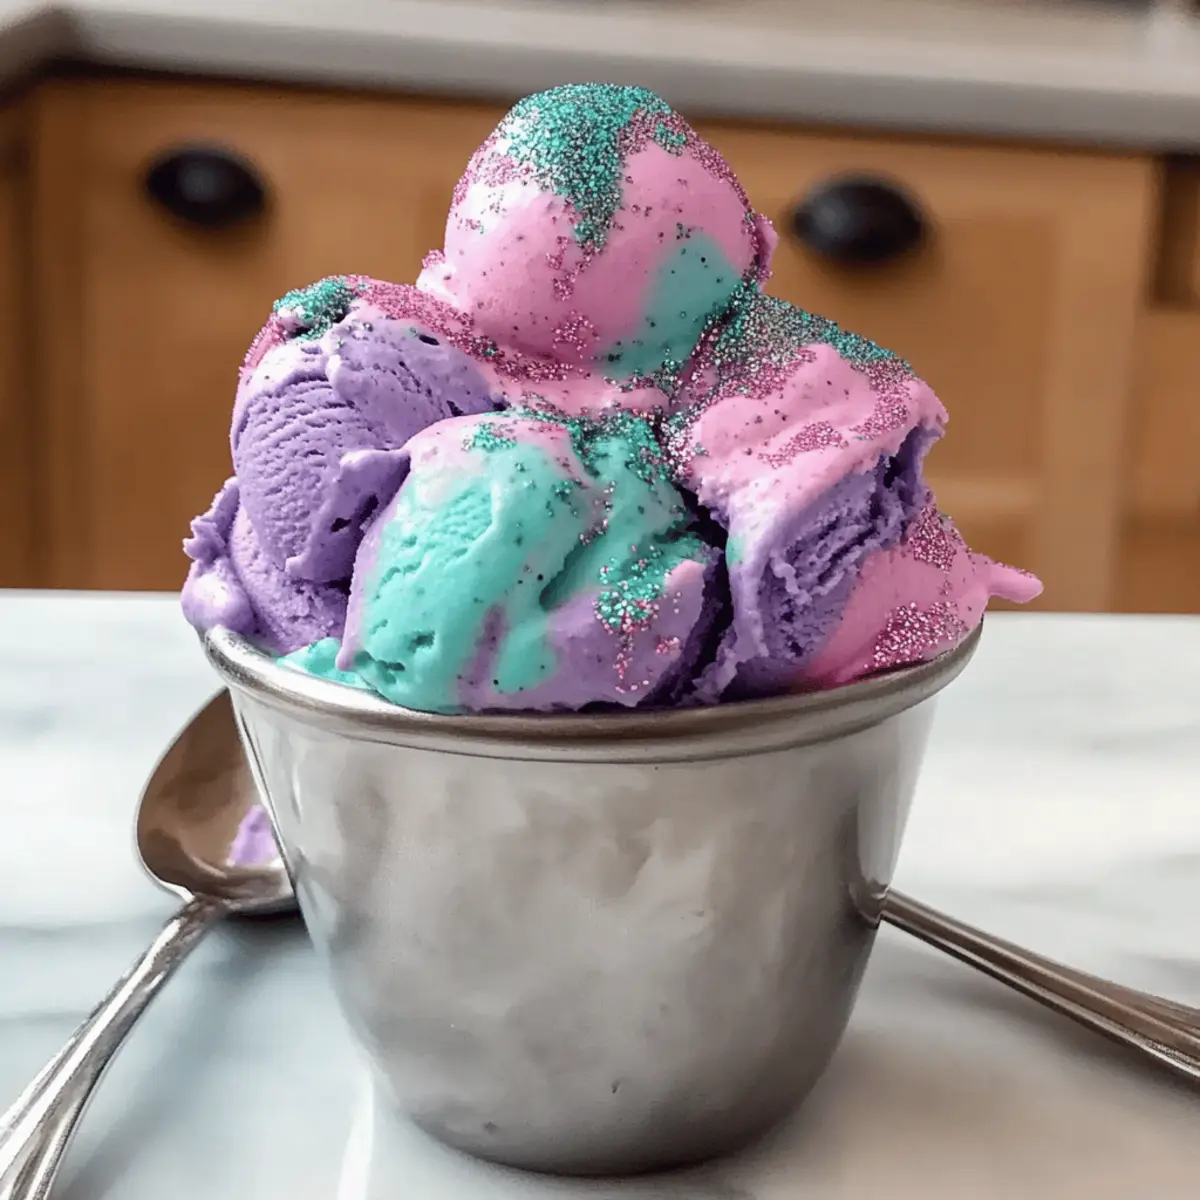
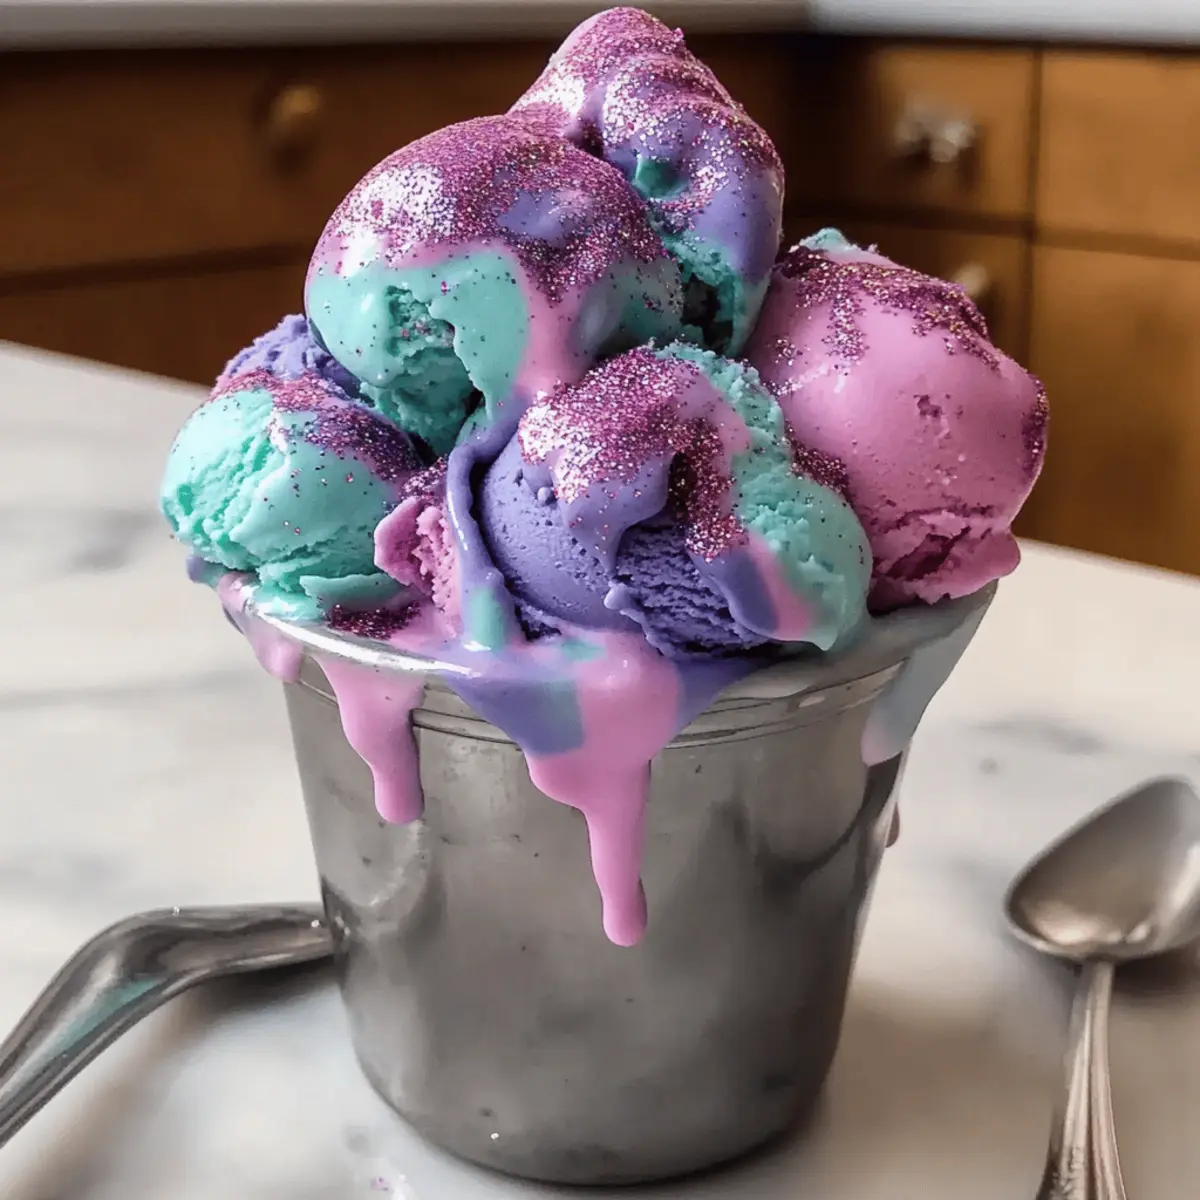
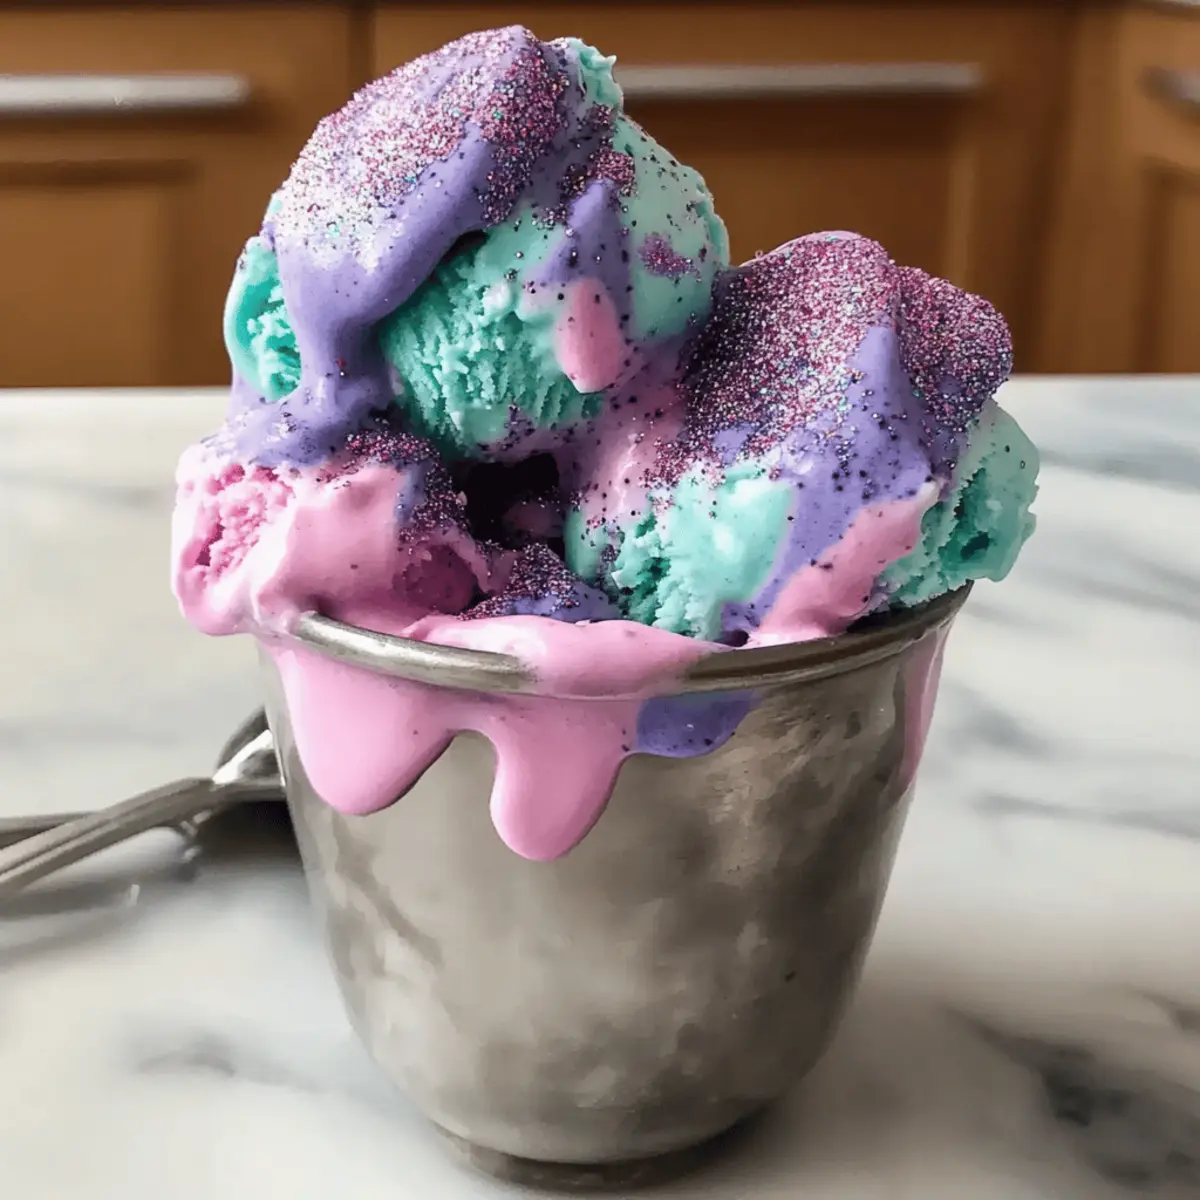
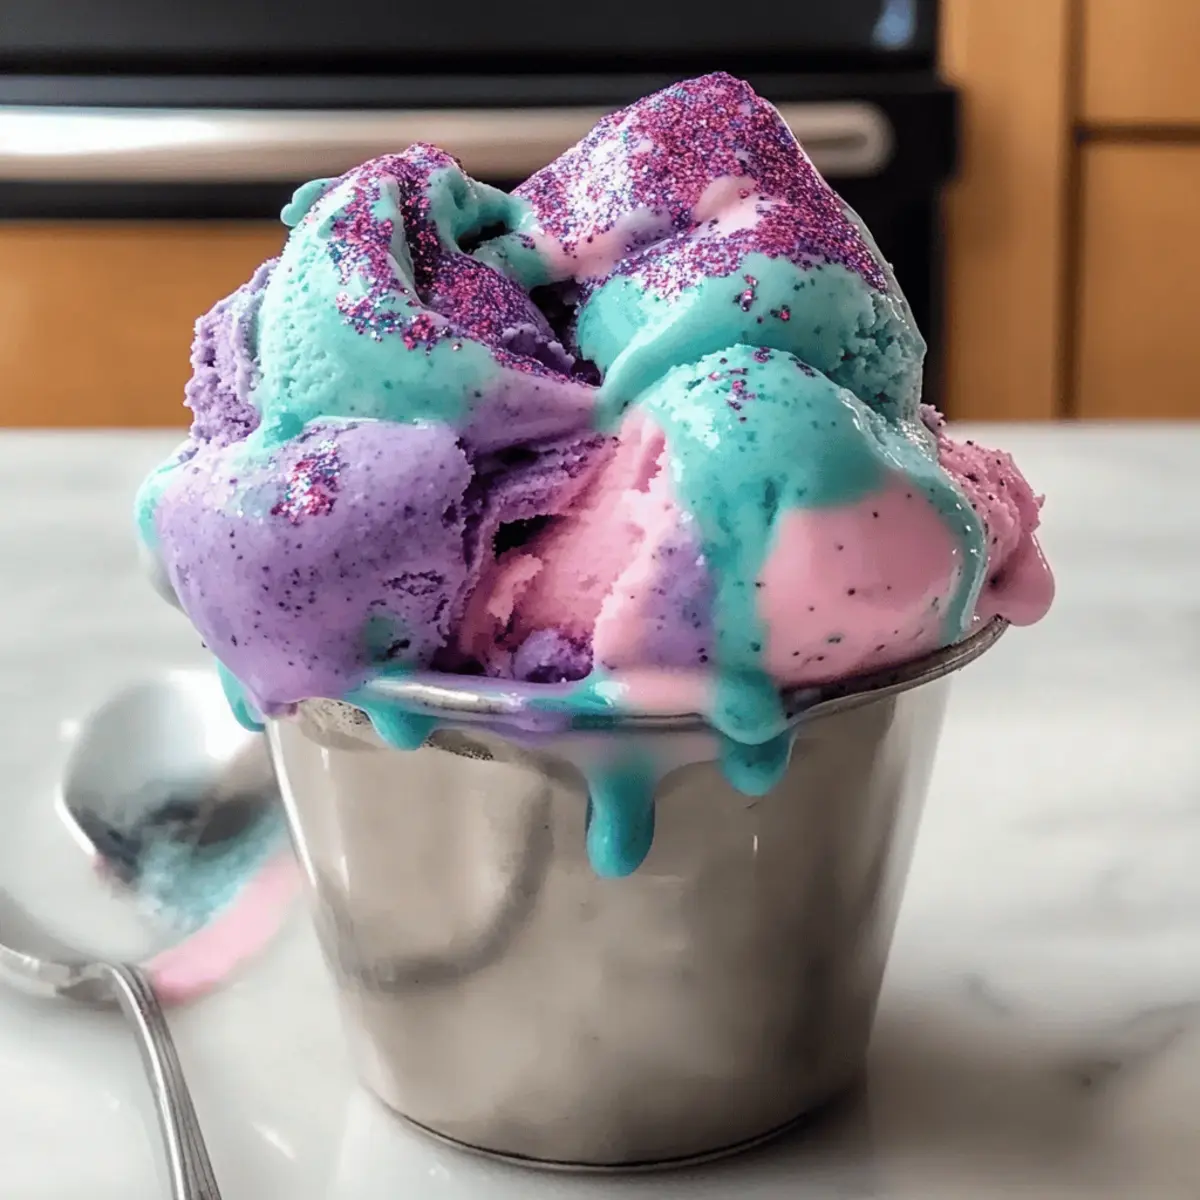
As I scoured my kitchen looking for something to make the day a bit more special, I stumbled upon an idea that sparked pure joy—Mermaid Ice Cream! This vibrant, no-churn treat instantly transforms any ordinary day into a magical experience, perfect for kids and adults alike. With its fluffy vanilla base and playful swirls of color, it’s not only eye-catching but incredibly easy to whip up. No fancy equipment? No problem! This delightful dessert takes minimal effort while delivering maximum satisfaction. Plus, it’s a fantastic way to unleash your creativity and celebrate any occasion. Are you ready to dive into a world of whimsical flavors? Let’s get started!
Why is Mermaid Ice Cream a must-try?
Easy, No-Churn Delight: Crafting Mermaid Ice Cream is a breeze, requiring no ice cream maker—ideal for any home cook seeking a sweet treat without fuss.
Vibrant and Fun: Its colorful swirls add a touch of magic, making it perfect for summer parties or themed celebrations.
Kid-Friendly: Children are naturally drawn to its playful appearance, turning dessert time into a joyful event that they’ll remember.
Versatile Variations: Feel like exploring? This recipe can easily transform into other whimsical desserts like the Unicorn Twist or Galaxy Vibes.
Creative Expression: Get your little ones involved in the kitchen and let them choose their favorite colors—creativity has no bounds!
Make-Ahead Convenience: With a simple freeze, you can prepare this treat in advance, freeing up your time to enjoy the festivities.
Mermaid Ice Cream Ingredients
• Create your delightful Mermaid Ice Cream with this simple list of essential ingredients!
For the Base
- Heavy Cream – Whip until stiff peaks form for a fluffy texture.
- Sweetened Condensed Milk – Adds a rich sweetness; substitute with coconut milk for a dairy-free version.
- Vanilla Extract – Enhances flavor; try coconut or almond for a twist if desired.
For the Colors
- Gel Food Coloring – Use to create vibrant pastel swirls; gel is better for saturation.
- Edible Glitter/Sprinkles – Adds a magical touch; optional but highly recommended for visual appeal.
Step‑by‑Step Instructions for Mermaid Ice Cream
Step 1: Whip the Cream
In a large mixing bowl, use a hand mixer or stand mixer to whip 2 cups of heavy cream on medium speed until stiff peaks form, which typically takes about 3-5 minutes. The cream should be thickened and hold its shape well. This light and fluffy texture will give your Mermaid Ice Cream its signature creaminess.
Step 2: Mix the Base
In a separate bowl, combine 1 can of sweetened condensed milk with 1 teaspoon of vanilla extract. Stir the mixture gently until fully blended, creating a creamy base that adds sweetness to your ice cream. Make sure to scrape down the sides of the bowl to incorporate all the ingredients smoothly.
Step 3: Fold Together
Carefully fold the whipped cream into the sweetened condensed milk mixture using a spatula. Begin by adding a scoop of whipped cream to lighten the condensed milk, then gently incorporate the rest until just combined. Be cautious not to over-mix; you want to maintain that airy texture essential for your delightful Mermaid Ice Cream.
Step 4: Add Colors
Divide the fluffy mixture equally into three bowls. In each bowl, add a few drops of gel food coloring—one pink, one purple, and one teal. Gently stir each with a spatula until the colors are vibrant but not over-mixed; you want those beautiful swirls to shine through in the final product.
Step 5: Layer the Mixtures
Grab a sturdy loaf pan for freezing. Start by placing alternating dollops of each colored mixture into the pan, layering them creatively to achieve a marbled effect. Use a knife or skewer to gently swirl the colors together, being careful not to overdo it, as this could mix the vibrant hues too much.
Step 6: Top with Sparkle
Once your Mermaid Ice Cream is layered, sprinkle edible glitter or colorful sprinkles on top for a whimsical touch. This decorative element will enhance the visual appeal, making your frozen treat even more enchanting. Ensure an even distribution for added sparkle as it freezes.
Step 7: Freeze Until Firm
Cover your loaf pan with plastic wrap or a lid, then place it in the freezer for at least 6 hours, or until the ice cream is firm. You’ll know it’s ready when it holds its shape and is no longer soft. This long freeze is essential for achieving the perfect texture in your magical dessert.
Expert Tips for Mermaid Ice Cream
-
Chill Your Tools: Ensure your mixing bowl and beaters are chilled before whipping the cream to achieve maximum volume for your Mermaid Ice Cream.
-
Coloring Wisely: Use gel food coloring for vibrant colors; avoid liquid dye, which can dilute your ice cream’s texture and flavor.
-
Gentle Folding: Be cautious when folding whipped cream into the condensed milk mixture—over-mixing can deflate the fluffy texture that makes your Mermaid Ice Cream delightful.
-
Layering Technique: For best visual results, add dollops of each color in varied patterns before swirling. This will enhance the marbled effect when served.
-
Freezing Success: Use a sturdy loaf pan for even freezing, preventing any unwanted ice crystals from forming for a smooth, creamy finish.
Mermaid Ice Cream Variations & Substitutions
Feel free to make this delightful treat your own with these fun and easy variations!
-
Unicorn Twist: Add more vibrant rainbow colors with cotton candy flavoring for a sweet, whimsical spin. Just imagine the smiles on your kids’ faces when they see this magical creation!
-
Galaxy Vibes: Swap for deep navy, violet, and silver hues for a celestial effect. This mesmerizing twist will transport your taste buds to outer space!
-
Fruit Infusion: Mix in pureed fruits like strawberries or mangoes, or add some citrus zest for a refreshingly zesty flavor. It’s a great way to sneak in some natural goodness and fruitiness!
-
Cone Presentation: Serve your Mermaid Ice Cream in waffle cones dipped in white chocolate and sprinkles. Alternatively, transform it into ice cream sandwiches using your favorite cookies for a lovely handheld treat.
-
Dairy-Free Delight: Substitute heavy cream with coconut cream for a luscious, dairy-free version that retains the signature fluffiness. You won’t miss the dairy with their surprisingly rich flavor!
-
Nutty Crunch: Incorporate finely chopped nuts like almonds or pistachios for a delightful texture contrast. This adds an enjoyable crunch that’ll make your dessert even more satisfying.
-
Spice It Up: Introduce a hint of cinnamon or nutmeg to the vanilla base for a warm and cozy flavor twist. This unexpected addition can transform your ice cream into a comforting treat perfect for any season!
For further inspiration, consider enhancing your dessert experience with a scoop of homemade Taro Ice Cream or top it with my creamy French Vanilla Creamer. The possibilities are endless!
What to Serve with Mermaid Ice Cream?
Transform your Mermaid Ice Cream into a feast of delightful pairings that enhance its whimsical charm.
- Colorful Fruit Salad: A medley of fresh fruits adds a refreshing contrast, balancing the sweetness of the ice cream beautifully.
- Waffle Cones: Serve your scoops in crispy cones for an enjoyable crunch, making each bite more exciting. Kids love the added fun!
- Chocolate Sauce: Drizzle warm chocolate sauce over your ice cream for a decadent touch that brings richness to the playful flavors.
- Sprinkle Topped Brownies: Dense brownie bites create a chewy texture, and the sprinkles mirror the joyous colors of the ice cream.
- Creamy Custard: A smooth vanilla custard underneath adds a luxurious creaminess, elevating the dessert experience to new heights.
- Fizzy Fruit Punch: Pair with a vibrant fruit punch or soda for a fizzy refreshment that perfectly complements the creamy dessert. Picture sweet bubbles dancing!
- Edible Glitter-Decorated Cookies: Light and buttery, these cookies echo the magic of your ice cream with visual flair; add edible glitter for sparkles.
- Coconut Whipped Cream: A dollop of this light, dairy-free topping enhances the tropical vibes, making each scoop feel even more festive.
- Mini Cupcakes: Bite-sized cupcakes make an excellent accompaniment; choose flavors like vanilla or rainbow to reflect the fun spirit of your ice cream.
How to Store and Freeze Mermaid Ice Cream
Fridge: Store Mermaid Ice Cream in an airtight container and enjoy within 3 days for the best flavor and texture.
Freezer: For long-term storage, keep in a freezer-safe container. It can last up to 2 weeks, but note that over time, the texture may become firmer.
Reheating: If the ice cream is too hard to scoop, let it sit at room temperature for about 10 minutes before serving. This will soften it to the perfect creamy consistency.
Preparation Advance: Feel free to prepare Mermaid Ice Cream a day or two in advance; just ensure it’s well-covered in the freezer to maintain its delightful taste and appearance.
Make Ahead Options
These Mermaid Ice Cream delights are perfect for busy home cooks looking to simplify their dessert prep! You can whip up the creamy base and color the mixtures up to 24 hours in advance. To do this, prepare the fluffy cream and the sweetened condensed milk mixture, then layer and swirl the colored mixtures in your loaf pan. Once you’ve done that, cover it tightly with plastic wrap or a lid to prevent ice crystals from forming. Freezing allows the flavors to meld beautifully, ensuring it’s just as delicious when served! When it’s time to enjoy, simply remove from the freezer, add your decorative sprinkles, and scoop into bowls for a show-stopping treat the whole family will love.
Mermaid Ice Cream Recipe FAQs
How do I choose ripe ingredients for Mermaid Ice Cream?
Absolutely! For the best texture and flavor, choose heavy cream that is fresh and well-chilled. Look for cream with a high fat content (at least 36%) for the fluffiest results. When selecting sweetened condensed milk, ensure the can is sealed and not dented for optimal quality.
What is the best way to store Mermaid Ice Cream?
Very! Store your Mermaid Ice Cream in an airtight container in the freezer. It will stay fresh for up to 2 weeks, but for the best taste and texture, enjoy it within 3 days. Make sure to cover it tightly to prevent freezer burn, which can affect the creaminess.
Can I freeze Mermaid Ice Cream for longer periods?
Of course! If you want to enjoy your Mermaid Ice Cream down the line, it can be stored in a freezer-safe container for up to 3 months. To ensure it stays at its best, cover the top with plastic wrap before sealing the lid. Just remember to let it sit out for about 10 minutes to soften before scooping when you’re ready to indulge.
What should I do if my ice cream seems too hard to scoop?
Wonderful question! If your Mermaid Ice Cream is too hard, try letting it sit at room temperature for about 10 minutes before serving. This allows it to soften slightly and reach that perfect creamy consistency, making it easier to scoop and serve.
Can I make Mermaid Ice Cream dairy-free?
Absolutely! To create a dairy-free version of Mermaid Ice Cream, substitute the heavy cream with coconut cream or a non-dairy whipped topping. For the sweetened condensed milk, choose a sweetened condensed coconut milk available at many grocery stores. This way, everyone can enjoy the magic!
Are there any allergy considerations for this recipe?
Yes! Check for allergies to dairy or other specific ingredients. If you’re serving the Mermaid Ice Cream to kids or guests, inform them of what’s included. You can also substitute ingredients for those with allergies, such as using nut-free coconut cream or omitting sprinkles if they contain allergens.
Dreamy Mermaid Ice Cream to Make Your Summer Sparkle
Ingredients
Equipment
Method
- In a large mixing bowl, whip the heavy cream on medium speed until stiff peaks form, about 3-5 minutes.
- In a separate bowl, mix the condensed milk with the vanilla extract until fully blended.
- Gently fold the whipped cream into the sweetened condensed milk mixture until just combined.
- Divide the mixture into three bowls and add different drops of gel food coloring to each bowl.
- Layer the colored mixtures into a loaf pan, creating a marbled effect with a knife or skewer.
- Sprinkle edible glitter or sprinkles on top before freezing.
- Cover and freeze for at least 6 hours until firm.
")


