")
Introduction to Milk Mochi
There’s something magical about desserts that transport you back to simpler times. Milk Mochi is one of those delightful treats that can whisk you away to a cozy kitchen in Japan, where the sweet aroma of freshly made mochi fills the air. This easy-to-make Japanese dessert is perfect for anyone looking to impress loved ones or simply indulge in a sweet moment after a long day. With just a few ingredients and minimal effort, you can create a chewy, sweet delight that will have everyone asking for seconds. Trust me, once you try this Milk Mochi, it’ll become a staple in your dessert repertoire!
Why You’ll Love This Milk Mochi
Milk Mochi is a game-changer for dessert lovers. It’s incredibly easy to whip up, making it perfect for busy weeknights or last-minute gatherings. The chewy texture and sweet flavor create a delightful experience that’s hard to resist. Plus, it’s versatile! You can customize it with different flavors or toppings, ensuring that every batch feels unique. Trust me, once you taste this mochi, you’ll be hooked!
Ingredients for Milk Mochi
Gathering the right ingredients is the first step to creating your delicious Milk Mochi. Here’s what you’ll need:
- Glutinous rice flour: This is the star of the show, giving mochi its signature chewy texture. Make sure to use glutinous rice flour, not regular flour.
- Milk: Adds creaminess and sweetness. You can use whole, low-fat, or even non-dairy milk for a twist.
- Sugar: Sweetens the mochi. Feel free to adjust the amount based on your taste preference.
- Salt: Just a pinch enhances the flavors, balancing the sweetness beautifully.
- Vanilla extract: This adds a lovely aroma and depth of flavor. You can also experiment with almond or coconut extract for a different twist.
- Cornstarch: Used for dusting, it prevents the mochi from sticking to surfaces. It’s essential for easy handling.
- Shredded coconut (optional): For those who love a tropical flair, rolling the mochi in coconut adds flavor and texture.
For exact measurements, check the bottom of the article where you can find everything listed for easy printing. Happy cooking!
How to Make Milk Mochi
Making Milk Mochi is a straightforward process that anyone can master. With just a few simple steps, you’ll be on your way to enjoying this delightful Japanese dessert. Let’s dive into the steps!
Step 1: Prepare the Mixture
Start by grabbing a large mixing bowl. Combine the glutinous rice flour, milk, sugar, salt, and vanilla extract. Whisk everything together until the mixture is smooth and free of lumps. This is where the magic begins! The aroma of vanilla will start to fill your kitchen, making it hard to resist. Make sure there are no dry spots; a well-mixed batter is key to achieving that perfect chewy texture.
Step 2: Microwave the Mixture
Next, pour the mixture into a microwave-safe dish. Spread it evenly to ensure even cooking. Microwave it on high for 2 minutes. After that, stir well to break up any clumps. Then, microwave for another 2 minutes. Stir again, and keep an eye on it as you microwave for an additional 1-2 minutes. You want the mixture to become thick and sticky, almost like a dough. This is the moment when your patience pays off!
Step 3: Cool and Shape the Mochi
Once the mixture is thickened, allow it to cool slightly. Meanwhile, dust a clean surface with cornstarch to prevent sticking. Carefully transfer the mochi onto the dusted surface. With your hands dusted in cornstarch, flatten and shape the mochi into a rectangle or square about 1/2 inch thick. The texture should be soft yet firm, and you’ll love how it feels in your hands. This is where you can let your creativity shine!
Step 4: Cut and Serve
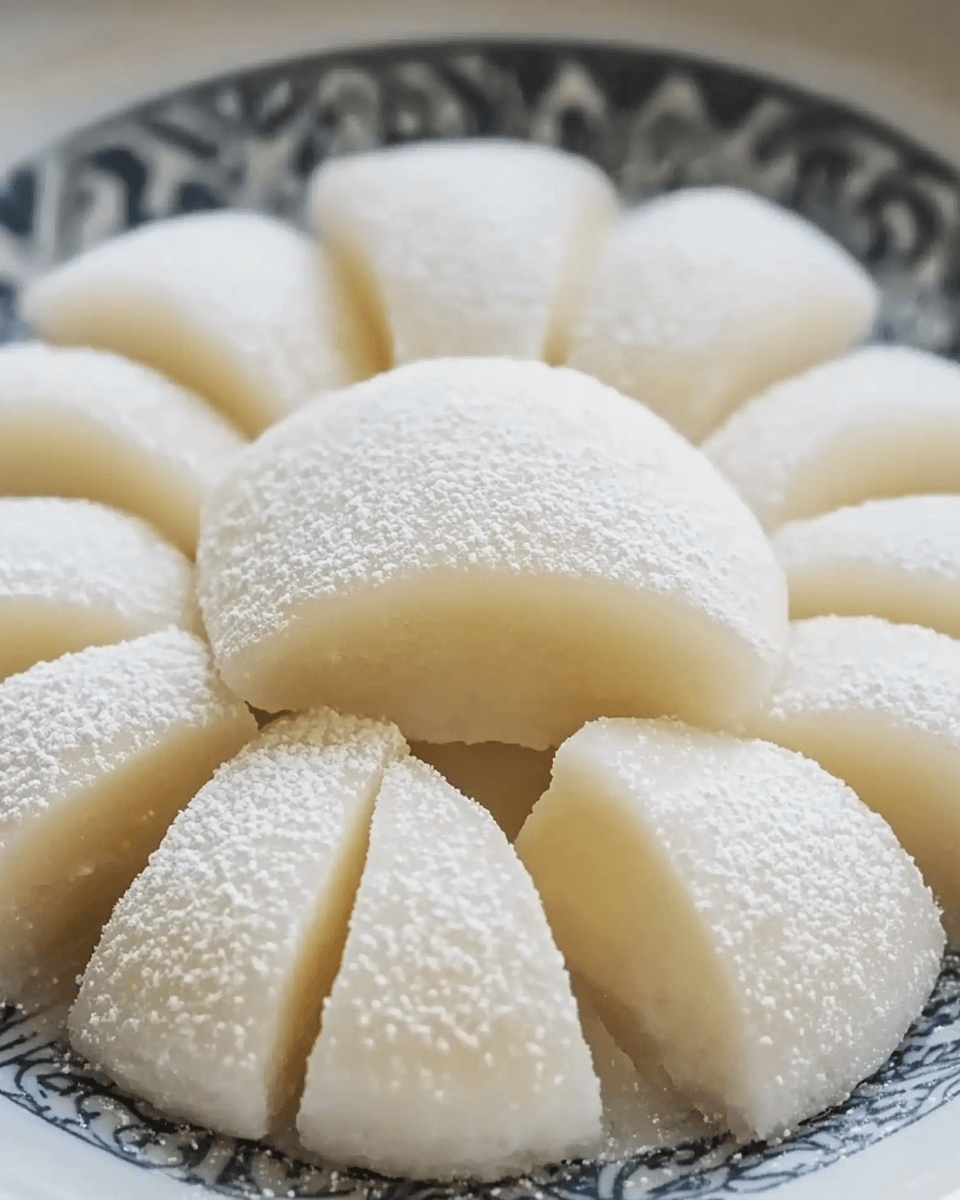
After the mochi has cooled completely, it’s time to cut it into squares or your desired shapes. If you’re feeling adventurous, roll the pieces in shredded coconut for an extra layer of flavor and texture. Serve immediately for the best experience, or store in an airtight container at room temperature for up to 2 days. Each bite will be a chewy, sweet delight that’s sure to impress!
Tips for Success
- Use a microwave-safe dish that’s wide and shallow for even cooking.
- Don’t skip the cornstarch dusting; it’s crucial for easy handling.
- Experiment with flavors by adding fruit purees or extracts to the mixture.
- Let the mochi cool completely before cutting for cleaner edges.
- Store any leftovers in an airtight container to maintain freshness.
Equipment Needed
- Mixing bowl: A large bowl for combining ingredients. A sturdy glass or ceramic bowl works well.
- Whisk: Essential for mixing. A fork can also do the trick in a pinch.
- Microwave-safe dish: Use a shallow dish for even cooking. A glass baking dish is perfect.
- Spatula: Handy for stirring and transferring the mochi.
Variations
- Chocolate Milk Mochi: Substitute 1/4 cup of glutinous rice flour with cocoa powder for a rich, chocolatey twist.
- Fruit-Infused Mochi: Add fruit puree, like strawberry or mango, to the mixture before microwaving for a refreshing flavor.
- Matcha Mochi: Mix in 1-2 tablespoons of matcha powder for a vibrant green color and earthy taste.
- Nuts and Seeds: Incorporate chopped nuts or seeds into the mixture for added crunch and nutrition.
- Vegan Option: Use plant-based milk and ensure any added flavorings are vegan-friendly for a delicious dairy-free treat.
Serving Suggestions
- Pair Milk Mochi with a cup of green tea for a traditional Japanese experience.
- Serve alongside fresh fruit like strawberries or mango slices for a refreshing contrast.
- For a fun presentation, arrange mochi pieces on a decorative plate and sprinkle with powdered sugar.
- Drizzle with chocolate or caramel sauce for an indulgent touch.
FAQs about Milk Mochi
As you embark on your Milk Mochi journey, you might have a few questions. Here are some common queries that can help you along the way:
Can I use regular rice flour instead of glutinous rice flour?
No, glutinous rice flour is essential for that signature chewy texture. Regular rice flour won’t give you the same results.
How do I store leftover Milk Mochi?
Store any leftover mochi in an airtight container at room temperature for up to 2 days. If you want to keep it longer, consider refrigerating it, but be aware that it may change the texture.
Can I make Milk Mochi in advance?
Absolutely! You can prepare the mochi ahead of time and cut it into pieces. Just remember to dust it with cornstarch to prevent sticking.
What can I do if my mochi is too sticky?
If your mochi turns out too sticky, dust your hands and the surface with more cornstarch while shaping. This will help manage the stickiness.
Is Milk Mochi gluten-free?
Yes, Milk Mochi is gluten-free as long as you use glutinous rice flour, which is made from rice. Just ensure that any additional ingredients are also gluten-free.
Final Thoughts
Creating Milk Mochi is more than just making a dessert; it’s about crafting a moment of joy. Each chewy bite transports you to a world of sweetness, where flavors dance on your palate. This simple recipe invites you to experiment and share with loved ones, making it a perfect addition to any gathering. Whether you enjoy it with a cup of tea or as a standalone treat, Milk Mochi brings a delightful touch to your culinary adventures. So roll up your sleeves, embrace the process, and savor the happiness that comes with every piece of this delightful Japanese dessert!
PrintMilk Mochi: Discover the Easiest Recipe Today!
- Total Time: 20 minutes
- Yield: 8 servings
- Diet: Vegetarian
Description
Milk Mochi is a delightful and easy-to-make Japanese dessert made from glutinous rice flour, milk, and sugar, resulting in a chewy and sweet treat.
Ingredients
- 2 cups glutinous rice flour
- 1 cup milk
- 1/2 cup sugar
- 1/4 teaspoon salt
- 1 tablespoon cornstarch (for dusting)
- 1 teaspoon vanilla extract
- 1/4 cup shredded coconut (optional)
Instructions
- In a large mixing bowl, combine the glutinous rice flour, milk, sugar, salt, and vanilla extract. Whisk until the mixture is smooth and free of lumps.
- Pour the mixture into a microwave-safe dish, spreading it evenly.
- Microwave the mixture on high for 2 minutes. Stir well, then microwave for an additional 2 minutes. Stir again, and microwave for another 1-2 minutes until the mixture is thick and sticky.
- Allow the mochi to cool slightly before dusting a clean surface with cornstarch.
- Transfer the mochi onto the dusted surface and use your hands (dusted with cornstarch) to flatten and shape it into a rectangle or square about 1/2 inch thick.
- Once cooled completely, cut the mochi into squares or desired shapes. If using shredded coconut, roll the mochi pieces in the coconut for added flavor and texture.
- Serve immediately or store in an airtight container at room temperature for up to 2 days.
Notes
- For a chocolate version, substitute 1/4 cup of the glutinous rice flour with cocoa powder.
- Add fruit puree (like strawberry or mango) to the mixture before microwaving for a fruity twist.
- Prep Time: 10 minutes
- Cook Time: 6-8 minutes
- Category: Dessert
- Method: Microwave
- Cuisine: Japanese
Nutrition
- Serving Size: 1 piece
- Calories: 130
- Sugar: 12g
- Sodium: 50mg
- Fat: 2g
- Saturated Fat: 1g
- Unsaturated Fat: 1g
- Trans Fat: 0g
- Carbohydrates: 24g
- Fiber: 0g
- Protein: 2g
- Cholesterol: 0mg
")


