")
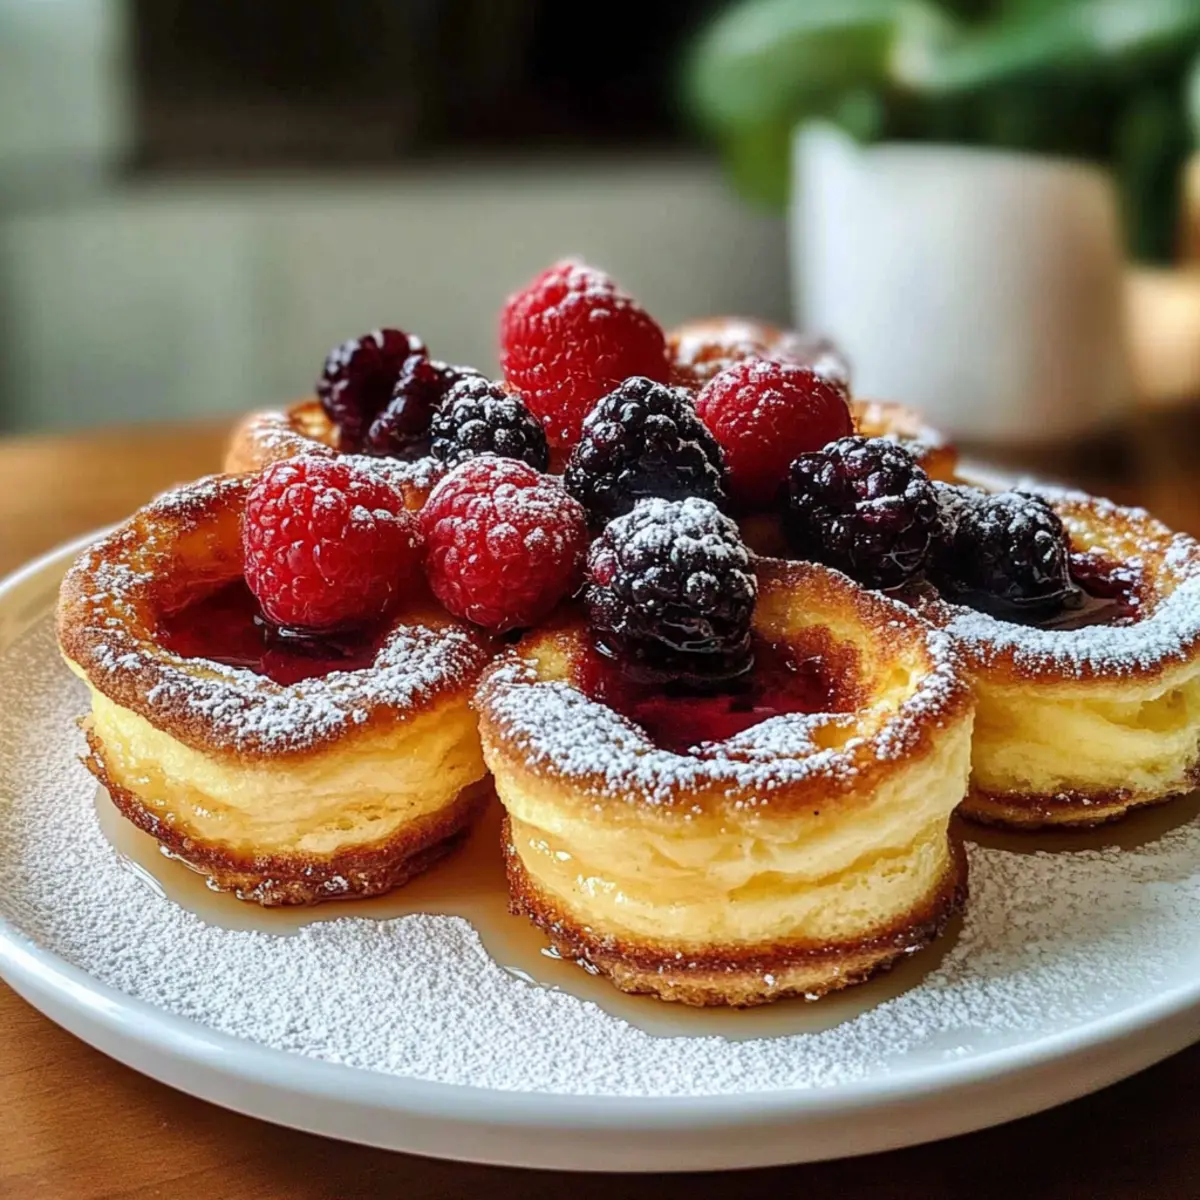
As I flipped through my favorite cookbook, a surprising thought crossed my mind: breakfast doesn’t have to be boring! That was the moment I stumbled upon the recipe for Mini Dutch Baby Pancakes, little clouds of joy that transform your morning routine. These delectable bites are not only easy to whip up but also incredibly versatile, allowing you to dress them up sweet or savory depending on your cravings. Perfect for brunch with friends or a cozy family breakfast, these pancakes will quickly become your go-to dish for any occasion. And let me tell you, they’re as fun to make as they are to eat! So, are you ready to elevate your breakfast game? Let’s dive into this delightful recipe together!
Why Are Mini Dutch Baby Pancakes So Special?
Versatile Toppings: From fresh berries and syrup to savory smoked salmon, you can dress these pancakes to suit any palate, making them ideal for any occasion.
Quick & Easy: With just a few ingredients and minimal prep, you can whip up these delightful bites in no time, saving you from fast food dilemmas.
Crowd-Pleasing: These mini pancakes not only look impressive but taste divine, ensuring you’ll be the star of any brunch!
Unique Texture: Their light, airy structure mimics fluffy soufflés, making every bite a heavenly experience that’s both crispy and soft.
Make-Ahead Friendly: Prepare the batter in advance for effortless mornings; it keeps well in the fridge for up to 24 hours!
Elevate your breakfast routine with these Mini Dutch Baby Pancakes and take your taste buds on a delicious journey. For more fun breakfast ideas, check out my Popcorn Flour Pancakes or for a hearty option, try my Dutch Oven Chili.
Mini Dutch Baby Pancake Ingredients
• Discover the essentials for creating fluffy delights!
For the Pancakes
- All-purpose Flour – Provides structure to the pancakes; you can substitute with gluten-free flour for a gluten-free option.
- Milk – Adds moisture and achieves the ideal texture; any non-dairy milk works beautifully as a substitute.
- Large Eggs – Acts as a binder and contributes to the rise; using room temperature eggs gives the best results.
- Granulated Sugar – Adds a hint of sweetness; feel free to replace it with honey or maple syrup for a more natural sweetness.
- Salt – Enhances flavor; sea salt or kosher salt can also be used as alternatives.
- Unsalted Butter – Adds richness and helps the pancakes release from the pan; use coconut oil for a dairy-free choice.
For Dusting & Toppings
- Powdered Sugar – Optional, but highly recommended for presentation and sweetness.
- Fresh Fruit (e.g., Berries) – Perfect for adding flavor and color; selecting seasonal fruits elevates the taste.
- Maple Syrup – A classic accompaniment that adds sweetness; agave syrup can be an excellent substitute.
Embrace the wonderful world of Mini Dutch Baby Pancakes with these fresh ingredients, and prepare to amaze your family and friends!
Step‑by‑Step Instructions for Mini Dutch Baby Pancakes
Step 1: Prepare the Dry Ingredients
In a medium bowl, whisk together 1 cup of all-purpose flour, 2 tablespoons of granulated sugar, and a pinch of salt until well combined. This mixture forms the base for your Mini Dutch Baby Pancakes, giving them structure and flavor. Set it aside while you gather the wet ingredients, ensuring you have a smooth and creamy batter.
Step 2: Blend the Wet Ingredients
In a separate bowl, whisk together 1 cup of milk and 3 large eggs until fully combined. This mixture should be smooth and slightly frothy, indicating that the ingredients are well incorporated. Allow the wet ingredients to sit for a moment, which helps to create a lighter texture in the pancakes once combined with the dry mixture.
Step 3: Combine the Mixtures
Gradually pour the wet ingredients into the dry mixture, whisking continuously until a smooth batter forms. Be careful not to overmix; a few small lumps are perfectly fine. Once combined, gently fold in 2 tablespoons of melted unsalted butter, which adds richness to the Mini Dutch Baby Pancakes and ensures they’re tender.
Step 4: Rest the Batter
Allow the batter to rest for at least 15 minutes. This resting period lets the flour hydrate and the gluten relax, resulting in fluffier pancakes. Meanwhile, you can preheat your oven to 425°F (220°C), ensuring the temperature is just right for those delightful puffs to form as they bake.
Step 5: Prepare the Muffin Tin
Place 1/2 teaspoon of unsalted butter into each muffin cup of a standard 12-cup muffin tin. Transfer the tin into the preheated oven for 3 to 5 minutes, or until the butter is melted and sizzling. This sizzling butter is essential for creating a beautifully browned exterior on your Mini Dutch Baby Pancakes, so don’t skip this step!
Step 6: Fill the Muffin Cups
Carefully remove the hot muffin tin from the oven, taking care not to burn yourself. Quickly pour the batter into each muffin cup, filling them about 2/3 full. The batter will foam slightly as it hits the hot butter, setting you on the path to those gorgeous, puffy pancakes.
Step 7: Bake to Perfection
Return the muffin tin to the oven and bake for 15 to 20 minutes. You’ll know they’re done when the Mini Dutch Baby Pancakes are puffed up and golden brown on top, a delightful sight that indicates their airy structure and perfect doneness. Avoid opening the oven door during baking to maintain the heat!
Step 8: Cool and Serve
Once baked, remove the muffin tin from the oven and let the pancakes cool for a few minutes. Then, gently transfer them to a wire rack to cool slightly before serving. Dust with powdered sugar, add fresh fruit or your favorite syrup, and enjoy your homemade Mini Dutch Baby Pancakes while they’re still warm!

Mini Dutch Baby Pancakes Variations
Feel free to switch things up and make this recipe your own with these delightful variations!
-
Savory Twist: Top your pancakes with cream cheese and smoked salmon for a luxurious breakfast. Add capers and chives for an authentic bagel flavor!
-
Fruit-Filled Delight: Swap out traditional berries for banana slices and a sprinkle of cinnamon. The warm fruit turns deliciously sweet and comforting as the pancakes puff up.
-
Chocolate Bliss: Incorporate mini chocolate chips into the batter for a sweet chocolate explosion upon every bite. Drizzle with melted dark chocolate for extra indulgence!
-
Citrus Zest: Add the zest of one lemon or orange to the batter for a refreshing citrus note. This twist brightens the flavors and adds a lovely fragrance.
-
Nutty Flare: Incorporate chopped walnuts or pecans for added texture and nuttiness. They provide a satisfying crunch that pairs well with maple syrup.
-
Hot & Spicy: Spice things up by blending in a pinch of cayenne pepper or adding pickled jalapeños as a topping. This exciting combination offers a surprising kick!
-
Vegan-Friendly: Swap the milk for almond milk and use flaxseeds as an egg substitute. Blend to create a batter that allows everyone to enjoy these fluffy treats!
-
Tropical Paradise: Top with coconut flakes and fresh pineapple pieces. Add a drizzle of honey for the ultimate tropical escape on your breakfast plate!
These variations will keep your breakfast routine vibrant and enjoyable! For more delicious recipes, don’t forget to check out my Baby Shower Meatballs or if you’re in the mood for something hearty, my Dutch Oven Chili is always a hit!
Storage Tips for Mini Dutch Baby Pancakes
Fridge: Store leftover Mini Dutch Baby Pancakes in an airtight container for up to 3-4 days. They’ll stay fresh and delicious, ready for a quick snack or breakfast.
Freezer: Freeze individual pancakes in a single layer on a baking sheet, then transfer them to a freezer-safe bag or container for up to 3 months. This makes for easy breakfast options whenever you crave them!
Reheating: For the best texture, reheat the pancakes in a toaster oven or an oven at 350°F (175°C) for about 5-10 minutes until warm and slightly crisp. Avoid microwaving, as this can make them soggy.
Batter Storage: If you want to prep ahead, the batter can be stored in the fridge for up to 24 hours. Just give it a gentle whisk before pouring it into the hot muffin tin!
Make Ahead Options
These Mini Dutch Baby Pancakes are a fantastic choice for meal prep, saving you time on busy mornings! You can prepare the batter up to 24 hours in advance; just store it in an airtight container in the refrigerator to maintain optimal freshness. When you’re ready to bake, simply give the batter a gentle whisk to recombine any settled ingredients. Additionally, any leftover cooked pancakes can be kept in an airtight container in the fridge for up to 3-4 days or frozen for up to 3 months. To enjoy, reheat them in a toaster oven for the best crispy edges and fluffy center. With these make-ahead tips, you’ll have delicious Mini Dutch Baby Pancakes ready with minimal effort!
What to Serve with Mini Dutch Baby Pancakes
Create a delightful breakfast experience that will make your taste buds sing!
- Fresh Berries: The burst of sweetness from seasonal berries creates a refreshing contrast to the rich, buttery pancakes. Their vibrant colors also add a beautiful presentation.
- Savory Cream Cheese Spread: Smooth cream cheese with herbs enhances the pancake’s buttery flavor, offering a creamy and savory twist that’s delightful.
- Maple Syrup: No breakfast is complete without that classic drizzle. It melds beautifully with the pancakes’ fluffy texture, adding a gentle sweetness.
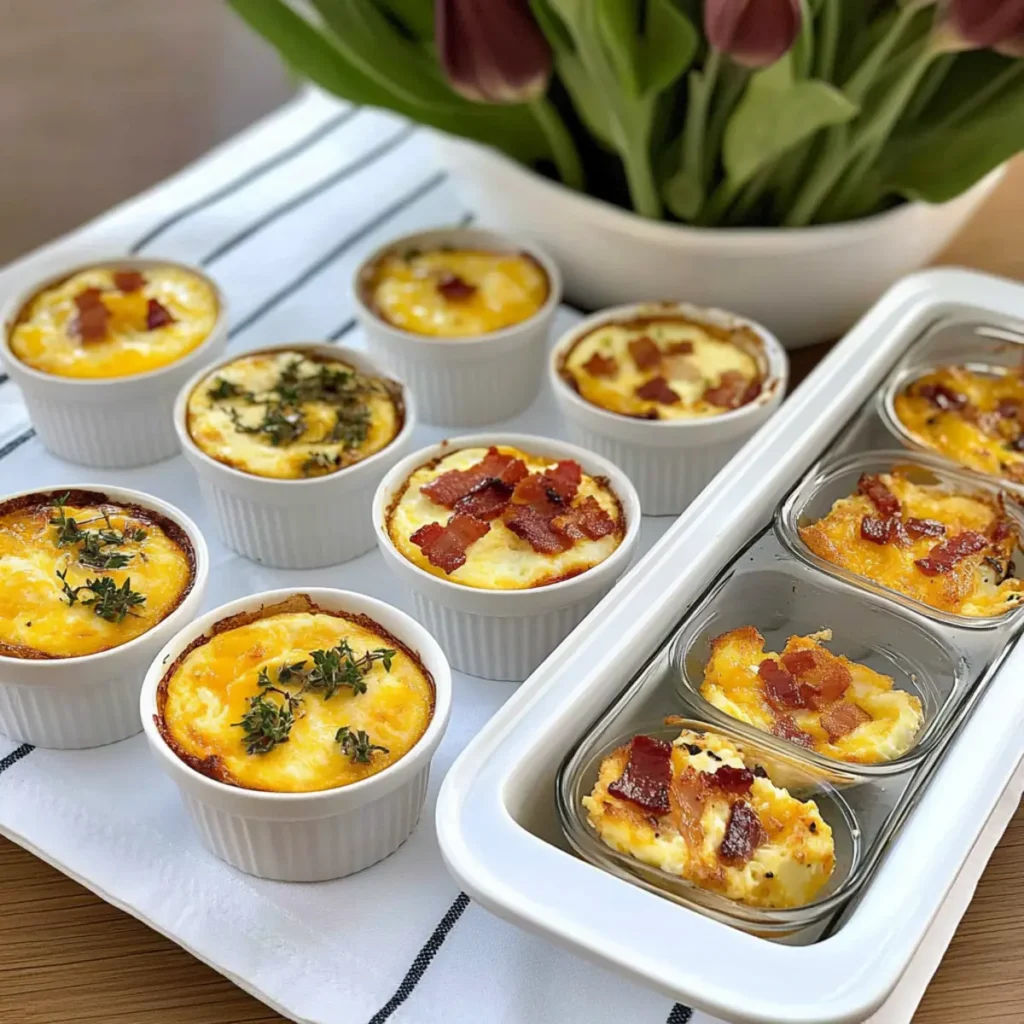
- Crispy Bacon: The saltiness and crunch of crispy bacon provide a delicious contrast, making each bite a flavorful adventure.
- Coffee or Tea: Start your day off right with a rich cup of coffee or a calming tea, creating a cozy atmosphere to enjoy your meal.
- Whipped Cream: Light and airy, whipped cream adds an indulgent touch that complements both sweet and savory toppings beautifully.
These pairings turn your Mini Dutch Baby Pancakes into a complete morning feast that your family will adore!
Expert Tips for Mini Dutch Baby Pancakes
- Hot Muffin Tin: Always preheat the muffin tin with butter; this step ensures a beautiful rise and crispy edges for your Mini Dutch Baby Pancakes.
- Proper Mixing: Avoid overmixing the batter to prevent denser pancakes; a few small lumps are perfectly fine for a light texture.
- Consistent Temperature: Keep the oven door closed during baking to maintain a steady temperature; this is crucial for achieving the perfect puff.
- Resting Time: Let the batter rest for at least 15 minutes; this helps yield a lighter and fluffier pancake by allowing the flour to fully hydrate.
- Ingredient Temperatures: Use room temperature eggs and milk; this promotes better mixing and a superior texture in your Mini Dutch Baby Pancakes.

Mini Dutch Baby Pancakes Recipe FAQs
What type of milk can I use for Mini Dutch Baby Pancakes?
Absolutely! You can use any kind of milk you prefer, such as whole milk, skim milk, or even non-dairy options like almond, oat, or soy milk. Each will lend a slightly different flavor and texture, but they’ll all work beautifully in this recipe, so feel free to experiment!
How should I store Mini Dutch Baby Pancakes?
For maximum freshness, store leftover Mini Dutch Baby Pancakes in an airtight container in the refrigerator for up to 3-4 days. They’ll be ready to enjoy again whenever hunger strikes! If you have any leftovers, I recommend reheating them in a toaster oven to retain their crispiness.
Can I freeze Mini Dutch Baby Pancakes?
Yes, you can! To freeze, start by placing your pancakes in a single layer on a baking sheet in the freezer until solid. Then, transfer them to a freezer-safe bag or container, stacking them with parchment paper in between to prevent sticking. They can be stored for up to 3 months. When you’re ready to enjoy them, simply reheat in a toaster oven for the best results!
What if my pancakes come out dense?
Oh no, nobody wants a dense pancake! Make sure to avoid overmixing the batter, as this is a common cause for denser results. A few small lumps in the batter are perfectly fine! Additionally, ensuring your muffin tin is hot and well-buttered helps achieve that perfect puffiness.
Can I make the batter ahead of time?
Very much so! You can prepare the batter up to 24 hours in advance and store it in the refrigerator. Just give it a gentle whisk before using. This way, your busy mornings become simpler, and you’ll still get that delightful texture once baked!
Are Mini Dutch Baby Pancakes suitable for people with allergies?
If you’re looking for alternatives, you can definitely tweak this recipe to suit various dietary needs. For a gluten-free option, simply substitute all-purpose flour with a gluten-free blend. Additionally, use non-dairy milk and coconut oil for a dairy-free version. Always double-check for any specific allergies related to the ingredients you choose, and I’m sure you’ll create a delightful pancake experience!

Mini Dutch Baby Pancakes: Fluffy Bites Everyone Will Love
Ingredients
Equipment
Method
- In a medium bowl, whisk together 1 cup of all-purpose flour, 2 tablespoons of granulated sugar, and a pinch of salt until well combined. Set aside.
- In a separate bowl, whisk together 1 cup of milk and 3 large eggs until fully combined.
- Gradually pour the wet ingredients into the dry mixture, whisking continuously until a smooth batter forms. Gently fold in 2 tablespoons of melted unsalted butter.
- Allow the batter to rest for at least 15 minutes. Preheat your oven to 425°F (220°C).
- Place 1/2 teaspoon of unsalted butter into each muffin cup of a standard 12-cup muffin tin. Transfer the tin into the preheated oven for 3 to 5 minutes until the butter is melted.
- Carefully remove the muffin tin from the oven and quickly pour the batter into each muffin cup, filling them about 2/3 full.
- Return the muffin tin to the oven and bake for 15 to 20 minutes until puffed up and golden brown.
- Once baked, remove the muffin tin and let the pancakes cool for a few minutes before transferring to a wire rack. Dust with powdered sugar, add fresh fruit or syrup, and serve warm.
")