")
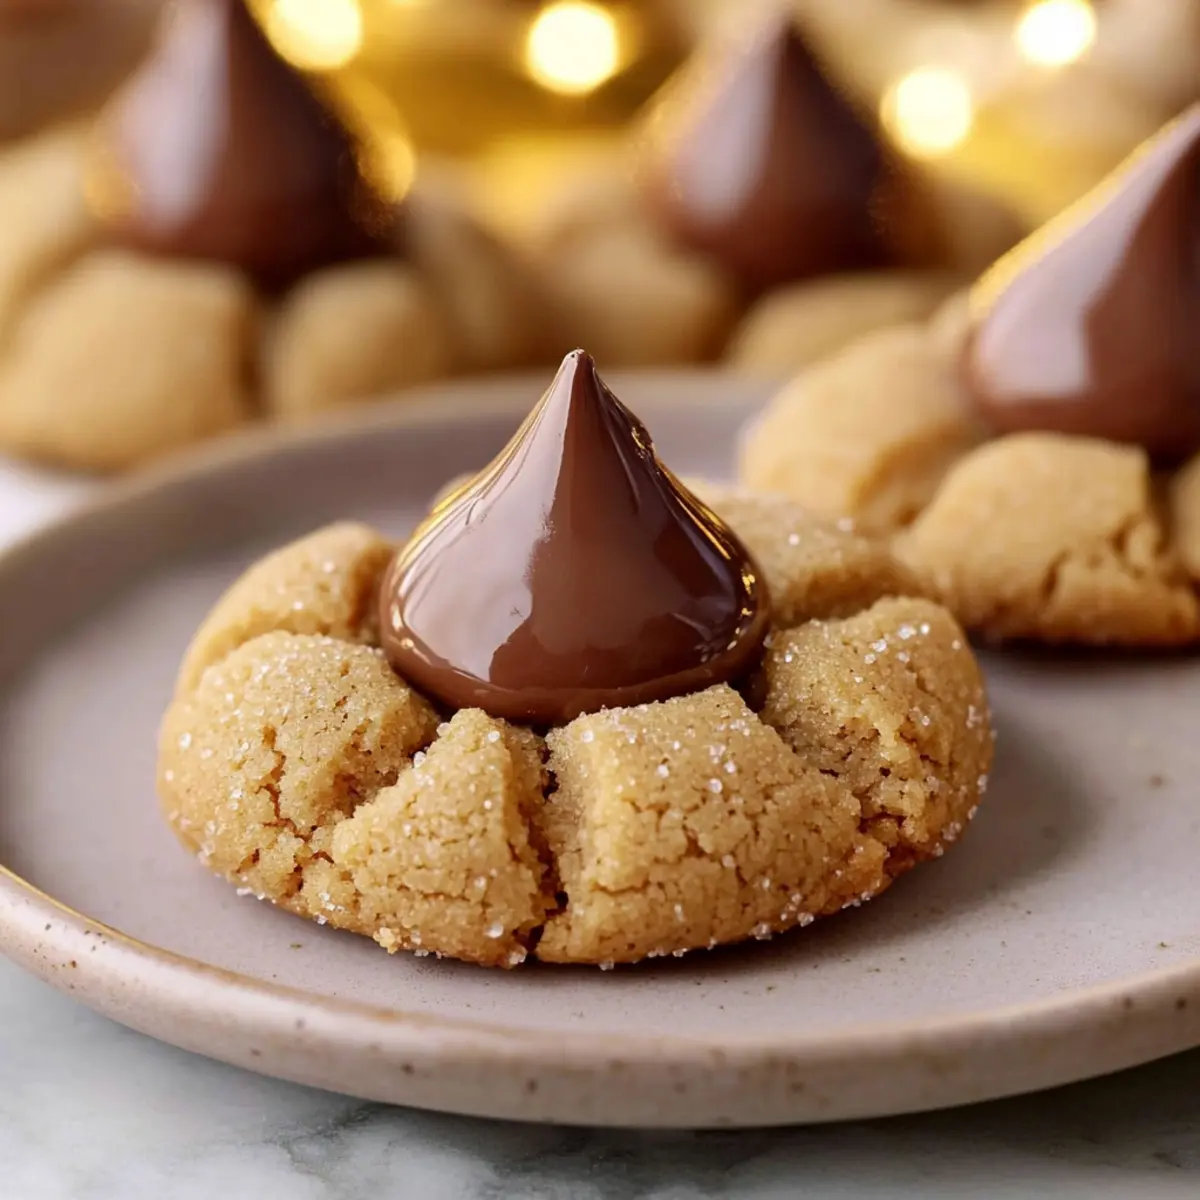
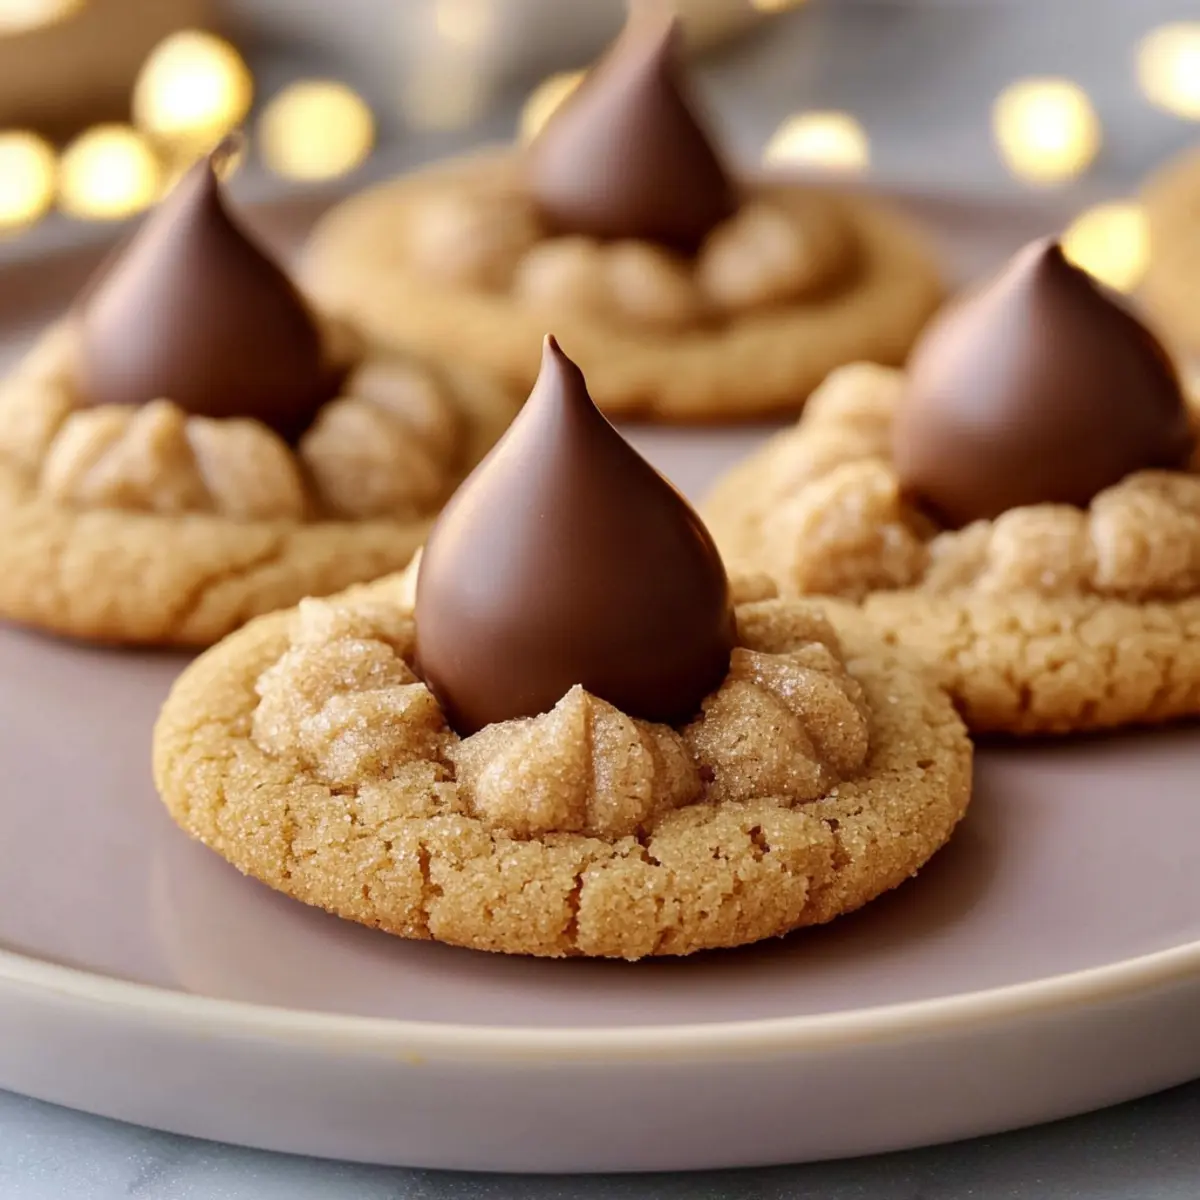
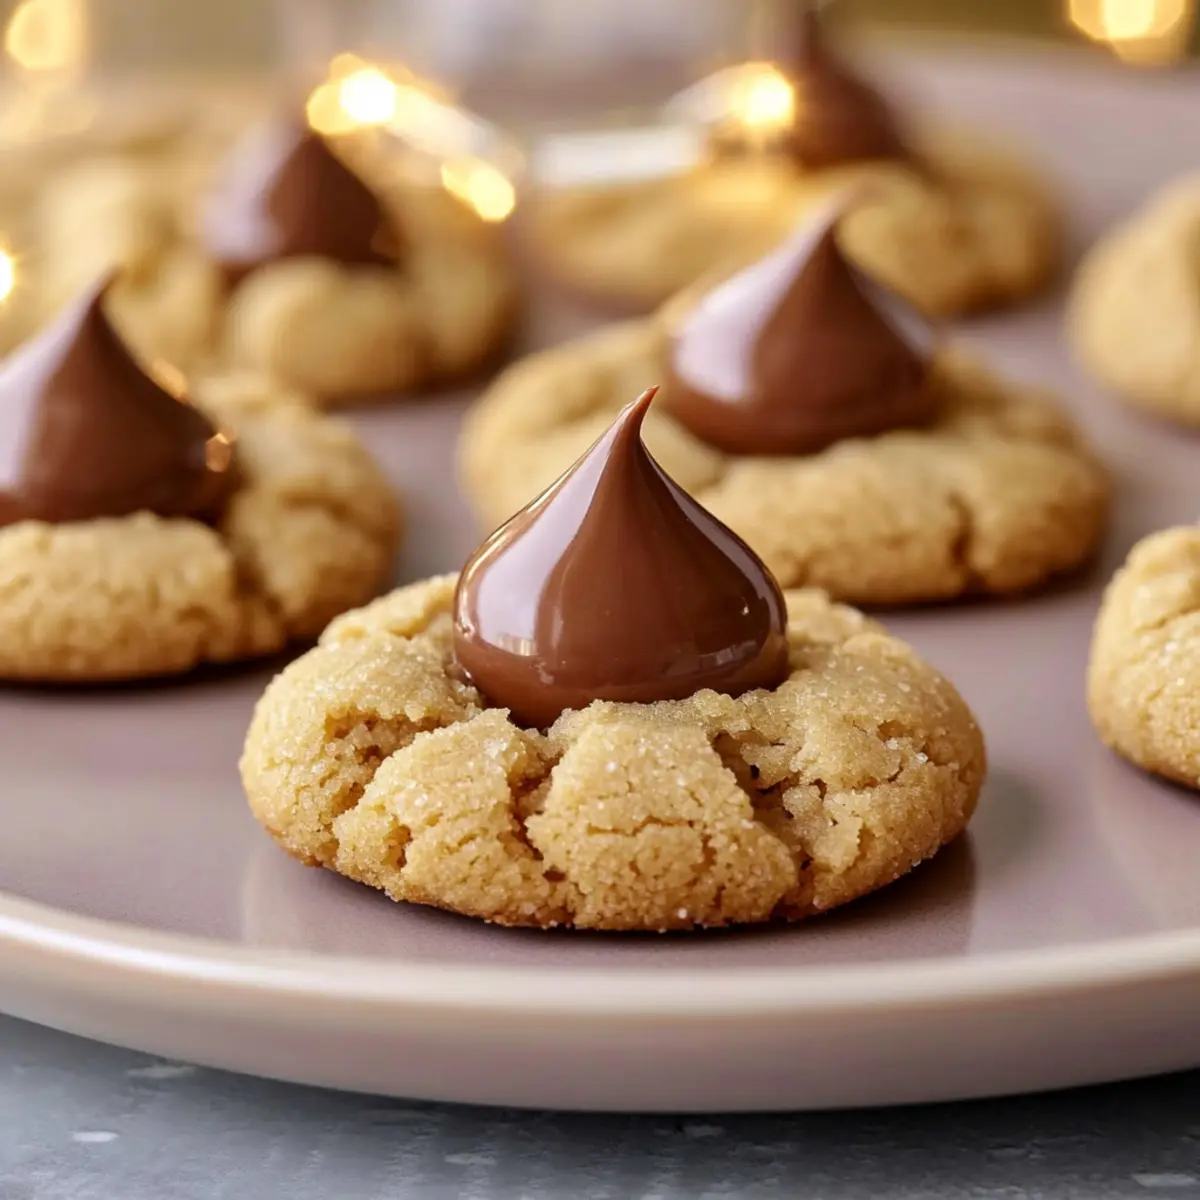
The aroma of freshly baked cookies wafting through the house instantly transports me back to my childhood. Soft Peanut Butter Kiss Cookies are a timeless classic, marrying the rich, creamy essence of peanut butter with a delightful chocolate kiss right in the center. Not only are these cookies super simple to whip up, but they also pack a satisfying punch of comfort that leaves everyone wanting more. Perfect for any occasion, particularly the cozy holiday season, they’re bound to become a cherished addition to your baking repertoire. If you’re ready to impress friends and family or just indulge in some warm, nostalgic goodness, let’s dive into this mouthwatering recipe. Who’s excited to make a batch?
Why Are Peanut Butter Kiss Cookies So Loved?
Irresistible Flavor: The combination of creamy peanut butter and rich chocolate creates a delightful harmony, making each bite utterly delicious.
Quick and Easy: With just a few simple steps, you can whip up these cookies in no time—perfect for busy bakers or anyone in need of a sweet fix.
Nostalgic Comfort: These cookies evoke warm memories, reminiscent of childhood treats during festive seasons.
Crowd-Pleasing Appeal: Whether it’s a family gathering or a friendly get-together, these cookies are guaranteed to impress. Pair them with a glass of milk or hot chocolate for a delightful experience.
Flexible Options: Want to switch it up? Try using almond butter or topping with dark chocolate for a fun twist. Check out Cool Whip Cookies for more easy baking ideas!
Peanut Butter Kiss Cookies Ingredients
• Get ready to bake these classic cookies!
For the Cookies
- All-Purpose Flour – Provides structure to the cookies; measure correctly for best results.
- Packed Brown Sugar – Adds moisture and a toffee-like flavor; can substitute with light brown sugar for a milder taste.
- Granulated Sugar – Sweetens and ensures a crispy exterior; use extra for rolling if desired.
- Smooth Peanut Butter – The essential flavor component; commercial brands like Jif or Skippy work best—avoid natural varieties as they may change the texture.
- Unsalted Butter – Brings richness; make sure it’s softened to room temperature for easy mixing.
- Large Egg – Helps bind the ingredients together; use an egg at room temperature for better incorporation.
- Vanilla Extract – Boosts flavor; opt for pure vanilla for the best quality.
- Baking Soda – Acts as a leavening agent, giving the cookies a soft and puffy texture.
- Salt – Balances sweetness and enhances overall flavor.
- Chocolate Kisses – The classic topping that adds a melty chocolate center; Hershey’s Kisses are traditional.
These Peanut Butter Kiss Cookies are sure to delight your taste buds!
Step‑by‑Step Instructions for Peanut Butter Kiss Cookies
Step 1: Preheat and Prepare
Begin by preheating your oven to 375°F (190°C). While the oven warms up, line your baking sheets with parchment paper. This will ensure the cookies don’t stick and maintain their lovely shape. Setting the stage with parchment makes cleanup a breeze afterward, too!
Step 2: Cream the Ingredients
In a large mixing bowl, combine 1 cup of smooth peanut butter, 1/2 cup of unsalted butter (softened), 1/2 cup packed brown sugar, and 1/2 cup granulated sugar. Using a hand mixer or a wooden spoon, cream the mixture together until it’s smooth and fluffy, which should take about 2-3 minutes. The sugars should blend perfectly with the creamy peanut butter, creating a heavenly base for your Peanut Butter Kiss Cookies.
Step 3: Add Eggs and Vanilla
Next, add in 1 large egg and 1 teaspoon of pure vanilla extract to the bowl. Mix well until fully incorporated, scraping down the sides of the bowl as needed to ensure everything is combined smoothly. This step not only adds richness to the dough but also infuses it with delightful vanilla aroma.
Step 4: Combine Dry Ingredients
In a separate bowl, whisk together 1 ½ cups of all-purpose flour, 1 teaspoon of baking soda, and a pinch of salt. Slowly add this dry mixture to your wet ingredients, mixing gently until just combined. Be careful not to overmix—the dough should be slightly sticky, signaling it’s ready to form into cookies.
Step 5: Form the Cookie Dough
Scoop the dough and roll it into 1-inch balls. If you’d like, you can roll each ball in granulated sugar for an extra sweet touch. The dough should feel soft yet firm enough to maintain its shape. This step is crucial for the chewy center of your Peanut Butter Kiss Cookies!
Step 6: Arrange on Baking Sheet
Place the cookie dough balls on the prepared baking sheets, ensuring they are spaced about 2 inches apart. This spacing allows the cookies to spread evenly while baking without sticking to each other. You should see the beautiful round shapes lined up, ready to transform into delicious treats.
Step 7: Bake to Perfection
Transfer the baking sheets to the preheated oven and bake for 8-10 minutes. Keep an eye on them; they should look puffed and lightly cracked, with the bottoms turning a golden brown. This is when the magic begins as the aroma fills your kitchen, making it hard to wait!
Step 8: Add the Chocolate Kisses
Once your cookies are baked, remove them from the oven. As soon as they come out, gently press a chocolate kiss into the center of each cookie, allowing the kiss to melt slightly into the cookie. This will make your Peanut Butter Kiss Cookies even more irresistible and add that essential chocolatey touch.
Step 9: Cooling Time
Let the cookies cool completely on the baking sheet. This allows the chocolate to set beautifully and keeps the cookies from crumbling. As they cool, your kitchen will be filled with delicious scents, making it hard to resist the urge to sneak a taste!

What to Serve with Soft Peanut Butter Kiss Cookies
These delightful cookies are perfect for creating a comforting meal experience, sparking joy with every bite.
-
Classic Milk: A tall glass of cold milk balances the sweetness and enhances the peanut butter flavor, making it an ideal pairing.
-
Rich Hot Chocolate: Sipping on creamy hot chocolate warms the soul and brings a cozy, indulgent touch to your cookie enjoyment.
-
Vanilla Ice Cream: A scoop of silky vanilla ice cream contrasts beautifully with the warm, melty chocolate kiss, adding a refreshing creaminess.
-
Sugar Cookies: A festive platter of sugar cookies offers a sweet variety, complementing the indulgence of your Peanut Butter Kiss Cookies while adding festive cheer.
-
Fresh Berries: Succulent strawberries or raspberries provide a bright, tart contrast, cutting through the richness and refreshing the palate.
-
Coffee: A cup of freshly brewed coffee, whether black or with cream, enhances the dessert-like qualities of the cookies without overpowering their flavors.
-
Chocolate Milkshake: Creamy and dreamy, a chocolate milkshake pairs delightfully with these cookies, creating a nostalgic, indulgent treat reminiscent of childhood.
-
Peanut Butter Chocolate Smoothie: This protein-packed smoothie echoes the cookie’s flavors, making it a guilt-free way to indulge alongside your baked treats.
Peanut Butter Kiss Cookies Variations
Feel free to get creative and tailor these delightful cookies to your taste buds with these fun variations!
-
Nut-Free: Substitute smooth peanut butter with sun butter for a nut-free twist that’s just as delicious.
-
Almond Butter: Use almond butter instead of peanut butter for a rich, nutty flavor that enhances the cookie’s warm essence.
-
Chocolate Variety: Swap regular chocolate kisses for white chocolate or dark chocolate kisses for a different taste experience. Each variation invites a new flavor journey!
-
Caramel Addition: Add a caramel-filled chocolate in the center for a sweet surprise that makes these cookies even more indulgent.
-
Oatmeal Twist: Mix in ½ cup of rolled oats for added texture and a hearty touch, making your cookies even more satisfying. The chewiness from the oats combines beautifully with the soft cookie.
-
Spicy Kick: Add a pinch of cayenne pepper or cinnamon to the dough for a spicy twist that beautifully complements the sweetness of the chocolate.
-
Holiday Cheer: For festive flavors, incorporate seasonal spices like nutmeg or ginger, making these cookies perfect for holiday gatherings.
Looking for more inspiration? Try pairing these cookies with delicious ideas from Chocolate Chip Cookies or add them to a cookie platter with Millie’s Cookies for a delightful treat!
Expert Tips for Peanut Butter Kiss Cookies
-
Measure Accurately: Proper measuring of all-purpose flour is vital for cookie structure. Use a kitchen scale or the spoon-and-level method to ensure exact amounts.
-
Mix with Care: Avoid overmixing the dough, as this can lead to tough cookies. Stop mixing as soon as the dry ingredients are incorporated for a soft, chewy texture.
-
Room Temperature Ingredients: Ensure your butter and egg are at room temperature. This helps create a smoother dough, leading to irresistibly chewy Peanut Butter Kiss Cookies.
-
Chocolate Kiss Timing: Press the chocolate kisses into the cookies shortly after they come out of the oven. Waiting too long may cause the kisses not to stick.
-
Keep an Eye on Baking: These cookies should look puffy and lightly cracked, not overly golden. Overbaking may result in a dry texture, so set your timer and stay vigilant!
How to Store and Freeze Peanut Butter Kiss Cookies
Room Temperature: Store cookies in an airtight container at room temperature for up to 1 week. This keeps them soft and fresh, ready for quick snacking.
Fridge: If your kitchen is warm, you can keep them in the fridge for extra freshness, but remember to let them come to room temperature before enjoying for the best flavor.
Freezer: For longer storage, freeze cookies layered between parchment paper in an airtight container for up to 3 months. This preserves their deliciousness and allows you to enjoy them whenever a craving strikes.
Reheating: To refresh frozen cookies, thaw them in the fridge overnight and then warm them in the microwave for about 10-15 seconds for that freshly baked feel!
Make Ahead Options
These Soft Peanut Butter Kiss Cookies are perfect for meal prep enthusiasts! You can prepare the cookie dough up to 24 hours in advance by mixing all your ingredients and then refrigerating them in an airtight container. This prevents the dough from spreading too much while baking, ensuring your cookies come out just as delicious. If you’re looking to prep even further ahead, freeze the rolled cookie balls for up to 2 months; just place them in a single layer on a baking sheet to freeze, then transfer to a zip-top bag. When you’re ready to bake, simply let them thaw for a few minutes, then bake as directed with the chocolate kisses pressed in right after they come out of the oven, offering you freshly baked cookies with minimal effort. Happy baking!
Peanut Butter Kiss Cookies Recipe FAQs
How can I tell if my peanut butter is ripe for baking?
Absolutely! When selecting peanut butter for your cookies, opt for smooth, creamy varieties like Jif or Skippy, as they provide the best texture and flavor. Ensure it doesn’t have an overly oily layer on top, which can indicate that it’s either too fresh or not well-stirred. Stirring it well before measuring is also essential to achieve that perfect consistency.
How should I store my Peanut Butter Kiss Cookies?
You can store your cookies in an airtight container at room temperature for up to 1 week. To keep them fresher longer, I recommend adding a slice of bread to the container; it’ll help maintain moisture and keep those delightful cookies soft.
Can I freeze Peanut Butter Kiss Cookies?
Very! To freeze your delicious cookies, just layer them between sheets of parchment paper inside an airtight container. This method prevents them from sticking together and allows you to enjoy them up to 3 months later. To thaw, simply move them to the fridge overnight and warm them slightly in the microwave for about 10-15 seconds if desired.
What if my cookies turn out too tough?
If your Peanut Butter Kiss Cookies are tough, it likely means they were overmixed or overbaked. Make sure to mix your dough just until the dry ingredients are incorporated. For baking, keep an eye on them: they should be puffy and cracked, but not overly golden. Adjusting your baking time can make all the difference!
Are Peanut Butter Kiss Cookies safe for my pets?
Unfortunately, peanut butter may not be suitable for pets, especially if it contains xylitol, which is toxic to dogs. Always check the ingredients before sharing these delicious treats. For a pet-friendly option, consider making homemade treats specifically designed for your furry friends!
Can I make these cookies ahead of time?
Absolutely! The cookie dough can be prepared up to 24 hours in advance and kept in the refrigerator. For longer storage, freeze the shaped cookie dough balls for up to 2 months—just remember to press the chocolate kisses in after baking, not before freezing, for the best results!
Peanut Butter Kiss Cookies: Irresistibly Chewy and Chocolatey
Ingredients
Equipment
Method
- Preheat your oven to 375°F (190°C) and line your baking sheets with parchment paper.
- In a large mixing bowl, cream the peanut butter, unsalted butter, packed brown sugar, and granulated sugar until smooth and fluffy.
- Add in the egg and vanilla extract, mixing until fully incorporated.
- In a separate bowl, whisk together the flour, baking soda, and salt, then slowly mix into the wet ingredients.
- Scoop the dough into 1-inch balls, rolling in granulated sugar if desired.
- Place the cookie dough balls on the prepared baking sheets, spaced about 2 inches apart.
- Bake for 8-10 minutes until puffed and lightly cracked; the bottoms should turn golden brown.
- Remove from oven and press a chocolate kiss into the center of each cookie.
- Let the cookies cool on the baking sheet completely.
")