")
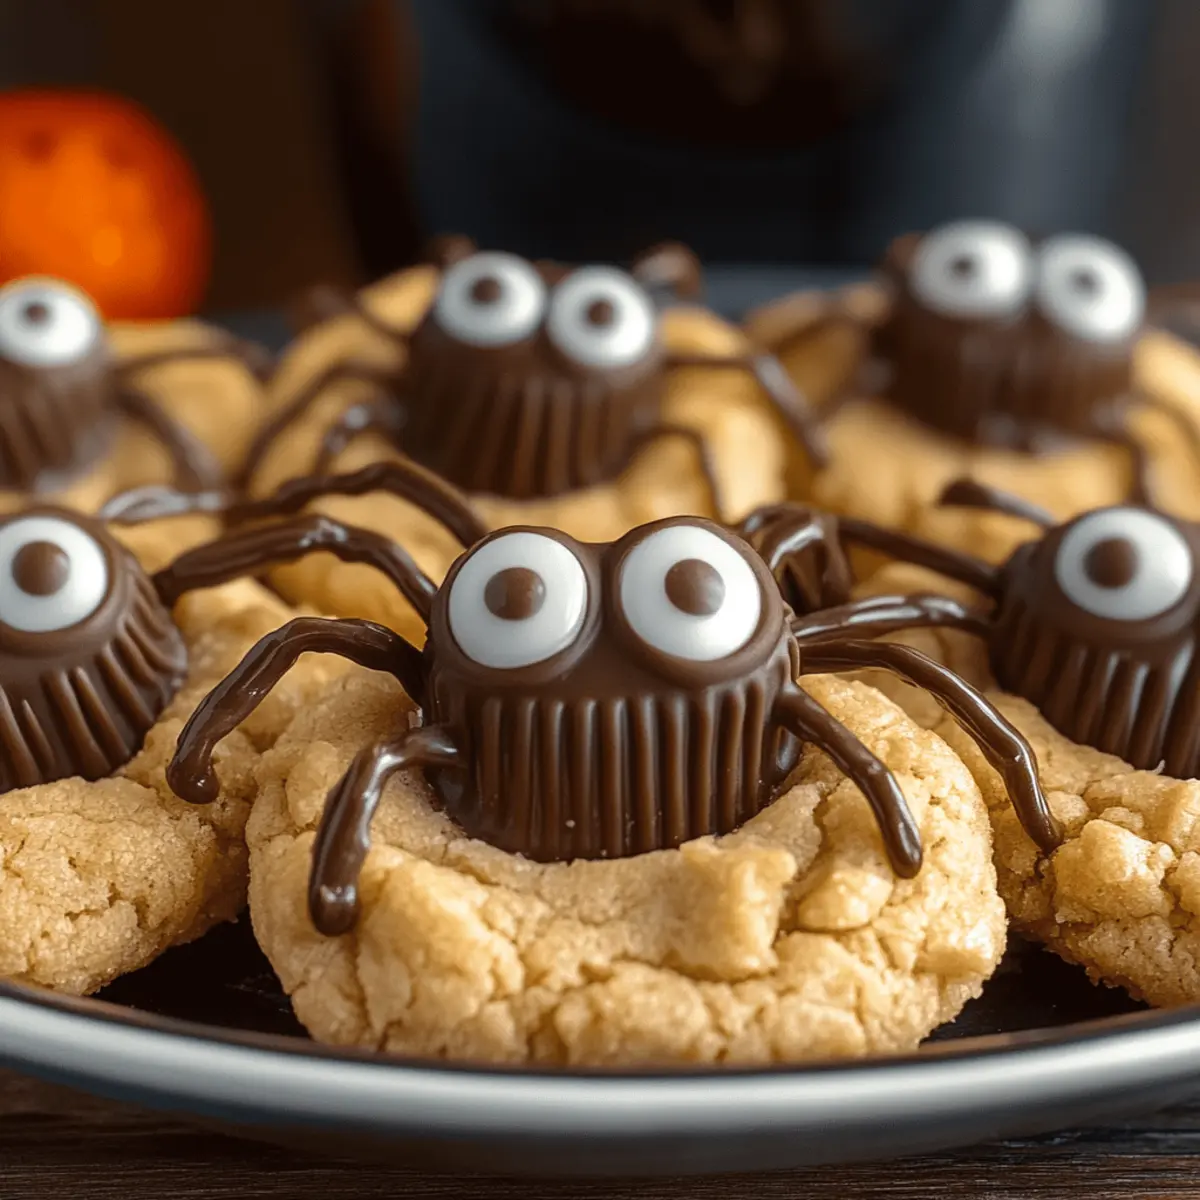
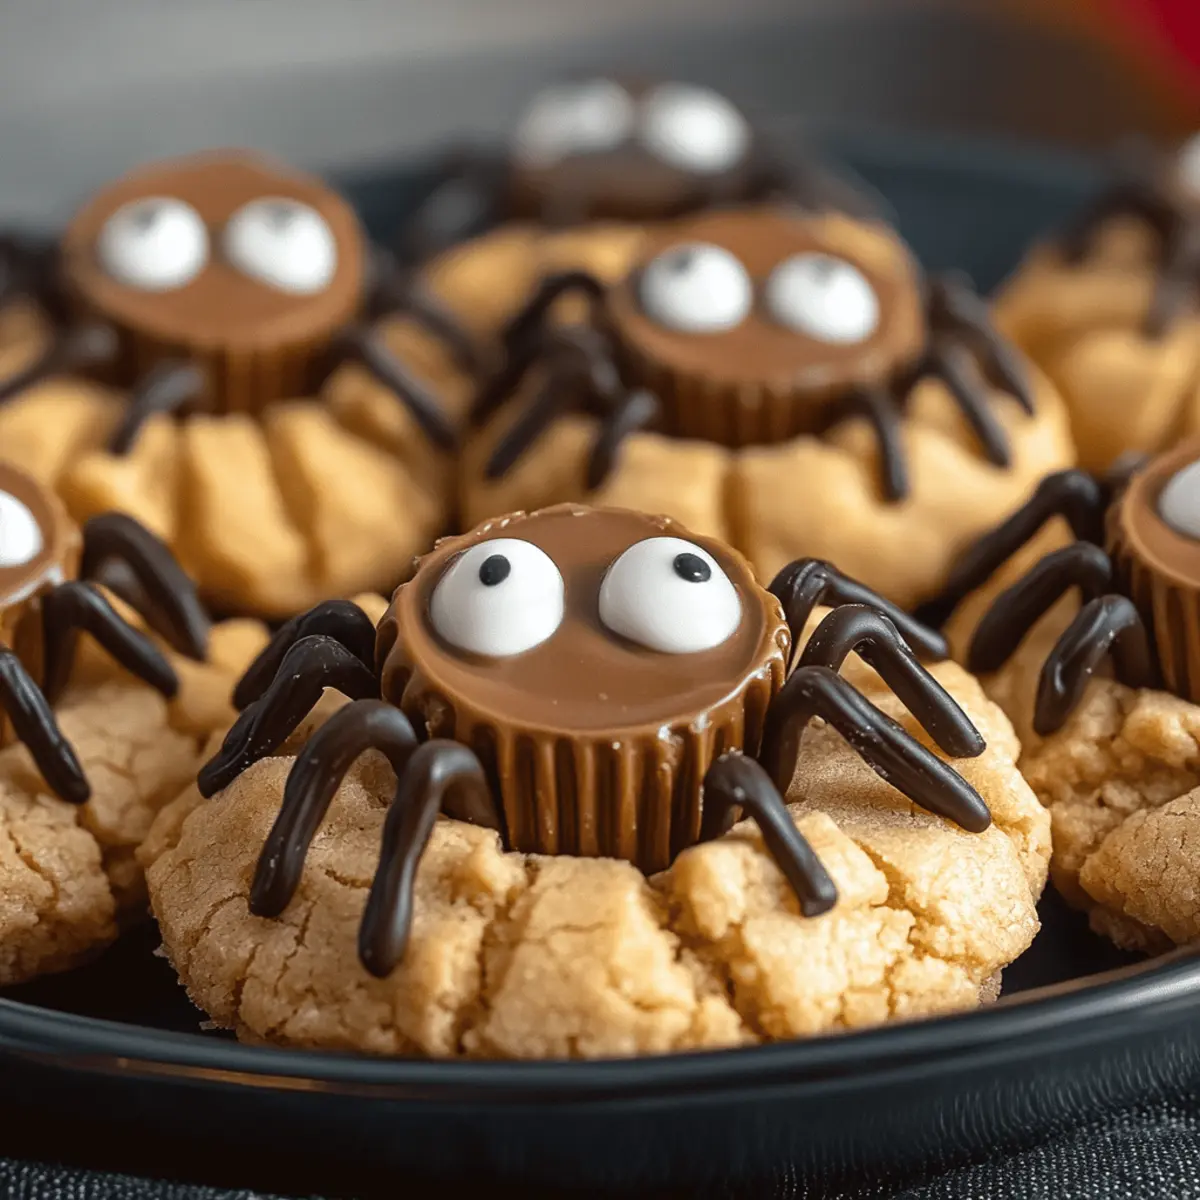
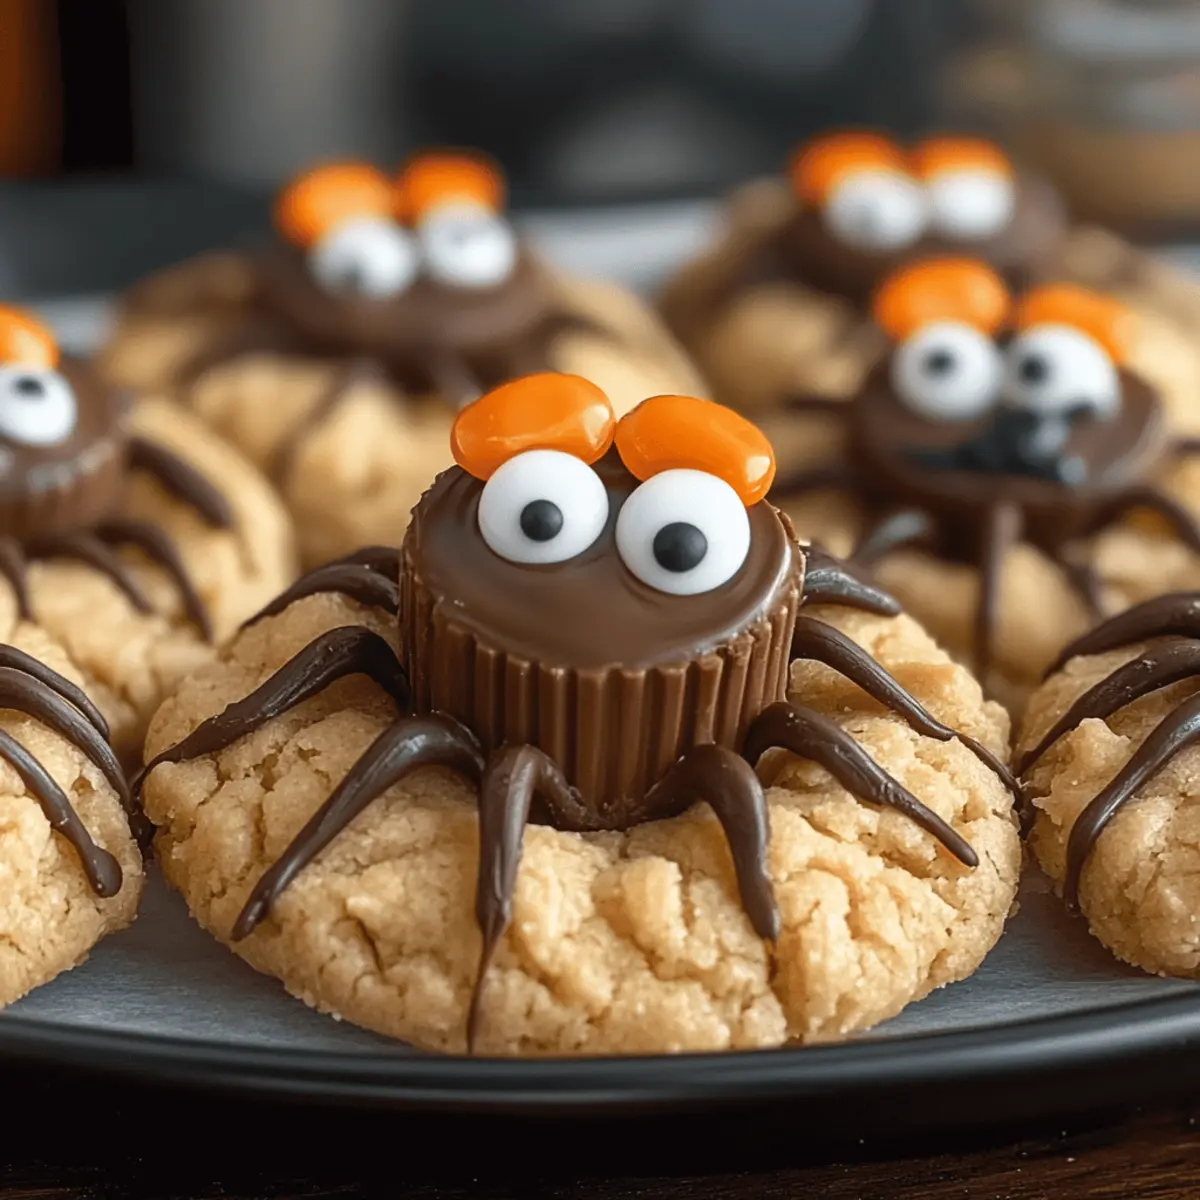
Just picture a bubbling cauldron filled with delightful treats—spooky yet sweet! This Halloween, I’m excited to bring you my Peanut Butter Spider Cookies, a whimsical dessert that’s sure to delight at any gathering. With soft, chewy peanut butter cookie bases topped with Reese’s cups and charming chocolate spider legs, they’re not just adorable but together create an equally scrumptious experience. The best part? They require just 12 ingredients and about 10 minutes of bake time, making them a quick and easy addition to your festive festivities. Whether you’re looking to impress the kids or indulge your own sweet tooth, these kid-friendly cookies are a delightful way to celebrate the season. I can’t wait for you to try making these scrumptious treats—what other fun Halloween themes could you envision for your very own dessert table?
Why Are Peanut Butter Spider Cookies a Must-Try?
Delightfully Fun: These cookies are a charming way to celebrate Halloween, combining soft peanut butter sweetness with a playful spider design that is sure to wow kids and adults alike.
Quick & Easy: All you need is 12 simple ingredients, and with a bake time of just 10 minutes, you’ll be ready to enjoy these treats in no time!
Kid-Friendly: Perfect for little chefs, these Peanut Butter Spider Cookies are easy to make and even more fun to decorate. Let your kids get creative with the spider legs!
Versatile Recipe: You can easily make them gluten-free by swapping regular flour for a gluten-free blend, ensuring everyone can enjoy these spooky delights.
Crowd-Pleaser: Whether it’s a Halloween party or family gathering, these cookies are bound to become a hit on your dessert table, bringing joy to everyone who bites into them.
Don’t forget to check out other festive treats like Peanut Butter Crackers or add some flair with Millies Cookies Bake for more Halloween magic!
Peanut Butter Spider Cookies Ingredients
For the Cookie Dough
- Unsalted Butter – ½ cup (113g) for richness and moisture; let it soften at room temperature for easy mixing.
- Brown Sugar – ½ cup (107g) adds depth of flavor and moisture; feel free to swap with light or dark brown sugar.
- Granulated Sugar – ⅓ cup (66g) ensures the right sweetness and texture in the cookies.
- Creamy Peanut Butter – ¾ cup (201g) provides that signature savory flavor and chewy texture; avoid natural peanut butter for the best results.
- Large Egg – 1 helps bind the ingredients and contributes to rising.
- Vanilla Extract – 1 tsp enhances the overall flavor profile beautifully.
- All-Purpose Flour – 1 ½ cups (180g) gives structure; can replace with a 1:1 gluten-free flour blend for gluten-free peanut butter spider cookies.
- Baking Soda – 1 tsp promotes a good rise for the cookies.
- Baking Powder – ½ tsp works alongside baking soda for extra leavening.
- Salt – ½ tsp balances sweetness and enhances flavor.
- Granulated Sugar (for rolling) – For a sweet, crusty coating before baking.
For the Decoration
- Mini Reese’s Peanut Butter Cups – 24 provide a unique cookie center that amplifies the peanut butter flavor.
- Semi-Sweet Chocolate Chips – ½ cup (85g) for melting into spider legs, creating a fun decoration.
These Peanut Butter Spider Cookies deliver an adorable and tasty Halloween treat that’s sure to enchant!
Step‑by‑Step Instructions for Peanut Butter Spider Cookies
Step 1: Chill Reese’s Cups
Begin by unwrapping 24 mini Reese’s Peanut Butter Cups and placing them in the freezer for about 30 minutes. Chilling helps them hold their shape when pressed into the warm cookie centers, ensuring a delightful surprise in your Peanut Butter Spider Cookies.
Step 2: Preheat Oven
While the Reese’s cups are chilling, preheat your oven to 350°F (175°C). This temperature will ensure that your cookies bake evenly and develop a lovely golden hue. Prepare a baking sheet by lining it with parchment paper for easy cleanup.
Step 3: Mix Wet Ingredients
In a large mixing bowl, beat together ½ cup of softened unsalted butter, ½ cup brown sugar, and ⅓ cup granulated sugar until the mixture is light and fluffy, about 2-3 minutes. Then, add in ¾ cup creamy peanut butter along with one large egg and 1 teaspoon vanilla extract, mixing thoroughly until combined and smooth.
Step 4: Combine Dry Ingredients
In a separate bowl, whisk together 1½ cups all-purpose flour, 1 teaspoon baking soda, ½ teaspoon baking powder, and ½ teaspoon salt. Gradually incorporate this dry mixture into the wet ingredients, stirring gently until just combined. The dough should be soft and slightly sticky, perfect for shaping your Peanut Butter Spider Cookies.
Step 5: Form Cookies
With your hands, roll tablespoon-sized portions of cookie dough into balls. For an added touch, roll each ball in granulated sugar before placing them on the prepared baking sheet. Make sure to space them about 2 inches apart to allow for spreading during baking.
Step 6: Bake
Transfer the baking sheet to your preheated oven and bake for 8 to 11 minutes, or until the edges are lightly browned, and the centers look set but still soft. Keep an eye on them; over-baking can lead to crunchy cookies instead of the desired chewy texture of your Peanut Butter Spider Cookies.
Step 7: Cool and Decorate
As soon as you remove the cookies from the oven, gently press one chilled Reese’s cup into the center of each cookie. Allow them to cool on the baking sheet for 15 to 20 minutes, as this will help the cookies firm up while the Reese’s melts slightly, creating a delicious center.
Step 8: Melt Chocolate
In the meantime, place ½ cup of semi-sweet chocolate chips in a microwave-safe bowl. Heat in 20-second intervals, stirring in between, until the chocolate is completely melted and smooth. A squeeze bottle or a piping bag makes it easy to draw the spider legs.
Step 9: Add Candy Eyes
Using your melted chocolate, create whimsical spider legs by squeezing out on either side of each cookie. Then, attach candy eyes using a small dollop of the chocolate and let it set completely before serving. These adorable decorations will make your Peanut Butter Spider Cookies the star of any Halloween spread!
Peanut Butter Spider Cookies Variations
Feel free to let your creativity shine and make these delightful cookies your own with these fun variations!
-
Almond Butter: Swap peanut butter with almond butter for a different nutty flavor that adds a unique twist. You’ll still achieve that soft, chewy texture!
-
Chocolate Cookie Base: Use chocolate cookie dough instead of peanut butter for an irresistible chocolate-peanut butter combo. It’s a delicious contrast that will wow your guests.
-
Gluten-Free Option: Simply substitute the all-purpose flour with a 1:1 gluten-free flour blend to make these cookies accessible to everyone at your gathering. No one will miss out on the fun and flavor!
-
Candy Coating: Experiment with different types of melting chocolate or candy melts, like white or colored chocolate, for a fun, spooky look. Your cookies can become a rainbow of festive delights!
-
Spicy Kick: Add a pinch of cayenne or chili powder to the dough for a surprising heat that contrasts beautifully with the sweetness of these treats. It’s a fun way to keep your taste buds guessing!
-
Nutty Crunch: Toss in some chopped nuts, like pecans or walnuts, for extra texture and a nutty crunch that complements the cookie’s chewiness well.
-
Decorative Sprinkles: Use Halloween-themed sprinkles to decorate your cookies, creating a delightful and colorful look that’s sure to please kids. It adds just the right amount of whimsy to your festive treats!
-
Replace Reese’s: Consider using other fun-sized candy bars like Snickers or Milky Way as a center surprise. Each bite will yield a different flavor sensation!
If you’re looking for more delightful recipes, consider making some Millies Cookies Bake or whip up a batch of Chocolate Chips Cookies to accompany your Halloween festivities!
Make Ahead Options
These Peanut Butter Spider Cookies are absolutely perfect for meal prep, allowing you to savor the fun of Halloween even on busy days! You can prepare the dough up to 3 days in advance; simply store it in an airtight container in the refrigerator to maintain the flavors and freshness. Additionally, the formed cookie balls can be frozen for up to 3 months, making it handy to have them ready to bake whenever a craving hits. When you’re ready to finish the cookies, just bake straight from frozen for a few extra minutes. After baking, decorate with the melted chocolate and candy eyes, and your delicious Halloween treats will be just as enchanting as fresh from the oven!
How to Store and Freeze Peanut Butter Spider Cookies
Room Temperature: Keep your cookies in an airtight container at room temperature for up to 3 days to maintain their freshness.
Fridge: Store in the refrigerator if you prefer a firmer texture; they can last about a week, but the flavor may slightly diminish.
Freezer: For longer storage, freeze baked cookies for up to 3 months in a single layer, placed in an airtight container, or sealed in a freezer bag.
Reheating: To enjoy your Peanut Butter Spider Cookies warm, microwave for 10-15 seconds or let them sit at room temperature before serving.
Expert Tips for Peanut Butter Spider Cookies
-
Chill the Surprise: Always freeze your Reese’s cups for at least 30 minutes before use. This prevents them from melting too much and losing their shape while baking.
-
Watch the Bake Time: Keep an eye on your cookies in the oven. Overbaking can lead to crunchy cookies instead of the desired soft and chewy texture of your Peanut Butter Spider Cookies.
-
Cooling is Key: Allow your cookies to cool on the baking sheet for 15 to 20 minutes. This helps them firm up and retain their shape while the Reese’s melts slightly.
-
Decorate with Care: Use a squeeze bottle for your melted chocolate to create neat spider legs. This makes decorating easier and adds a touch of fun to your Halloween treats!
-
Storage Savvy: Store your cookies in an airtight container at room temperature for up to 3 days. For longer freshness, freeze baked cookies for up to 3 months.
What to Serve with Peanut Butter Spider Cookies
Imagine a table adorned with delightful treats that complement your spooky cookie creations—perfect for making your Halloween memorable!
-
Milk and Cookies: A classic pairing, cold milk enhances the rich peanut butter flavor and soft texture, making each bite even more enjoyable.
-
Halloween Fruit Platter: Vibrant fruits like tangerines (for “pumpkins”) and grapes (for “witches’ eyes”) add a refreshing balance to the sweetness and create visual appeal.
-
Chewy Caramel Corn: These sweet, crunchy bites bring a fun texture contrast to the soft cookies, perfect for snack lovers and Halloween enthusiasts alike.
-
Chocolate Pumpkin Spice Latte: Embrace the festive flavors of the season with a cozy beverage that complements the nuttiness of the cookies and warms the soul.
-
Ghostly Marshmallow Treats: Cute and chewy, these treats provide a playful way to mirror the spirit of your cookies while adding another layer of Halloween whimsy.
-
Spiced Apple Cider: The warm, spiced notes of apple cider blend beautifully with the peanut butter sweetness, making it a comforting drink choice for chilly evenings.
-
Mini Pumpkin Pies: A seasonal favorite, these mini desserts introduce a rich, spiced flavor that pairs perfectly with the creamy peanut butter in your spider cookies.
-
Festive Candy Corn: Scatter candy corn around your cookie display for a pop of color and sweet crunch, creating a beautifully themed Halloween table.
-
Chocolate-Covered Pretzels: The salty crunch of pretzels dipped in chocolate balances the sweetness of the cookies, providing a delightful taste and texture contrast.
Peanut Butter Spider Cookies Recipe FAQs
What type of peanut butter should I use?
I recommend using creamy peanut butter for the best texture and flavor. Avoid natural peanut butter, as it can make your cookies too oily and affect their structure.
How should I store my Peanut Butter Spider Cookies?
To keep your cookies fresh, store them in an airtight container at room temperature for up to 3 days. Layer them with parchment paper if stacking to prevent sticking!
Can I freeze Peanut Butter Spider Cookies?
Absolutely! You can freeze the cookies after baking. Simply place them in a single layer in an airtight container or freezer bag. They can last up to 3 months. To enjoy, thaw at room temperature or pop them in the microwave for a quick warm-up.
I underbaked my cookies. What should I do?
If your cookies are too doughy, leave them on the baking sheet for a few more minutes after baking. The residual heat will help firm them up. If they’re still not right, feel free to bake them for a couple of minutes more during your next batch.
Can these cookies be made gluten-free?
Yes, you can easily make gluten-free Peanut Butter Spider Cookies! Just swap out the all-purpose flour with a 1:1 gluten-free flour blend. This way, everyone can indulge in these delightful treats at your Halloween gathering.
Are there any dietary considerations?
If you’re making these cookies for someone with allergies, be cautious with the ingredients. The cookies contain peanuts and gluten. Always read labels if you’re using store-bought ingredients to ensure they are safe for your guests.

Peanut Butter Spider Cookies: A Halloween Treat Your Kids Will Love
Ingredients
Equipment
Method
- Begin by unwrapping 24 mini Reese’s Peanut Butter Cups and placing them in the freezer for about 30 minutes.
- While the Reese's cups are chilling, preheat your oven to 350°F (175°C) and prepare a baking sheet with parchment paper.
- In a large mixing bowl, beat together the softened butter, brown sugar, and granulated sugar until light and fluffy, about 2-3 minutes. Add the creamy peanut butter, egg, and vanilla extract, mixing until combined and smooth.
- In a separate bowl, whisk together the flour, baking soda, baking powder, and salt. Gradually incorporate this dry mixture into the wet ingredients, stirring gently until just combined.
- Roll tablespoon-sized portions of cookie dough into balls, optionally rolling each ball in granulated sugar before placing on the baking sheet, spaced about 2 inches apart.
- Bake for 8 to 11 minutes, or until edges are lightly browned and centers look set but still soft.
- Remove cookies from the oven and gently press one chilled Reese's cup into the center of each cookie. Allow to cool on the baking sheet for 15 to 20 minutes.
- Melt the chocolate chips in a microwave-safe bowl in 20-second intervals until smooth.
- Using the melted chocolate, create whimsical spider legs by squeezing out on either side of each cookie and attach candy eyes with a small dollop of chocolate.
")


