")
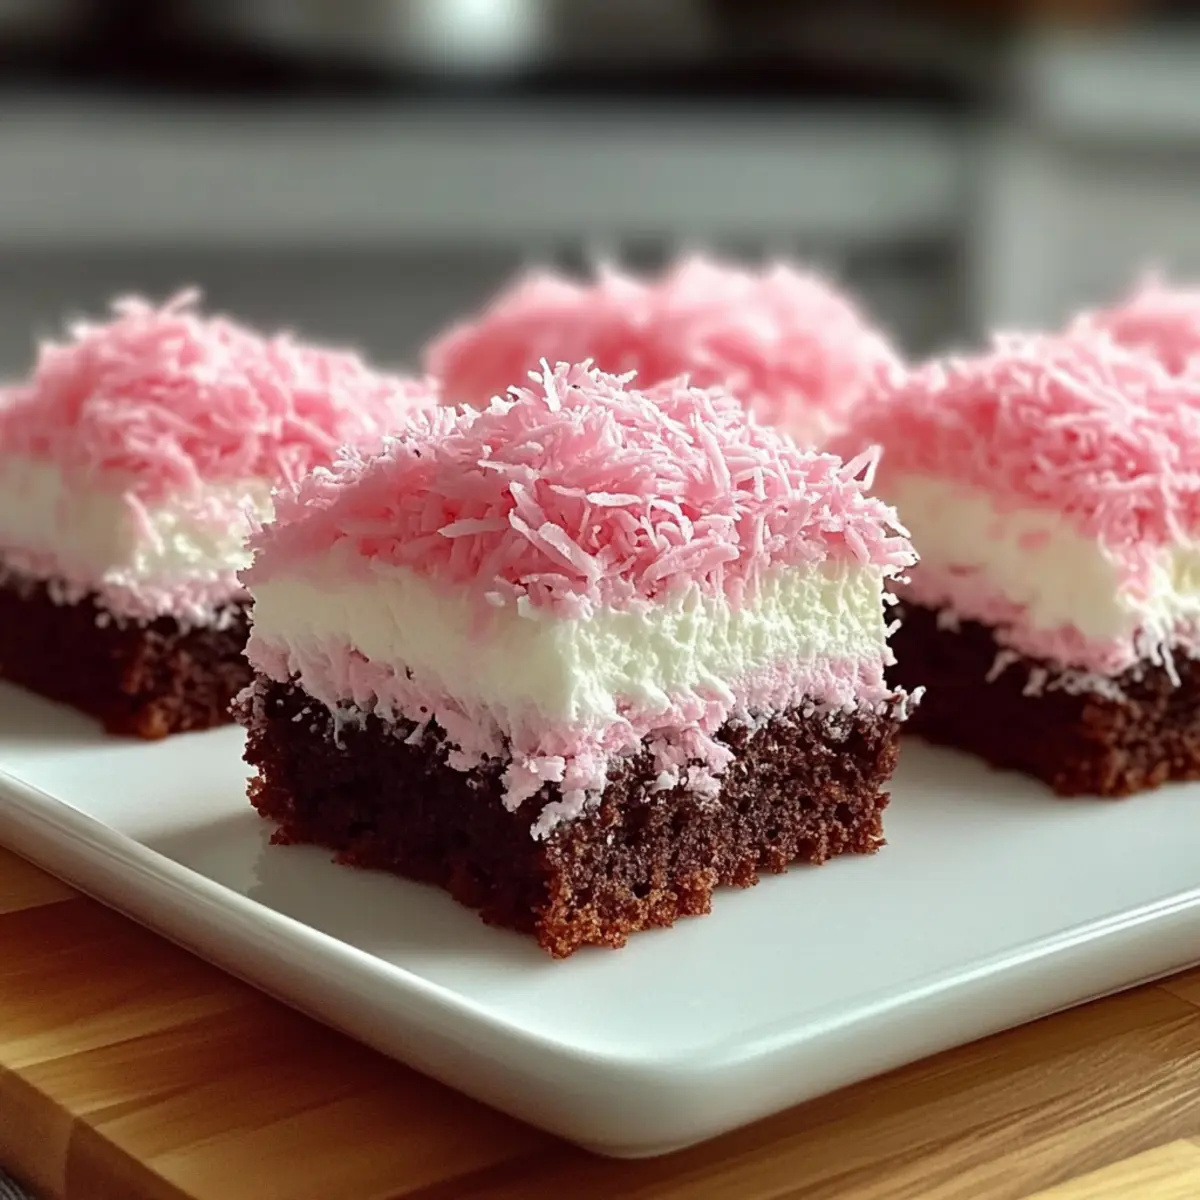
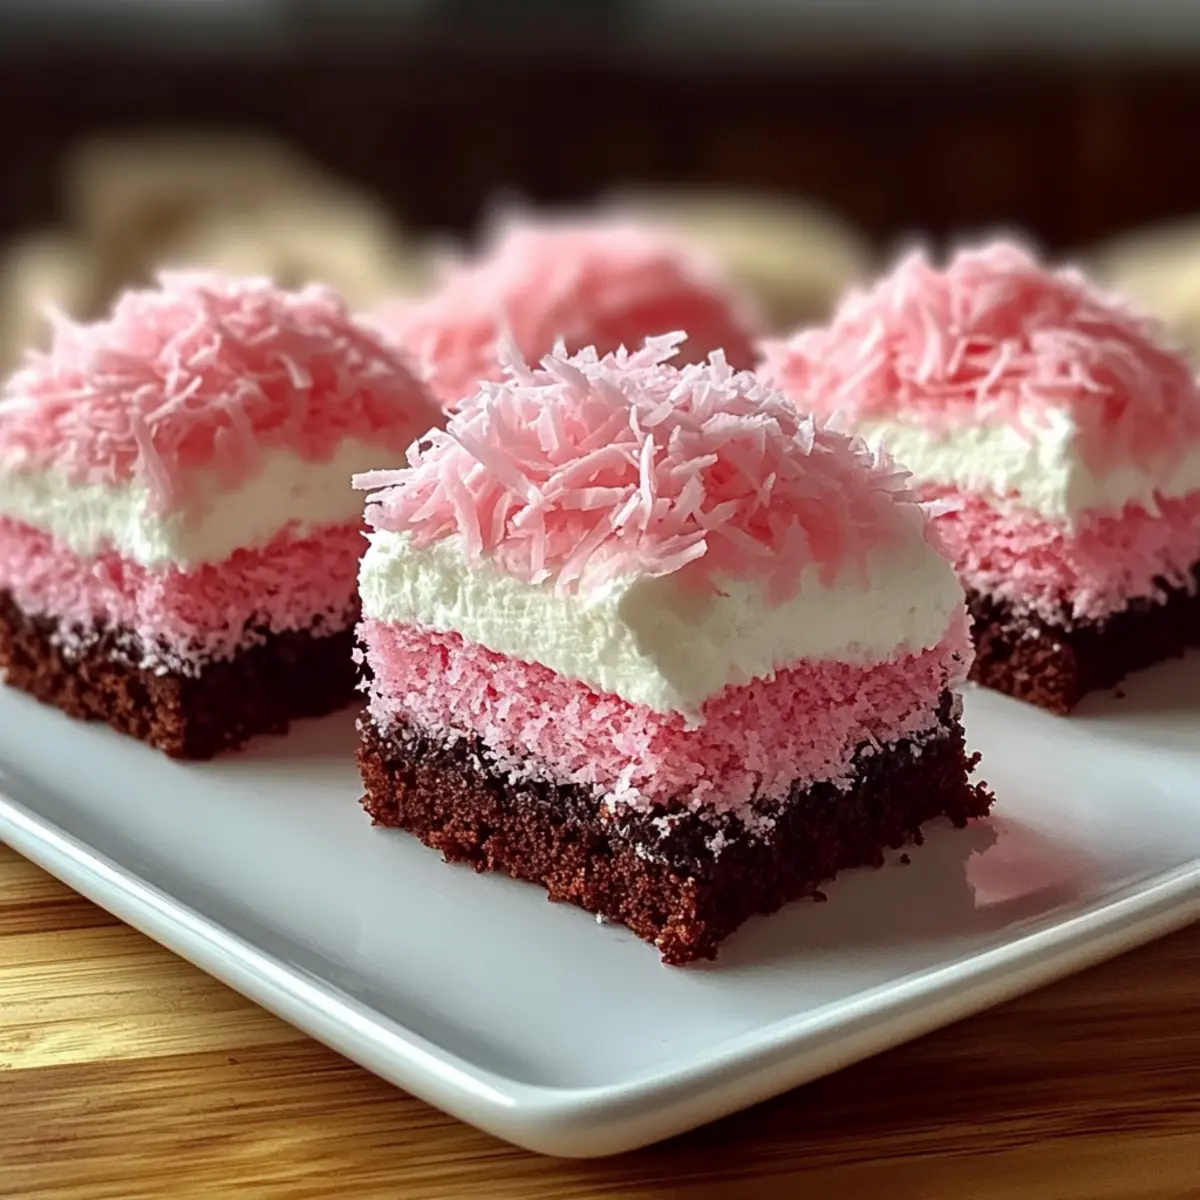
While flipping through a cherished family recipe book, I stumbled upon a vibrant gem: Pink Coconut Snowball Cake Bars. Instantly, the delightful image of these bars sparked memories of sweet celebrations, from joyful birthdays to romantic Valentine’s Day treats. This easy-to-make dessert combines a moist chocolate cake base with a fluffy vanilla cream topping, all elegantly wrapped in a whimsical layer of pink coconut that adds both flavor and flair. What makes this recipe truly special is how effortlessly it transforms any gathering into a festive occasion. You’ll love the simplicity of preparation alongside the stunning presentation that will impress family and friends. Ready to make a dessert that steals the spotlight? Let’s get baking!
Why Are These Cake Bars So Irresistible?
Simplicity at Its Best: The straightforward process makes these Pink Coconut Snowball Cake Bars easy to whip up, even for novice bakers.
Visual Appeal: Their vibrant pink coconut topping creates an eye-catching presentation, perfect for charming guests.
Versatile Treat: Ideal for various occasions—from festive celebrations to sweet everyday treats—these bars fit every event beautifully.
Delicious Flavor Harmony: The combination of rich chocolate cake with the light, fluffy vanilla topping is a match made in dessert heaven.
Make-Ahead Convenience: Prepare ahead and store in the fridge for up to three days, allowing you to enjoy stress-free gatherings.
Try pairing them with fresh berries or a scoop of ice cream for a delightful twist—just like how I suggest in my other recipes, such as the Easy Coconut Cake Vape or Enchanting Barbie Cake!
Pink Coconut Snowball Cake Bars Ingredients
These vibrant bars come together with a few simple yet delightful ingredients.
For the Cake Base
- Chocolate Cake Mix – Choose a high-quality mix or make from scratch for the best flavor.
- Eggs – Ensure they are at room temperature for a better batter consistency.
- Buttermilk – Adds moisture and richness; see substitution for alternatives.
- Vegetable Oil – Keeps the cake moist; can be swapped for melted butter if desired.
For the Fluffy Topping
- Cream Cheese – Provides stability and creaminess to the topping; bring to room temperature for easier mixing.
- Powdered Sugar – Sweetens the cream frosting beautifully; gives it that perfect consistency.
- Vanilla Extract – Enhances the overall flavor; use pure vanilla for the best results.
For the Pink Coconut Topping
- Sweetened Flaked Coconut – The star ingredient that gives these cake bars their signature look and taste.
- Pink Food Coloring – A few drops will make the coconut pop visually, perfect for celebrations.
Enjoy making these Pink Coconut Snowball Cake Bars and watch how they light up your next gathering!
Step‑by‑Step Instructions for Pink Coconut Snowball Cake Bars
Step 1: Preheat the Oven
Begin by preheating your oven to 350°F (175°C). While the oven heats, grease a rectangular baking dish thoroughly with butter or cooking spray to ensure that your Pink Coconut Snowball Cake Bars come out easily after baking. This step is crucial for achieving a perfect, tidy finish.
Step 2: Mix the Dry Ingredients
In a large mixing bowl, combine the all-purpose flour, cocoa powder, and granulated sugar. Whisk together until they are well blended, ensuring there are no lumps. This dry mixture will form the foundation of your chocolate cake base, giving it that rich flavor and texture once baked.
Step 3: Combine the Wet Ingredients
In a separate bowl, mix the buttermilk, eggs, melted butter, and vanilla extract. Use a whisk to beat these ingredients until smooth and well combined. Ensuring your eggs are at room temperature will help them blend seamlessly, which is important for the overall texture of your Pink Coconut Snowball Cake Bars.
Step 4: Combine Wet and Dry Mixtures
Gently fold the wet ingredients into the dry mixture using a spatula. Stir until just combined, being careful not to overmix, as this can lead to a denser cake. You want a smooth batter without any dry patches, which will bake beautifully into a moist chocolate cake.
Step 5: Bake the Cake Base
Pour the prepared batter into the greased baking dish, spreading it evenly. Place the dish in the preheated oven and bake for 25-30 minutes. You’ll know your Pink Coconut Snowball Cake Bars are ready when a toothpick inserted in the center comes out clean.
Step 6: Cool the Cake
Once baked, remove the dish from the oven and let your cake cool in the pan for about 10 minutes. Then, transfer the cake to a wire rack to cool completely. Ensuring the cake is fully cooled is essential before adding the fluffy topping, as warm cake can melt the cream.
Step 7: Prepare the Fluffy Topping
While the cake cools, in a medium bowl, whip together the cream cheese and powdered sugar using an electric mixer until the mixture is smooth and creamy. This fluffy topping is essential for the Pink Coconut Snowball Cake Bars, providing a lovely contrast to the rich chocolate cake below.
Step 8: Spread the Topping
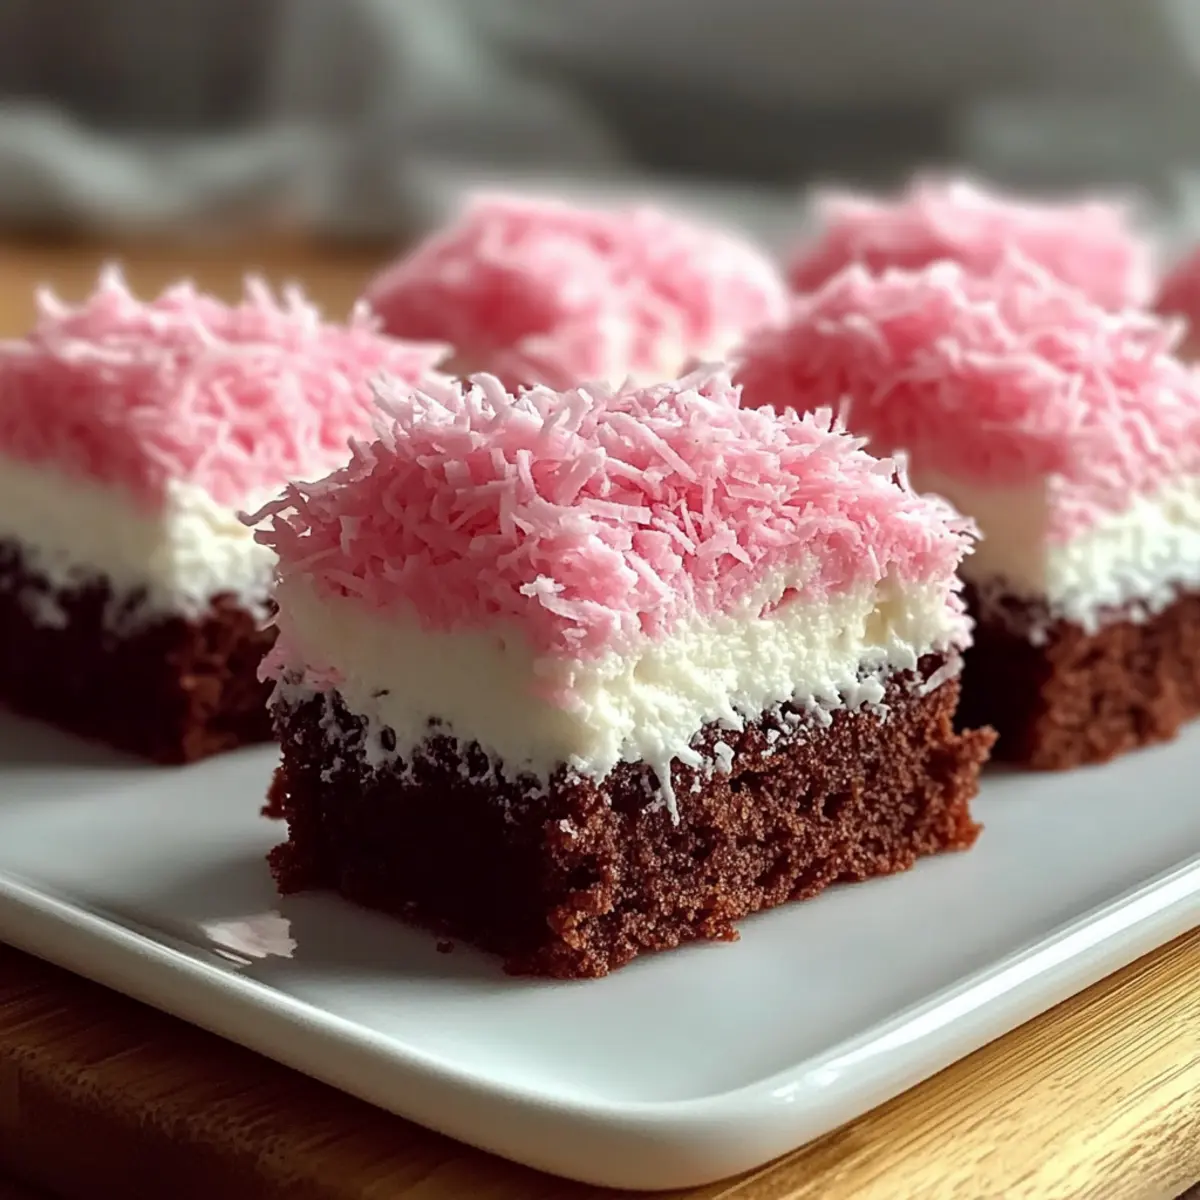
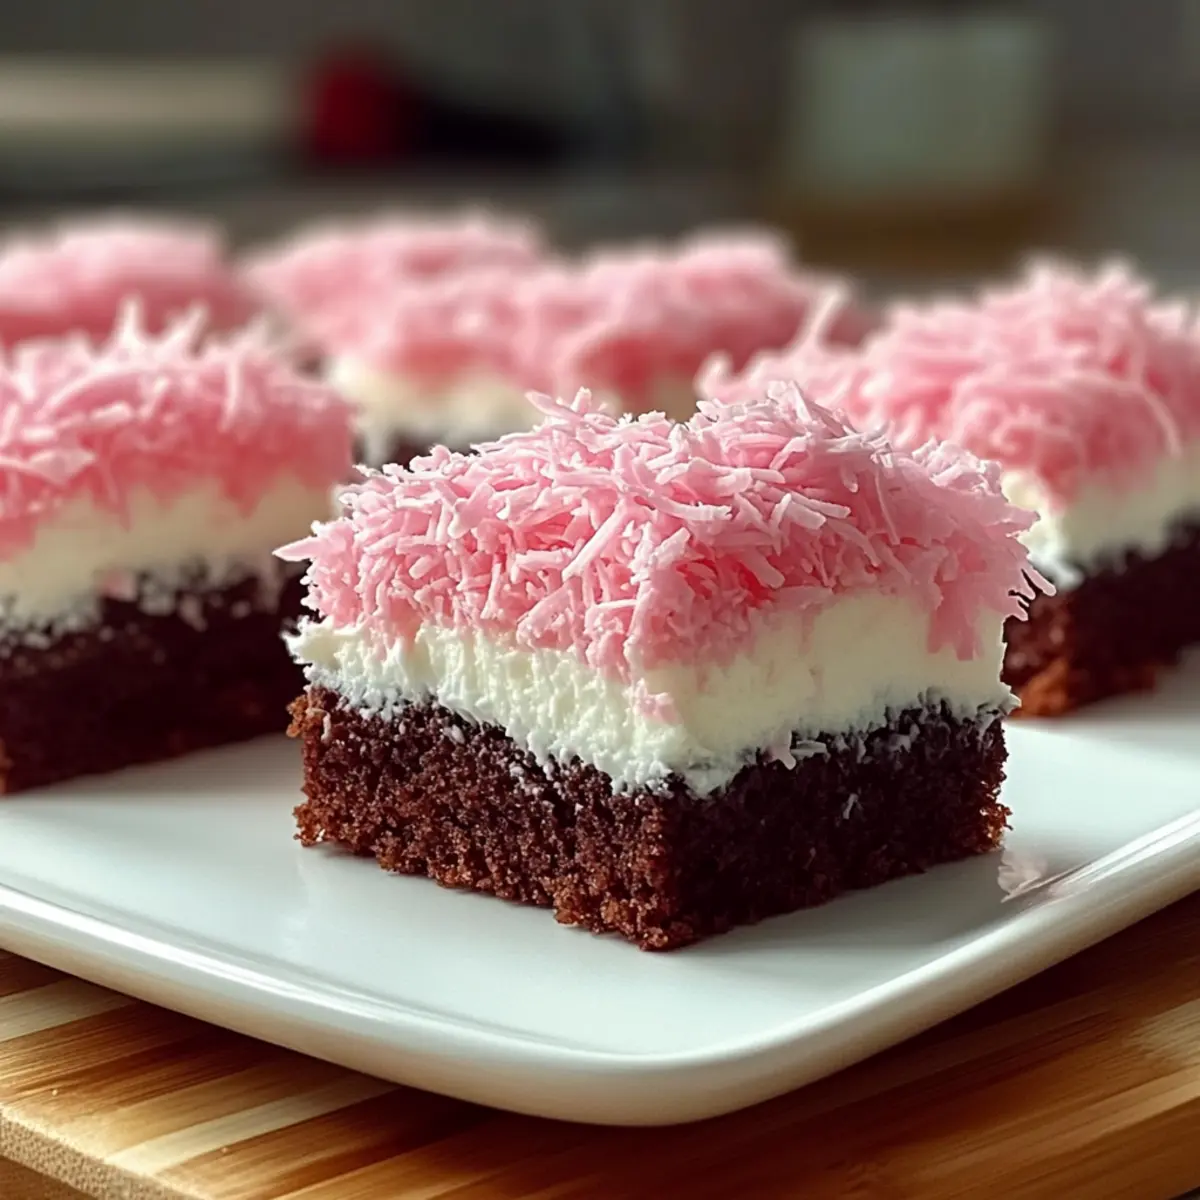
Once your cake is completely cooled, spread the whipped cream cheese mixture evenly over the top of the cake using a spatula. Make sure to cover every corner, creating a smooth and inviting layer that will hold the pink coconut beautifully atop your cake bars.
Step 9: Add the Pink Coconut
Now, sprinkle the sweetened flaked coconut over the cream layer, ensuring an even distribution. If you want your coconut to really pop, lightly press it into the cream topping. This step not only adds flavor but also makes your Pink Coconut Snowball Cake Bars visually appealing for your celebrations.
Step 10: Slice and Serve
Finally, slice the cake into bars using a sharp knife. For the best presentation, chill the bars in the refrigerator for at least 30 minutes before serving. This allows the layers to set beautifully, creating delightful portions that will be the highlight of any gathering.
Make Ahead Options
These Pink Coconut Snowball Cake Bars are perfect for meal prep enthusiasts! You can make the chocolate cake base up to 24 hours in advance. Simply bake the cake, let it cool completely, and then cover it tightly with plastic wrap before refrigerating. The fluffy cream cheese topping can also be prepared ahead and stored in the fridge for up to 3 days in an airtight container; just give it a quick whip before spreading it on the cake. When you’re ready to serve, spread the topping over the chilled cake, sprinkle with pink coconut, and slice into bars for a delicious, stress-free dessert that will impress your guests!
Expert Tips for Pink Coconut Snowball Cake Bars
Cool Completely: Ensure the cake is completely cool before adding the topping to prevent it from melting into a gooey mess.
Whip the Cream Cheese Well: Be sure to whip the cream cheese and powdered sugar until smooth to create a fluffy topping that adheres well to the cake.
Avoid Overmixing: When combining wet and dry ingredients, mix gently to maintain the light texture of the cake; overmixing can lead to a dense outcome.
Customize the Coconut Color: Feel free to use different food colors for themed events; pastel shades work beautifully for spring celebrations!
Chill Before Serving: For the best texture and flavor, chill the Pink Coconut Snowball Cake Bars for at least 30 minutes before slicing and serving.
What to Serve with Pink Coconut Snowball Cake Bars
The delightful combination of flavors and textures in these bars makes them the star of any gathering, so complement them with the perfect sides.
-
Fresh Berries: Bright strawberries or raspberries add a tart contrast to the sweetness of the bars. Their juiciness enhances the celebratory feel.
-
Vanilla Ice Cream: A scoop of creamy vanilla ice cream brings a delightful chill and richness that pairs beautifully with the chocolate cake base.
-
Coconut Whipped Cream: Light and airy, this topping echoes the coconut flavor, enhancing the festive vibe while keeping it light.
-
Lemonade or Sparkling Water: The zesty freshness of lemonade or a bubbly sparkling water keeps the palate refreshed, balancing the cake’s richness.
-
Mint Chocolate Chip Cookies: The cool mint flavor in these cookies complements the chocolate, creating a fun and indulgent dessert table.
-
Fruit Salad: A colorful mix of seasonal fruits adds brightness and a refreshing bite, perfect for cleansing the palate after enjoying the rich bars.
-
Chocolate Truffles: These decadent bites are a lovely treat to serve alongside, bringing an extra touch of luxury your guests will adore.
-
Coffee or Espresso: The bold flavors of roasted coffee beautifully contrast with the sweetness of the cake, making it a great pairing for adults.
Each of these options complements the Pink Coconut Snowball Cake Bars while creating a well-rounded and enjoyable dessert experience.
How to Store and Freeze Pink Coconut Snowball Cake Bars
Fridge: Keep the bars in an airtight container in the refrigerator for up to 3 days to maintain freshness and prevent drying out.
Freezer: For longer storage, wrap individual bars tightly in plastic wrap and then place them in a freezer-safe bag. They can last up to 2 months in the freezer.
Thawing: When you’re ready to enjoy, simply transfer the bars to the fridge for a few hours to thaw before serving. This helps retain their ideal texture and flavor.
Reheating: If desired, you can lightly warm the bars in the microwave for a few seconds, but avoid overheating to keep the topping from melting.
Variations & Substitutions for Pink Coconut Snowball Cake Bars
Feel free to play around with flavors, textures, and dietary needs to make these delightful bars your own!
- Gluten-Free: Substitute all-purpose flour with a gluten-free blend to accommodate dietary restrictions without compromising taste.
- Dairy-Free Delight: Use almond milk and coconut oil in place of buttermilk and butter for a completely dairy-free version, keeping it rich and tasty.
- Flavored Extracts: Try almond or coconut extract instead of vanilla for a unique twist in both the cake and topping, adding depth to the overall flavor.
- Fruity Addition: Add some fresh raspberries or strawberries into the cake batter for fruity bursts of flavor that perfectly complement the chocolate.
- Nutty Crunch: Fold in chopped nuts like pecans or walnuts into the batter for added texture; this can create an enjoyable crunch amidst the softness.
- Layering Options: Don’t hesitate to layer in a thin spread of fruit preserves or chocolate ganache between the cake and cream topping for extra richness.
- Festive Colors: Use different shades of food coloring for the coconut to make your cake bars pop for various occasions, like vibrant pastels for spring celebrations.
- Choco-Coconut Fusion: For chocolate enthusiasts, mix in chocolate chips or drizzle melted chocolate over the top of the pink coconut for an indulgent finish.
Whether you’re seeking something whimsical for a birthday party or a heartfelt touch for a Valentine’s Day celebration, these variations will elevate your Pink Coconut Snowball Cake Bars! Always remember to keep the fun of baking alive—just like my other favorites, such as the classic Lemon Cake Mix Cookies or the lovely Strawberry Cake Filling.
Pink Coconut Snowball Cake Bars Recipe FAQs
How do I choose the right ingredients for the Pink Coconut Snowball Cake Bars?
Absolutely! For the best results, ensure your cocoa powder is fresh for the richest chocolate flavor. When selecting eggs, choose ones that are at room temperature; this allows for better mixing and a fluffier cake. Also, look for sweetened flaked coconut without preservatives to enhance the taste and texture of the topping.
How should I store the Pink Coconut Snowball Cake Bars?
To maintain their delightful freshness, store the bars in an airtight container in the refrigerator for up to 3 days. This keeps them moist and delicious! If you want to prepare them ahead of time, you can also freeze the bars wrapped tightly in plastic wrap and placed in a freezer-safe bag for up to 2 months.
Can I freeze the Pink Coconut Snowball Cake Bars?
Very! To freeze, wrap each bar individually in plastic wrap to prevent freezer burn, then place them in a freezer-safe bag. When you’re ready to indulge, transfer them to the fridge to thaw for a few hours. This will help retain their lovely texture and flavor, so they taste just as delightful as when freshly made.
What should I do if my topping becomes too runny?
The key here is to make sure your cream cheese is whipped until smooth but not overly so. If your topping seems runny, try chilling the cream cheese and powdered sugar mixture in the refrigerator for about 15-20 minutes to firm it up. If you’re still having issues, consider adding a bit more powdered sugar to thicken it, ensuring a lovely spreadable consistency.
Are there any dietary considerations I should be aware of when making these bars?
Yes, indeed! If you have anyone with allergies, be sure to check for gluten if using regular flour, as a gluten-free option may be necessary. For those with lactose intolerance, you can easily substitute dairy products like buttermilk and butter with almond milk and coconut oil. Always communicate with your guests about ingredients to keep everyone safe!
Can I modify the recipe for different flavor profiles?
Absolutely! Feel free to experiment by swapping the chocolate cake base for a vanilla or lemon cake, which provides a refreshing twist. You can also play around with flavored extracts, such as almond or coconut, within the cake batter or fluffy topping, creating unique variations for different celebrations!
Delightful Pink Coconut Snowball Cake Bars for Any Celebration
Ingredients
Equipment
Method
- Preheat the oven to 350°F (175°C) and grease a rectangular baking dish.
- In a large mixing bowl, combine dry ingredients: flour, cocoa powder, and granulated sugar. Whisk until blended.
- In a separate bowl, mix buttermilk, eggs, melted butter, and vanilla extract until smooth.
- Fold the wet ingredients into the dry mixture until just combined.
- Pour the batter into the greased baking dish and bake for 25-30 minutes, until a toothpick comes out clean.
- Cool the cake in the pan for 10 minutes, then transfer to a wire rack to cool completely.
- In a medium bowl, whip cream cheese and powdered sugar until smooth and creamy.
- Spread the whipped cream cheese mixture evenly over the cooled cake.
- Sprinkle sweetened flaked coconut over the cream layer, pressing it lightly.
- Slice into bars and chill in the refrigerator for at least 30 minutes before serving.
")