Imagine a dessert so simple yet so satisfying that it feels like a warm hug on a chilly evening or a refreshing treat after a long day. The No-Bake 3-Ingredient Milk Pudding Dessert is just that—a creamy, velvety dessert that you can make in no time with ingredients you likely already have in your kitchen. This foolproof recipe delivers maximum flavor with minimal effort. Whether you’re a dessert enthusiast or someone trying their hand at cooking for the first time, this milk pudding is bound to impress. Let’s dive in!
Why You’ll Love This No-Bake Milk Pudding Dessert
This no-bake milk pudding is the perfect answer to your dessert cravings for so many reasons:
- Effortless: Only three main ingredients, no oven, no fuss!
- Budget-Friendly: Uses common, inexpensive pantry staples.
- Customizable: Easily elevate it with vanilla extract, caramel sauce, or nuts.
- Light and Creamy: The texture is silky smooth without being overly rich.
Ingredients for Creamy Milk Pudding
To make this easy and creamy dessert, gather the following ingredients:
| Ingredient | Quantity |
|---|---|
| Milk | 2 cups (500ml) |
| Sugar | 1/3 cup (70g) |
| Eggs | 2 |
| Vanilla Extract (Optional) | 1 teaspoon |
| Optional Garnish | Chopped nuts or caramel sauce |
Step-by-Step Instructions for No-Bake 3-Ingredient Milk Pudding Dessert
1. Prepare the Ingredients
Start by combining the milk and sugar in a medium saucepan. If you’re adding vanilla extract for extra flavor, stir it in now. In a separate bowl, beat the eggs until smooth and well-blended.
2. Heat the Milk and Sugar
Place the saucepan on medium heat and stir continuously. The goal is to dissolve the sugar completely and warm the milk, but don’t let it boil—this can alter the texture of your pudding.
3. Temper the Eggs
Tempering the eggs is crucial to avoid curdling. Slowly pour a small amount of the warm milk mixture into the beaten eggs while whisking constantly. Gradually add more milk to the eggs, continuing to whisk until all the milk is incorporated.
4. Cook the Pudding
Pour the tempered egg mixture back into the saucepan. Cook it over low heat, stirring constantly with a wooden spoon or spatula. The pudding is ready when it thickens enough to coat the back of your spoon. This process usually takes about 5–7 minutes.
5. Chill the Pudding
Remove the pudding from the heat and let it cool slightly. Pour it into serving dishes or ramekins. To prevent a skin from forming, cover each dish with plastic wrap, making sure it touches the surface of the pudding. Refrigerate for at least 2 hours, or until fully chilled and set.
6. Garnish and Serve
Before serving, take your pudding to the next level by adding optional garnishes like chopped nuts or a drizzle of caramel sauce. Serve chilled and enjoy the creamy goodness!
Nutritional Information
Here’s a quick look at the nutritional breakdown per serving (approx.):
| Nutrient | Per Serving |
|---|---|
| Calories | 140 |
| Protein | 5 g |
| Carbohydrates | 18 g |
| Fat | 4 g |
| Sugar | 12 g |
This dessert is light yet satisfying, making it perfect for when you’re craving something sweet without the guilt.
Tips for Making the Perfect Milk Pudding
- Low Heat is Key: Always cook the pudding on low heat to avoid curdling.
- Consistent Stirring: Stirring constantly ensures the pudding thickens evenly and prevents lumps.
- Prevent Skin Formation: Cover the pudding with plastic wrap touching the surface to keep it smooth.
- Room Temperature Ingredients: Let the eggs sit at room temperature for about 15 minutes before using for better results.
How to Serve Milk Pudding
While this pudding is delicious on its own, you can elevate it with creative serving ideas:
- Caramel Drizzle: Add a touch of indulgence with caramel sauce on top.
- Fresh Fruits: Garnish with sliced strawberries, bananas, or blueberries.
- Nutty Crunch: Sprinkle with toasted almonds, pistachios, or hazelnuts for texture.
- Chocolate Love: Shave some chocolate over the pudding for a decadent twist.
- Layered Dessert: Use it as a layer in trifles or parfaits with crushed cookies and whipped cream.
How Long Can You Store No-Bake Milk Pudding?
This pudding can be stored in the refrigerator for up to 3 days. Cover the dishes tightly with plastic wrap to preserve their freshness and creamy texture. Avoid freezing as it can alter the consistency.
Why Milk Pudding is a Classic Dessert
Milk pudding is one of those desserts that has stood the test of time. It’s a comfort food enjoyed across cultures, with variations like flan, custard, or kheer. The simplicity of this recipe highlights how basic ingredients like milk, eggs, and sugar can transform into something extraordinary. The no-bake method makes it even more accessible for busy schedules or those without an oven.
Frequently Asked Questions (FAQs)
1. Can I use plant-based milk instead of regular milk?
Yes, you can substitute regular milk with plant-based options like almond, soy, or oat milk. However, the texture may vary slightly depending on the milk’s thickness.
2. What can I use instead of sugar?
You can replace sugar with honey, maple syrup, or a natural sweetener like stevia. Adjust the quantity to suit your taste preferences.
3. Is it okay to skip the eggs?
Eggs play a key role in thickening this pudding. For an egg-free version, consider using cornstarch or agar-agar as a thickening agent.
4. How can I make this recipe vegan?
To make a vegan version, use plant-based milk, replace eggs with cornstarch or silken tofu, and sweeten with a vegan-friendly sugar alternative.
5. Can I serve this warm instead of chilled?
Yes, this pudding can be served warm if you prefer. However, chilling enhances its creamy texture and flavor.
6. What other flavors can I add?
You can experiment with flavors like cocoa powder for a chocolate pudding, cinnamon for warmth, or instant coffee for a mocha twist.
Final Thoughts: Why You Should Try This No-Bake Milk Pudding Today
The No-Bake 3-Ingredient Milk Pudding Dessert is everything a dessert should be: simple, creamy, and utterly satisfying. Whether you’re whipping it up for a quick treat, a family gathering, or even a dinner party, this recipe is sure to impress. With just three main ingredients and a bit of creativity, you can create a dessert that feels luxurious without being complicated.
So, what are you waiting for? Grab those pantry staples and start stirring up some magic in your kitchen today!
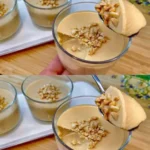
Simple and Creamy: No-Bake 3-Ingredient Milk Pudding Dessert with Ingredients
- Total Time: 2 hours 20 minutes
- Yield: 4 servings
Description
This Simple and Creamy No-Bake 3-Ingredient Milk Pudding Dessert is the ultimate easy treat. With just three basic ingredients, you can create a luscious, silky pudding that’s perfect for any occasion. Whether you’re looking for a quick snack or a light dessert to impress your guests, this recipe has you covered!
Ingredients
- 2 cups milk (500ml)
- 1/3 cup sugar (70g)
- 2 eggs
- Optional: 1 teaspoon vanilla extract
- Optional garnish: Chopped nuts or caramel sauce
Instructions
-
Prepare the Ingredients: Combine the milk and sugar in a medium saucepan. If using vanilla extract, stir it in now. In a separate bowl, beat the eggs until smooth and well-mixed.
-
Heat the Milk and Sugar: Place the saucepan over medium heat. Stir continuously to dissolve the sugar and gently warm the milk. Do not let it boil.
-
Temper the Eggs: Slowly add a small amount of the warm milk mixture to the beaten eggs, whisking constantly to avoid curdling. Gradually mix in the rest of the milk, continuing to whisk.
-
Cook the Pudding: Pour the tempered egg mixture back into the saucepan. Cook over low heat, stirring constantly, until the mixture thickens enough to coat the back of a spoon (about 5–7 minutes).
-
Chill the Pudding: Remove from heat and let the pudding cool slightly. Pour into serving dishes or ramekins. Cover the surface with plastic wrap to prevent a skin from forming. Refrigerate for at least 2 hours or until fully chilled and set.
-
Serve and Garnish: Before serving, add optional garnishes like chopped nuts or a drizzle of caramel sauce. Serve chilled and enjoy!
Notes
- Use low heat to prevent the pudding from curdling or separating.
- Stir constantly to achieve a smooth, lump-free texture.
- For added flavor, consider mixing in a pinch of cinnamon or cocoa powder.
- Refrigerate leftovers for up to 3 days, but do not freeze as freezing alters the texture.
- Prep Time: 10 minutes
- Cook Time: 2 hours 10 minutes
- Category: Dessert
- Method: No-Bake
- Cuisine: International


