")
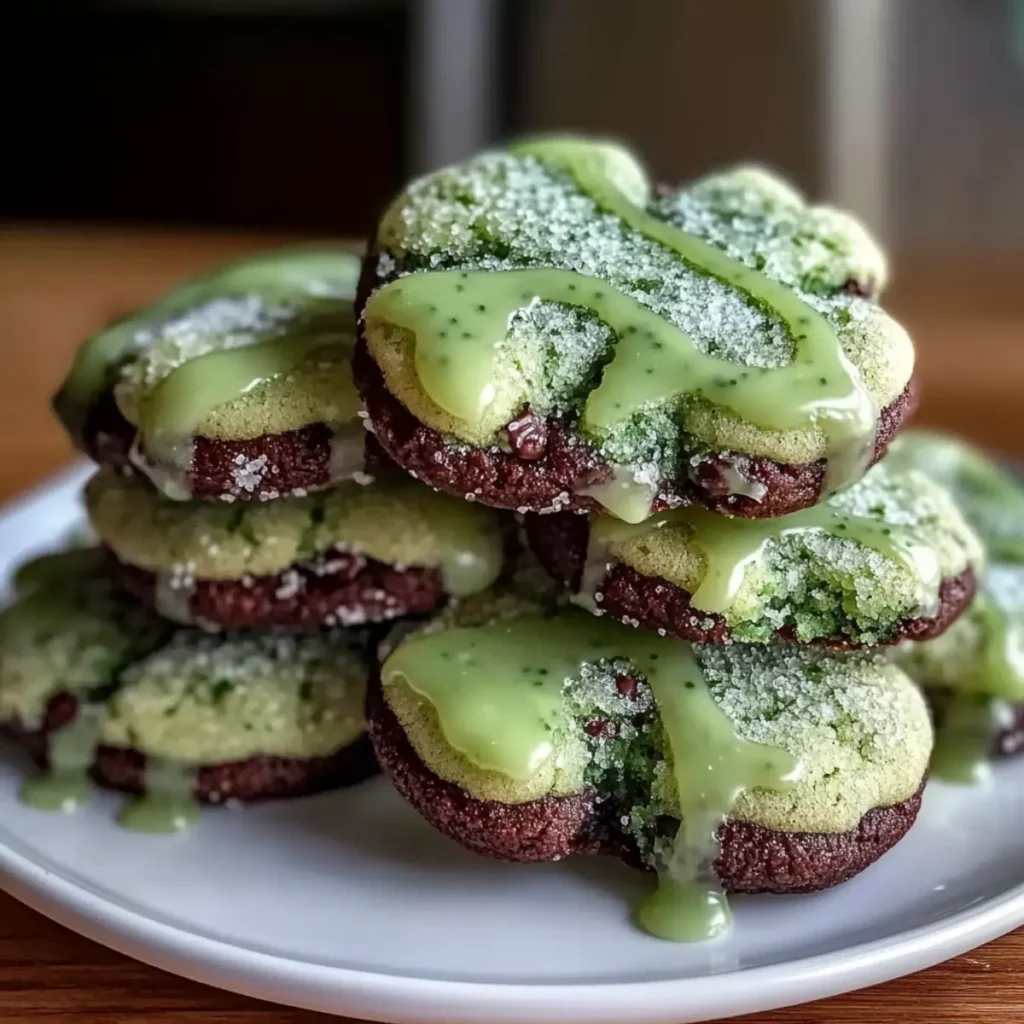
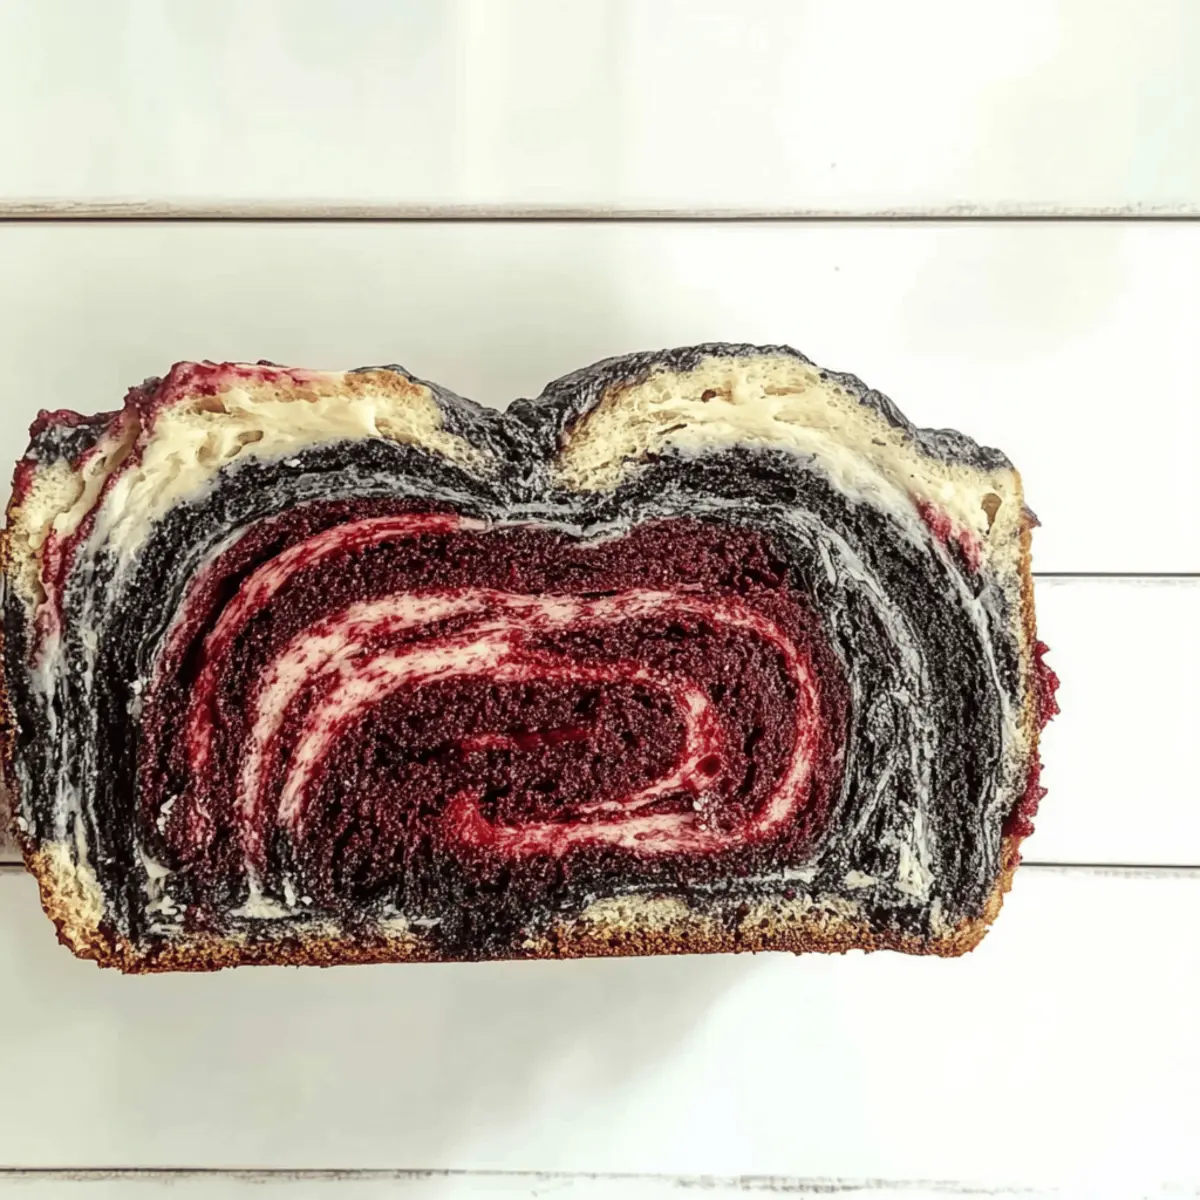
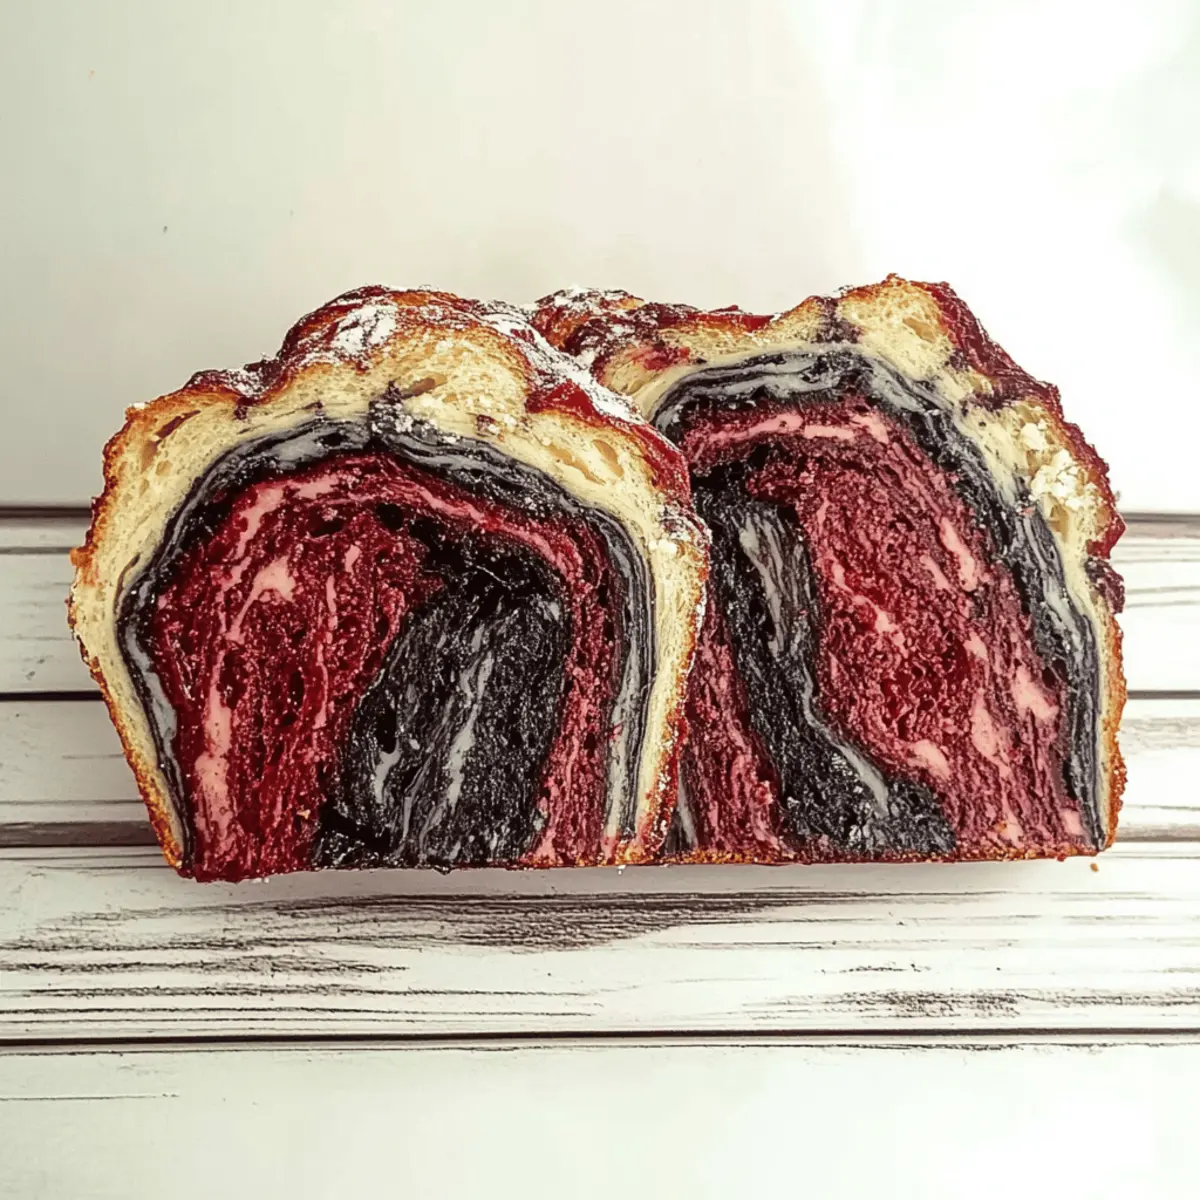
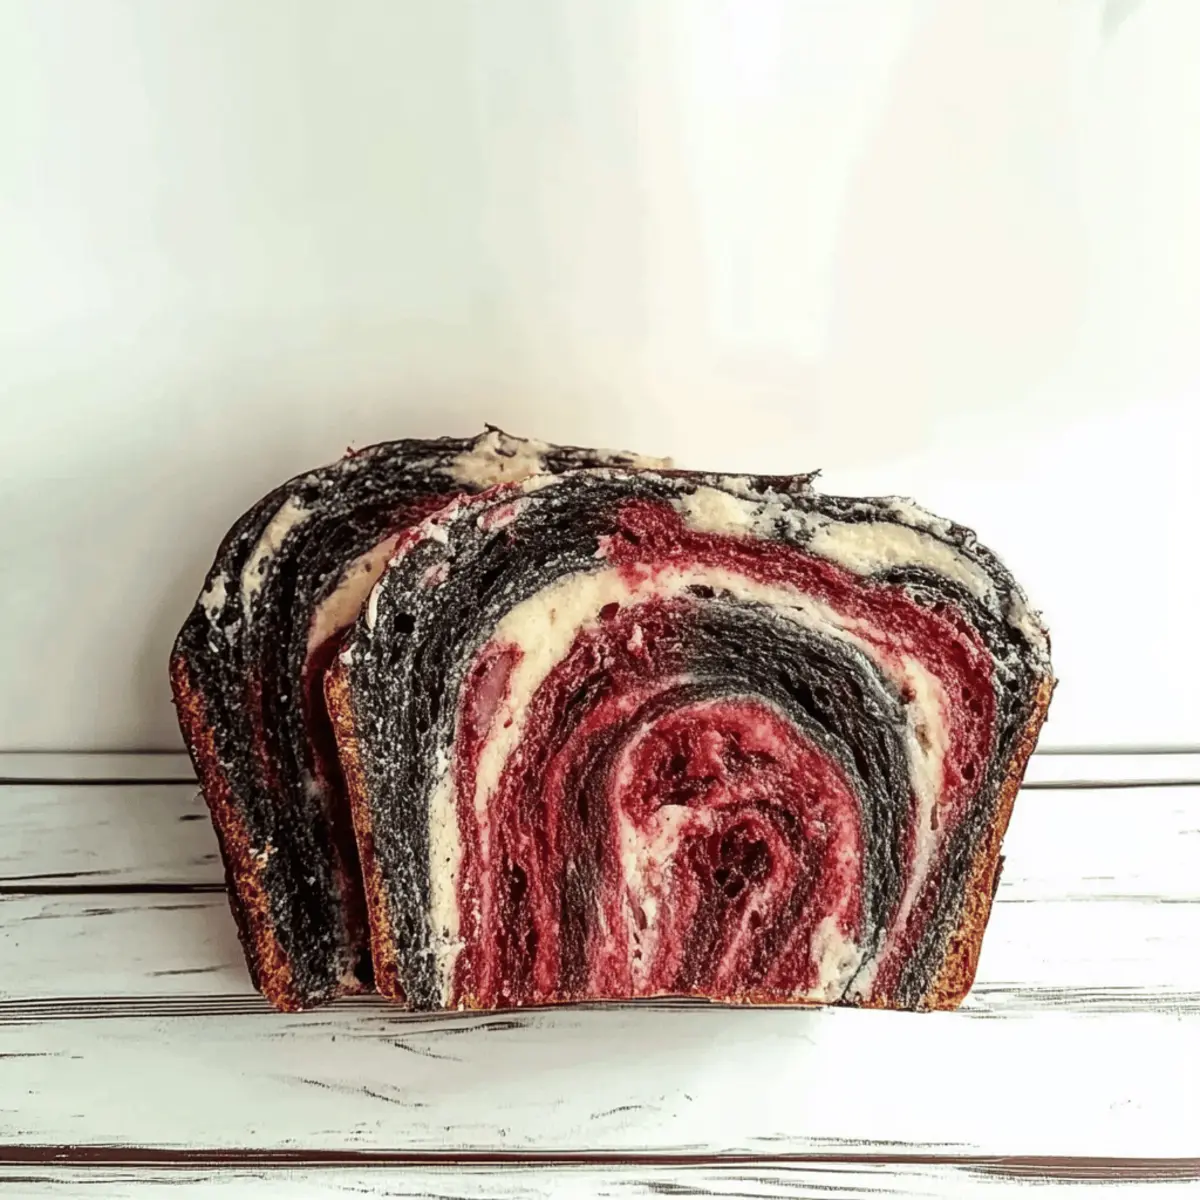
As I mixed the vibrant colors of dough, a flicker of childhood whimsy sparked within me. Today’s recipe, Vampire Bread, transforms the otherwise humble loaf into a festive delight with a playful twist. Not only is this spooky creation perfect for Halloween gatherings, but its low-fat, vegetarian-friendly nature makes it an enticing option year-round—ideal for breakfast or as a fun snack. Imagine sinking your teeth into its fluffy, sweet layers, paired with your favorite spreads or soups. You’re bound to impress your family and friends with this colorful centerpiece. Are you ready to whip up something delightfully unexpected? Let’s dive into the magic of baking!
Why is Vampire Bread a Must-Bake?
Spooktacular Appeal: This bread isn’t just a loaf; it’s a festive centerpiece that sparks joy at any gathering.
Low-Fat Treat: Enjoy guilt-free indulgence with a recipe that’s low in fat and packed with flavor.
Customizable Colors: Mix and match vibrant hues for a personalized creation that dazzles the eyes.
Quick Recipe: With simple steps, you can bake this enchanting bread in just a few hours.
Perfect Pairing: Whether matched with a cup of soup or used for playful sandwiches, it’s incredibly versatile.
Kid-Friendly Fun: Get little ones involved in the baking process, making it a memorable family activity. For more delicious ideas, check out this Garlic Bread Air that’s equally fun and easy!
Vampire Bread Ingredients
For the Dough
• Flour – Provides structure; substitute with gluten-free flour for a delicious gluten-free option.
• Sugar – Adds sweetness; swap with honey or maple syrup for a natural sweetener.
• Yeast – The leavening agent; ensure it’s fresh to achieve that fluffy rise.
• Salt – Enhances flavor; sea salt adds a finer taste that elevates your bread.
• Water – Hydrates the dough; using warm water helps to activate the yeast, ensuring a great rise.
For the Color
• Food Coloring – Essential for that signature look; opt for gel dye for vibrant and rich colors in your Vampire Bread.
With these ingredients in hand, you’re just steps away from baking a delightful loaf that’s not only eye-catching but also wonderfully versatile!
Step‑by‑Step Instructions for Vampire Bread
Step 1: Dough Preparation
In a large mixing bowl, combine flour, sugar, yeast, and salt. Gradually pour in warm water, mixing with a wooden spoon until a rough dough forms. Once combined, transfer the dough to a floured surface and knead for about 8-10 minutes until it becomes smooth and elastic. This well-kneaded dough will be the base for your delightful Vampire Bread.
Step 2: Color Mixing
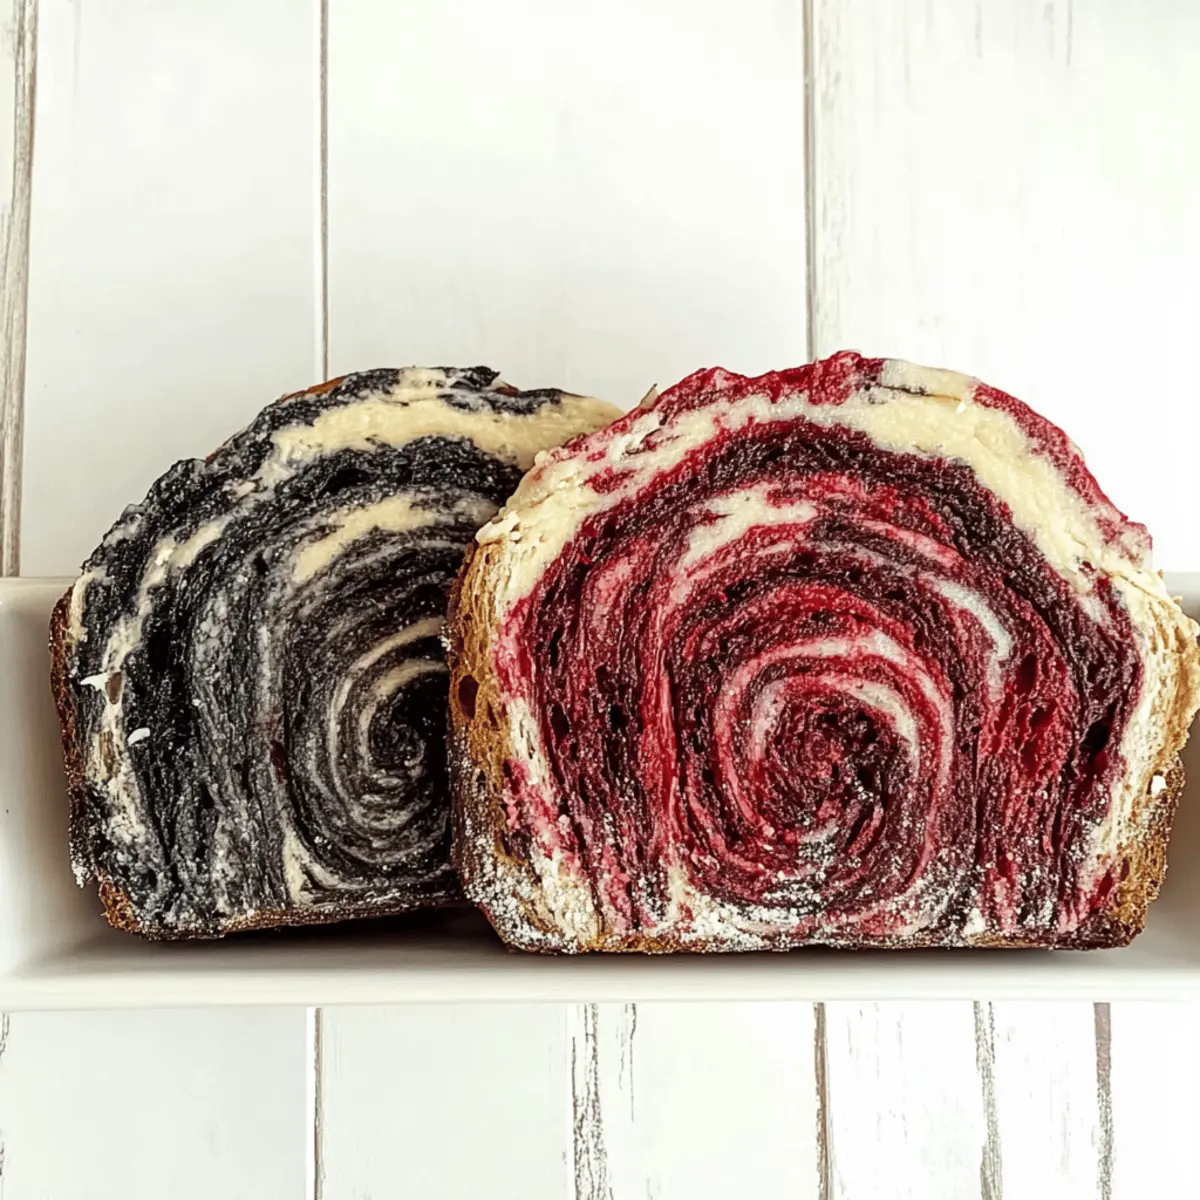
Divide the kneaded dough into two or more equal portions, depending on how many colors you wish to use. Add food coloring to each portion, one at a time, and knead until the colors are vibrant and well distributed. You can go for classic black and red shades or choose your unique twist to make your Vampire Bread even more eye-catching.
Step 3: Kneading for Marbling
Once all the portions are colored, gently twist and knead them together just enough to create a marbled effect. Aim for a mixture where the colors swirl together without fully blending, which enhances the visual appeal of your Vampire Bread. This process will take about 3-5 minutes, and you’ll want to stop before the colors lose their definition.
Step 4: First Rise
Form the marbled dough into a ball and place it in a lightly greased bowl. Cover it with a damp cloth or plastic wrap to prevent drying. Place the bowl in a warm, draft-free area and let the dough rise for about 1.5 to 2 hours. The dough should double in size, signaling it’s ready for the next stage of making your whimsical Vampire Bread.
Step 5: Shaping the Dough
Once the dough has risen, gently punch it down to release excess air. Turn it out onto a lightly floured surface, shaping it into a loaf or individual rolls as you prefer. If making a loaf, tuck the ends under for a neat finish. This step shapes your spooky creation, setting the stage for its final lift.
Step 6: Second Rise
Transfer the shaped dough to a greased loaf pan or baking sheet. Cover it lightly with plastic wrap or a clean towel, allowing it to rise for an additional 30 minutes. This second rise is crucial for achieving that light and airy texture in your Vampire Bread, so be patient and allow it to puff up nicely.
Step 7: Baking
Preheat your oven to 375°F (190°C). Once the dough has finished rising, place it in the oven and bake for about 30 minutes. The Vampire Bread is done when it has turned golden brown and sounds hollow when tapped on the bottom. Your kitchen will soon be filled with a delightful aroma that promises tasty bites to come!
Step 8: Cooling
After baking, carefully remove the Vampire Bread from the oven and let it cool in the pan for 5-10 minutes. Then, transfer it to a wire rack to cool completely. This cooling process is essential to help the bread set perfectly, ensuring each slice is fluffy and infused with delightful sweetness ready for your preferred toppings.
Expert Tips for Making Vampire Bread
-
Ingredient Temperature: Ensure all ingredients are at room temperature before starting. This helps the yeast activate properly, contributing to a perfect rise in your Vampire Bread.
-
Avoid Over-Kneading: Knead the dough until smooth but stop once it reaches elasticity. Over-kneading can result in a dense, tough loaf instead of the fluffy texture you desire.
-
Check Yeast Freshness: If your bread fails to rise, ensure your yeast is fresh and that the water temperature is warm (not hot) for optimal activation.
-
Color Mixing Technique: When adding food coloring, start with a small amount and gradually increase until you reach your desired vibrancy; adding too much at once can affect dough consistency.
-
Perfect Oven Temperature: Use an oven thermometer to ensure your oven is at the correct temperature. An accurate bake is crucial for the final golden color and texture of your Vampire Bread.
-
Storage for Freshness: Keep leftover Vampire Bread in an airtight container at room temperature for up to 3 days, or freeze it for longer storage to maintain its deliciousness.
Make Ahead Options
Vampire Bread is a fabulous choice for meal prep, allowing you to savor its spooky delights with less stress! You can prepare the dough and let it rise up to 24 hours in advance; simply place it in a greased bowl and cover it well with plastic wrap to prevent drying. If you prefer, you can also mix the colored portions of dough and store them in the refrigerator for up to 3 days; just make sure they’re covered to retain their moisture. When you’re ready to bake, simply allow the shaped dough to come to room temperature and complete the second rise before baking. This approach not only saves time but also ensures your Vampire Bread remains just as delicious, capturing all that whimsy and flavor you crave!
Vampire Bread Variations & Substitutions
Feel free to let your creativity soar by customizing this whimsical bread to suit your taste or dietary preferences!
-
Gluten-Free: Substitute all-purpose flour with a good-quality gluten-free flour blend to enjoy this delightful treat without gluten.
-
Natural Coloring: Use beet juice for a rich red hue or activated charcoal for a striking black, offering a fun, all-natural twist.
-
Sugar Alternatives: Swap refined sugar for coconut sugar or maple syrup to create a delightful, naturally sweetened loaf perfect for health-conscious bakers.
-
Spiced Up: Add a teaspoon of cinnamon or nutmeg to the dough for a warm, aromatic flavor that pairs beautifully with sweet spreads.
-
Savory Blend: Incorporate herbs like rosemary or thyme into the dough for an earthy, savory variant, turning your bread into a delicious pairing for soups or cheese.
-
Cheesy Surprise: Fold in shredded cheese, like mozzarella or cheddar, when mixing the dough for a cheesy twist that kids and grown-ups will adore.
-
Hot & Spicy: Add a pinch of cayenne pepper or crushed red pepper flakes for a playful heat that complements the sweet undertones of the bread.
-
Decorative Shapes: Use cookie cutters to shape the dough into festive forms, making your Vampire Bread an even more entertaining treat for Halloween gatherings. For more fun baking ideas, consider trying this Garlic Bread Air that will surely delight!
What to Serve with Vampire Bread
Savor the allure of Vampire Bread that transforms your meals into festive culinary delights, perfect for any occasion.
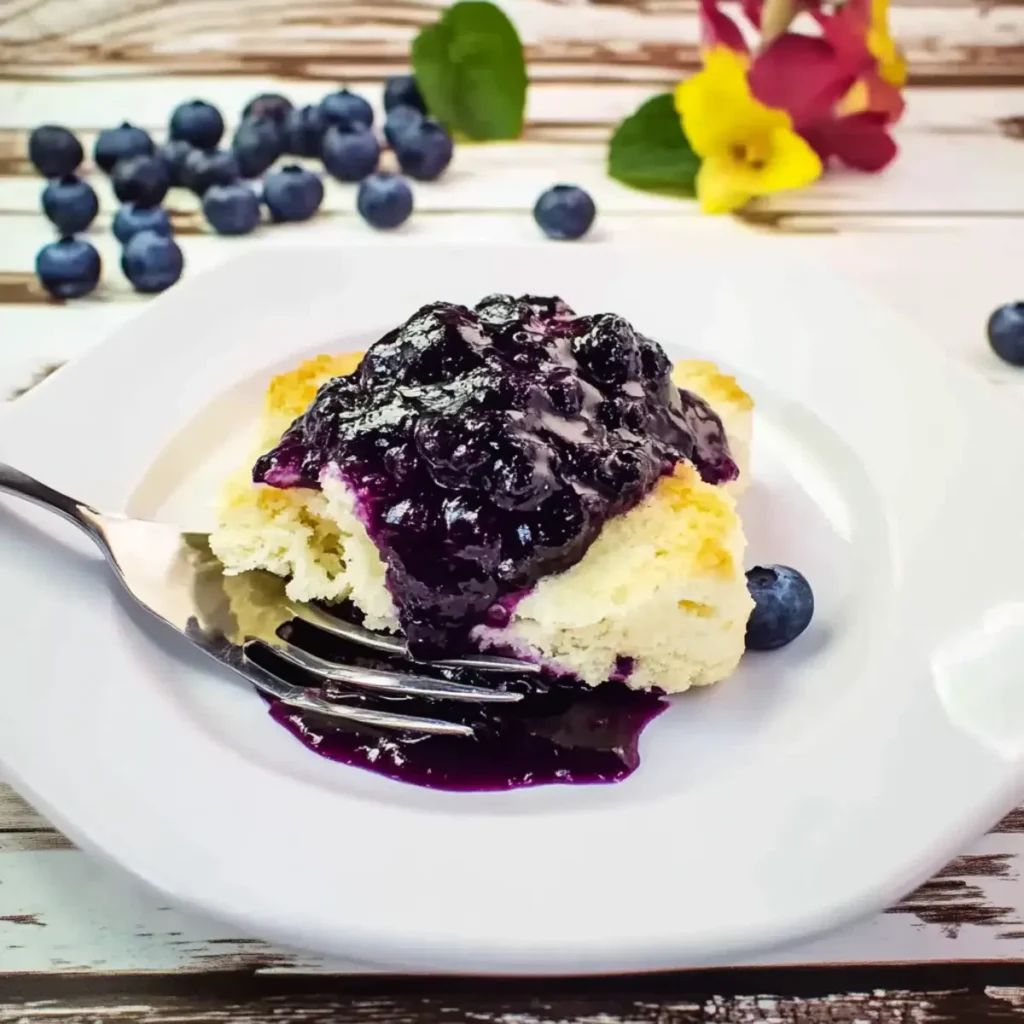
- Creamy Pumpkin Soup: This velvety soup adds a seasonally spooktacular touch, making each bite a cozy, comforting experience.
- Garlic Herb Butter: Spread this fragrant blend on warm slices for a mouthwatering twist that enhances the sweet flavors of the bread.
- Savory Spinach Dip: Its creamy, rich texture pairs deliciously with the fluffy bread, perfect for dipping in at gatherings.
- Cinnamon Sugar Topping: Sprinkle this mix over toasted Vampire Bread for a delightful sweet morning treat that dances on your tongue.
- Sweet Berry Jam: The vibrant fruitiness of homemade jam complements the bread’s sweetness and adds a burst of color to your table.
- Toasty Avocado Smash: Creamy avocado and tangy lime create a fresh, zesty topping that elevates your Vampire Bread to new heights.
- Chilled Apple Cider: Serve this refreshing drink alongside for a delightful match that brings a sense of autumn coziness.
- Chocolate Sauce for Drizzling: Indulge in some dessert magic by drizzling warm chocolate over slices, perfect for a fun treat after meals.
Storage Tips for Vampire Bread
Room Temperature: Store Vampire Bread in an airtight container at room temperature for up to 3 days. This keeps the bread fresh and prevents it from drying out.
Freezer: To extend its shelf life, wrap the bread tightly in plastic wrap and then place it in a freezer-safe bag. It freezes well for up to a month while maintaining its delightful sweetness and texture.
Reheating: When ready to enjoy, let the bread thaw at room temperature. For best results, reheat slices in a toaster or oven at 350°F (175°C) for a few minutes to restore its fluffy texture.
Slicing: Wait until the bread is completely cool before slicing to avoid a gummy texture. This delicious Vampire Bread deserves a perfect cut!
Vampire Bread Recipe FAQs
What type of flour should I use for Vampire Bread?
You can use all-purpose flour for a classic texture. If you need a gluten-free option, I recommend substituting it with a 1:1 gluten-free flour blend. Ensure it’s suitable for baking to achieve the right consistency!
How should I store Vampire Bread?
To keep your Vampire Bread fresh, store it in an airtight container at room temperature for up to 3 days. This prevents it from drying out. For longer storage, wrap it tightly in plastic wrap and place it in a freezer-safe bag. It can be frozen for up to a month while maintaining its delightful flavor.
Can I freeze Vampire Bread?
Absolutely! After letting the bread cool completely, wrap it tightly in plastic wrap or aluminum foil, and then place it in a freezer-safe bag. When you’re ready to enjoy, just let it thaw at room temperature, and for the perfect fluffy texture, reheat slices in a toaster or an oven set to 350°F (175°C) for a few minutes.
Why isn’t my Vampire Bread rising?
If your bread isn’t rising, check the freshness of your yeast—using expired yeast is a common culprit. Additionally, ensure the water you use is warm, around 100°F (37°C), to activate the yeast effectively. If it’s too hot, it could kill the yeast!
What dietary restrictions does Vampire Bread meet?
Vampire Bread is low in fat and fits well into vegetarian and pescatarian diets. It’s also allergy-friendly, being free from peanuts, tree nuts, and soy, making it a safe option for those with common allergies. If you’re adding toppings, just ensure they align with these dietary considerations.
Can I use natural food coloring for my Vampire Bread?
Definitely! If you prefer natural colorings, beet juice is a wonderful alternative for red hues, while activated charcoal can create a dramatic black without artificial additives. Just keep in mind that the intensity of colors will vary compared to traditional food dyes, so adjust your amounts accordingly!
Vampire Bread: Irresistibly Sweet and Spooktacularly Fun!
Ingredients
Equipment
Method
- In a large mixing bowl, combine flour, sugar, yeast, and salt. Gradually pour in warm water, mixing until a rough dough forms.
- Transfer the dough to a floured surface and knead for about 8-10 minutes until smooth and elastic.
- Divide the kneaded dough into portions, add food coloring to each and knead until colors are vibrant.
- Gently twist and knead the colored portions together to create a marbled effect.
- Form the marbled dough into a ball and place it in a greased bowl. Cover with a damp cloth and let it rise for 1.5 to 2 hours.
- Punch down the risen dough, shape it into a loaf or rolls, and tuck the ends under.
- Transfer the shaped dough to a greased pan, cover lightly and let it rise for an additional 30 minutes.
- Preheat oven to 375°F (190°C). Bake the dough for about 30 minutes until golden brown.
- Remove from oven and cool in the pan for 5-10 minutes, then transfer to a wire rack.
")