")
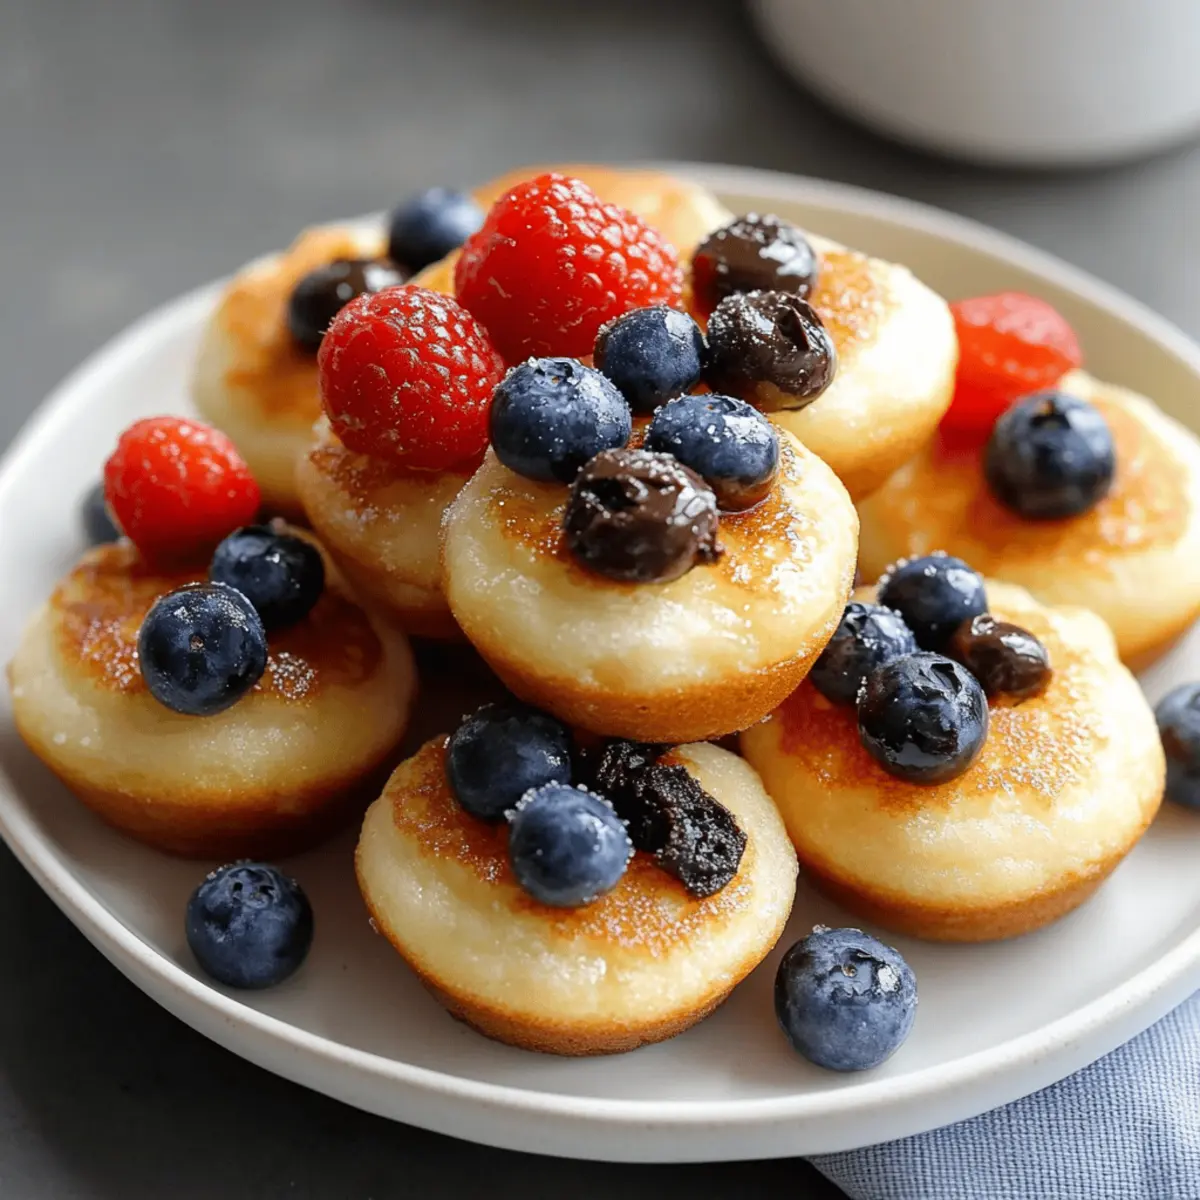
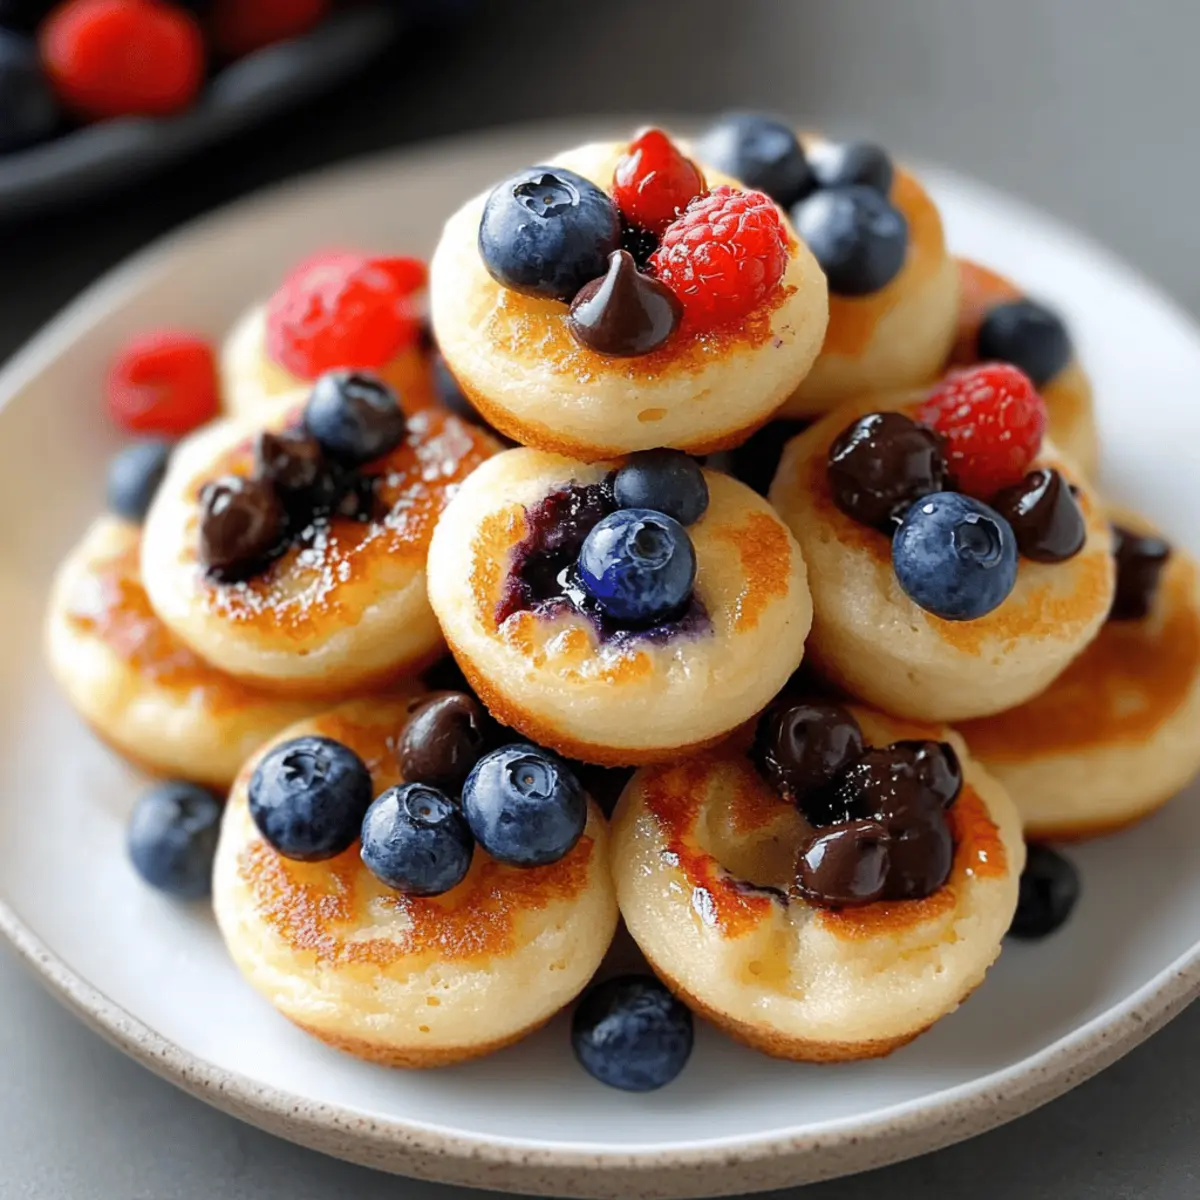
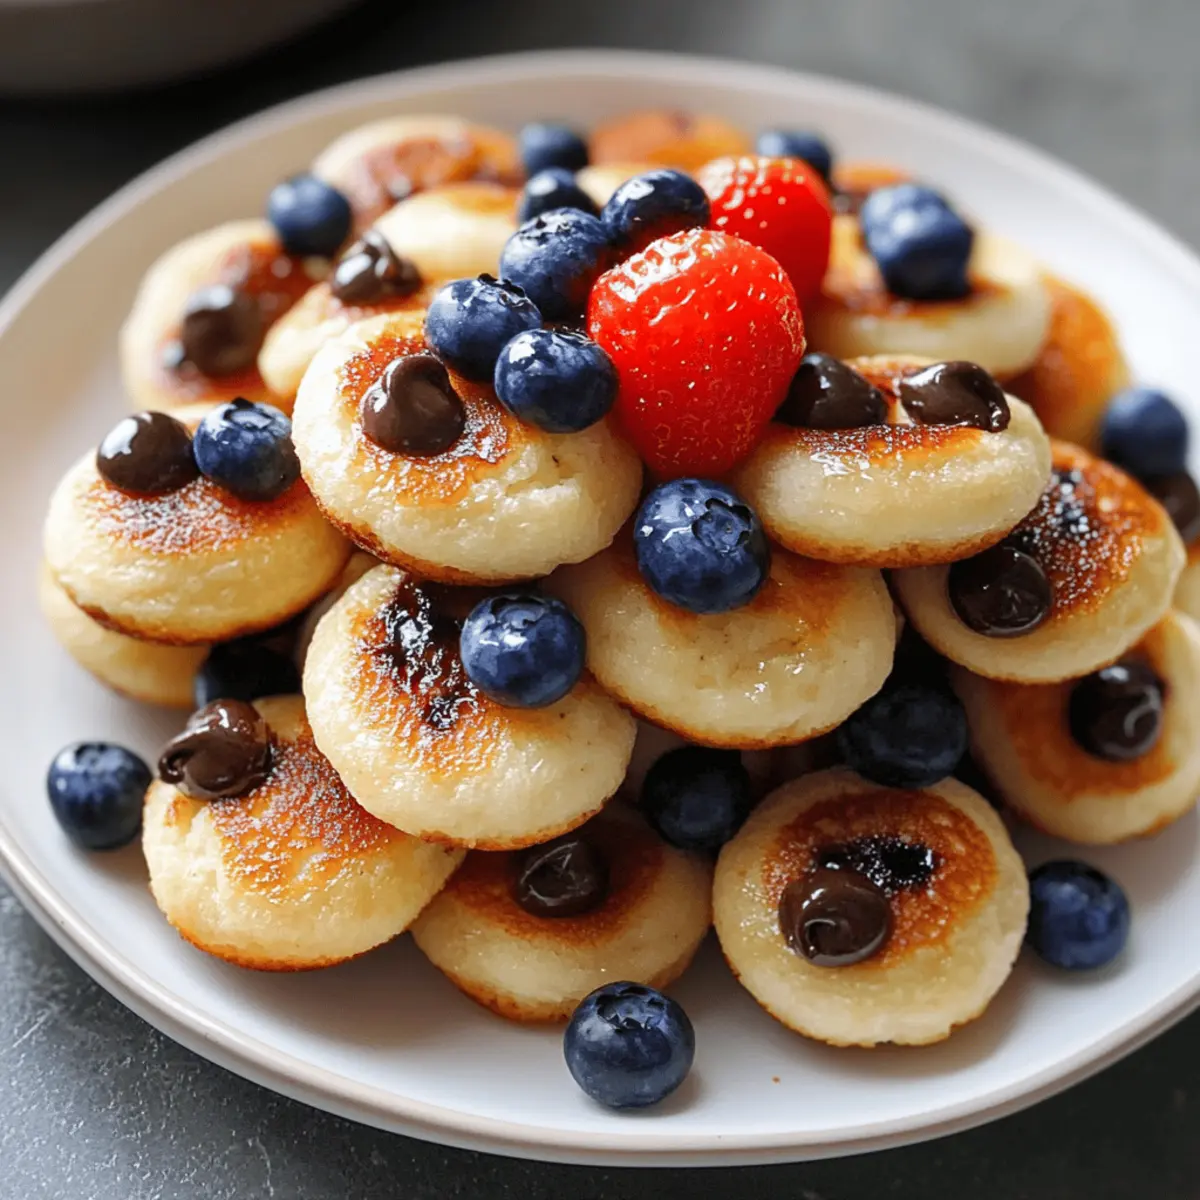
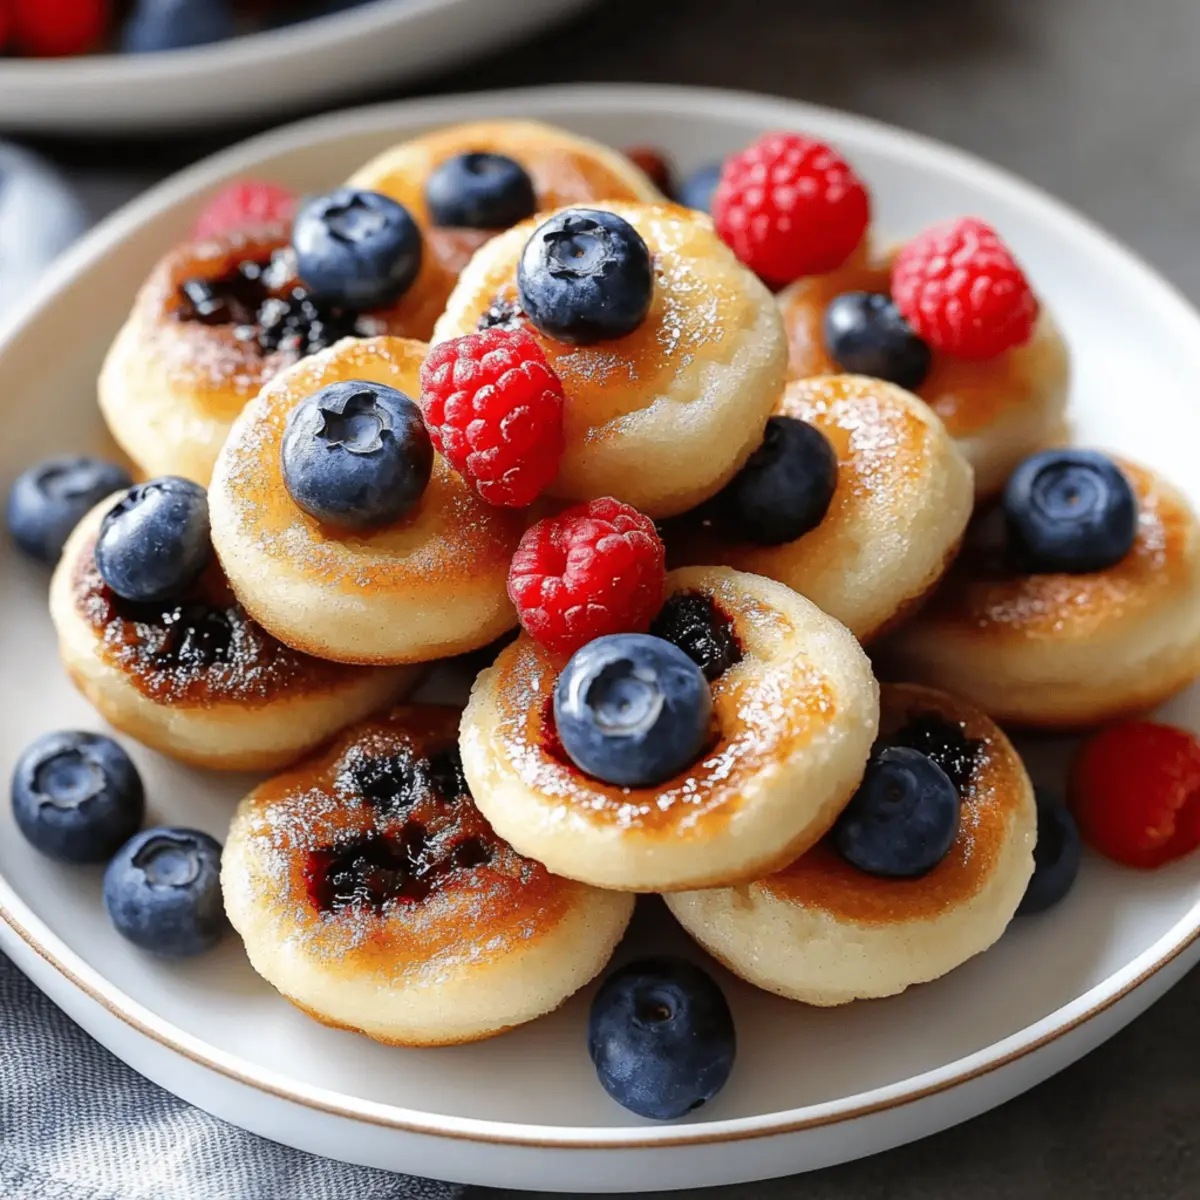
As I stood in the kitchen one sunny morning, the delightful aroma of freshly baked treats wafted through the air, instantly lifting my spirits. These fluffy pancake mini muffins quickly became my go-to solution for busy breakfasts or cozy brunches—coming together in just 32 minutes! Biting into one reveals a soft, tender texture that blends the best of pancakes and muffins, making them irresistibly fun for everyone, especially kids. With the added bonus of customizable toppings like mini chocolate chips or juicy blueberries, these pancake mini muffins are not just easy to whip up; they’re a treat that transforms any morning into a celebration. Curious how to make them perfectly fluffy? Let’s dive into the recipe!
Why Are Pancake Mini Muffins Amazing?
Fluffy Texture: Each muffin embodies the lightness of pancakes while maintaining a tender crumb, perfect for little bites of happiness.
Quick Prep: With just 32 minutes from start to finish, they fit seamlessly into your busy mornings or relaxed brunch plans.
Customizable Toppings: Get creative! Whether it’s mini chocolate chips, fresh blueberries, or crunchy nuts, the topping options are endless.
Kid-Friendly Appeal: These mini delights are not only fun to eat but also a great way to introduce your kids to the joys of cooking! If you’re looking for more family favorites, check out my Chick Fil Chicken recipe!
Versatile: Perfect for breakfast, snacks, or even dessert, they can be enjoyed at any time of the day.
Easy Cleanup: One bowl and a muffin tin mean minimal mess, allowing you to focus on savoring your delicious creations.
Pancake Mini Muffin Ingredients
For the Muffins
- All-Purpose Flour – Provides structure and a tender crumb to keep these pancake mini muffins fluffy.
- Granulated Sugar – Sweetens the muffins and enhances browning for a beautiful golden color.
- Baking Powder – Acts as a leavening agent, ensuring your muffins rise perfectly.
- Baking Soda – Works with buttermilk to elevate the batter and boost flavor.
- Salt – Balances the sweetness, enhancing the overall taste of your muffins.
- Buttermilk – Adds moisture and a tangy flavor; can be substituted with milk mixed with vinegar or lemon juice (1 tbsp per cup).
- Egg – Binds ingredients together while providing richness to each mini muffin.
- Unsalted Butter (melted) – Infuses the muffins with buttery flavor and ensures silky texture; distribute evenly for best results.
- Vanilla Extract – Adds warm, aromatic notes, enhancing the flavor profile of the muffins.
For the Toppings
- Mini Chocolate Chips – A delightful addition that melts in your mouth, making each bite even more enjoyable.
- Fresh Blueberries – Juicy and sweet, these add a burst of flavor and a pop of color.
- Diced Strawberries – Sweet and vibrant, they bring a refreshing touch to the muffins.
- Chopped Nuts – Adds crunch and nuttiness, perfect for those who love a little extra texture.
These delicious pancake mini muffins are sure to brighten your mornings!
Step‑by‑Step Instructions for Pancake Mini Muffins
Step 1: Preheat and Prepare
Preheat your oven to 350°F (175°C) and prepare for delicious pancake mini muffins! Grease a mini muffin tin with non-stick spray or line it with mini muffin liners. This will ensure your muffins release easily after baking and make cleanup a breeze, keeping your kitchen stress-free.
Step 2: Mix Dry Ingredients
In a large mixing bowl, combine the all-purpose flour, granulated sugar, baking powder, baking soda, and salt. Whisk together until the mixture is lump-free and well combined. This essential step not only ensures even distribution of ingredients but sets a solid foundation for the fluffy texture of your pancake mini muffins.
Step 3: Combine Wet Ingredients
In a separate bowl, whisk together the buttermilk, egg, melted unsalted butter, and vanilla extract until smooth. The wet ingredients play a crucial role in creating a moist batter, so ensure they’re well combined. This mixture will blend beautifully with the dry ingredients, enhancing the flavor of your pancake mini muffins.
Step 4: Mix Wet and Dry Ingredients
Pour the wet mixture into the bowl with the dry ingredients, stirring gently until just combined. Be careful not to overmix; a few lumps are perfectly fine! This careful blending helps to maintain the light and fluffy texture that makes pancake mini muffins so delightful.
Step 5: Fill Muffin Tin
Using a tablespoon or small scoop, fill each mini muffin cup about three-quarters full with batter. This step ensures your pancake mini muffins have enough room to rise beautifully without overflowing while baking. Make sure each cup is evenly filled to guarantee consistent baking results.
Step 6: Add Toppings
Now comes the fun part—adding your desired toppings! Sprinkle mini chocolate chips, fresh blueberries, or diced strawberries on top of the batter in each muffin cup. Feel free to mix and match to create a delightful variety of flavors in your pancake mini muffins, making each bite a treat.
Step 7: Bake
Carefully place the muffin tin in the preheated oven and bake for 10–12 minutes. Keep an eye on them, and check for doneness by inserting a toothpick into the center of a muffin; it should come out clean and the tops should be lightly golden. This ensures your pancake mini muffins are perfectly fluffy and delicious.
Step 8: Cool Slightly
Once baked, remove the muffin tin from the oven and allow the pancake mini muffins to cool in the pan for about 5 minutes. This step makes it easier to remove them without breaking, allowing the air to circulate and helping them set just right.
Step 9: Transfer and Serve
Gently transfer the mini muffins to a wire rack to cool completely. Serve them warm, perhaps drizzling with maple syrup or enjoying them plain for a versatile breakfast option. Each fluffy pancake mini muffin is a delight, ready to brighten your mornings!
How to Store and Freeze Pancake Mini Muffins
Room Temperature: Store your pancake mini muffins in an airtight container at room temperature for up to 3 days to keep them fresh and delicious.
Fridge: If you prefer a longer shelf life, you can refrigerate them in an airtight container for up to a week, but note that they may become slightly denser.
Freezer: For freezing, place the muffins in a single layer on a baking sheet until frozen solid, then transfer to a freezer-safe bag or container for up to 3 months.
Reheating: To enjoy your frozen pancake mini muffins, reheat them in the microwave or oven until warm, helping to restore their delightful softness and flavor.
What to Serve with Fluffy Pancake Mini Muffins?
Start your morning off right by pairing these delightful treats with other breakfast favorites, creating a brunch experience that’s both fun and fulfilling.
-
Fresh Fruit Salad: A colorful medley of seasonal fruits adds brightness and freshness, balancing the sweetness of the muffins.
-
Greek Yogurt Parfait: Creamy yogurt layered with granola and berries offers a wholesome complement, enhancing texture and flavor.
-
Scrambled Eggs: Fluffy, scrambled eggs bring protein into the mix, rounding out your brunch spread beautifully.
-
Maple Syrup Dipping Sauce: Drizzling warm, rich maple syrup provides a sweet, indulgent contrast to the muffins’ fluffy goodness.
-
Smoothies: Whip up a fruit smoothie to sip alongside your muffins for an easy, nutritious drink that harmonizes perfectly with your meal.
-
Coffee or Tea: A steaming cup of coffee or soothing tea pairs beautifully to elevate your breakfast experience, enhancing the warm flavors of the muffins.
-
Nut Butter Spread: Creamy almond or peanut butter gives a nutty richness that can elevate the taste of each mini muffin, making them even more decadent.
Transform morning routines into cherished moments with these delightful pairings!
Tips for the Best Pancake Mini Muffins
- Gentle Mixing: Avoid overmixing the batter, which can result in dense muffins. Mix just until combined for the best fluffy pancake mini muffins.
- Baking Time: Start checking for doneness at the 10-minute mark, as ovens can vary. A toothpick should come out clean for perfectly baked muffins.
- Cool Time: Let your muffins cool in the pan for a few minutes before transferring them to a wire rack. This helps prevent them from sticking or breaking.
- Topping Tips: Try to distribute toppings evenly in each muffin cup to ensure every muffin has a delightful burst of flavor.
- Storage Solutions: For freshness, store leftover pancake mini muffins in an airtight container at room temperature for up to three days!
Pancake Mini Muffins Variations
Explore the endless possibilities of these delightful pancake mini muffins with creative twists!
-
Whole Wheat: Substitute up to half of the all-purpose flour with whole wheat flour for a nutty flavor and extra fiber. This change not only enhances the texture but adds a nutritious touch that’s perfect for health-conscious eaters.
-
Dairy-Free: Use almond or oat milk combined with vinegar or lemon juice instead of buttermilk. This simple switch makes the recipe accessible for those with lactose intolerance, ensuring everyone can enjoy these fluffy treats!
-
Fruit Burst: Add diced apples or mashed banana into the batter for natural sweetness and moisture. The addition of fruit can elevate the muffins to new flavor heights, making each bite an exciting experience.
-
Nutty Crunch: Stir in chopped nuts like walnuts or pecans for added crunch! A delightful textural contrast, they bring a satisfying bite alongside the fluffy muffins.
-
Chocolate Lover’s Twist: Fold in cocoa powder alongside the dry ingredients and add chocolate chips for double chocolate pancake mini muffins. This rich variation is a definite crowd-pleaser, especially for kids who love chocolate!
-
Spicy Kick: Incorporate a pinch of cinnamon or nutmeg into the batter for a cozy, warm flavor. These spices can transform your mini muffins into an aromatic delight, perfect for chilly mornings.
-
Savory Style: Experiment with adding grated cheese or sautéed veggies like spinach or bell peppers for a savory muffin option. These savory pancake mini muffins are a great way to enjoy breakfast in a new light!
-
Maple Glaze: Drizzle a simple maple syrup glaze on top after baking for an extra sweet finish. It adds a beautiful sheen and a deliciously sweet touch that elevates the whole experience.
For more breakfast inspirations, check out my Popcorn Flour Pancakes that are both delightful and unique!
Make Ahead Options
These Pancake Mini Muffins are perfect for meal prep enthusiasts looking to save time on busy mornings! You can prepare the batter and refrigerate it for up to 24 hours before baking; this keeps the muffins fresh and fluffy. If you prefer, you can also bake the mini muffins in advance and store them in an airtight container at room temperature for up to 3 days or freeze them for longer storage. Just be sure to let them cool completely before sealing to maintain their delightful texture. When you’re ready to enjoy, simply reheat in the microwave for a few seconds, and you’ll have warm, delicious pancake mini muffins in no time!
Pancake Mini Muffins Recipe FAQs
How do I select ripe fruit toppings for my pancake mini muffins?
Absolutely! Look for berries that are vibrant in color and firm to the touch. Fresh blueberries should be plump and deep blue, while strawberries should be bright red and fragrant. Avoid any fruit that has dark spots or seems mushy, as these can affect the taste and texture of your mini muffins.
How should I store pancake mini muffins, and how long do they last?
You can store your pancake mini muffins in an airtight container at room temperature for up to 3 days. If you need longer storage, consider refrigerating them for up to a week, though the texture may be slightly denser. If you want to freeze them, be sure to follow the freezing instructions below.
What’s the best way to freeze pancake mini muffins?
To freeze your pancake mini muffins, first arrange them in a single layer on a baking sheet and put them in the freezer until they are solid—this usually takes about 1 to 2 hours. Once frozen, transfer the muffins to a freezer-safe bag or container. They can be stored for up to 3 months. When you’re ready to enjoy them, simply reheat in the microwave or oven until warmed through.
How can I troubleshoot if my pancake mini muffins turn out dense?
If your pancake mini muffins are dense, it usually means they were overmixed. Remember to mix just until combined; a few lumps are perfectly okay! Additionally, check that your baking powder and baking soda are fresh, as expired leavening agents can prevent your muffins from rising properly. Lastly, keep an eye on the baking time, as it may need slight adjustments based on your oven.
Are there any dietary considerations for pancake mini muffins?
Very! If you’re looking to make them allergy-friendly, you can substitute buttermilk with a non-dairy milk mixed with vinegar or lemon juice for a similar tangy flavor. For nut allergies, simply skip the chopped nuts or choose suitable alternatives. These muffins can also easily be made gluten-free by using a 1:1 gluten-free flour blend, so everyone can enjoy them!
Can I make pancake mini muffins ahead of time?
Of course! You can prepare the batter in advance and refrigerate it for up to 24 hours before baking. Just be aware that the muffins might not rise as much, so it’s best to bake them fresh if you want super fluffy results. If you decide to make them ahead of time, store any leftover muffins properly to maintain their freshness.
Pancake Mini Muffins That Make Mornings Brighter and Sweeter
Ingredients
Equipment
Method
- Preheat your oven to 350°F (175°C) and grease a mini muffin tin.
- In a large mixing bowl, combine the all-purpose flour, granulated sugar, baking powder, baking soda, and salt. Whisk until lump-free.
- In another bowl, whisk together the buttermilk, egg, melted butter, and vanilla extract until smooth.
- Pour the wet mixture into the dry ingredients, stirring gently until just combined.
- Fill each mini muffin cup about three-quarters full with batter.
- Add toppings such as chocolate chips, blueberries, or strawberries on top of the batter.
- Bake in the preheated oven for 10–12 minutes until golden and a toothpick comes out clean.
- Allow to cool in the pan for about 5 minutes before removing.
- Transfer to a wire rack to cool completely before serving.
")