")
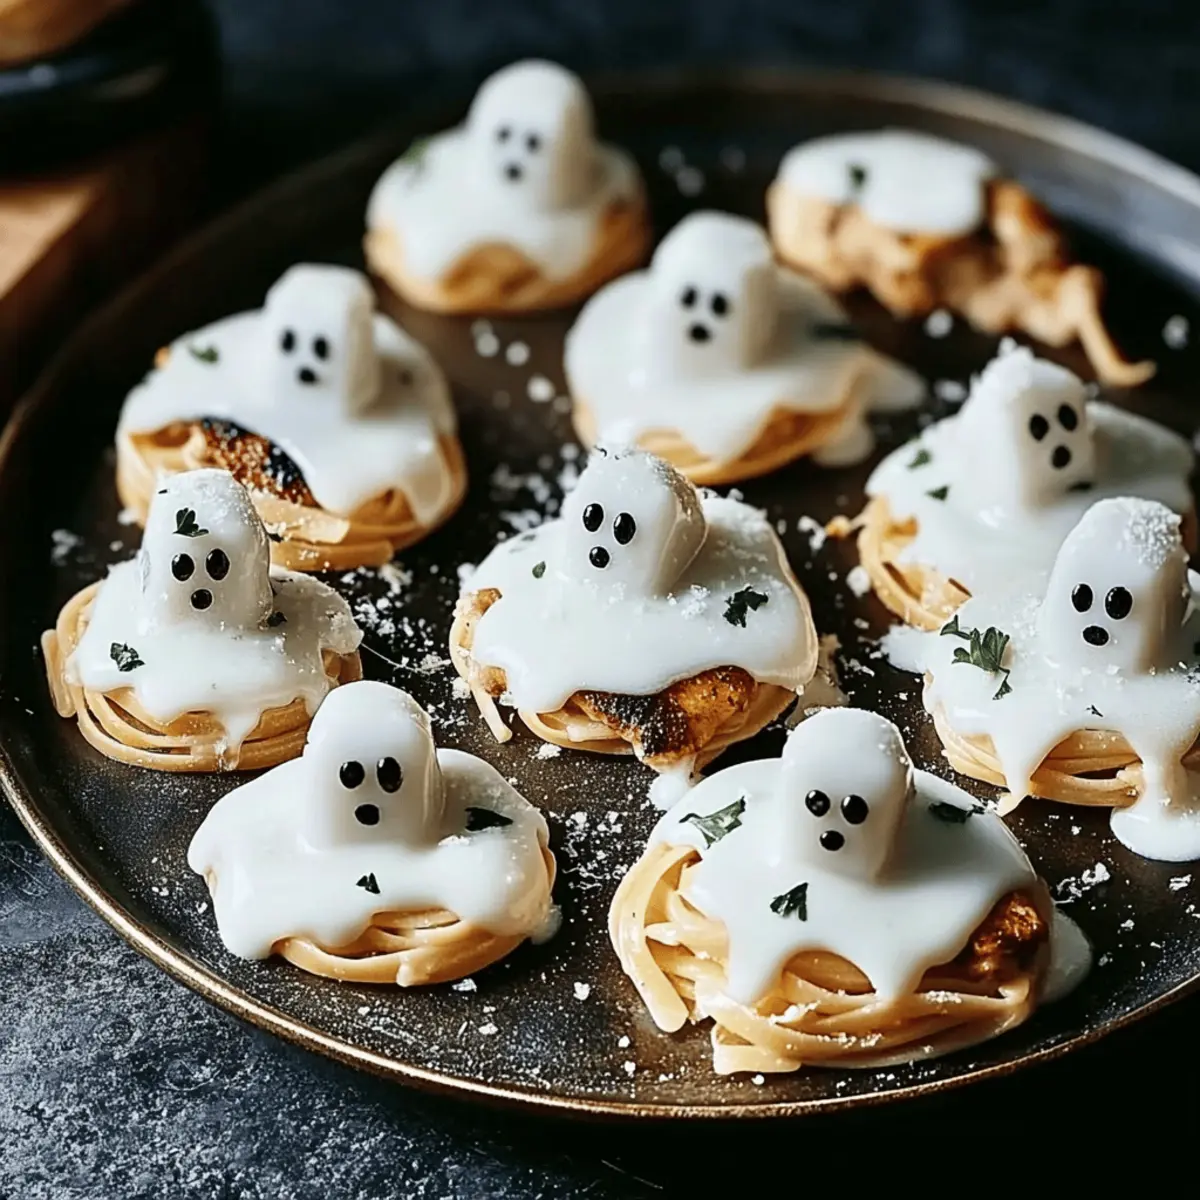
As the autumn leaves begin to fall, I find myself grinning at the prospect of a delightful kitchen adventure: creating spooky yet scrumptious ghost cookies. These adorable treats are not only a playful way to celebrate the Halloween season, but they also offer a quick and easy baking option that’s perfect for those busy weeknights. With just a handful of ingredients, you can whip up a batch that’s sure to impress family, friends, or even your little goblins at home. Plus, they make for a fantastic crowd-pleaser at any gathering! So, are you ready to transform your kitchen into a hauntingly delicious pastry lab and conjure up some ghostly delights?
Why are ghost cookies a must-bake?
Whimsical Fun: These cookies provide a delightful twist on traditional baking, making your treats both cute and festive for Halloween parties.
Quick and Easy: With minimal ingredients, whipping up a batch is a breeze, giving you more time for creepy decorations.
Crowd-Pleasing Treat: Their playful design and delicious flavor are sure to enchant both kids and adults alike at any gathering.
Creative Customization: You can easily personalize them with different toppings, making each ghost cookie unique, similar to the versatility found in Cool Whip Cookies.
Perfect for Any Occasion: While they shine around Halloween, these cookies are delightful year-round, encouraging you to indulge your creative spirit!
Ghost Cookie Ingredients
For the Cookie Base
• All-purpose flour – the foundation of your cookies; use cake flour for a lighter texture.
• Granulated sugar – sweetens the cookies; brown sugar can add a hint of caramel flavor.
• Butter – use unsalted for better control over salt levels; room temperature makes for easier blending.
• Egg – binds the ingredients together; egg whites can create a lighter cookie texture.
• Baking powder – helps the cookies rise; be sure it’s fresh for perfect puffiness.
For the Ghostly Icing
• Powdered sugar – gives that sweet, smooth finish; try substituting with coconut sugar for a different flavor.
• Milk – thins the icing to the right consistency; almond or oat milk can be used for a dairy-free option.
• Vanilla extract – adds a warm flavor; almond extract can be a delicious alternative.
For Decorations
• Chocolate chips – a delightful way to create the ghost eyes; or use white chocolate for a spooky twist.
• Candy corn – offers a burst of color and sweetness; consider using sprinkles for added fun!
With these ghost cookie ingredients, you’re all set to create a batch that will haunt your taste buds with flavor! Happy baking!
Step‑by‑Step Instructions for Ghost Cookies
Step 1: Preheat Your Oven
Begin your ghost cookie adventure by preheating your oven to 350°F (175°C). This ensures your cookies bake evenly and come out perfectly golden. While the oven is warming up, line two baking sheets with parchment paper to prevent sticking and make cleanup a breeze.
Step 2: Cream the Butter and Sugar
In a large mixing bowl, add ½ cup of softened unsalted butter and 1 cup of granulated sugar. Using an electric mixer, beat them together on medium speed for about 2-3 minutes until the mixture is light and fluffy. This step is crucial for incorporating air into your ghost cookies, creating a delightful texture.
Step 3: Add Eggs and Vanilla
Once your butter and sugar are well combined, crack in 1 large egg and stir in 1 teaspoon of vanilla extract. Beat the mixture on medium speed for an additional minute until everything is fully incorporated. The batter will appear creamy and smooth, setting the base for your spooky cookies.
Step 4: Combine Dry Ingredients
In a separate bowl, whisk together 2 cups of all-purpose flour and 1 teaspoon of baking powder. Gradually add this dry mixture to your wet ingredients, mixing on low speed just until combined. Be sure not to overmix—your cookie dough should look slightly thick and cohesive, allowing for easy shaping into ghostly forms.
Step 5: Scoop the Dough
Using a cookie scoop or tablespoon, portion out the dough onto the prepared baking sheets, leaving about 2 inches between each scoop. You should aim for 12-15 cookie mounds per sheet. As you shape, visualize a ghostly silhouette, as these will spread slightly as they bake, creating an adorable spooky shape.
Step 6: Bake the Cookies
Slide your baking sheets into the preheated oven and bake for 10-12 minutes. Keep an eye on them! The cookies will puff up and the edges should be lightly golden while the centers remain soft and slightly underbaked. This ensures they will set perfectly once cooled, creating the ultimate ghost cookie experience.
Step 7: Cool the Cookies
Once baked, remove the cookies from the oven and let them cool on the baking sheets for about 5 minutes. This allows them to firm up. Afterward, transfer the ghost cookies to a wire rack to cool completely. This step is essential as it allows the cookies to reach their ideal texture for decorating.
Step 8: Prepare the Icing
While the cookies cool, whip up your ghostly icing! In a medium bowl, combine 1 cup of powdered sugar, 2 tablespoons of milk, and ½ teaspoon of vanilla extract, stirring until smooth. Adjust the consistency by adding more milk if too thick, ensuring it’s pourable but not runny—perfect for ghost cookie decoration.
Step 9: Ice the Cookies
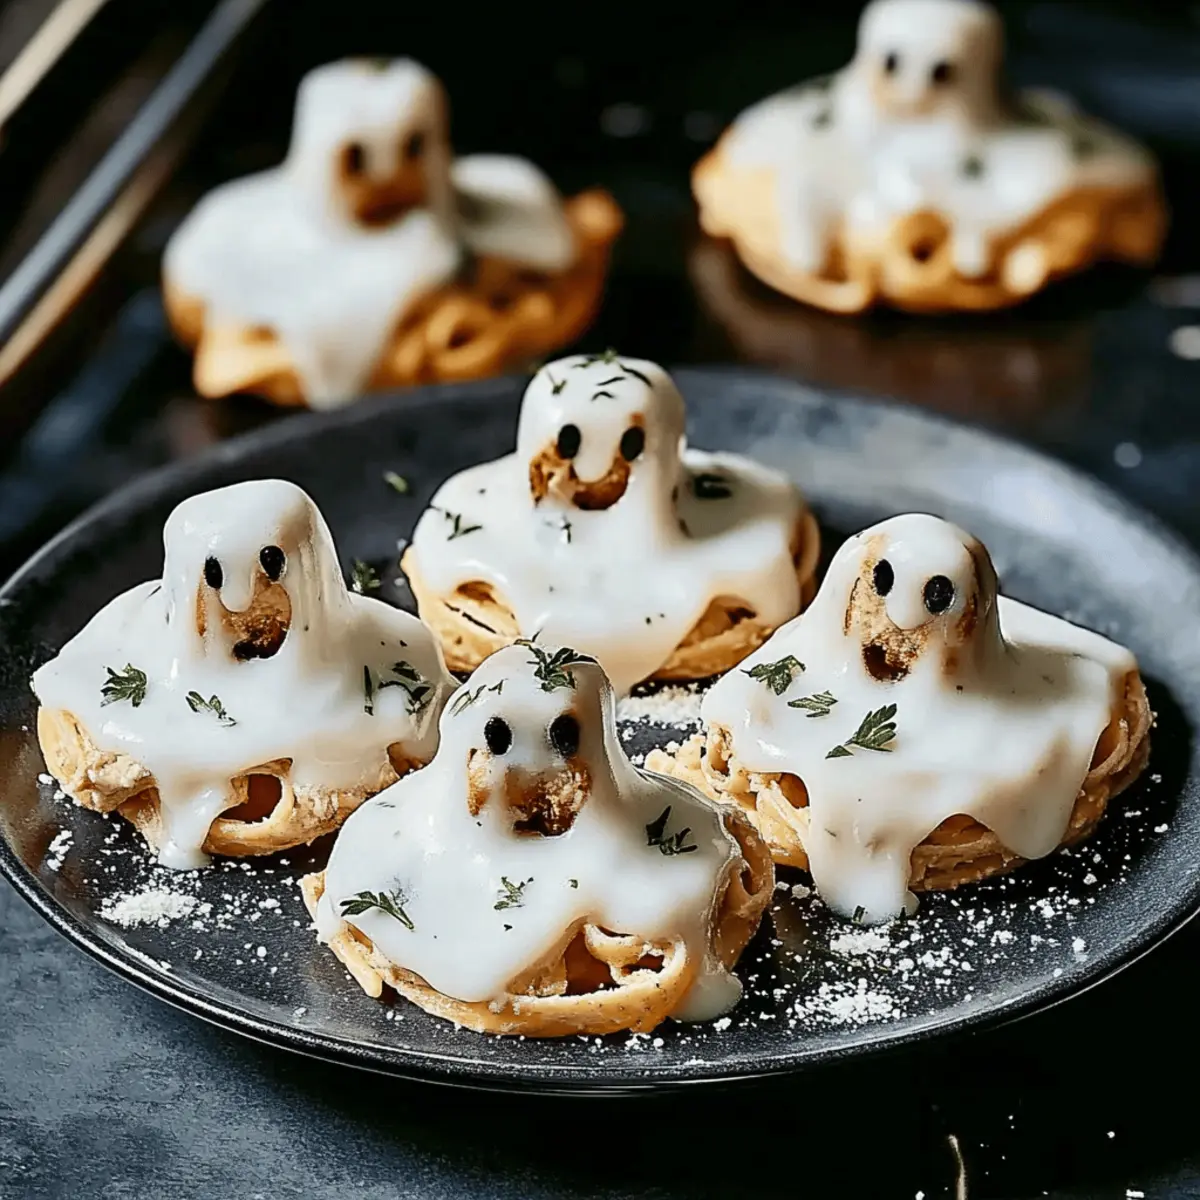
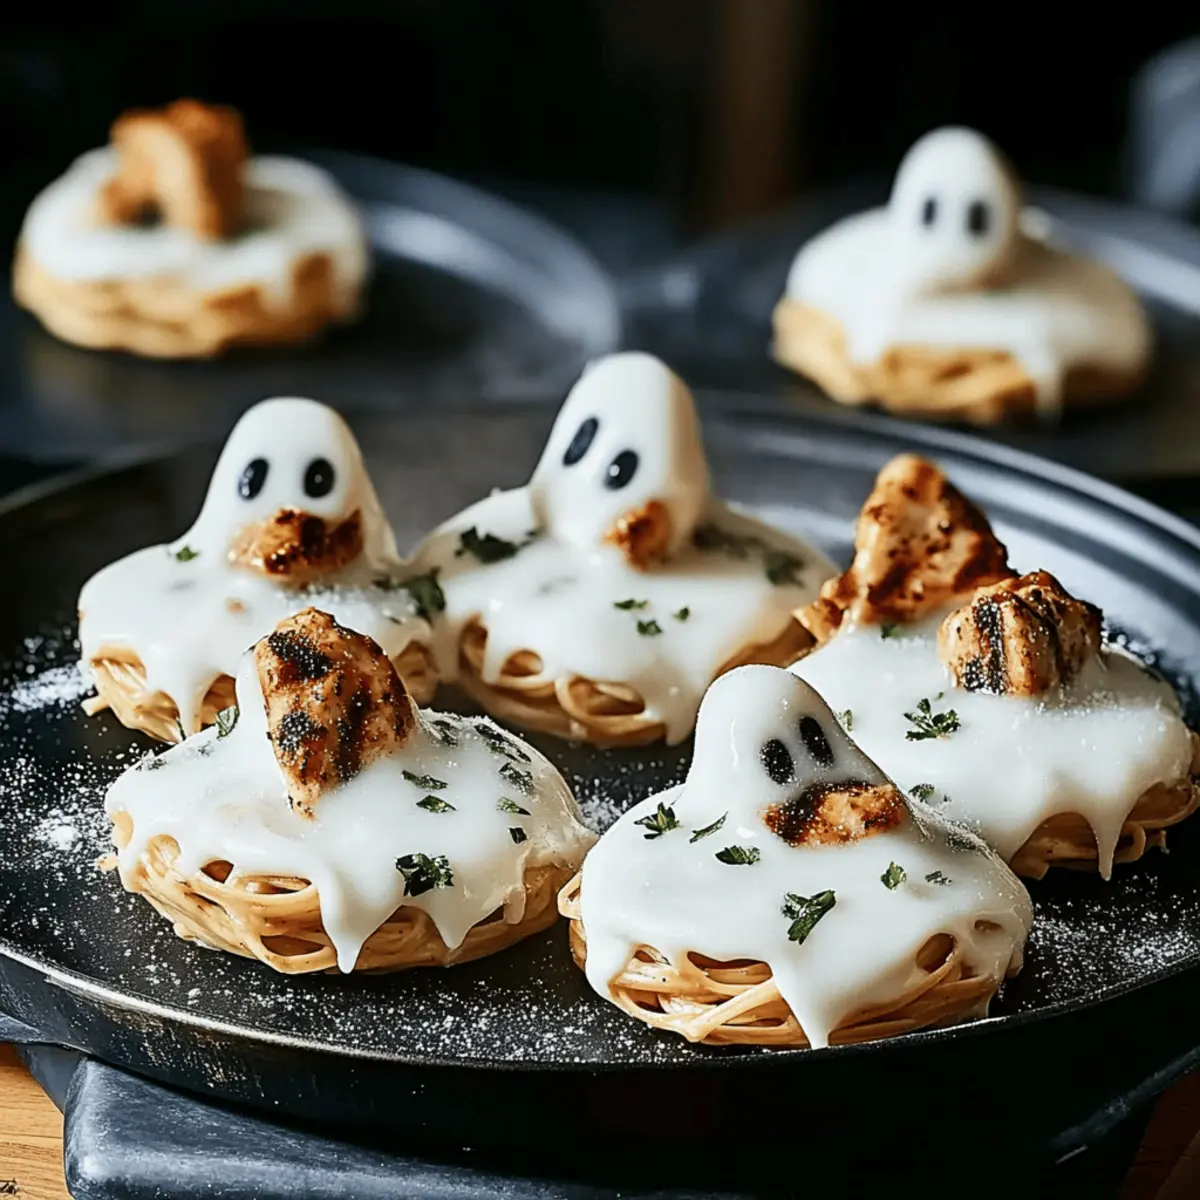
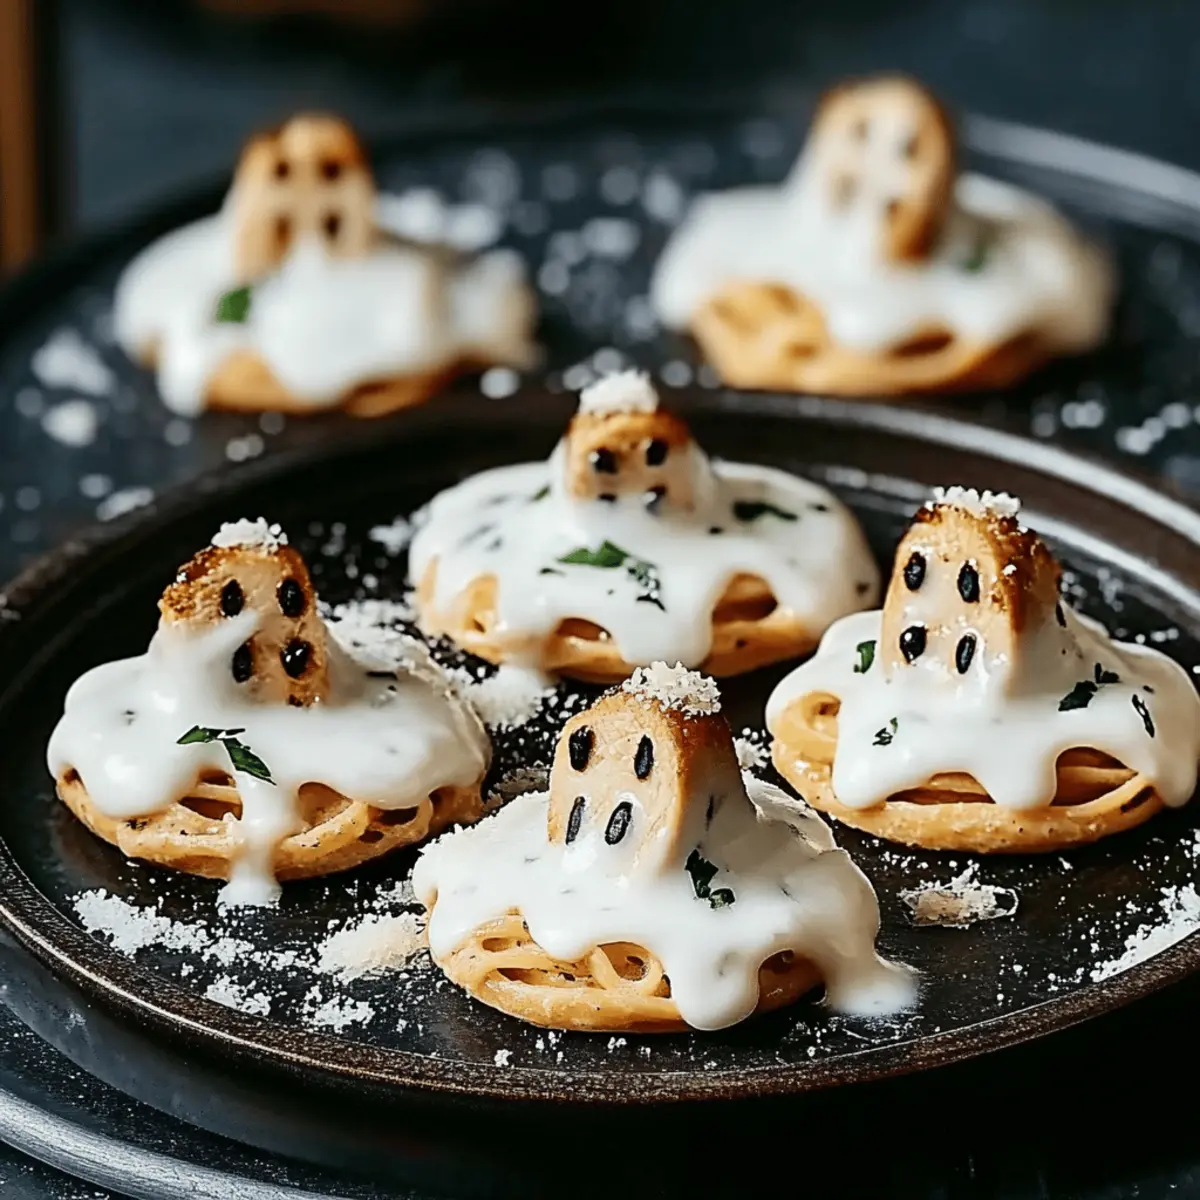
Once the cookies are completely cool, drizzle the icing over the tops, allowing it to naturally flow down the sides. This whimsical finish is what makes these ghost cookies so enchanting. Don’t worry about perfect coverage; the spooky charm is in the imperfections!
Step 10: Add Decorations
To bring your ghost cookies to life, use chocolate chips or candy corn to create eyes and mouth expressions. Get creative with your designs! Let the icing set for about 30 minutes at room temperature before serving, allowing the decorations to stay in place and making your ghost cookies truly hauntingly appealing.
Storage Tips for Ghost Cookies
Room Temperature: Store your ghost cookies in an airtight container at room temperature for up to 3 days. This keeps them fresh while the spooky charm remains intact.
Fridge: If you want to extend their shelf life, you can keep ghost cookies in the fridge for up to 5 days. Just be sure to wrap them tightly to avoid drying out.
Freezer: For longer storage, freeze baked ghost cookies for up to 3 months. Place them in a single layer on a baking sheet to freeze, then transfer to a zip-top bag.
Reheating: When ready to enjoy, thaw cookies in the fridge overnight or at room temperature for a few hours. Warm briefly in the microwave for a cozy treat that brings back memories of baking!
Expert Tips for Ghost Cookies
• Best Flour Choice: Use cake flour for a lighter texture and softer cookies. All-purpose flour works too, but the difference is noticeable!
• Don’t Overmix: Mix the dough just until combined to avoid tough cookies. A thick but cohesive dough is key for ghostly shapes.
• Icing Consistency: Ensure the icing is pourable but not too runny. Adjust with milk slowly until you reach the perfect consistency for decorating your ghost cookies.
• Cooling Time: Allow cookies to cool completely before icing. This prevents the icing from melting or becoming too runny, preserving their spooky charm!
• Creative Decorations: Use a variety of decorations to personalize your ghost cookies. Try different candy shapes to give each ghost its unique personality!
Ghost Cookies: Fun Variations Await
Feel free to add your own twist to these ghost cookies and make them uniquely yours—your taste buds will thank you!
- Gluten-Free: Use a gluten-free all-purpose blend to cater to gluten sensitivities while keeping the cookie’s delightful flavor intact.
- Vegan: Swap the egg for flaxseed meal mixed with water and the butter for coconut oil for a cruelty-free treat that’s still spooky and delicious!
- Choco-Ghost: Add cocoa powder to the dough for a chocolate-flavored ghost cookie, then use white chocolate for the icing. Who says ghosts can’t be decadent?
- Nutty Flavor: Stir in some chopped nuts or nut butter for extra texture and richness, creating a pleasing contrast to the soft dough.
- Spicy Kick: Add a dash of cayenne pepper to the dough for a surprising heat that perfectly contrasts the sweet icing!
- Seasonal Spices: Enhance the flair with cinnamon or nutmeg, adding warmth and an inviting aroma—perfect for those cozy autumn evenings.
- Decorative Themes: Instead of just chocolate chips or candy corn, get creative with festive sprinkles or edible glitter to transform your ghosts into playful characters!
- Serving Suggestion: Pair these delightful ghost cookies with a warm cup of spiced apple cider for a Halloween-themed treat. Just like with the Millies Cookies Bake, the combination will put everyone in a festive mood!
What to Serve with Ghost Cookies
As you gather your loved ones for a delightful Halloween treat, consider these tasty pairings that will create a memorable spread.
-
Hot Apple Cider: A warm, spiced apple cider brings a comforting fall flavor that perfectly complements the sweetness of ghost cookies.
-
Gingerbread Men: Add a festive touch with these spiced cookies; their rich flavor contrasts beautifully with the light sweetness of ghost cookies.
-
Chocolate Milk: The creamy richness of chocolate milk enhances the flavors of your cookies while making for a nostalgic pairing that’s loved by all ages.
-
Pumpkin Pie: The classic autumn dessert provides a creamy, spiced element that pairs harmoniously with the airy texture of ghost cookies.
-
Vanilla Ice Cream: Serving ghost cookies alongside vanilla ice cream creates a playful contrast, turning your treat into an enjoyable sundae.
-
S’mores Dip: This gooey, chocolatey dip adds a fun twist, inviting everyone to dip their ghost cookies and indulge in sweet memories.
Each of these suggestions adds a unique burst of flavor and warmth, bringing friends and family together for a festive celebration!
Make Ahead Options
These ghost cookies are perfect for busy home cooks looking to save time during the Halloween season! You can prepare the cookie dough up to 24 hours in advance by mixing all the ingredients through Step 4, then wrapping the bowl tightly with plastic wrap and refrigerating it. Just ensure that the dough is allowed to come to room temperature for about 15-20 minutes before scooping and baking. Additionally, you can make the icing up to 3 days ahead; simply store it in an airtight container in the refrigerator. When you’re ready to serve these ghostly delights, follow Steps 6 through 10 for a hauntingly delicious finish that’s just as scrumptious as when first baked!
Ghost Cookies that Haunt Your Taste Buds with Flavor Recipe FAQs
How do I select ripe ingredients for my ghost cookies?
Absolutely! For the best results, ensure your butter is at room temperature for easy blending—this helps create that fluffy texture. When using eggs, fresh ones are key; look for any cracks on the shell as a sign they may not be as fresh. Always check for quality in your baking supplies to guarantee the best flavor in your ghostly delights!
How do I store leftover ghost cookies?
Storing your ghost cookies is simple! Keep them in an airtight container at room temperature for up to 3 days to maintain freshness. If you need them to last longer, transfer them to the fridge, where they can stay good for up to 5 days. Just remember to wrap them tightly to prevent drying out—nobody wants sad ghost cookies!
Can I freeze ghost cookies, and if so, how?
Very! Freezing ghost cookies is an excellent way to preserve them for later enjoyment. To freeze, arrange the baked cookies in a single layer on a baking sheet and place them in the freezer until solid. Once frozen, transfer them to a zip-top freezer bag, removing as much air as possible. They can last up to 3 months—perfect for spontaneous spooky cravings!
What should I do if my cookie dough is too sticky?
If you find your ghost cookie dough to be too sticky, no need to panic! Simply add a little more flour—start with 1 tablespoon at a time—until you reach a workable consistency. Make sure not to overmix, as this can lead to tough cookies. Aim for a dough that holds its shape but isn’t overly sticky; this will help you create those adorable ghostly silhouettes.
Are there any dietary considerations with ghost cookies?
Absolutely! If you’re accommodating dietary restrictions, you can use dairy-free milk alternatives like almond or oat milk for the icing. For those with gluten sensitivities, substituting all-purpose flour with a gluten-free flour blend is a great option—just ensure it’s a blend that can work for baking. Personalizing your ghost cookies can help everyone enjoy this festive treat!
How can I enhance the flavor of my ghost cookies?
To elevate the flavor of your ghost cookies, consider replacing some of the granulated sugar with brown sugar for a hint of caramel essence. Another fun twist is to infuse your icing with a splash of almond extract instead of vanilla—it adds a lovely and unexpected depth. The more the merrier when it comes to flavor experiments!
Ghost Cookies that Haunt Your Taste Buds with Flavor
Ingredients
Equipment
Method
- Preheat your oven to 350°F (175°C) and line two baking sheets with parchment paper.
- In a large mixing bowl, cream together the softened unsalted butter and granulated sugar for 2-3 minutes until light and fluffy.
- Add the egg and vanilla extract to the mixture and beat for an additional minute until well incorporated.
- In a separate bowl, whisk together the all-purpose flour and baking powder, then gradually add to the wet ingredients, mixing until combined.
- Scoop dough onto prepared baking sheets, leaving about 2 inches between each cookie.
- Bake in the preheated oven for 10-12 minutes, until edges are lightly golden.
- Allow to cool on baking sheets for 5 minutes before transferring to a wire rack to cool completely.
- Prepare the icing by mixing powdered sugar, milk, and vanilla extract until smooth.
- Once cool, drizzle the icing over each cookie and let it set for 30 minutes.
- Decorate with chocolate chips or candy corn for eyes and mouth expressions.
")