")
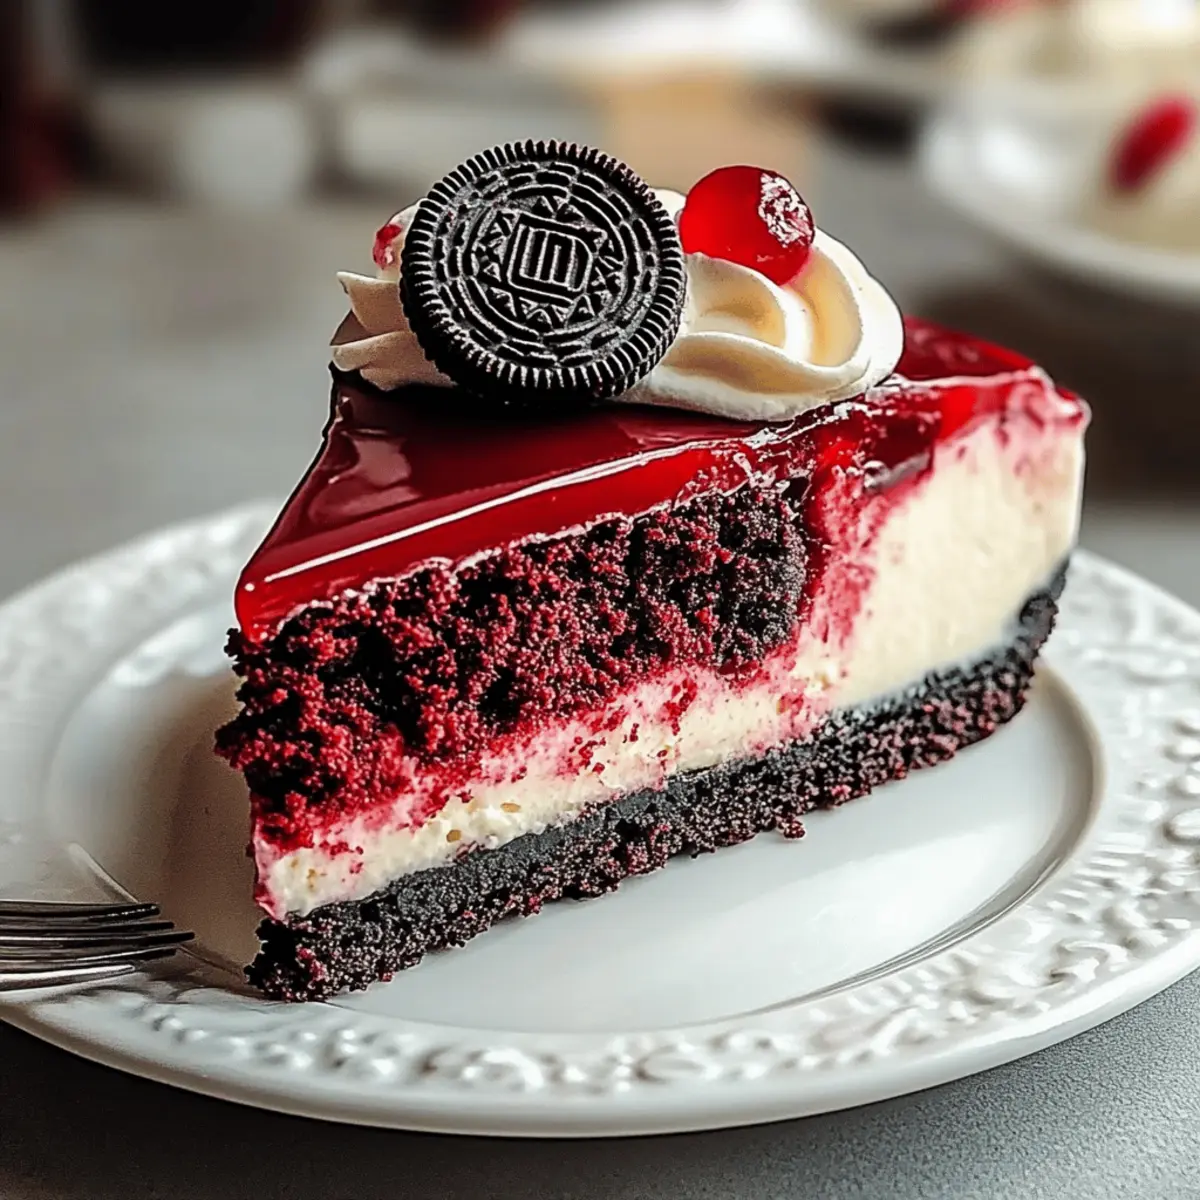
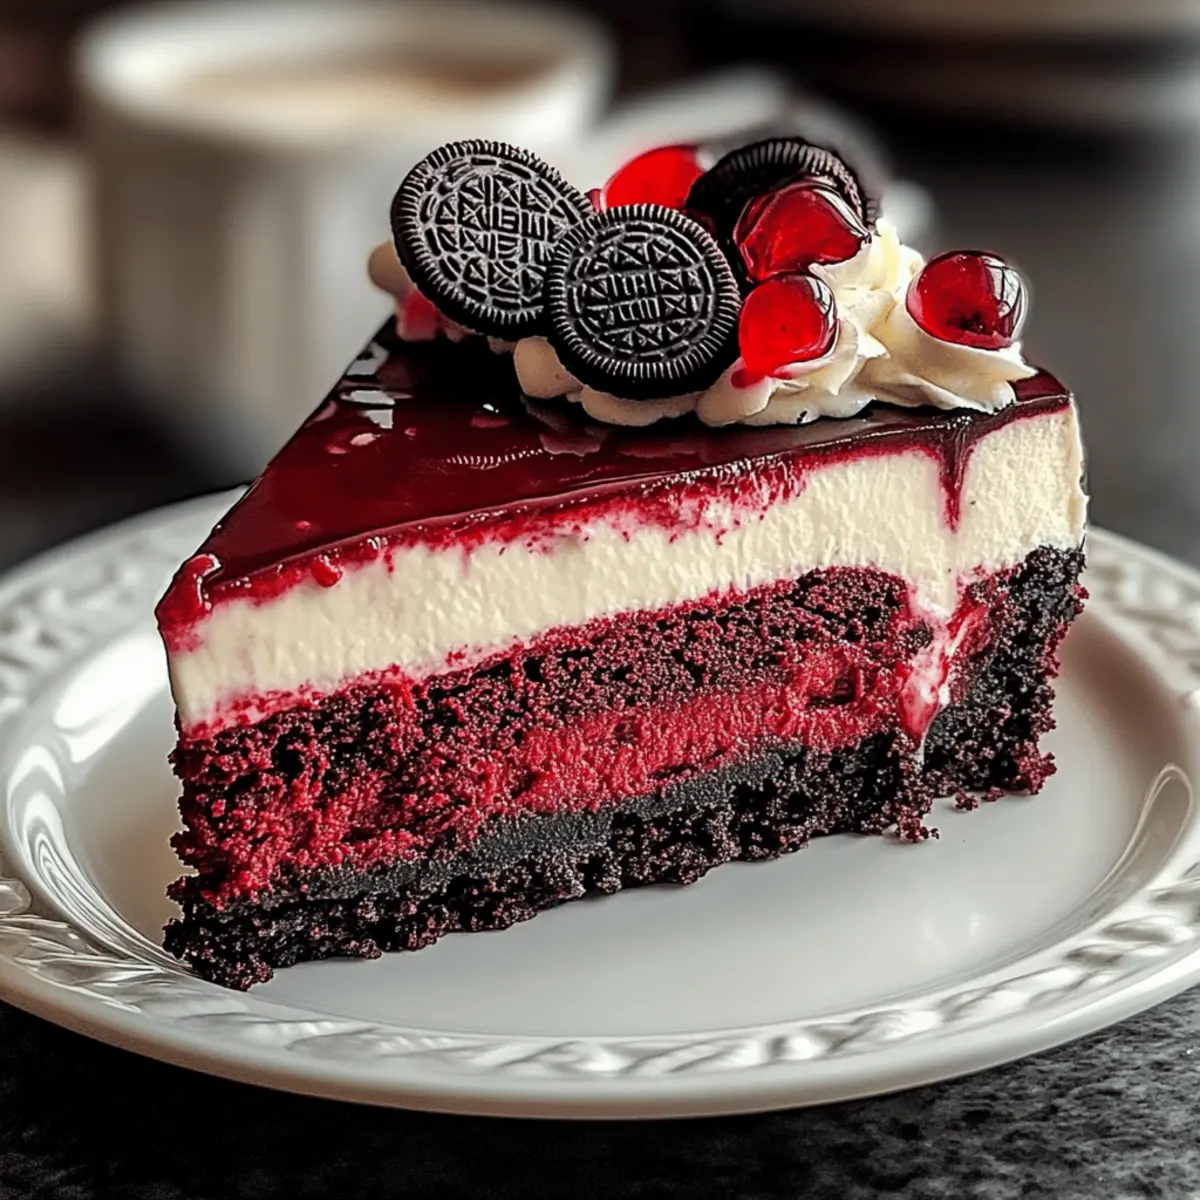
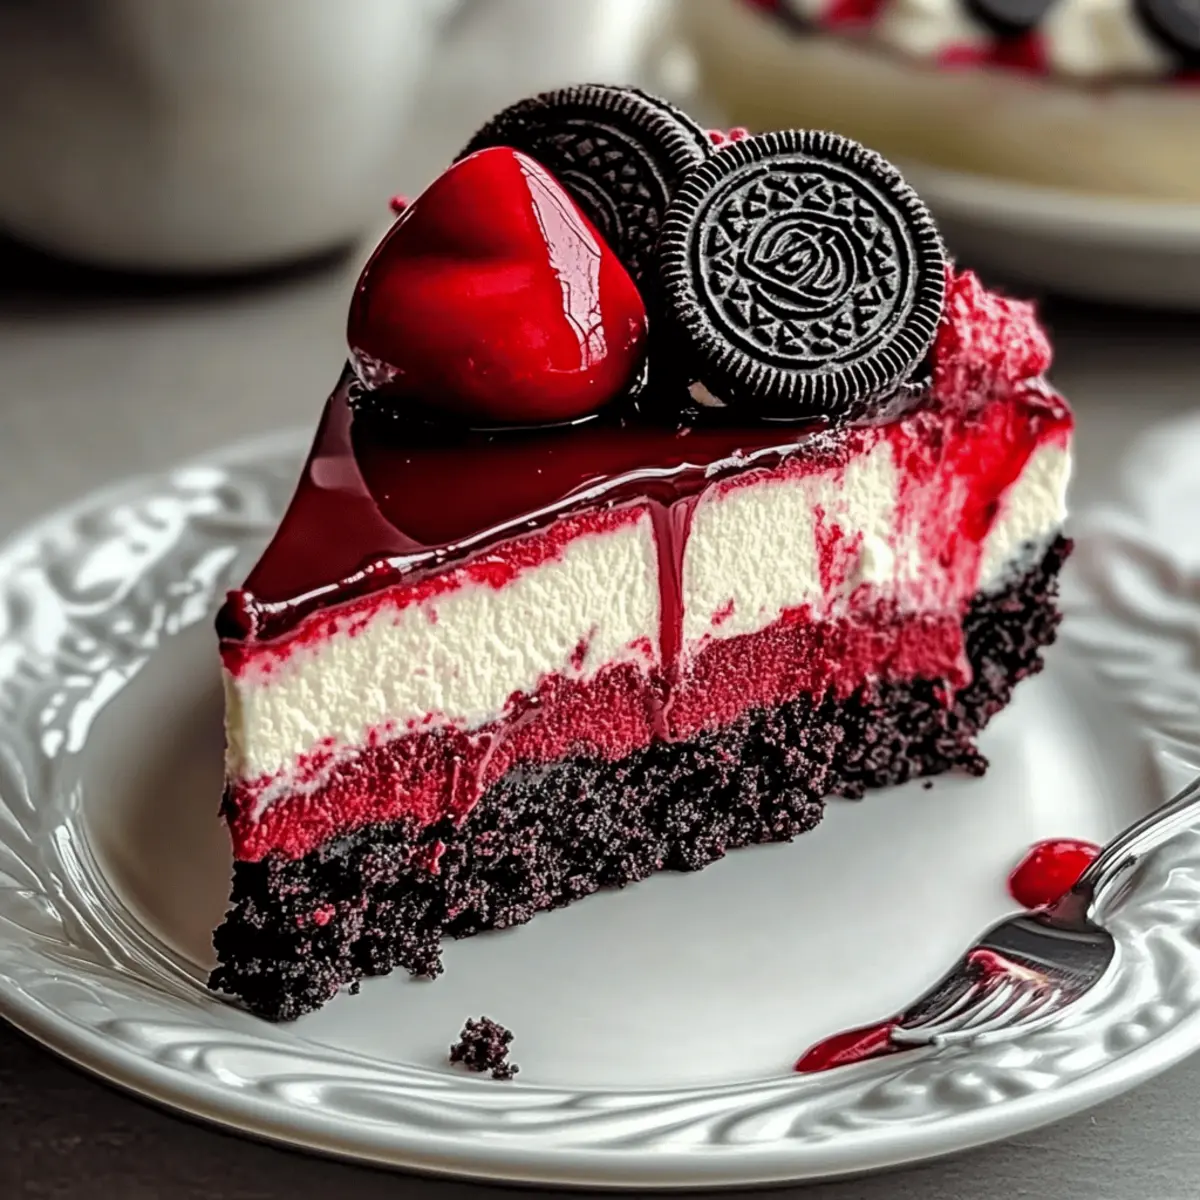
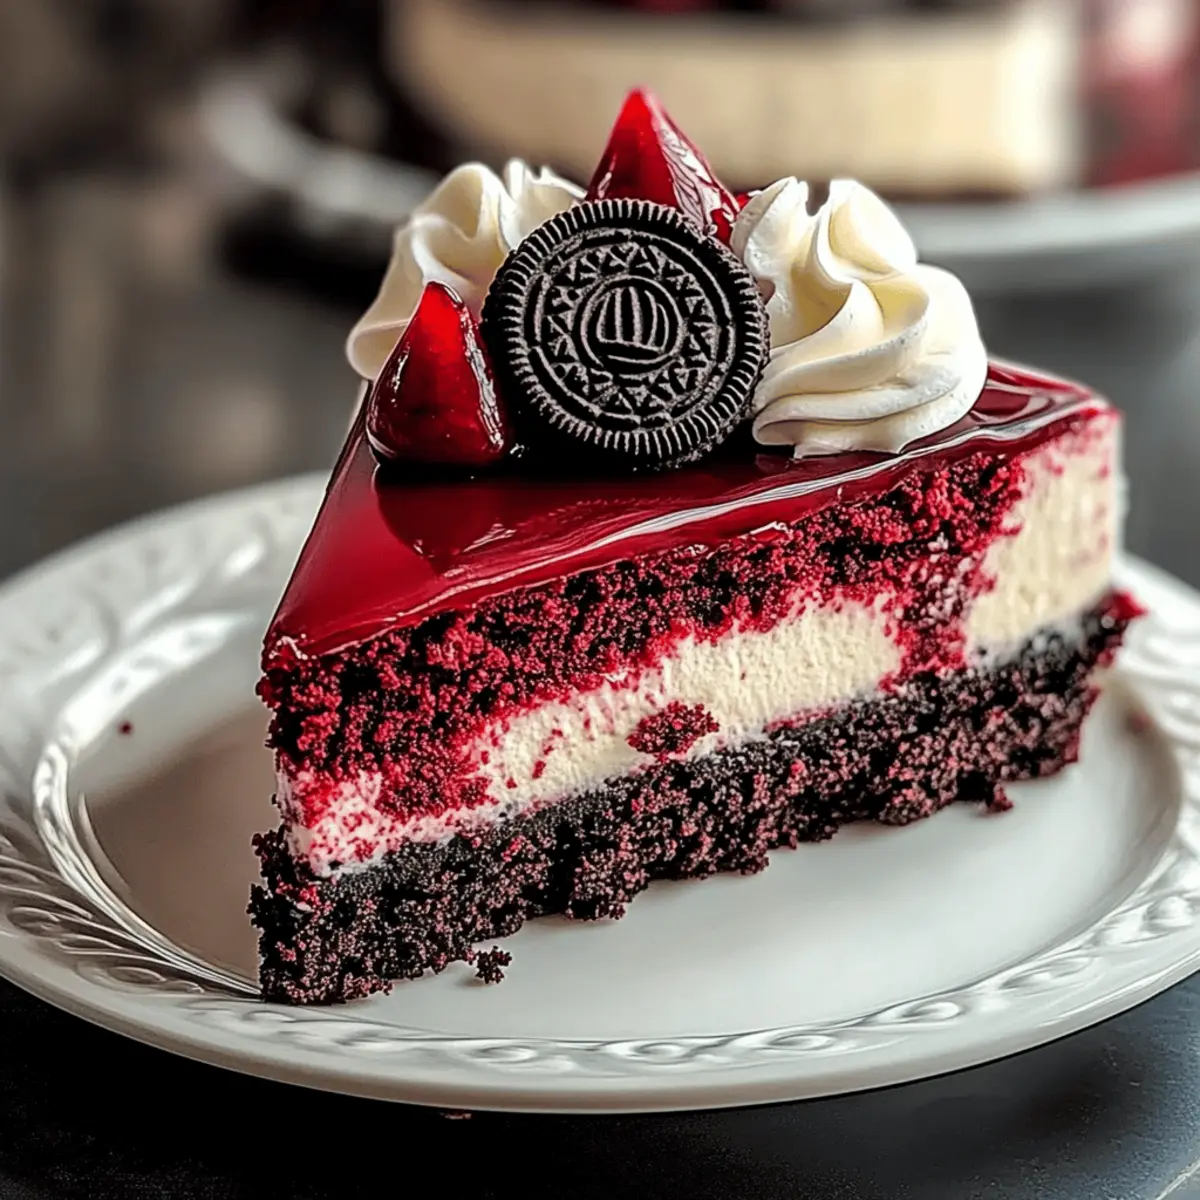
As I stood in my kitchen, the warm scent of cocoa wafting through the air, I couldn’t help but smile at the delightful creation taking shape: a Red Velvet Oreo Cheesecake. This dessert is not just another sweet treat; it’s a tribute to the beloved red velvet cake adorned with a creamy cheesecake layer, all harmoniously combined with chunks of Oreo cookies. The best part? It’s both show-stopping and surprisingly simple to make, making it a fantastic centerpiece for any gathering. With this cheesecake, you get the indulgence of creamy textures paired with a crunchy crust, and it even offers gluten-free options! Ready to take your dessert game to the next level and impress your friends and family? Let’s dive into this luscious recipe together!
Why Is This Cheesecake So Special?
Indulgent Flavor: The luxurious blend of red velvet and creamy cheesecake creates an enticing flavor profile that delights every palate.
Visual Appeal: With its eye-catching red hue and decadent layers, this cheesecake doubles as a stunning centerpiece for any occasion.
Simple Steps: Despite its elegance, the recipe is surprisingly easy to follow, making it perfect for home bakers of all skill levels!
Versatile Variations: Feel free to get creative! Substitute Oreo crust with gluten-free cookies or top with whipped cream and chocolate ganache for an extra indulgence.
Crowd-Pleasing: Whether at a birthday party or holiday gathering, everyone will be clamoring for a slice of this show-stopper! And if you’re looking for more delectable desserts, check out my Ultimate Red Velvet Brownies or my favorite Sara Lee Cheesecake.
Red Velvet Oreo Cheesecake Ingredients
For the Crust
- Oreo Cookies – Perfect for a chocolatey base; swap with gluten-free chocolate cookies for a gluten-free twist.
- Butter (Unsalted) – Binds the crust; coconut oil is a great non-dairy alternative.
For the Cheesecake Filling
- Cream Cheese – Adds richness and creaminess; low-fat cream cheese works for a lighter version.
- Granulated Sugar – Sweetens your cheesecake; consider erythritol for a low-sugar substitute.
- Cocoa Powder (Dutch-processed) – Enhances the chocolatey flavor; unsweetened cocoa can be used but subtly changes the taste.
- Vanilla Extract – Elevates flavor; pure vanilla extract is the best choice.
- Red Food Coloring – Gives that classic vibrant red hue; optional if you’re keeping it natural.
- Eggs – Provides structure and moisture; flax eggs are a perfect vegan substitute.
- Sour Cream – Adds tanginess and moisture; Greek yogurt is a healthy alternative.
- Heavy Cream – Contributes richness; coconut cream is a wonderful dairy-free replacement.
For the Swirl
- Cream Cheese – Used to make the creamy swirl layer; ensures a delightful contrast in texture.
- Sugar – Sweetens the swirl; you can scale down based on your taste preferences.
- Egg Yolk – Helps bind the swirl; for a vegan option, use a vegan egg replacement.
- Vanilla – Enhances the flavors of the swirl, blending harmoniously with the cheesecake.
Each ingredient plays a vital role in crafting the perfect Red Velvet Oreo Cheesecake that will not only taste divine but also look absolutely stunning!
Step‑by‑Step Instructions for Red Velvet Oreo Cheesecake
Step 1: Preheat the Oven
Begin by preheating your oven to 325°F (163°C). This temperature is crucial for setting the perfect texture of your Red Velvet Oreo Cheesecake. Once the oven reaches the desired heat, you’ll be ready to bake the crust and cheesecake layers beautifully.
Step 2: Prepare the Crust
Crush 24 Oreo cookies into fine crumbs using a food processor or a zip-top bag with a rolling pin. Combine the crumbs with melted unsalted butter, mixing until well combined. Press this mixture evenly into the bottom of a 9-inch springform pan, ensuring it’s tightly packed for a sturdy crust, then set aside.
Step 3: Bake the Crust
Place the crust in the preheated oven and bake for 8–10 minutes. Keep an eye on it; it should be firm to the touch and slightly set. Once done, remove it from the oven and let it cool completely while you prepare the cheesecake filling.
Step 4: Make the Cheesecake Batter
In a large mixing bowl, beat the cream cheese until it’s smooth and creamy. Gradually add granulated sugar, Dutch-processed cocoa powder, vanilla extract, vinegar, and red food coloring, mixing until everything is well incorporated. The mixture should be a vibrant red with no lumps—indicative of a well-prepared batter.
Step 5: Incorporate the Eggs
Add the eggs to the cheesecaket mixture one at a time, mixing gently after each addition until just combined. Avoid overmixing to prevent the cheesecake from cracking during baking. Once integrated, fold in sour cream and heavy cream until everything is blended together smoothly.
Step 6: Add Chopped Oreos
Stir in the chopped Oreo cookie pieces, distributing them evenly throughout the cheesecake batter. This step enhances the texture and flavor of your Red Velvet Oreo Cheesecake, giving it that delightful crunch in every bite.
Step 7: Create the Swirl
In a separate bowl, mix cream cheese, sugar, egg yolk, and vanilla extract to create the swirl mixture. Spoon dollops of this mixture over the red velvet cheesecake batter, then use a knife or skewer to gently swirl it together for a beautiful marbled effect.
Step 8: Prepare for Baking
Wrap the base of the springform pan in aluminum foil to prevent water from seeping in during baking. Place the pan in a larger baking dish and fill it with hot water to create a water bath. This method ensures even baking and helps prevent cracks.
Step 9: Bake the Cheesecake
Carefully place the baking dish in the oven and bake for 55–65 minutes. The cheesecake should look set around the edges while the center remains slightly jiggly. This is the perfect time for a smooth, creamy texture once cooled.
Step 10: Cool in the Oven
After baking, turn off the oven and crack the door open, allowing the cheesecake to cool in the oven for 1 hour. This gradual cooling helps to mitigate the chance of cracks forming on the surface as it temperature adjusts.
Step 11: Chill in the Fridge
Once cool, remove the cheesecake from the water bath and let it come to room temperature. Afterwards, place it in the refrigerator to chill for at least 6 hours, preferably overnight. This extended chilling time allows the flavors to meld beautifully and enhances the overall taste of your decadent Red Velvet Oreo Cheesecake.
Expert Tips for Red Velvet Oreo Cheesecake
-
Room Temperature Ingredients: Always use room-temperature ingredients to prevent lumps and ensure a smooth batter for your cheesecake.
-
Gentle Mixing: Incorporate the eggs gently to avoid overmixing. This is crucial to prevent cracks on your beautifully layered Red Velvet Oreo Cheesecake.
-
Water Bath Technique: Wrap the pan with foil to prevent water from leaking in during baking. This ensures a perfect texture by providing moisture while baking.
-
Chill for Best Flavor: Letting the cheesecake chill overnight helps develop its flavors and makes slicing easier. Patience leads to perfection!
-
Visual Appeal: For a stunning finish, consider topping your cheesecake with whipped cream, extra Oreo crumbles, or chocolate ganache for that final touch.
Red Velvet Oreo Cheesecake Variations
Feel free to make this delightful dessert your own by swapping ingredients and introducing exciting twists!
- Gluten-Free: Substitute Oreo cookies with gluten-free chocolate cookies to enjoy this cheesecake without worrying about gluten.
- Dairy-Free: Replace cream cheese and heavy cream with vegan cream cheese and coconut cream for a creamy texture that’s completely dairy-free.
- Low-Sugar: Use erythritol or another sugar substitute in place of granulated sugar for a diabetic-friendly version without sacrificing sweetness.
- Extra Crunch: Add finely chopped nuts or crushed pretzels to the Oreo crust for an unexpected crunch that complements the creamy filling.
- Seasonal Flavors: Consider adding spices like cinnamon or nutmeg for a festive autumn twist or a splash of peppermint extract for a winter wonderland vibe.
- Swirl It Up: Want more variety? Mix in or top with your favorite fruit puree, like raspberry or strawberry, for a tangy contrast that brightens the flavors!
- Toppings Galore: Top your cheesecake with whipped cream and a sprinkle of cocoa for a classic look, or indulge by drizzling it with chocolate ganache for a rich finish.
- Cheesecake Dip: For a fun twist, try transforming this recipe into a dip! Skip the crust and serve with fruit, cookies, or graham crackers—a guaranteed crowd-pleaser at parties!
With your creative flair, you can elevate your Making Cheesecake Dip or try out an enticing side of my Air Fryer Red Potatoes alongside this delectable cheesecake. Happy baking!
Make Ahead Options
These Decadent Red Velvet Oreo Cheesecakes are perfect for meal prep, allowing you to save time on busy days while still impressing your family or guests! You can prepare the entire cheesecake up to 24 hours in advance by following the standard instructions, letting it chill in the refrigerator to enhance the flavors. To maintain quality, ensure it’s wrapped tightly in plastic wrap and stored in an airtight container to prevent drying out. Alternatively, you can make the crust and the cheesecake filling separately; refrigerate them for up to 3 days before assembly. When ready to serve, simply assemble and let it rest for a few minutes at room temperature for easy slicing into delectable portions!
How to Store and Freeze Red Velvet Oreo Cheesecake
Fridge: Store your Red Velvet Oreo Cheesecake in an airtight container for up to 4-5 days. This keeps it fresh and prevents odors from mingling.
Freezer: For longer storage, wrap individual slices tightly in plastic wrap and aluminum foil, then freeze for up to 2 months. Thaw in the fridge before serving.
Serving: To enjoy, simply let the cheesecake slices thaw in the refrigerator overnight, or bring them to room temperature for about 30 minutes before indulging in their rich flavors.
Label: When freezing, don’t forget to label your slices with the date, ensuring you enjoy them while still at their best!
What to Serve with Red Velvet Oreo Cheesecake
As the vibrant red layers of your cheesecake come to life, think about the delightful accompaniments that will elevate this indulgent dessert experience.
-
Fresh Berries: Their natural sweetness and tartness balance the rich flavors of the cheesecake perfectly. A medley of strawberries, raspberries, and blueberries adds a beautiful and refreshing touch.
-
Chocolate Ganache: Drizzle warm chocolate ganache over each slice for an extra layer of richness. This adds an irresistible glossy finish that speaks to chocolate lovers everywhere.
-
Whipped Cream: A dollop of homemade whipped cream is the ultimate companion, adding lightness and a creamy contrast to the dense cheesecake. Plus, it enhances the dessert’s overall presentation.
-
Coffee: A warm cup of coffee enhances the flavors in each bite, offering a delightful contrast to sweetness while also complementing the chocolate undertones. This pairing beckons for cozy conversations around the table.
-
Red Velvet Cupcakes: Why not keep the theme going? Mini red velvet cupcakes on the side can create a festive atmosphere and allow guests to indulge in a delightful variety of flavors.
-
Milkshakes: For a fun twist, serve a cold Oreo milkshake alongside the cheesecake. It’s a nostalgic nod that complements the creamy texture and provides a playful contrast.
-
Raspberry Sauce: Drizzle tangy raspberry sauce over the cheesecake slices to add brightness and a burst of fruity flavor that cuts through the richness, creating a memorable dessert.
-
Ice Cream: A scoop of vanilla or cream cheese ice cream on the side brings another layer of creaminess and can be a refreshing touch against the dense cheesecake.
These delectable side dishes and drinks not only complement the Red Velvet Oreo Cheesecake but also add layers of taste and texture that make your dessert spread truly unforgettable.
Red Velvet Oreo Cheesecake Recipe FAQs
How do I know if my ingredients are ripe or selected properly?
Absolutely! For the best flavor and texture, ensure your cream cheese is at room temperature. This prevents lumps in your batter. When choosing eggs, opt for large ones, and make sure the sour cream is full-fat for creaminess. If using fresh ingredients, check for any signs of spoilage, like dark spots on the eggs or an off-smell from the cream cheese.
How should I store my Red Velvet Oreo Cheesecake, and how long does it last?
You can store your Red Velvet Oreo Cheesecake in an airtight container in the refrigerator for up to 4-5 days. Make sure it cools completely before transferring to the fridge to maintain its delicious texture. If you’d like to keep it for a longer period, wrapping it tightly in plastic wrap and aluminum foil will allow it to stay fresh in the freezer for up to 2 months!
Can I freeze leftovers, and how should I do that?
Yes, you can freeze your cheesecake! First, wrap individual slices tightly in plastic wrap, then in aluminum foil. Place them in a freezer-friendly bag or container, ensuring you label them with the date. When you’re ready to enjoy, thaw them in the refrigerator overnight or let them sit at room temperature for about 30 minutes before indulging. This method will maintain their beautiful texture and rich flavors!
What should I do if my cheesecake cracks while baking?
If your cheesecake cracks, don’t worry too much! This can happen for several reasons, such as overmixing or sudden temperature changes. To minimize this, always mix the batter gently and consider baking in a water bath—the moisture helps to regulate the temperature. If cracks do appear, you can use whipped cream or a chocolate ganache drizzle to cleverly cover them up; no one will ever know!
Are there any dietary considerations I should keep in mind?
Very! If you’re looking for alternatives, you can easily make this cheesecake gluten-free by substituting Oreo cookies with gluten-free chocolate cookies. For a dairy-free option, use coconut cream instead of heavy cream and ensure your cream cheese is a non-dairy brand. Additionally, you can replace regular eggs with flax eggs for a vegan version, making this cake more accessible for various dietary needs.
Can pets enjoy this cheesecake, or is it safe for them?
No, it’s best not to share your Red Velvet Oreo Cheesecake with pets! Ingredients like chocolate (found in Oreos) and cream cheese can be harmful to dogs and cats. Stick to safe treats designed for pets to keep them happy and healthy!
Irresistible Red Velvet Oreo Cheesecake You'll Love
Ingredients
Equipment
Method
- Preheat your oven to 325°F (163°C).
- Crush 24 Oreo cookies into fine crumbs and mix with melted unsalted butter. Press into the bottom of a 9-inch springform pan.
- Bake the crust for 8–10 minutes and let it cool.
- In a mixing bowl, beat cream cheese until smooth. Gradually add sugar, cocoa powder, vanilla extract, red food coloring, mixing until combined.
- Add eggs one at a time, mixing gently. Fold in sour cream and heavy cream until smooth.
- Stir in chopped Oreos.
- Mix cream cheese, sugar, egg yolk, and vanilla for the swirl. Spoon over cheesecake batter and swirl gently.
- Wrap the springform pan in aluminum foil and place it in a larger baking dish filled with hot water.
- Bake for 55–65 minutes, then cool in the oven for 1 hour.
- Chill in the fridge for at least 6 hours or overnight.
")