")
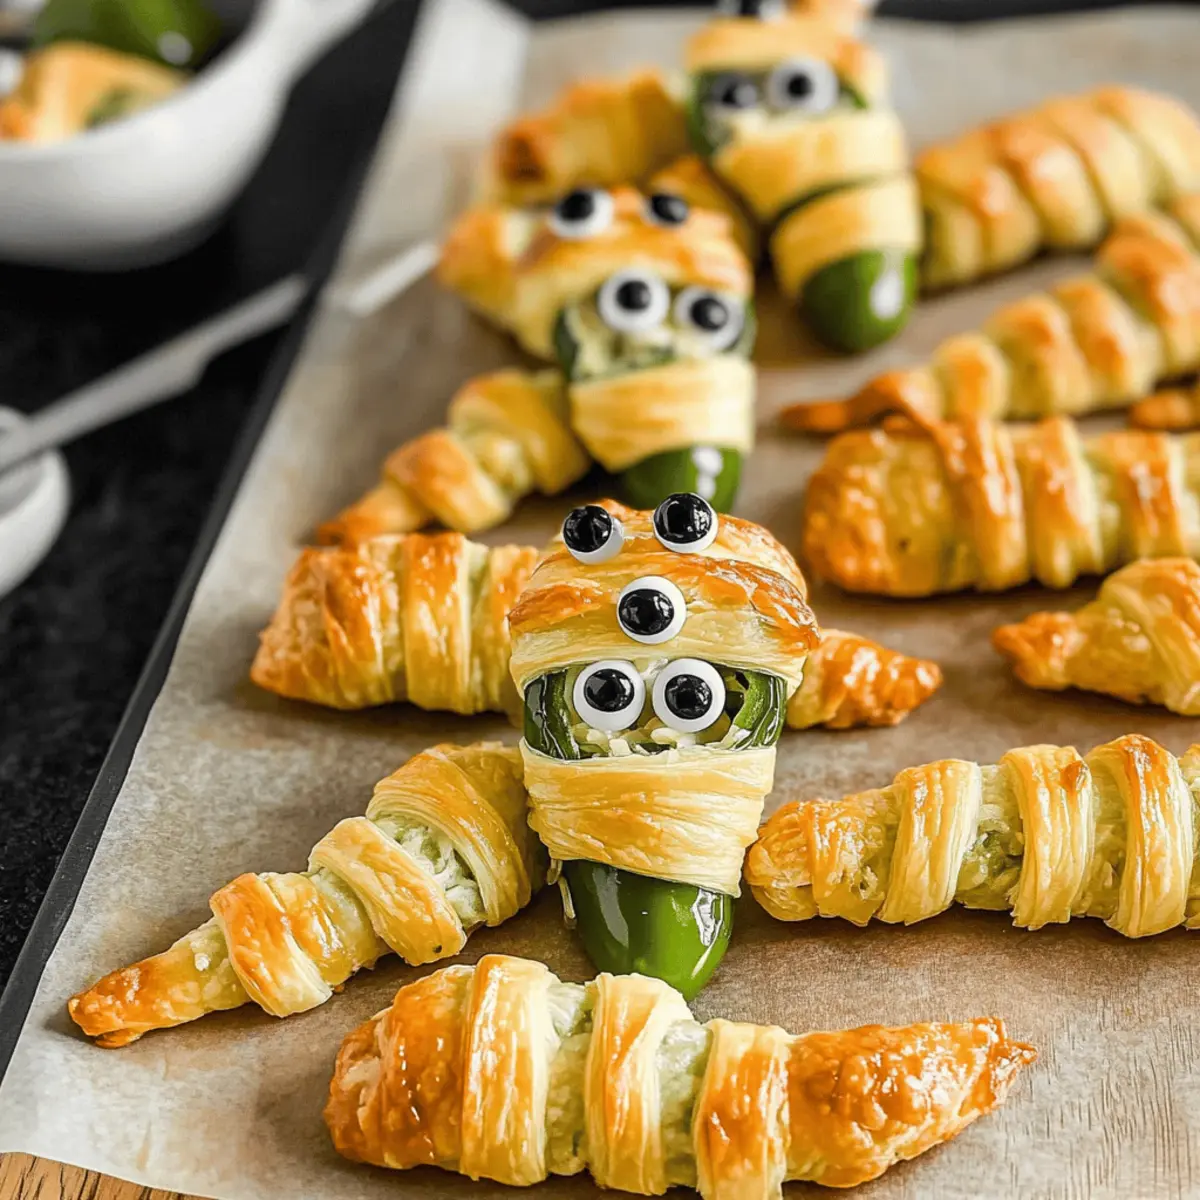
As I rummaged through my kitchen, the crisp scent of crescent dough was a delightful reminder that Halloween is just around the corner. Enter the Mummy Jalapeño Poppers—spooky little bites that are as fun to make as they are to eat! These vegetarian treasures are quick to prepare, making them an ideal party appetizer that will have everyone talking. With creamy cheese nestled inside spicy jalapeños, these mummies bring both a hint of heat and a touch of festive flair to your gathering. As the oven fills with the irresistible aroma of baking dough, you’ll find yourself eagerly anticipating that first warm, cheesy bite. Who could resist a snack that looks this good and tastes even better? Are you ready to scare up some fun with these festive treats?
Why Are Jalapeño Mummies a Must-Make?
Simplicity made fun: These spooky snacks are easy to prepare, perfect for both seasoned chefs and kitchen newcomers.
Deliciously cheesy: The creamy filling inside fresh jalapeños creates a flavor explosion that’s hard to resist.
Visually striking: Wrapped like mummies, they’re guaranteed to impress your guests and spark conversations at any Halloween party.
Quick prep: With minimal time in the kitchen, you can whip these up and get back to enjoying your celebration.
Crowd-pleaser: Whether you’re catering to vegetarians or spice lovers, everyone will adore these poppers, making them a versatile addition to your menu. Consider serving with a zesty ranch dip or homemade salsa for added delight!
Jalapeño Mummies Ingredients
Spooky and savory ingredients for your Halloween treat!
For the Filling
- Jalapeño Peppers – The star of the show, bringing delightful heat; feel free to swap for mini sweet peppers for milder bites.
- Cream Cheese – Offers a rich, creamy interior; ensure it’s room temperature for easier mixing.
- Shredded Monterey Jack Cheese – Adds melty goodness; cheddar can substitute for a sharper taste.
- Garlic Powder – Elevates the savory profile; fresh garlic works too—just use less.
- Onion Powder – Deepens the flavor; finely chopped fresh onion is also an option.
- Kosher Salt – Essential for enhancing the flavors; adjust to personal preference.
- Paprika – Imparts color and a hint of smokiness; cayenne offers a spicier alternative!
- Ground Black Pepper – Adds a touch of heat; optional, depending on your spice tolerance.
For the Dough
- Crescent Roll Dough – Forms the mummy-like wrapping; consider puff pastry for a flakier texture.
- Large Egg – Used for an egg wash to create a golden finish; olive oil provides an egg-free alternative.
- Milk – Combined with egg for the wash; any milk type works—dairy or non-dairy.
For Decoration
- Mini Candy Eyeballs – These fun embellishments give personality to your mummies; alternatively, chocolate chips or olives can be used for an edible twist.
These Jalapeño Mummies are bound to be a hit at your Halloween gathering!
Step‑by‑Step Instructions for Jalapeno Mummies
Step 1: Preheat Your Oven
Begin by preheating your oven to 375°F (190°C). This ensures that the dough bakes evenly and achieves that beautiful golden color. While the oven heats up, prepare your baking sheet by lining it with parchment paper, making cleanup a breeze and preventing any sticking of your delicious Jalapeno Mummies.
Step 2: Prepare the Creamy Filling
In a medium mixing bowl, combine 8 ounces of softened cream cheese, 1 cup of shredded Monterey Jack cheese, 1 teaspoon of garlic powder, 1 teaspoon of onion powder, ½ teaspoon of kosher salt, 1 teaspoon of paprika, and a pinch of ground black pepper. Use a handheld mixer or a sturdy spatula to blend everything thoroughly until the mixture is smooth and well combined, creating a delightful filling for your jalapeños.
Step 3: Stuff the Jalapeños
Next, take 8 fresh jalapeño peppers and carefully slice them in half lengthwise, removing the seeds for a milder flavor or leaving them in for a spicy kick. Use a spoon or a piping bag to generously fill each jalapeño half with the creamy cheese mixture, ensuring they are packed well but not overflowing. Set the filled jalapeños aside while you prepare the dough.
Step 4: Roll Out the Dough
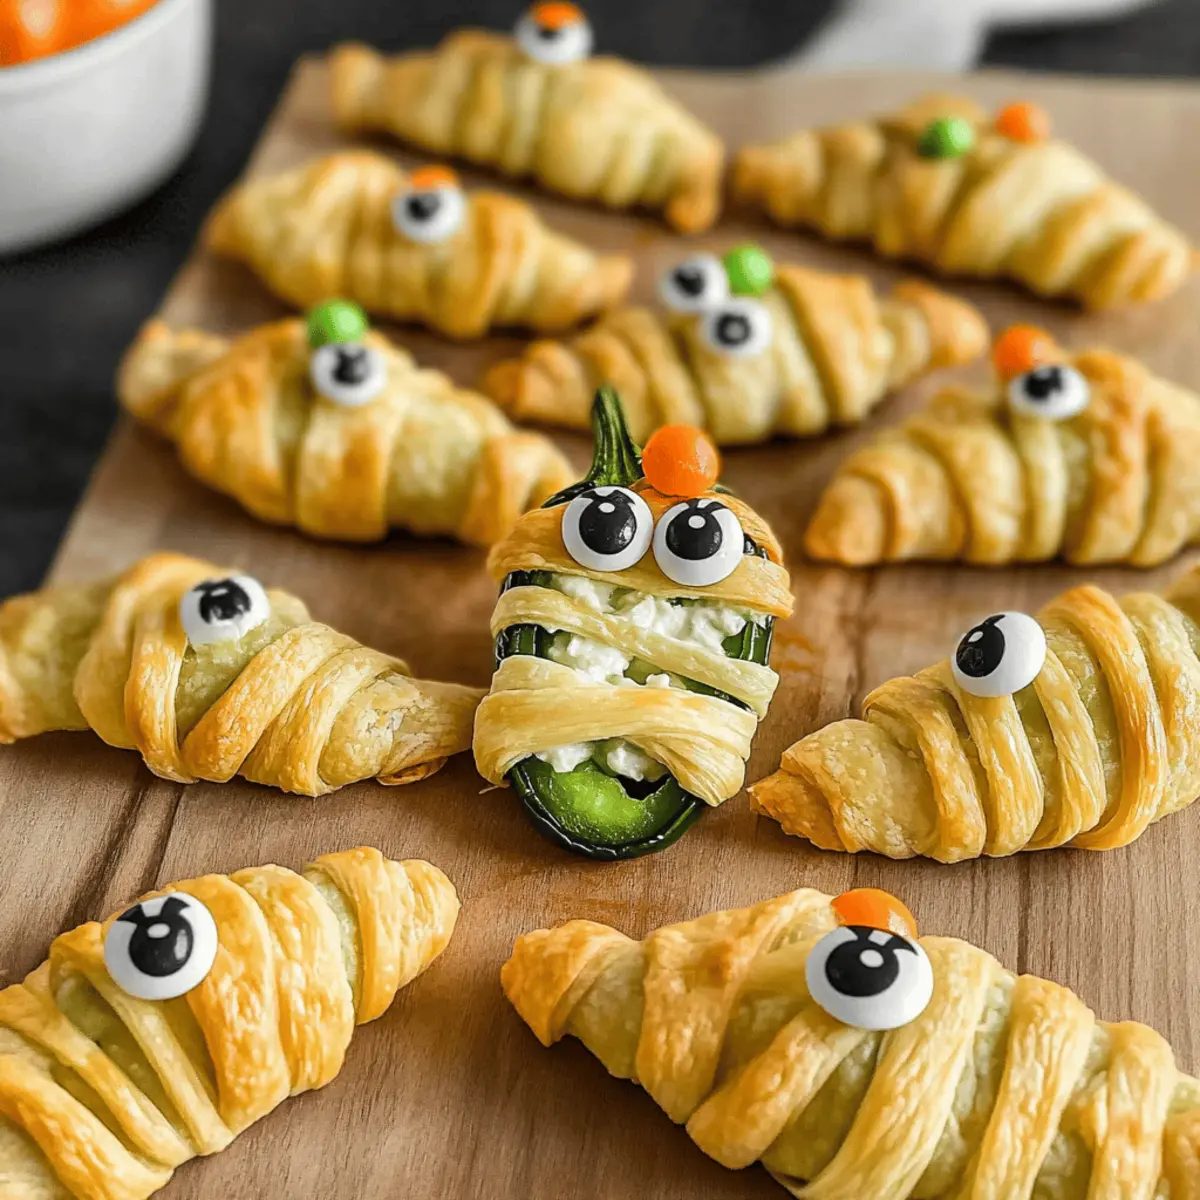
Unroll a tube of crescent roll dough on a lightly floured surface. Using a sharp knife or pizza cutter, slice the dough into thin strips, about ½ inch wide. These strips will form the mummy wrappings around your stuffed jalapeños. Aim for a playful, uneven wrap for a more whimsical mummy look, leaving space for the eyes.
Step 5: Wrap the Mummies
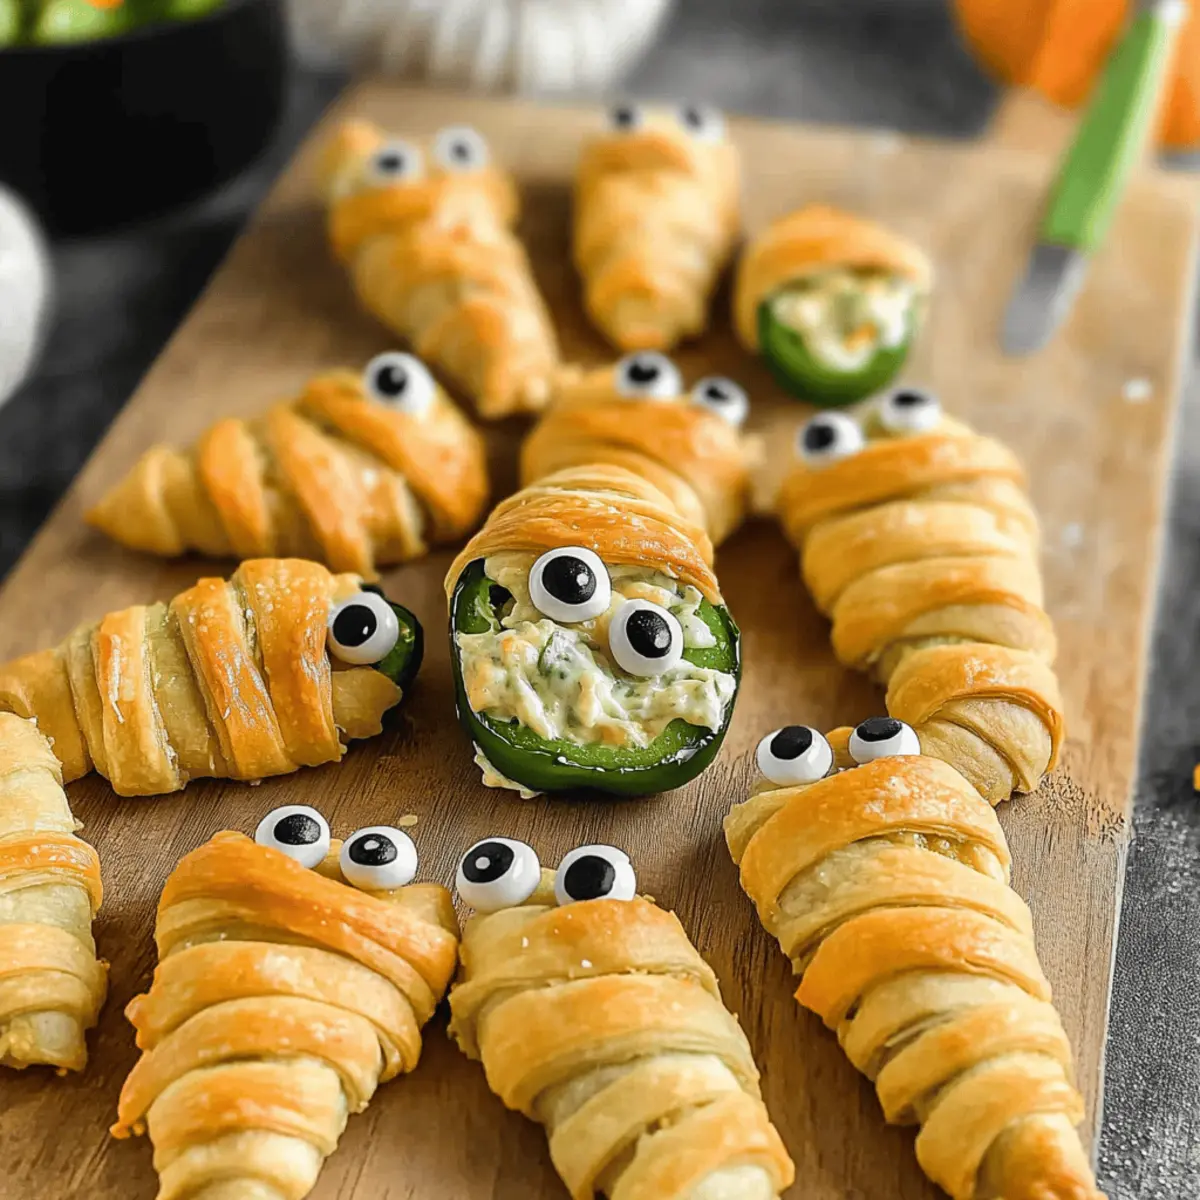
Take a filled jalapeño half and gently wrap a strip of dough around it, overlapping as needed to create a mummy effect. Leave a small gap at the top for the eyes. Repeat this process for all stuffed jalapeños, arranging them neatly on the prepared baking sheet as you go, one by one, ensuring they’re spaced apart to allow for even cooking.
Step 6: Apply the Egg Wash
In a small bowl, whisk together 1 large egg and 1 tablespoon of milk until well blended. Using a pastry brush, carefully apply this egg wash over the wrapped jalapeños to give them that enticing golden-brown finish as they bake. This step adds a lovely shine and rich color to your Jalapeno Mummies.
Step 7: Bake the Mummies
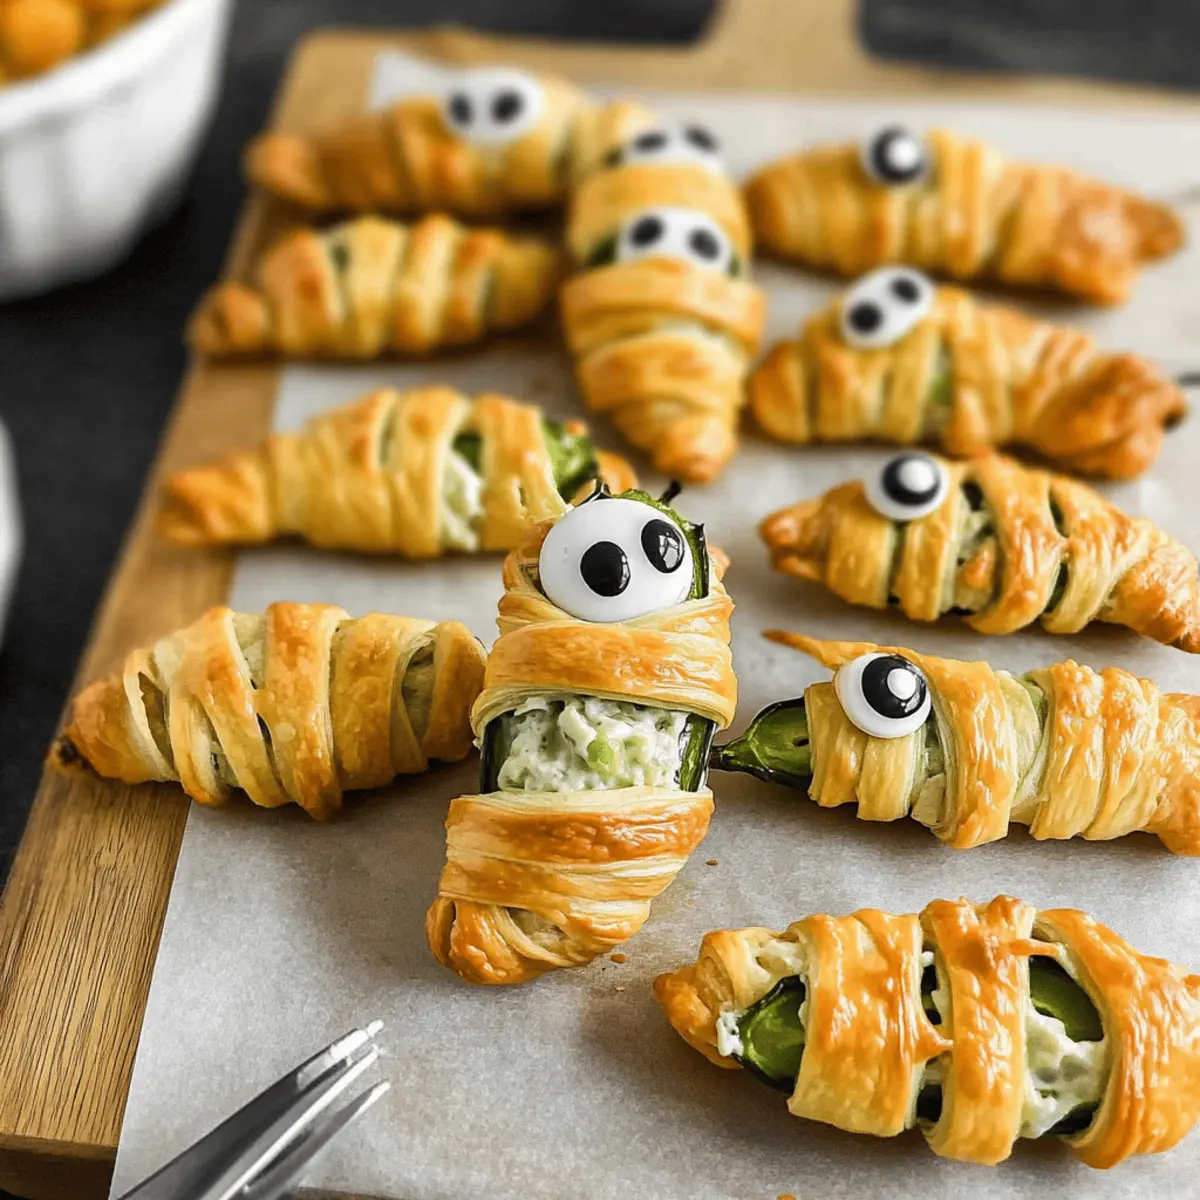
Place the baking sheet in your preheated oven and bake for approximately 15-20 minutes, or until the dough is golden brown and the jalapeños are tender. Keep an eye on them during the last few minutes to ensure they don’t over-bake, achieving that perfect crispy exterior while the creamy filling remains luscious inside.
Step 8: Get Creative with Eyes
Once baked, remove the Jalapeno Mummies from the oven and let them cool for a minute. While they’re still warm, add mini candy eyeballs to the open space at the top of each mummy for that extra fun Halloween touch. These playful decorations will surely delight everyone at your gathering!
Step 9: Serve and Enjoy
Serve your Jalapeno Mummies warm while the gooey cheese is still melty and inviting. For a complete snack experience, consider offering dipping sauces like ranch or homemade salsa alongside for your guests to enjoy. These spooky snacks will bring both flavor and festivity to your Halloween party!
Jalapeño Mummies Variations & Substitutions
Feel free to play around with your Mummy Jalapeño Poppers for a custom twist that tantalizes your taste buds!
- Dairy-Free: Swap cream cheese and Monterey Jack with plant-based cheeses to enjoy a vegan-friendly version without sacrificing flavor.
- Herb-Infused: Add fresh herbs such as cilantro or parsley to the filling for a refreshing twist that brightens each bite.
- Spicy Kick: Incorporate diced jalapeños or crushed red pepper flakes into the filling for an extra heat boost that spice lovers will adore.
- Crunchy Topping: Sprinkle some panko bread crumbs on top before baking for an added crunch that contrasts beautifully with the creamy filling.
- Puff Pastry Magic: Instead of crescent roll dough, use puff pastry for a flakier texture that holds the cheesy goodness comfortably inside.
- Meat Lover’s Delight: Add crumbled cooked bacon or chorizo to the cheese filling for a savory twist that adds depth and extra flavor.
- Sweet Surprise: Try adding a touch of honey or maple syrup to the cheese filling to balance the spicy jalapeños with a hint of sweetness.
- Mini Versions: Use bite-sized sweet peppers instead of jalapeños for smaller, kid-friendly poppers that are perfect for dipping!
These fun variations ensure your Jalapeño Mummies will be a hit. Serve with a creamy dip, like ranch dressing, or your favorite homemade salsa to elevate the experience!
Make Ahead Options
These Jalapeño Mummies are perfect for busy cooks looking to save time during Halloween festivities! You can prepare the creamy filling up to 24 hours in advance and store it in an airtight container in the refrigerator. Additionally, you can stuff the jalapeños and wrap them with dough before your event, refrigerating the assembled mummies for up to 3 days. To maintain quality, cover the baking sheet tightly with plastic wrap or foil. When you’re ready to delight your guests, simply remove the cover and bake straight from the refrigerator for about 20-25 minutes or until golden brown. This way, you can enjoy your party without spending too much time in the kitchen!
How to Store and Freeze Jalapeño Mummies
Fridge: Store leftover Jalapeño Mummies in an airtight container for up to 2 days. This keeps them fresh and prevents drying out.
Freezer: If you want to save them for later, freeze unbaked wrapped jalapeños in a single layer. Once frozen solid, transfer them to a freezer bag and store for up to 2 months.
Reheating: To reheat baked Jalapeño Mummies, place them in a preheated oven at 375°F (190°C) for about 10-12 minutes, ensuring they regain their crunchiness.
Airtight Guidance: Always make sure your storage container is airtight to maintain freshness and flavor in your Jalapeño Mummies.
What to Serve with Jalapeño Mummies?
Treat your guests to a delightful spread by pairing these playful snacks with a collection of complementary sides and drinks.
- Creamy Guacamole: This fresh avocado dip brings creamy richness that contrasts beautifully with the spicy jalapeños.
- Zesty Ranch Dip: A classic choice, this cooling ranch dip balances the heat and adds a tangy punch with each bite.
- Sweet Corn Salsa: The sweetness of the corn salsa pairs perfectly with the kick of the jalapeño mummies, creating a refreshing flavor combination.
- Crispy Potato Wedges: Serving crispy potato wedges adds a hearty texture, making it a satisfying addition to your Halloween spread.
- Mixed Green Salad: The crunch of a fresh salad with a light vinaigrette offers a light contrast to the heaviness of the mummies.
- Sparkling Apple Cider: This festive drink brings a hint of sweetness and effervescence, perfectly complementing the savory snacks for Halloween fun.
- Pumpkin Spice Deviled Eggs: These themed deviled eggs bring seasonal flavor to your table and will enchant your guests as much as the mummies.
- Mini Chocolate Covered Pretzels: A sweet bite at the end will round out your menu nicely, providing a crunchy, sweet finish that everyone will love.
- Cranberry Ginger Ale: The tartness in this drink nicely offsets the spiciness, making it a standout choice for your Halloween gathering.
With this selection, your Jalapeño Mummies will shine even brighter on your table!
Expert Tips for Jalapeño Mummies
-
Properly Dry Peppers: Ensure jalapeños are fully dried to help the dough stick better and avoid sogginess after baking.
-
Choose Your Heat: For a milder version, switch out jalapeños for mini sweet peppers. This keeps the festive spirit while catering to spice-sensitive guests.
-
Bake to Perfection: Keep a close eye on baking time; every oven is different! Aim for a golden-brown color to ensure the dough is crispy but not overcooked.
-
Experiment with Cheese: Feel free to mix up the cheeses based on your preferences. Trying gouda or pepper jack can add a delicious twist to your Jalapeño Mummies.
-
Serve Immediately: For the best experience, serve these spooky bites warm and fresh from the oven. Consider reheating in the oven to maintain crispness for any leftovers.
Jalapeño Mummies Recipe FAQs
How do I choose the right jalapeños for making Jalapeño Mummies?
Absolutely! Look for firm, shiny jalapeños without dark spots or blemishes. They should be vibrant and slightly fragrant. Choosing peppers that are uniform in size ensures even cooking, and don’t hesitate to sample a few to find your preferred level of heat!
How should I store leftover Jalapeño Mummies?
Very! Store any leftover Jalapeño Mummies in an airtight container immediately after they cool. They will stay fresh in the fridge for up to 2 days. Be sure to keep them sealed to prevent them from drying out!
Can I freeze Jalapeño Mummies?
Absolutely! If you’d like to enjoy them later, freeze the unbaked wrapped jalapeños. Place them in a single layer on a baking sheet until frozen solid, then transfer them to a freezer bag. They can last up to 2 months. When you’re ready to bake them, no need to thaw—just pop them in the oven and add a few extra minutes to the baking time.
What should I do if my dough gets soggy after baking?
If your dough ends up soggy, it could be due to moisture from the jalapeños. To avoid this, be sure to dry the peppers after washing them, and ensure you’re not overstuffing them with the filling. A light coating of oil or butter on the dough can also help create a shield against moisture.
Are Jalapeño Mummies safe for vegetarians?
Yes, these delicious Jalapeño Mummies are suitable for vegetarians! The ingredients mainly consist of cheese, peppers, and dough. However, if you have lactose intolerance, try using dairy-free cream cheese and ensure to check the dough ingredient list for any hidden animal products.
Can I make Jalapeño Mummies ahead of time?
Of course! You can prepare the filling and stuff the jalapeños a day in advance. Store them in an airtight container in the fridge until you’re ready to wrap them in dough and bake. This makes your party prep a breeze while allowing the flavors to meld beautifully!
Jalapeno Mummies: Spooky Snacks to Wow Your Halloween Party
Ingredients
Equipment
Method
- Preheat your oven to 375°F (190°C) and line your baking sheet with parchment paper.
- In a medium mixing bowl, combine all filling ingredients and mix until smooth.
- Slice jalapeños in half and fill with the creamy cheese mixture.
- Roll out the crescent roll dough and cut into strips about ½ inch wide.
- Wrap the dough strips around the stuffed jalapeños, leaving gaps for eyes.
- Whisk egg and milk together, then brush over the wrapped jalapeños.
- Bake for 15-20 minutes until golden brown and the jalapeños are tender.
- Add mini candy eyeballs to the top of each mummy while still warm.
- Serve warm with dipping sauces like ranch or salsa.
")