")
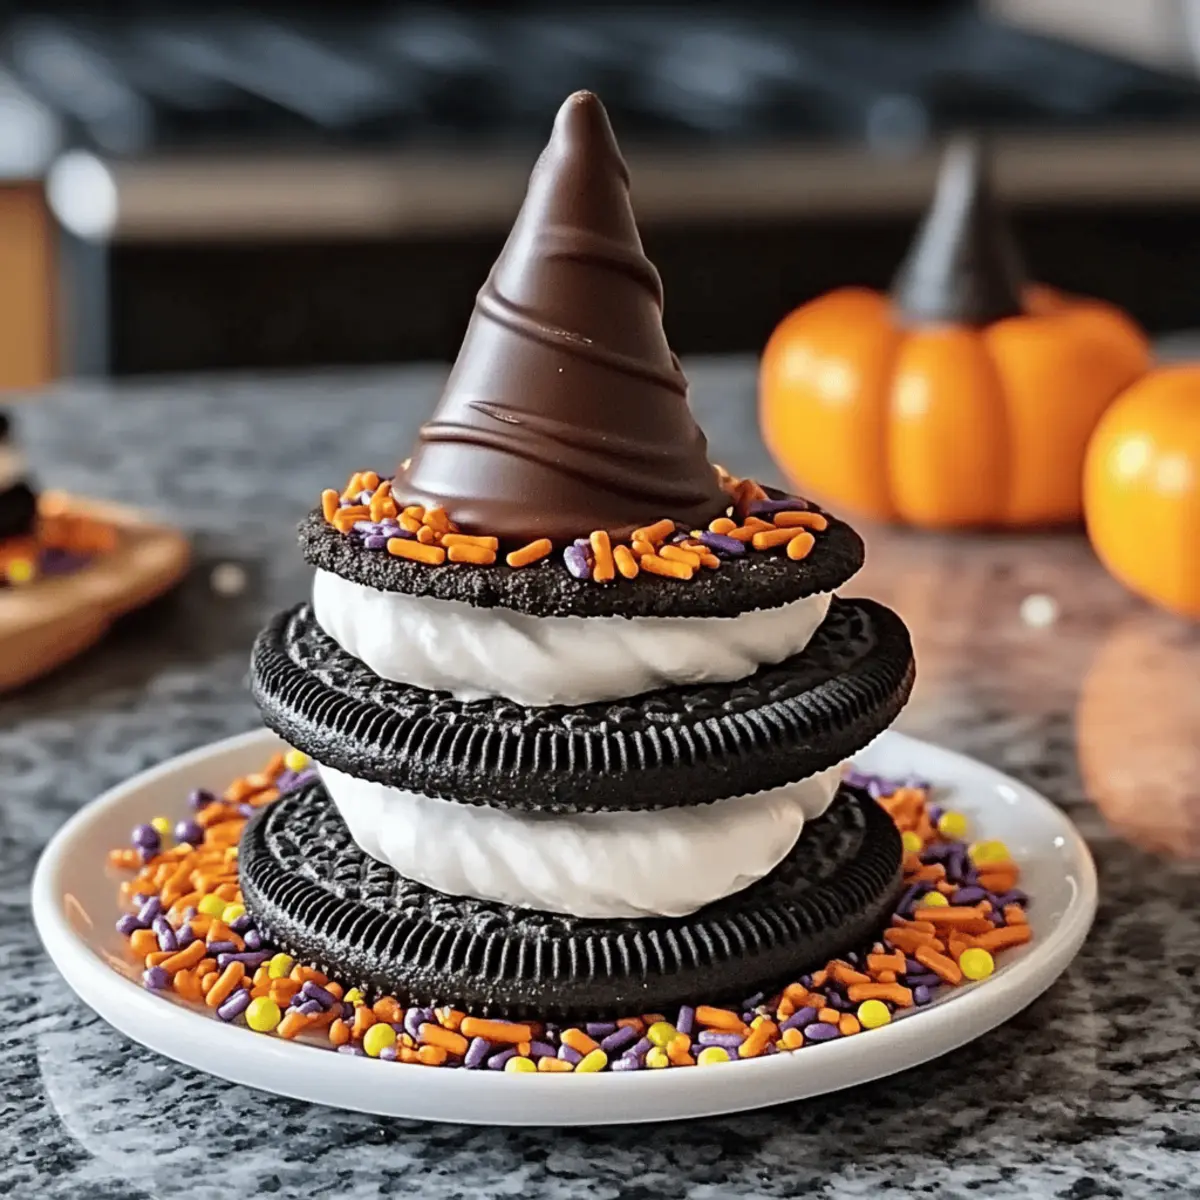
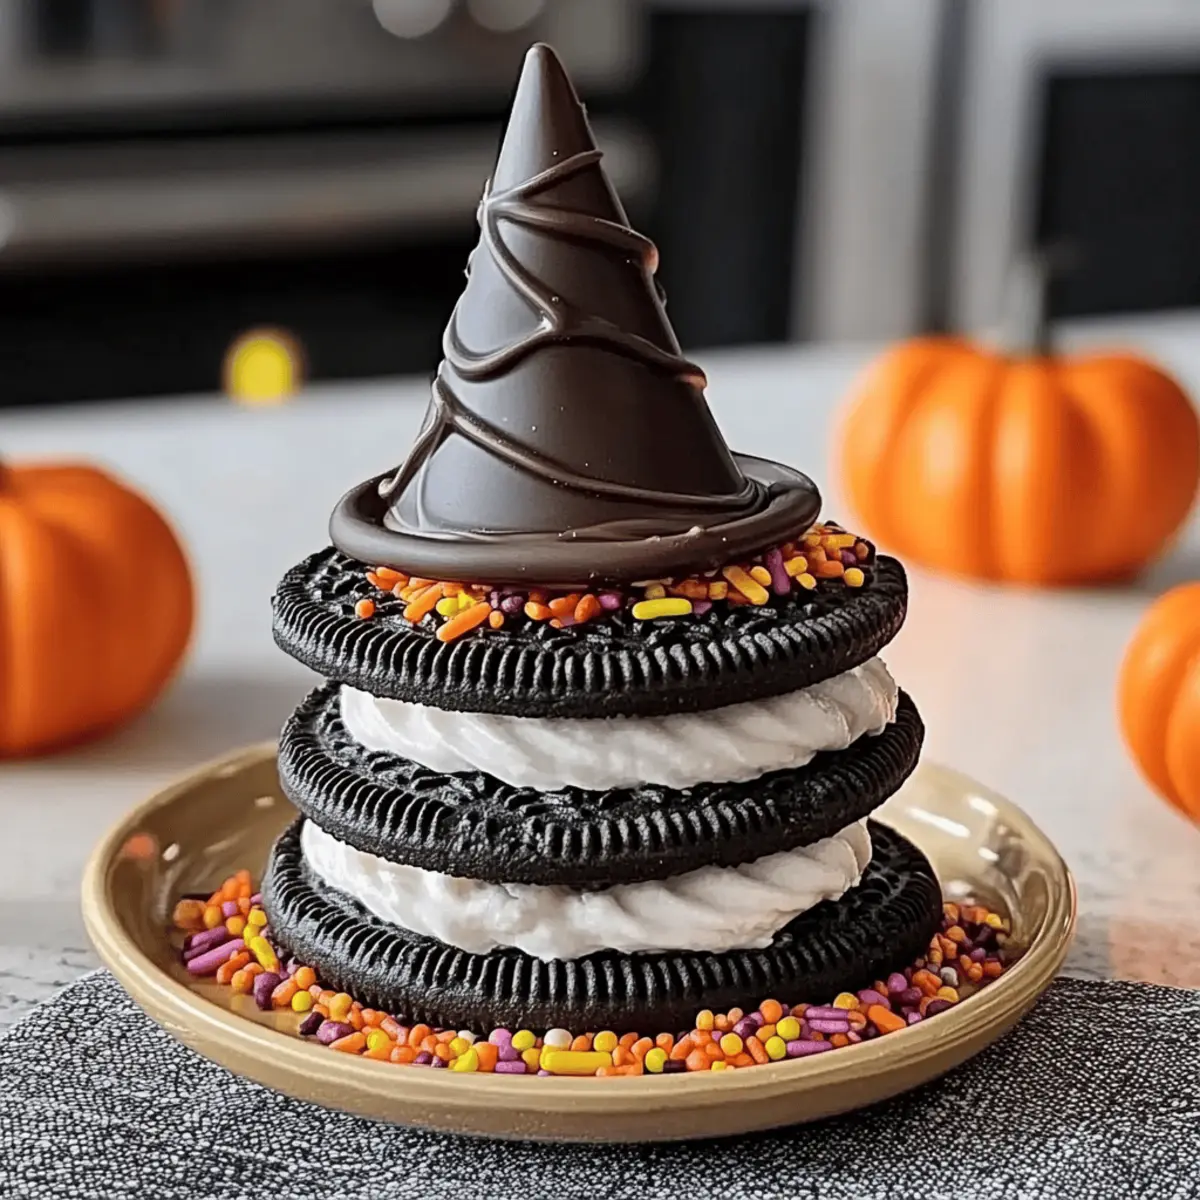
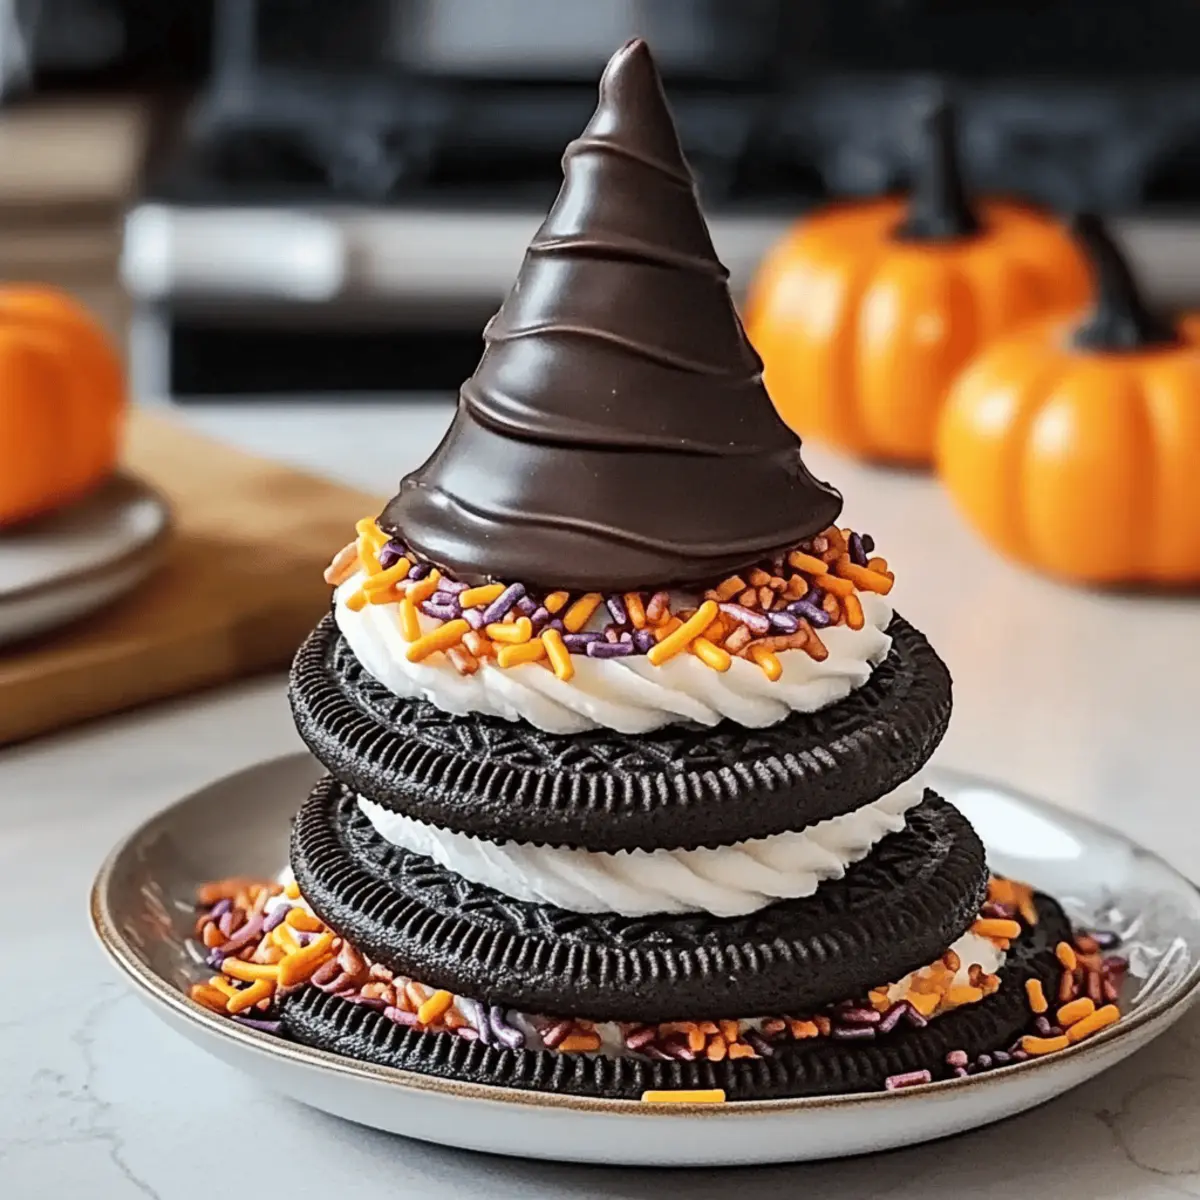
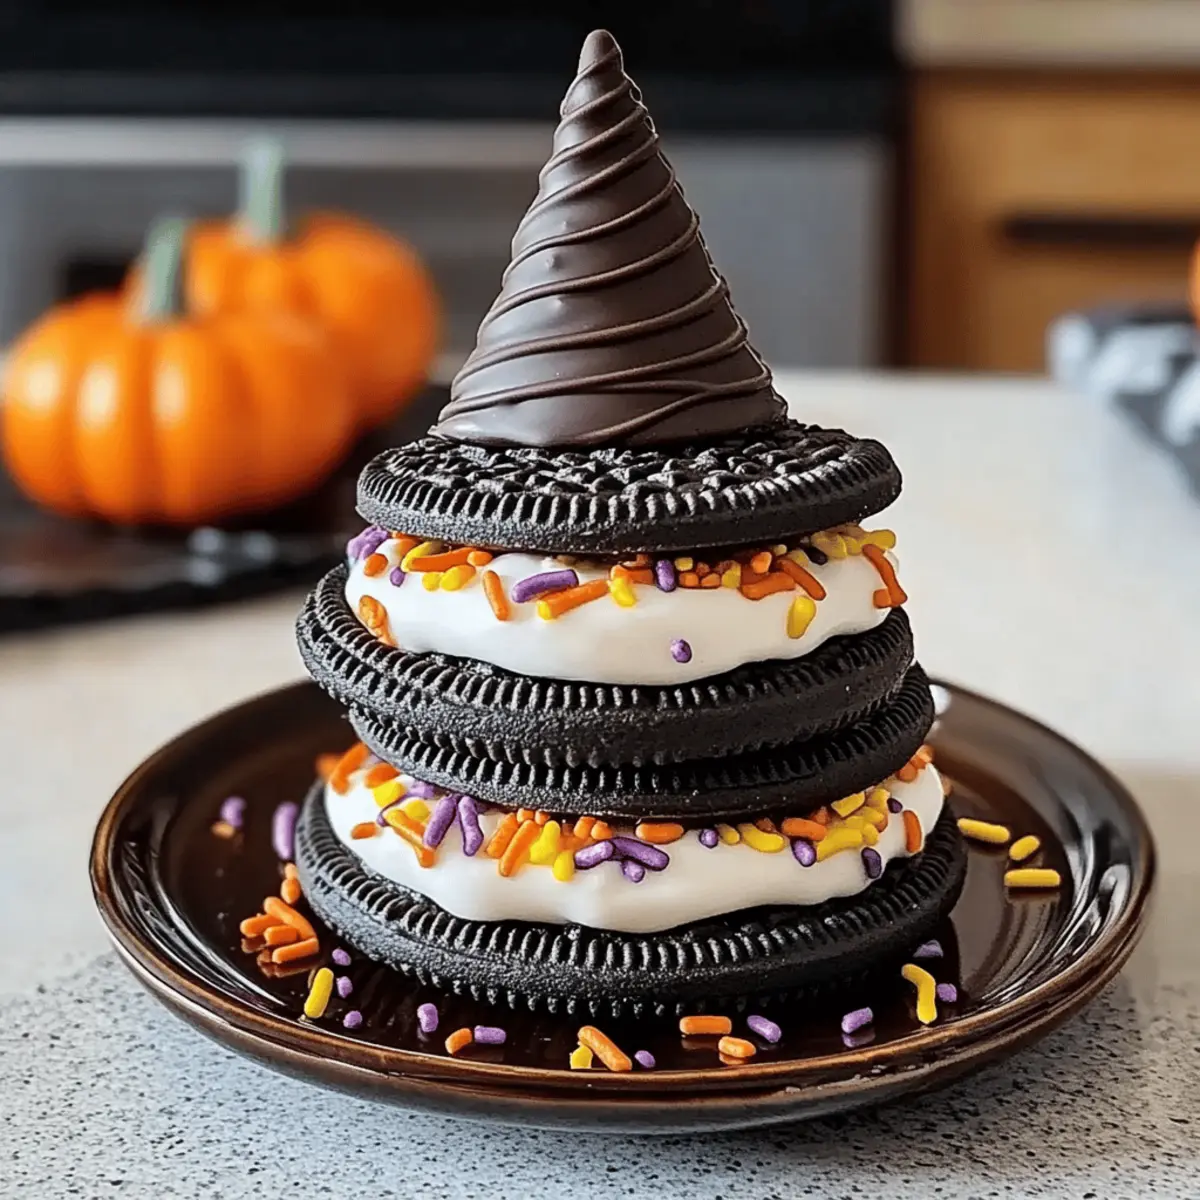
As leaves turn crisp and the air fills with a hint of magic, I find myself swept away in the charm of Halloween. This season invites us to embrace creativity in the kitchen, and what better way to kick off the festivities than with these delightful Oreo Witch Hat Cookies? Perfect for all ages, these easy no-bake treats feature a crunchy Oreo base, a creamy filling peeking out like a playful ghost, and a delicious chocolate kiss crowning each cookie. Not only are they a fun addition to any Halloween gathering, but their customizable twist makes them a fantastic activity for family baking days too. What’s your favorite spooky treat to make? Let’s dive into crafting these whimsical cookies together!
Why Are Oreo Witch Hat Cookies Fun?
Spooky, Fun Presentation: These cookies are not just delicious; they’re a festive showstopper that brings the magic of Halloween to your table.
Easy No-Bake Recipe: With minimal steps and no baking required, this is a stress-free treat that anyone can whip up.
Endless Customization: From using various flavored Oreos to unique toppings like gummy worms or colorful sprinkles, you can easily personalize these cookies to fit any Halloween theme.
Kid-Friendly Activity: Perfect for family baking days, kids will love getting involved, creating their own spooky designs, and sharing them with friends.
Perfect for Gatherings: These cookies are an instant crowd-pleaser, great for serving at Halloween parties or while enjoying a spooky movie night.
Once you create these, you might also want to explore other delightful recipes like Millies Cookies Bake or Cool Whip Cookies to keep the sweetness flowing!
Oreo Witch Hat Cookies Ingredients
For the Cookie Base
• Oreo cookies – The crunchy foundation of your witch hats, providing that classic chocolate flavor.
For the Filling
• Butter (softened) – Essential for a smooth and creamy filling; be sure it’s at room temperature for best results.
• Powdered sugar – Sweetens up the filling, creating a light and fluffy texture that’s irresistible.
For the Topping
• Chocolate kisses – The crowning element that gives these cookies their whimsical witch hat look; swap for candy corn for a different flair!
• White chocolate chips – Melt and drizzle for added sweetness and a gorgeous visual effect.
• Colorful sprinkles – Sprinkle on top to enhance festivity and fun; choose any style to suit your Halloween theme.
Step‑by‑Step Instructions for Oreo Witch Hat Cookies
Step 1: Preheat the Oven
Begin by preheating your oven to 350°F (175°C). While the oven is warming up, gather all your ingredients and a baking sheet lined with parchment paper. This preparation will set the stage for your Oreo Witch Hat Cookies, ensuring that everything is at hand when you start assembling your delightful treats.
Step 2: Separate the Oreos
Carefully twist apart the Oreo cookies, isolating the cream filling side from the cookie side. You’ll be using the cookie halves without the cream for the base of your witch hats. Place these cookie halves cream side down on your parchment-lined baking sheet, giving you a sturdy foundation for your cookies to stand tall.
Step 3: Make the Creamy Filling
In a medium mixing bowl, combine the softened butter and powdered sugar. Use a hand mixer to beat them together until the mixture is light and fluffy, about 2-3 minutes. This creamy filling will soon be sandwiched between the cookies, adding a deliciously sweet touch to your Oreo Witch Hat Cookies.
Step 4: Assemble the Cookies
Take the creamy filling you prepared and generously spread it over the cream-less side of one Oreo half. Then, take another Oreo half and press it down on top, creating a sandwich. Ensure that the filling presses out slightly for that cute ghostly peek. Repeat this process with the remaining cookies until all have a sweet filling.
Step 5: Add the Chocolate Kisses
Unwrap your chocolate kisses and place them in a microwave-safe bowl. Heat them in the microwave for about 30 seconds, stirring halfway through, until just melted. Carefully place one melted kiss on top of each assembled Oreo cookie, pressing gently to secure it in place to complete the whimsical witch hat look.
Step 6: Drizzle with White Chocolate
In a separate microwave-safe bowl, melt the white chocolate chips as you did with the kisses. Once melted and smooth, take a spoon and drizzle the warm white chocolate over each cookie. This adds sweetness and a decorative flair that enhances your Oreo Witch Hat Cookies’ appeal—let your creativity shine here!
Step 7: Add Colorful Sprinkles
While the white chocolate drizzle is still wet, sprinkle your colorful decorations generously over the cookies. Choose sprinkles that match your Halloween theme, and let them stick to the chocolate for a fun, festive touch. The bright colors will make your cookies pop and be even more enticing for your guests.
Step 8: Cool and Serve
Transfer the assembled Oreo Witch Hat Cookies to a wire rack to cool completely. This will allow the chocolate to harden slightly, making them easier to handle. Once cooled, these delightful treats are ready to serve at parties, family gatherings, or for a spooky movie night—enjoy the smiles they bring!
What to Serve with Tasty Oreo Witch Hat Cookies
These whimsical treats will enchant any gathering, making every bite a delightful experience filled with sweet surprises.
-
Spooky Fruit Salad: Combine colorful fruits like oranges, apples, and grapes to create a fresh and vibrant contrast to the rich cookies. The crispness of the fruit pairs perfectly, providing a refreshing palate cleanser.
-
Pumpkin Spice Latte: Embrace the autumn flavor with this warm drink that complements the chocolatey sweetness of the cookies. It’s the perfect cozy addition to any Halloween gathering.
-
Chocolate Milkshake: Indulge in creamy chocolate goodness that enhances the cookie experience. The rich flavors of the milkshake resonate with the chocolate kiss on each cookie, making it a match made in dessert heaven.
-
Ghostly Marshmallow Popcorn: For a crunchy, sweet side, serve popcorn coated in melted white chocolate and mini marshmallows. This fun treat adds texture and a playful element to your dessert table.
-
Caramel Apple Slices: Sliced apples drizzled with caramel offer a sweet and slightly tart contrast to the cookies. Dip them on the side for a fun and interactive treat.
-
Gummy Worms: Enhance the Halloween theme by adding gummy worms around the cookie display. Their playful aspect brings a festive flair and encourages kids to join in on the fun!
-
Apple Cider: Sip on warm spiced apple cider as a cozy drink to accompany your cookies. The apple’s sweetness and spices create a harmonious vibe with your Halloween treats.
-
Vanilla Ice Cream: Serve alongside for a decadent pairing—the melting ice cream against the crunchy cookies creates a deliciously creamy experience.
-
Witch’s Brew Punch: A spooky punch with green fruit juices and soda can be a fun and thematic drink to serve. Its bright color complements the festive spirit of your cookies, ensuring a memorable Halloween gathering!
Oreo Witch Hat Cookies Variations
Inviting a world of creativity, these Oreo Witch Hat Cookies beckon you to customize and elevate your festive treats.
-
Flavorful Oreos: Try using seasonal flavored Oreos like pumpkin spice or candy cane for a delightful twist.
-
Candy Swap: Instead of chocolate kisses, use candy corn or gummy worms to give your cookies a unique flair. Candy corn offers a classic Halloween vibe, while gummy worms add a fun touch that kids will love!
-
Alternative Drizzles: Swap white chocolate for dark chocolate or even caramel drizzle for a richer taste and different look that will tantalize your taste buds.
-
Sprinkle Varieties: Choose sprinkle mixes with Halloween shapes for a fun touch—you can use bats, ghosts, or pumpkins to bring your cookies to life. This theme adds an engaging visual element to your treats.
-
Crunch Factor: Introduce crushed nuts or pretzels into the filling for an added crunch and saltiness that balances the sweetness perfectly, giving a delightful texture contrast.
-
Extra Creaminess: Fold in some cream cheese into the filling for a tangy twist that pairs wonderfully with the sweetness and offers a luxuriously creamy texture.
-
Spiced Touch: Add a dash of cinnamon or pumpkin spice to the filling for a warm, cozy flavor reminiscent of autumn, elevating your cookies from treat to seasonal delight.
-
Fun Shapes: Instead of traditional witch hats, use Halloween-themed cookie cutters to shape your Oreos, turning them into spooky ghosts or playful pumpkins that will spark joy during the season.
These variations not only make your Oreo Witch Hat Cookies exciting, but they’re also perfect for creating delightful themes for your Halloween gatherings! Looking for more sweet inspiration? Don’t miss out on trying Chocolate Chips Cookies or discover the joy of Cake Mix Cookies!
Make Ahead Options
These Oreo Witch Hat Cookies are perfect for busy home cooks who appreciate time-saving meal prep! You can assemble the cookie sandwiches with the creamy filling up to 24 hours in advance, storing them in an airtight container in the refrigerator. This allows the flavors to meld beautifully while keeping them fresh. For optimal texture, melt the chocolate kisses and drizzle with white chocolate just before serving, ensuring a lovely finish. If you want to prepare them even further in advance, you can also separate the Oreos and make the filling up to 3 days ahead; just remember to keep everything covered to maintain their quality and freshness. There’s nothing like having these delightful treats ready to go when Halloween rolls around!
Expert Tips for Oreo Witch Hat Cookies
-
Room Temperature Butter: Ensure your butter is softened at room temperature to create a smooth and fluffy filling; cold butter will make mixing difficult.
-
Avoid Chocolate Burn: When melting chocolate for your kisses, do it in 30-second bursts, stirring in between to prevent burning and maintain a silky texture.
-
Creative Variations: Feel free to experiment with different flavored Oreos for your base—mint or pumpkin spice can add surprising twists to your Oreo Witch Hat Cookies.
-
Sprinkle Selection: Choose festive, colorful sprinkles that match the Halloween theme; this simple touch can elevate your cookies and make them more attractive at gatherings.
-
Cool Completely: Allow the cookies to cool completely on a wire rack before serving; this helps the chocolate set and prevents messy handling.
How to Store and Freeze Oreo Witch Hat Cookies
Airtight Container: Store your Oreo Witch Hat Cookies in an airtight container at room temperature for up to 5 days to maintain their delightful crunch and freshness.
Refrigeration: If you prefer, you can refrigerate the cookies for longer life, but make sure to let them come to room temperature before serving for the best texture.
Freezing: For longer storage, these cookies can be frozen for up to 3 months. Use a freezer-safe container, separating layers with parchment paper to prevent sticking.
Thawing: When ready to enjoy your frozen Oreo Witch Hat Cookies, let them thaw in the fridge overnight or at room temperature for about an hour before serving.
Oreo Witch Hat Cookies Recipe FAQs
What type of Oreos should I use for the best flavor?
Absolutely! You can use classic chocolate Oreos for a traditional taste, but I recommend experimenting with flavored Oreos like mint or pumpkin spice for a fun twist. Each unique flavor adds its own character to the cookies, making them even more delightful!
How should I store Oreo Witch Hat Cookies to keep them fresh?
To maintain their delicious crunch and flavor, store your Oreo Witch Hat Cookies in an airtight container at room temperature for up to 5 days. If you’d like to extend their shelf life, you could refrigerate them, but remember to let them return to room temperature before serving for the best texture.
Can I freeze Oreo Witch Hat Cookies? How?
Yes, you can freeze these whimsical cookies for up to 3 months! To do so, place them in a freezer-safe container, ensuring that you separate layers with parchment paper to prevent them from sticking together. When you’re ready to enjoy, let them thaw in the fridge overnight or at room temperature for about an hour.
What should I do if my chocolate kisses are not melting properly?
If your chocolate kisses aren’t melting as they should, don’t despair! Try microwaving them in shorter bursts of 15 seconds, stirring in between until they’re fully melted. This method helps prevent burning, ensuring your chocolate remains smooth and easy to drizzle over the cookies.
Can I make these cookies allergy-friendly?
Very! To make these cookies allergy-friendly, you can use gluten-free Oreos and dairy-free butter alternatives. Always check the packaging for any allergen warnings to be certain, especially for cross-contamination. Your guests will appreciate the thoughtful accommodation, and they can still enjoy the festive spirit of these cookies!
What if I want to make these cookies with kids? Any tips?
Absolutely! These cookies are a fantastic activity for kids in the kitchen! I recommend setting up a decorating station with various toppings and let the kids unleash their creativity by making their own spooky designs. Just ensure they understand the steps for melting chocolate carefully, and the rest of the process is simple and fun for them to engage in!
Oreo Witch Hat Cookies
Ingredients
Equipment
Method
- Begin by preheating your oven to 350°F (175°C) and gather ingredients and a lined baking sheet.
- Carefully twist apart the Oreo cookies and place the cookie halves cream side down on the baking sheet.
- In a mixing bowl, beat softened butter and powdered sugar until light and fluffy, about 2-3 minutes.
- Spread creamy filling over the cream-less side of one Oreo half and sandwich it with another half.
- Melt chocolate kisses in the microwave for about 30 seconds and place one melted kiss on each cookie.
- Melt white chocolate chips and drizzle over each cookie for added sweetness and decoration.
- While the white chocolate is still wet, sprinkle colorful decorations over the cookies.
- Cool assembled cookies on a wire rack before serving.
")