")
As the leaves turn and the air gets a bit crispier, it’s time to conjure up some Halloween magic in the kitchen! Halloween is my favorite season, and what better way to celebrate than with a spooktacular Hocus Pocus Snack Board? This fun, themed charcuterie board is not only a feast for the eyes but also a delightful mix of savory and sweet treats that your guests will adore. With its quick assembly and endless customization options, it’s perfect for a cozy movie night or a lively Halloween bash. Plus, the whimsical presentation inspired by the Sanderson Sisters will spark joy and laughter amongst everyone gathered. Are you ready to create your own enchanting board?
Why is the Hocus Pocus Snack Board so delightful?
Uniquely Themed: This Hocus Pocus Snack Board brings the magic of Halloween to your table, combining delightful flavors with a visually captivating design inspired by the classic movie.
Quick Assembly: Perfect for those busy days, this recipe allows for creative assembly in under 30 minutes, making it a stress-free option for any gathering.
Customizable Options: Tailor the ingredients to fit your tastes or dietary needs by swapping out fruits or cheeses. Want a twist? Try using gluten-free crackers, or check out this Peanut Butter Snack for a delightful addition!
Crowd Pleaser: Whether it’s a cozy movie night or a Halloween party, this board will make everyone smile, inviting guests to dig in and enjoy.
Flavor Fusion: Experience the perfect blend of creamy, crunchy, and sweet with each bite, ensuring a delightful snack experience that’s sure to impress your guests!
Hocus Pocus Snack Board Ingredients
-
For the Faces
• Brie Cheese – The star of your board, creating the “faces” of the Sanderson sisters; substitute with other soft cheeses if desired.
• Black Olives – Sliced to make expressive eyes for each Brie witch; can also use capers for a different flavor.
• Twizzlers Pull and Peel Licorice – Shredded for fun, whimsical lips on each cheese wheel; perfect for adding a pop of color. -
For the Hair and Dresses
• Popcorn – Represents one sister’s hair, adding a delightful crunch; use classic or kettle corn for extra flavor.
• Pepperoni – Rolled to mimic Winifred’s curly hair; prosciutto or salami are great alternatives if preferred.
• Blackberries – Creates vibrant hair for Mary while providing a burst of sweetness; feel free to swap with blueberries.
• Green Grapes – Perfect for forming Winifred’s dress, adding a touch of sweetness.
• Small Oranges – Offers a bright contrast, representing part of Mary’s dress.
• Raspberries – Add color and sweetness for Sarah’s dress; you could also use strawberries for a twist. -
For Decoration
• Sliced Cheese – Use your favorite light-colored cheese to cut shapes for fun bats and broomsticks; cheddar or mozzarella work beautifully.
• Crackers/Chips – Serve alongside your board for added crunch; consider gluten-free options for dietary restrictions.
Feel free to personalize your Hocus Pocus Snack Board by mixing and matching ingredients to create a unique display that will enchant your guests this Halloween season!
Step‑by‑Step Instructions for Hocus Pocus Snack Board
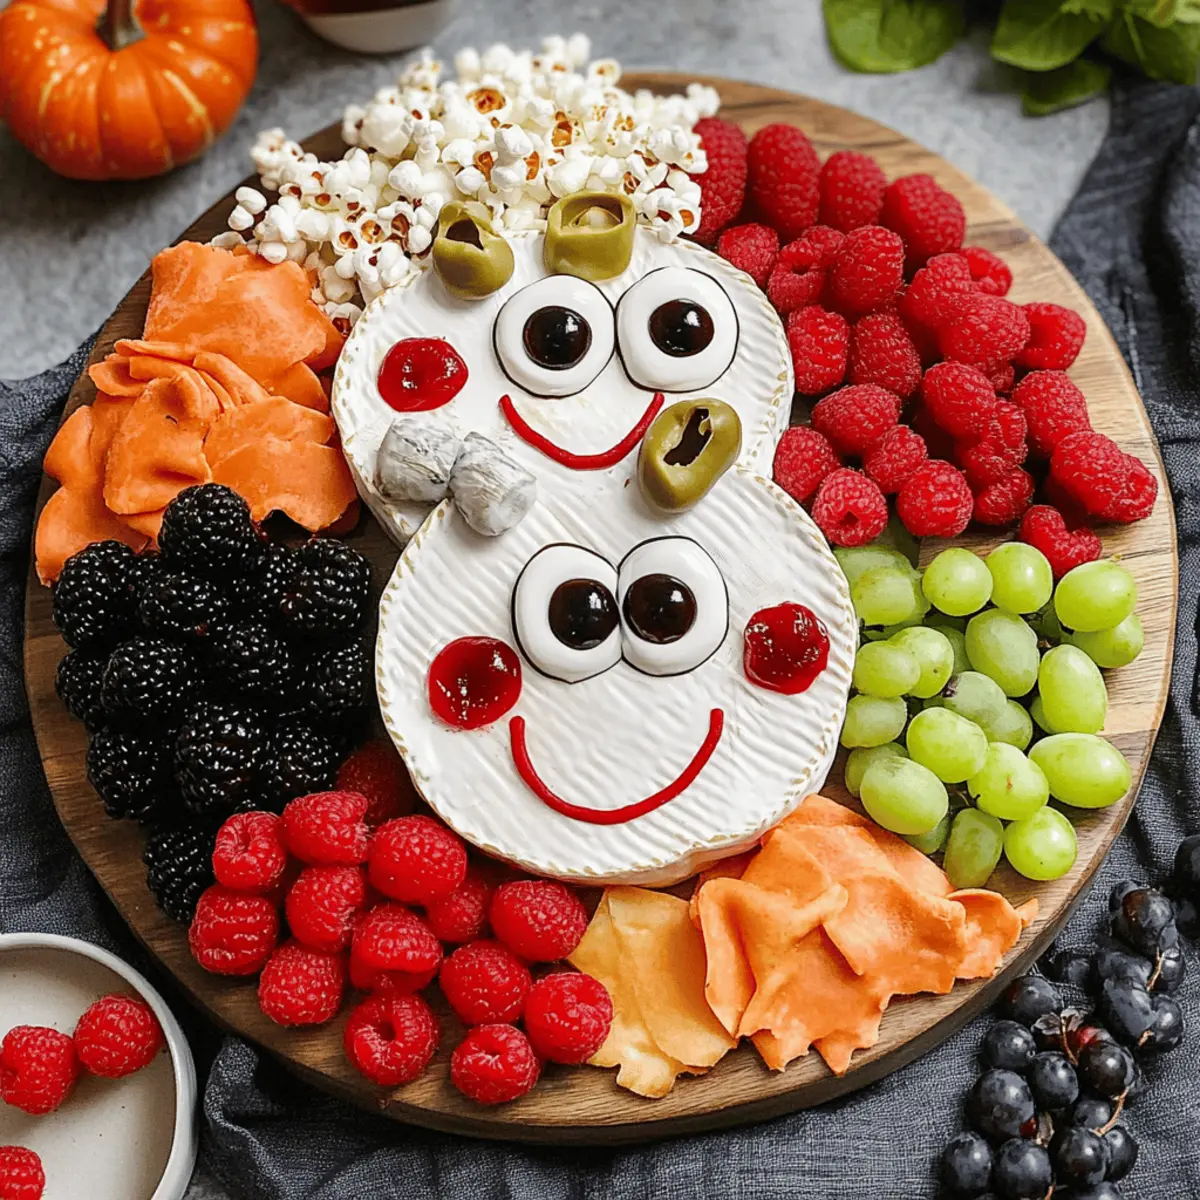
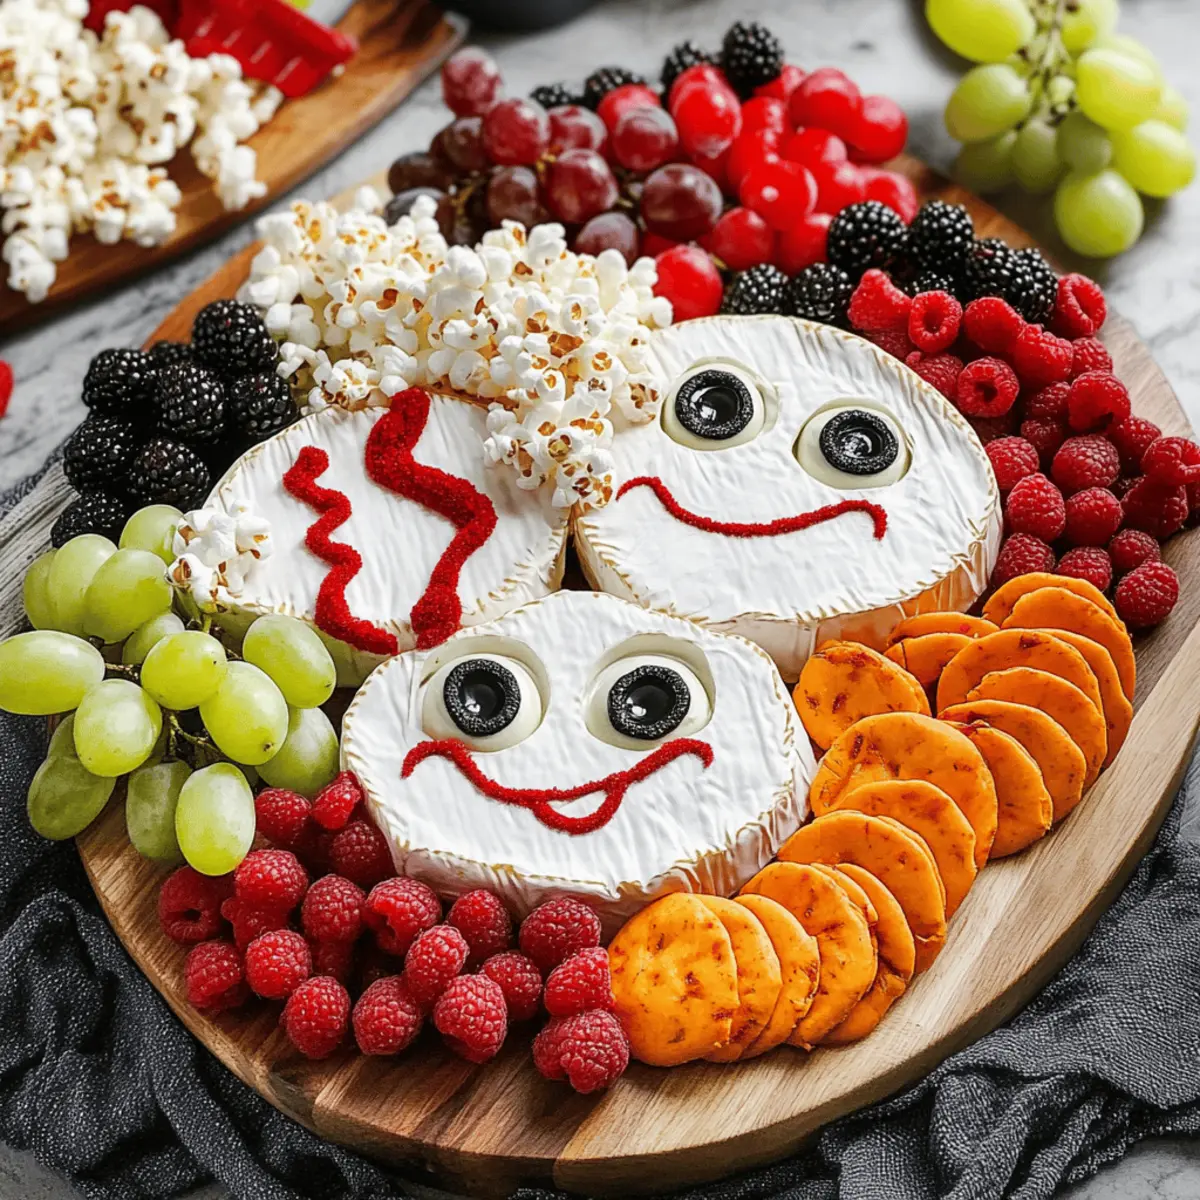
Step 1: Arrange the Brie Cheese
Start by placing three rounds of brie cheese on a large wooden or ceramic board. Ensure there’s ample space between each wheel to create the faces of the Sanderson Sisters. This will allow you to visually separate each character, making a delightful presentation that draws the eye immediately.
Step 2: Create Whimsical Lips
Using Twizzlers Pull and Peel Licorice, cut and stretch pieces to create playful lips for each Brie wheel. Take a moment to mold the licorice into fun shapes that enhance the character of each sister, adding whimsy to your Hocus Pocus Snack Board.
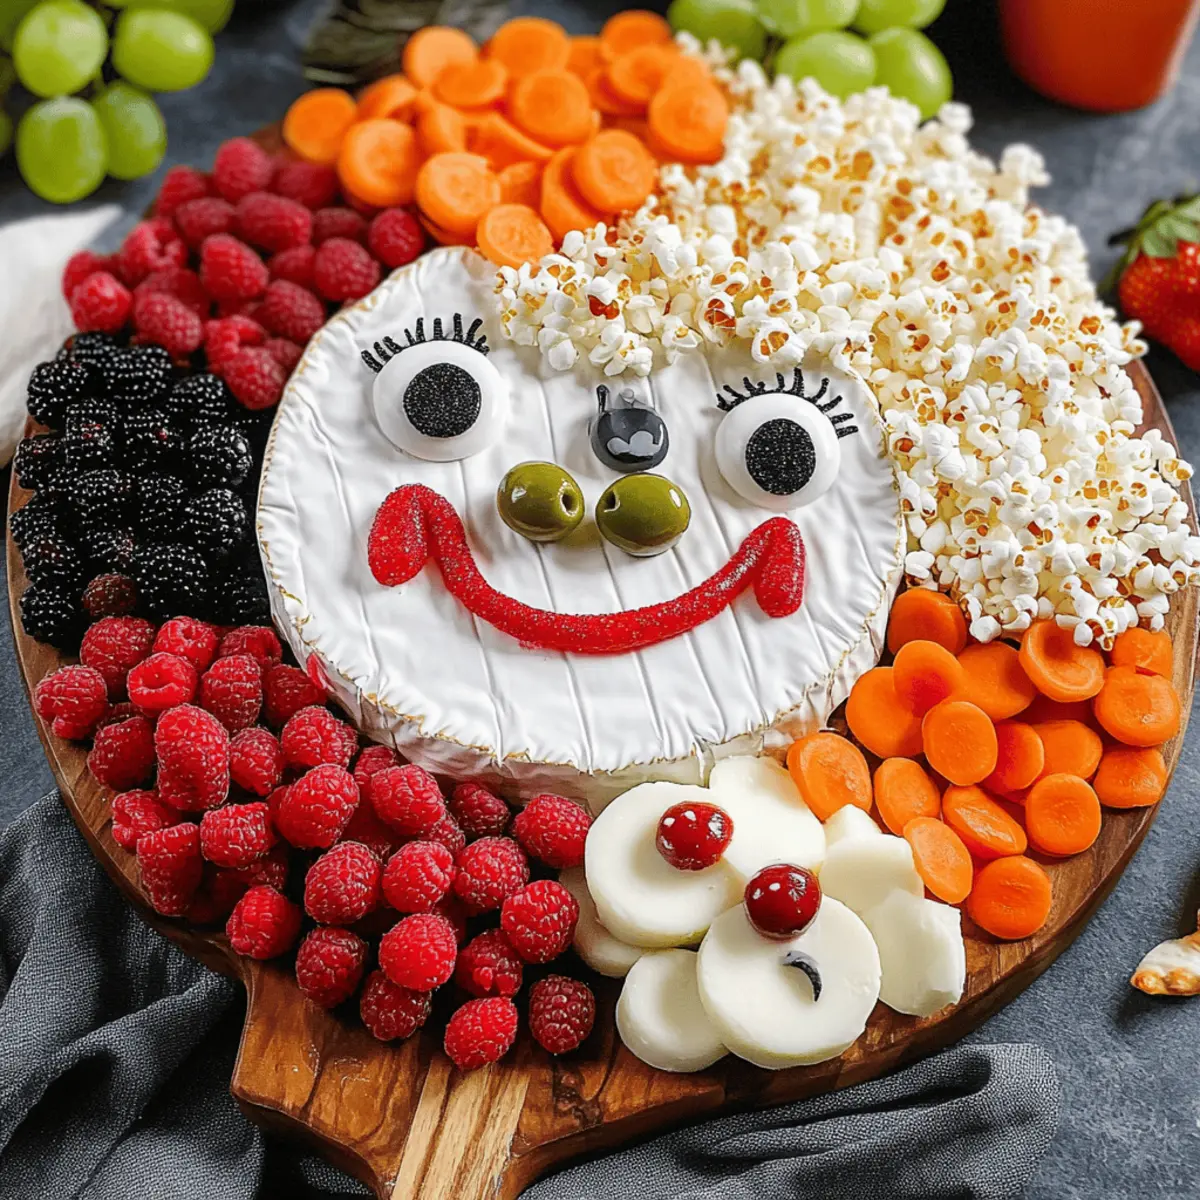
Step 3: Add Playful Eyes
Slice black olives into halves, then gently place them on each brie wheel to form the eyes of the cheese witches. Position the olives securely so that they stand out, giving the board a charming and lively appearance that your guests will love.
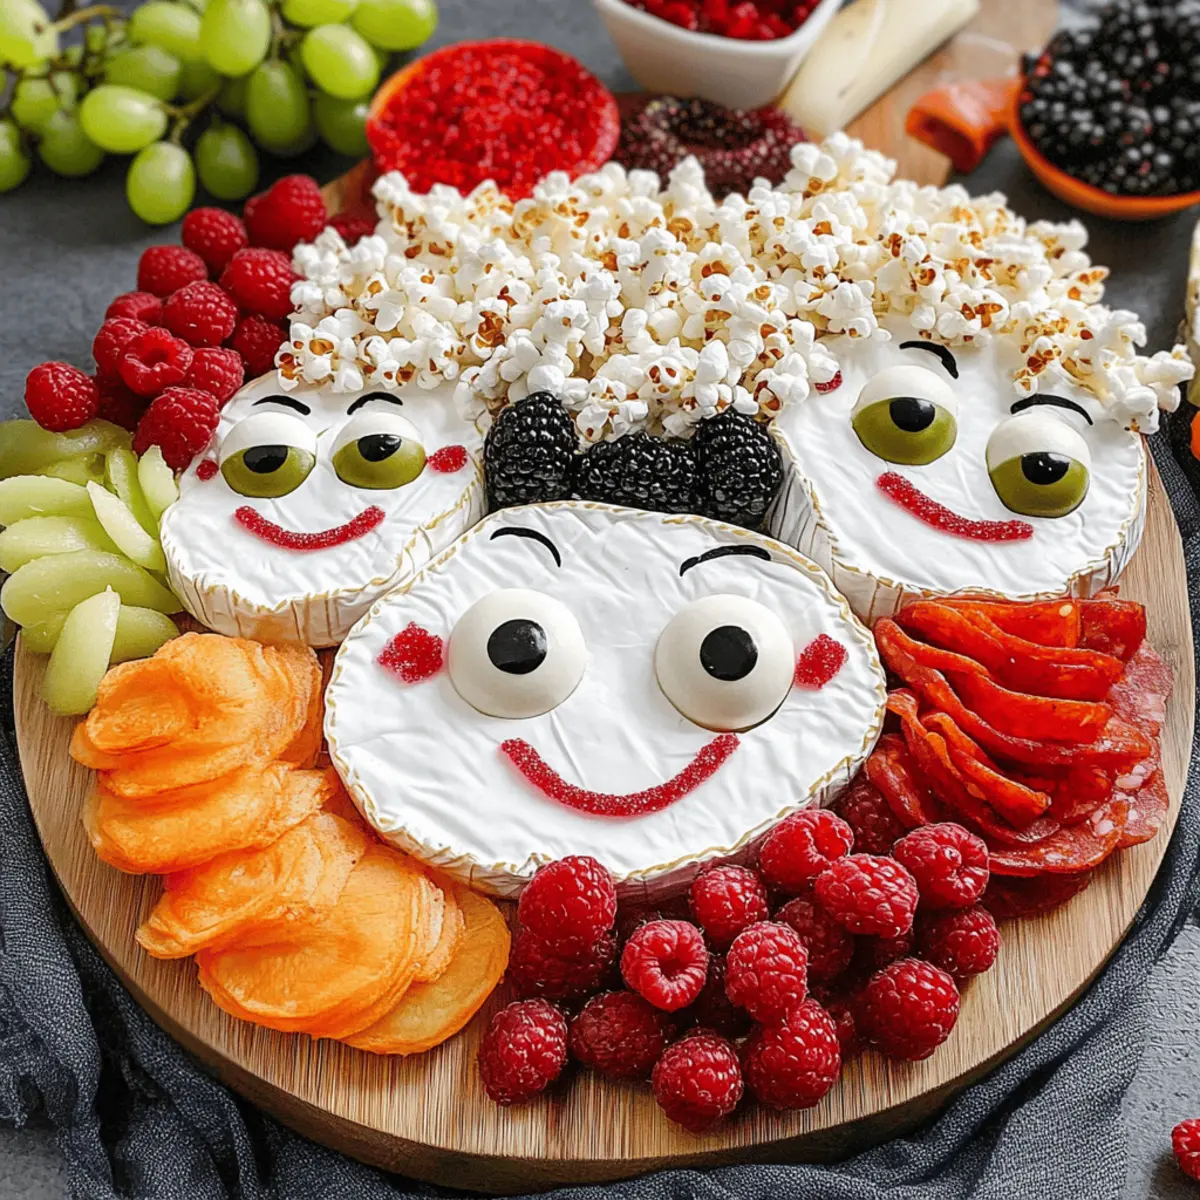
Step 4: Style Sarah’s Hair
To represent Sarah’s hair, grab a generous handful of popcorn and pile it atop one of the Brie wheels. Scatter it around loosely to resemble soft curls, creating a fun texture that evokes the playful spirit of the character and adds an inviting crunch to the board.
Step 5: Create Winifred’s Curly Hairstyle
Roll up slices of pepperoni and use toothpicks to secure them standing upright around Winifred’s Brie wheel. This will emulate her signature curly locks, giving a lively touch to your presentation. As you arrange them, let your creativity flow, angling the slices for maximum visual impact.
Step 6: Stack Mary’s Hair
For Mary’s hair, take a few blackberries and layer them on top of her Brie wheel. Stack the blackberries high to give a voluminous look, which provides a beautiful contrast against the creamy cheese and adds a sweet touch to the overall flavor of your Hocus Pocus Snack Board.
Step 7: Dress the Sisters
Place raspberries, green grapes, and small orange slices around the Brie wheels to fashion the sisters’ dresses. Use the raspberries for Sarah’s dress, the green grapes for Winifred’s, and the oranges for Mary’s. This colorful combination will heighten the visual appeal and complement the flavors beautifully.
Step 8: Decorate with Cheese Shapes
Cut light-colored cheese into fun shapes like bats and broomsticks to fill empty spaces on the board. Arrange these playful pieces artistically around the Brie wheels to maintain a whimsical theme for your Hocus Pocus Snack Board, ensuring it looks both lavish and inviting.
Step 9: Complete with Crackers and Chips
Finally, fill in any gaps on the board with an assortment of crackers and chips, catering to your guests’ crunch cravings. Provide a variety of shapes and flavors to play off the other elements. This step rounds out your Hocus Pocus Snack Board while also inviting everyone to partake in the fun.
Expert Tips for the Hocus Pocus Snack Board
-
Fresh Ingredients: Assemble your Hocus Pocus Snack Board as close to serving time as possible. This will keep the fruits vibrant and delicious for your guests.
-
Visual Balance: Avoid overcrowding the board. Leave some empty spaces to allow each element to shine, enhancing the overall presentation and making it more inviting.
-
Creative Shapes: Use cheese cutters or fun molds to create themed shapes like bats or broomsticks. This playful touch elevates your board’s aesthetics and matches the Halloween vibe.
-
Alternative Ingredients: Don’t hesitate to swap ingredients to fit dietary needs or enjoy new flavors. For example, try using gluten-free crackers or different varieties of cheese to suit everyone’s preferences.
-
Theme Consistency: Keep all elements aligned with your Hocus Pocus theme. The right colors and shapes create a cohesive look that adds to the festive atmosphere of your gathering.
Make Ahead Options
These Hocus Pocus Snack Boards are perfect for meal prep enthusiasts looking to save time before a party! You can cut and prepare the decorative cheese shapes and wash the fruits up to 24 hours in advance, refrigerating them in airtight containers to keep everything fresh. Additionally, rolling the pepperoni and slicing the olives can also be done ahead of time. Just assemble the board right before serving, layering the ingredients for that magical presentation. This way, you’ll have more time to enjoy the festivities while serving a delightful and whimsical board that’s just as delicious as if you had made it all at once!
How to Store and Freeze Hocus Pocus Snack Board
Fridge: Store any leftover pieces tightly covered with plastic wrap or in an airtight container; best enjoyed within 3-4 days for optimal freshness.
Room Temperature: If you’re serving leftovers, avoid leaving them out for more than 2 hours to maintain food safety, especially with cheese and cut fruits.
Freezer: While it’s not recommended to freeze the assembled Hocus Pocus Snack Board, you can freeze individual components like the cheese or fruits; store them in airtight bags for up to 2 months.
Reheating: If you have leftover cheese and want to enjoy it warm, bringing it to room temperature before serving can enhance its creamy goodness!
What to Serve with Hocus Pocus Charcuterie Board
As you prepare to dazzle your guests with a whimsical spread, consider enhancing the experience with delightful pairings that will elevate the flavors and atmosphere of your Halloween gathering.
-
Halloween-themed Drinks: Pair with spooky cocktails like a Halloween margarita that complements the festive vibe and adds a fun twist.
-
Savory Stuffed Mushrooms: These herb-infused bites are an exquisite contrast to the sweeter elements of the board, offering a burst of umami.
-
Crispy Apple Slices: Featuring fresh, crisp apples will add a refreshing crunch and a touch of sweetness that balances out the board’s rich flavors.
-
Pumpkin Spice Popcorn: This warm snack ties in the seasonality of Halloween, bringing cozy, nostalgic flavors that guests will adore.
-
Roasted Garlic Hummus: Serve alongside pita chips for a creamy dip option that adds a delicious layer to your snack offerings.
-
Chocolate-Covered Pretzels: The sweet and salty combination echoes the playful spirit of the charcuterie while providing a satisfying crunch.
-
Mini Pumpkin Pies: End the evening on a sweet note with bite-sized desserts that resonate with the festive spirit, leaving guests enchanted.
Each of these delightful pairings will harmonize beautifully with your Hocus Pocus Snack Board, ensuring a memorable Halloween celebration!
Hocus Pocus Snack Board Variations
Feel free to get creative and customize your Hocus Pocus Snack Board with these fun and flavorful ideas!
-
Cheese Variety: Opt for goat cheese or aged cheddar for different tastes. Experimenting with cheese can add a whole new dimension to your board.
-
Fruit Swaps: Use seasonal fruits like strawberries instead of raspberries or pineapple for a tropical twist. Each fruit swap invites a refreshing surprise that delights the palate!
-
Savory Alternatives: Try pickles or marinated artichokes in place of olives for a zesty kick. Tangy bites can perfectly complement the rich flavors of the cheese.
-
Sweet Additions: Incorporate candy corn or chocolate-covered pretzels for a sugary touch. Not only do they add a sweet note, but they also enhance the Halloween theme beautifully!
-
Heat It Up: Add a sprinkle of chili flakes to the pepperoni for those who love some spice. This simple twist can bring a surprising heat that pairs nicely with the creamy cheese.
-
Crunchy Options: Instead of popcorn, use mini pretzel bites for extra crunch and flavor. These little guys will not only add texture but also elevate the overall theme as fun “broomsticks!”
-
Nutty Touch: Consider adding candied nuts for an unexpected flavor contrast. Their sweetness and crunch can complement the board wonderfully, making it even more enticing.
-
Dippable Elements: Include some homemade Peanut Butter Snack for extra fun! Pair it with sliced apples or celery for an added crunch that rounds out your snack board.
With these exciting variations, your Hocus Pocus Snack Board will be the talk of the party! Each tweak allows you to cater to your guests’ preferences while keeping the spirit of Halloween alive.
Hocus Pocus Snack Board Recipe FAQs
What kind of Brie cheese should I use for the faces?
Absolutely! It’s best to use a creamy, soft Brie cheese to create the faces of the Sanderson sisters. This type of cheese not only adds a luxurious texture but also has a mild flavor that pairs perfectly with the other ingredients. If you prefer, you can substitute Brie with other soft cheeses such as Camembert or goat cheese, which can add a different taste profile to your board.
How should I store leftovers from the Hocus Pocus Snack Board?
After your gathering, store any leftover pieces tightly covered with plastic wrap or in an airtight container. Enjoy them within 3-4 days for optimal freshness. Make sure to keep any cut fruits covered to prevent browning, and try to consume any leftover cheese as soon as possible for the best flavor!
Can I freeze components of the Hocus Pocus Snack Board?
While it’s not recommended to freeze the assembled Hocus Pocus Snack Board, you can freeze individual components. Simply place leftover cheeses or fruits in airtight bags, and they can last for up to 2 months in the freezer. When you’re ready to enjoy them again, just thaw in the refrigerator overnight for the best results.
What can I do if I have leftover pepperoni?
If you have leftover rolled pepperoni from your board, don’t fret! You can use it in other dishes like pizzas, pasta salads, or even in breakfast scrambles. Just store it in an airtight container in the fridge, where it will stay fresh for up to a week.
Are there any dietary considerations I should keep in mind?
Very! This Hocus Pocus Snack Board can easily be customized for dietary needs. For gluten-free options, swap out standard crackers for gluten-free varieties. If you have guests with allergies, such as dairy, consider using dairy-free cheese alternatives or even skipping the cheese entirely and opting for more fruits and vegetables in your arrangement!
How can I make the board a little more festive?
To add an extra touch of festivity, consider using themed decorations like mini pumpkins or Halloween-themed tableware. You can also incorporate small decorative items inspired by the film, or even print out cute labels for your food items, making it a delightful experience for everyone involved!
Deliciously Fun Hocus Pocus Snack Board for Halloween Magic
Ingredients
Equipment
Method
- Arrange the Brie Cheese by placing three rounds on the board with space in between for the faces.
- Create Whimsical Lips using Twizzlers Pull and Peel Licorice, molding them into fun shapes.
- Add Playful Eyes by slicing black olives and placing them on each brie wheel.
- Style Sarah’s Hair by piling a handful of popcorn on top of one Brie wheel to resemble curls.
- Create Winifred's Curly Hairstyle by rolling slices of pepperoni and securing them with toothpicks.
- Stack Mary’s Hair by layering blackberries on top of her Brie wheel for volume.
- Dress the Sisters by placing raspberries, green grapes, and small orange slices around the Brie wheels.
- Decorate with Cheese Shapes by cutting light-colored cheese into playful shapes and filling empty spaces.
- Complete with Crackers and Chips by filling in gaps with assorted varieties.
")