")
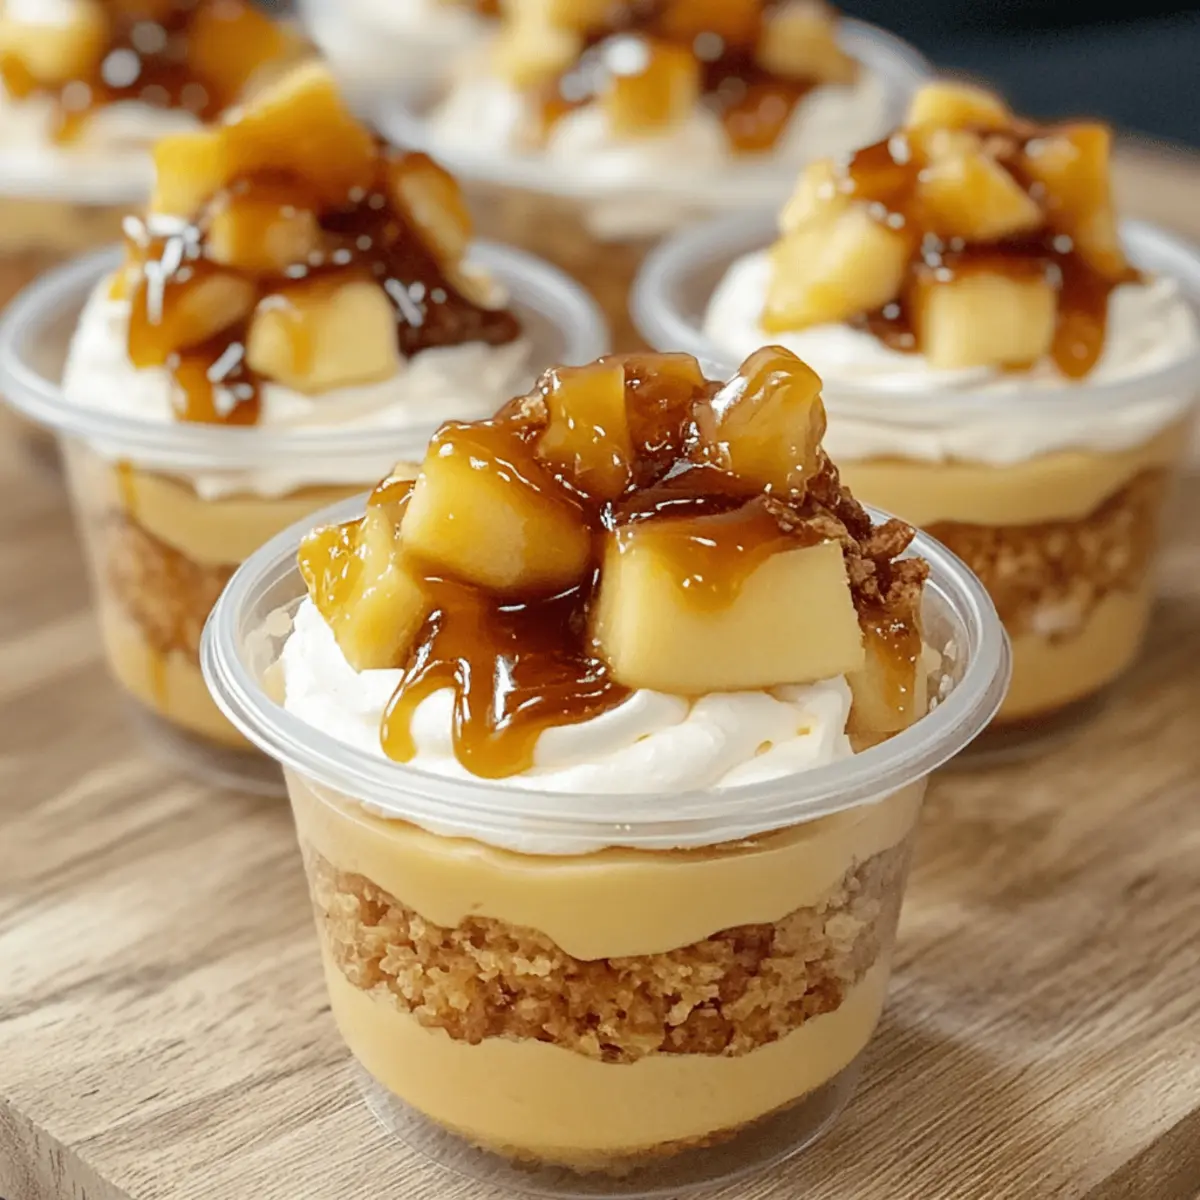
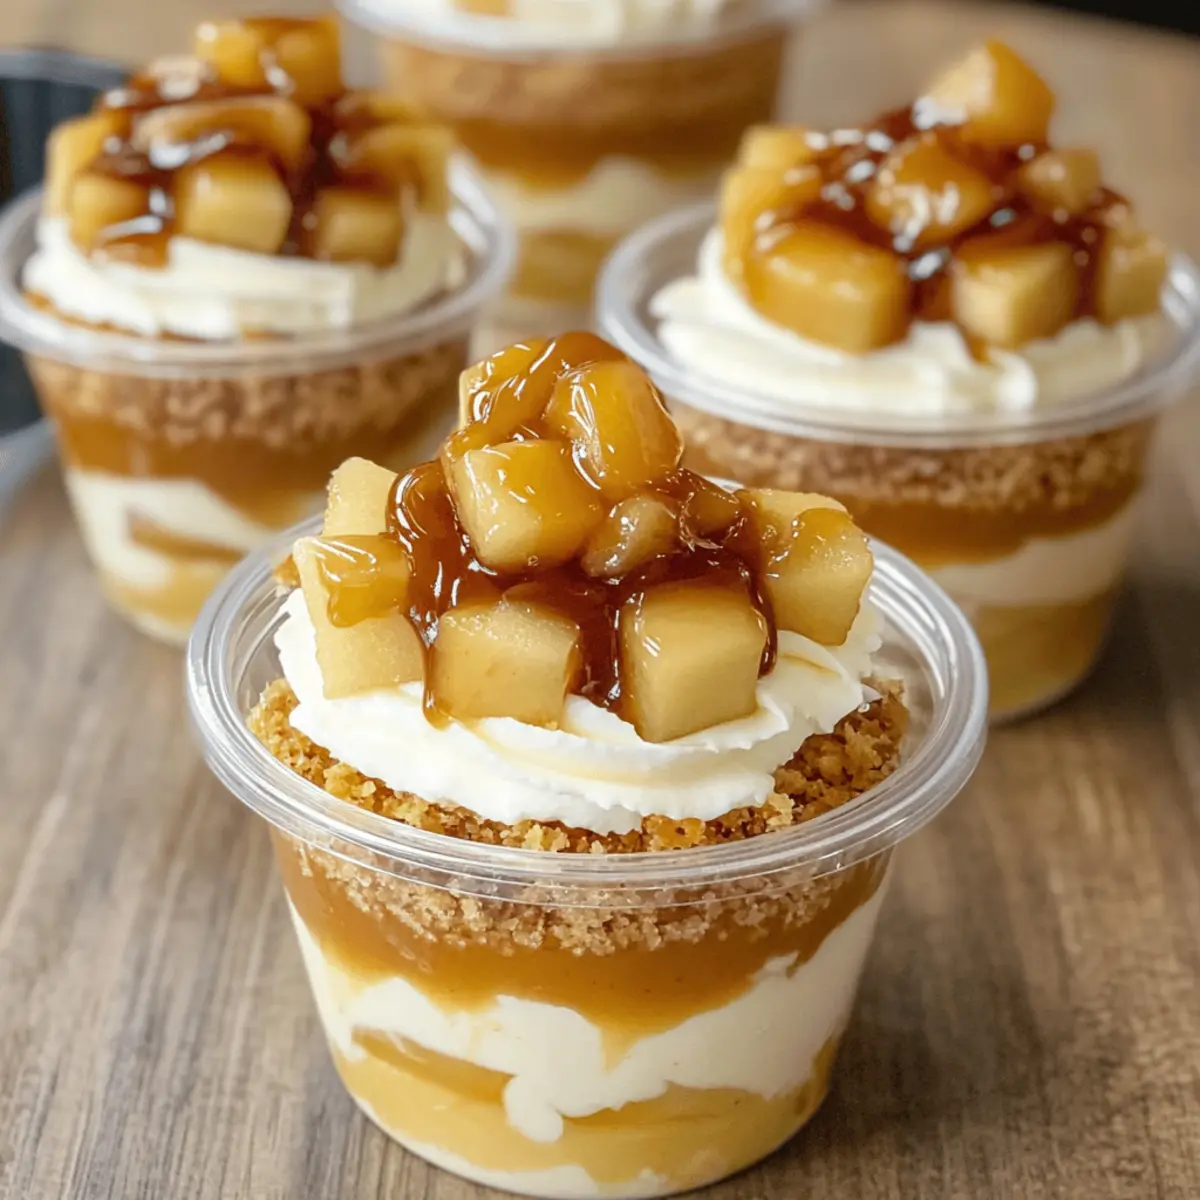
As the leaves turn and the air grows crisp, there’s nothing quite like the sweet aroma of caramelizing apples wafting through the kitchen. Today, I’m thrilled to share my Caramel Apple Dessert Cups, a delightful treat that captures the essence of fall in every bite. Not only are these cups a feast for the eyes, but they’re also incredibly easy to whip up, making them perfect for a cozy night in or a casual gathering with friends. You can customize the tartness of the apples and even swap out the whipped cream for a lighter twist, ensuring that this comforting dessert stays true to your taste. How do you like to enjoy your autumnal flavors? Let’s dive in and bring some cozy vibes to your table!
What makes these dessert cups so special?
Simplicity at its Best: This recipe shines with only a handful of ingredients while delivering rich flavors.
Warm, Comforting Aroma: The scent of sautéed cinnamon apples filling your kitchen creates an inviting atmosphere.
Customizable Delight: Feel free to adjust the apple variety or cream toppings, like a dollop of whipped cream or a scoop of vanilla ice cream, to suit your preference!
Perfect for Any Occasion: These Caramel Apple Dessert Cups are crowd-pleasers, whether at fall gatherings or cozy evenings at home. You might also enjoy pairing them with a refreshing dessert like Strawberry Cream Desserts or a unique flavor twist like Taro Ice Desserts.
Effortless Elegance: Serve them in eye-catching cups to impress your guests without a lot of fuss—say goodbye to complicated dessert techniques!
Ingredients for Caramel Apple Dessert Cups
For the Apple Mixture
• Peeled and Chopped Apples – These provide the perfect balance of sweetness and tartness; consider using Granny Smith apples for that ideal flavor kick.
• Brown Sugar – Adds richness and depth; for a different twist, you can substitute it with coconut sugar.
• Ground Cinnamon – This spice enhances the warmth of the dessert; feel free to skip it if you’re not a fan of spice.
• Butter – Used for sautéing the apples, infusing them with richness; coconut oil works well for a dairy-free option.
For the Topping
• Whipped Cream – This creamy addition complements the flavors beautifully; for a fun alternative, try vanilla ice cream!
• Caramel Sauce – Drizzle on top for an indulgent finish; homemade or store-bought both work just fine for these Caramel Apple Dessert Cups.
With these simple ingredients, you’re all set to create a comforting, easy dessert that’ll warm your heart and delight your taste buds!
Step‑by‑Step Instructions for Caramel Apple Dessert Cups
Step 1: Melt Butter
Begin by melting 2 tablespoons of butter in a large skillet over medium heat. Swirl the pan gently as the butter foams, ensuring it doesn’t brown too much. This step is crucial as the melted butter will enhance the richness of your Caramel Apple Dessert Cups, setting a flavorful base for the apples to cook.
Step 2: Cook Apples
Once the butter is melted, add 4 cups of peeled and chopped tart apples to the skillet. Sprinkle in 1/4 cup of brown sugar and 1 teaspoon of ground cinnamon. Sauté the mixture for about 8-10 minutes, stirring occasionally until the apples become tender and slightly caramelized. You’ll know it’s ready when the apples are soft but still hold their shape, glistening with a sweet syrup.
Step 3: Cool
After cooking the apples, remove the skillet from heat and allow the mixture to cool slightly. This typically takes around 5 minutes. It’s important to cool the caramelized apples to prevent them from melting your whipped cream later, ensuring your Caramel Apple Dessert Cups remain beautifully layered and visually appealing.
Step 4: Layer Ingredients
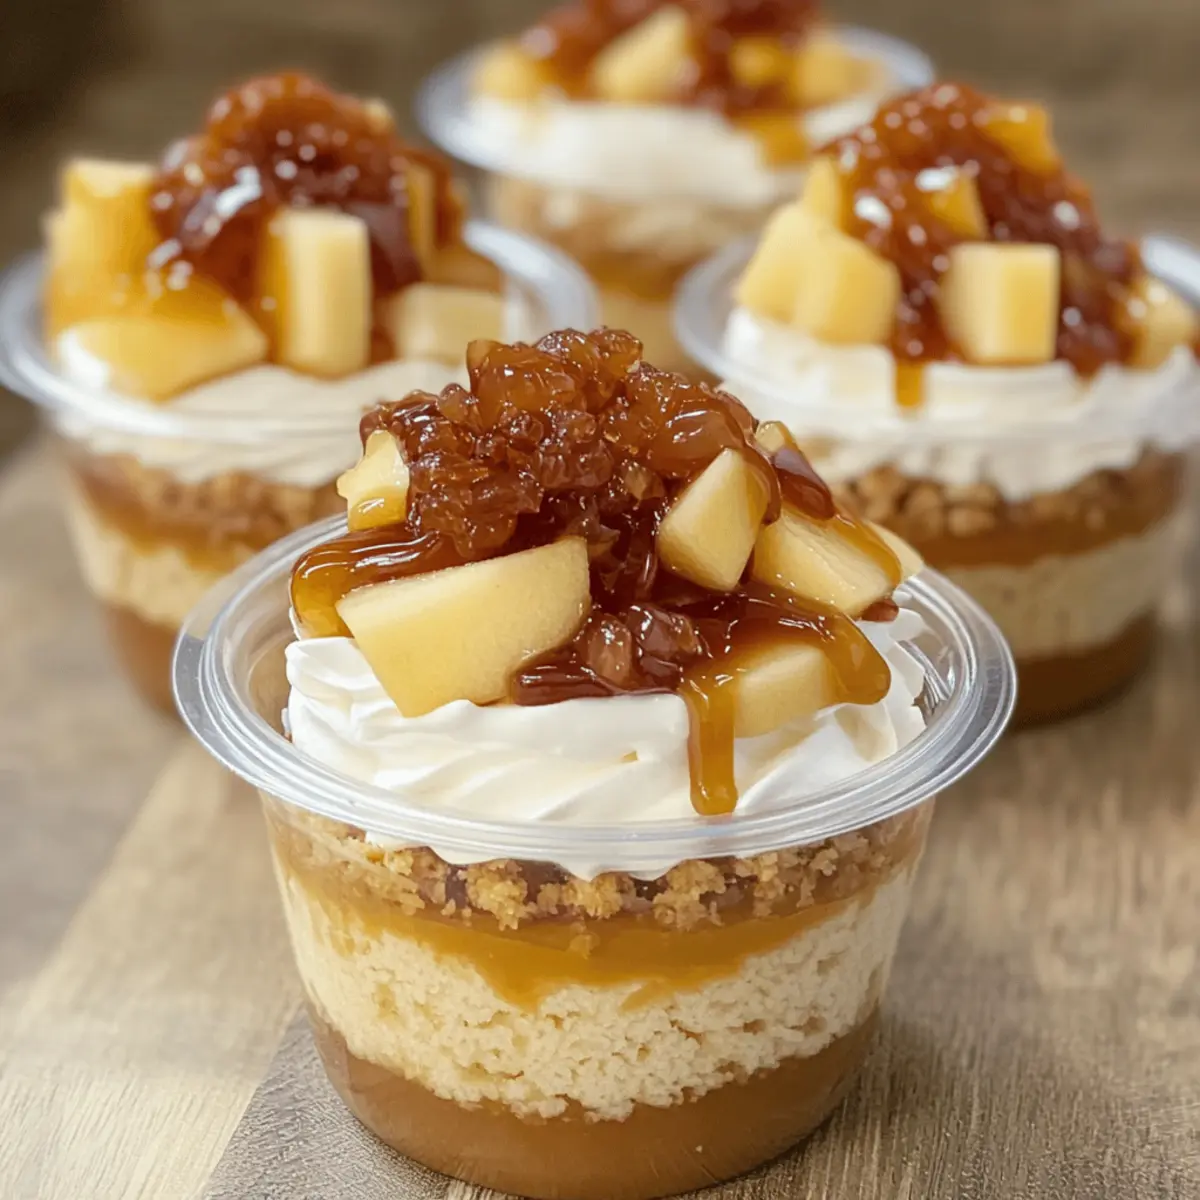
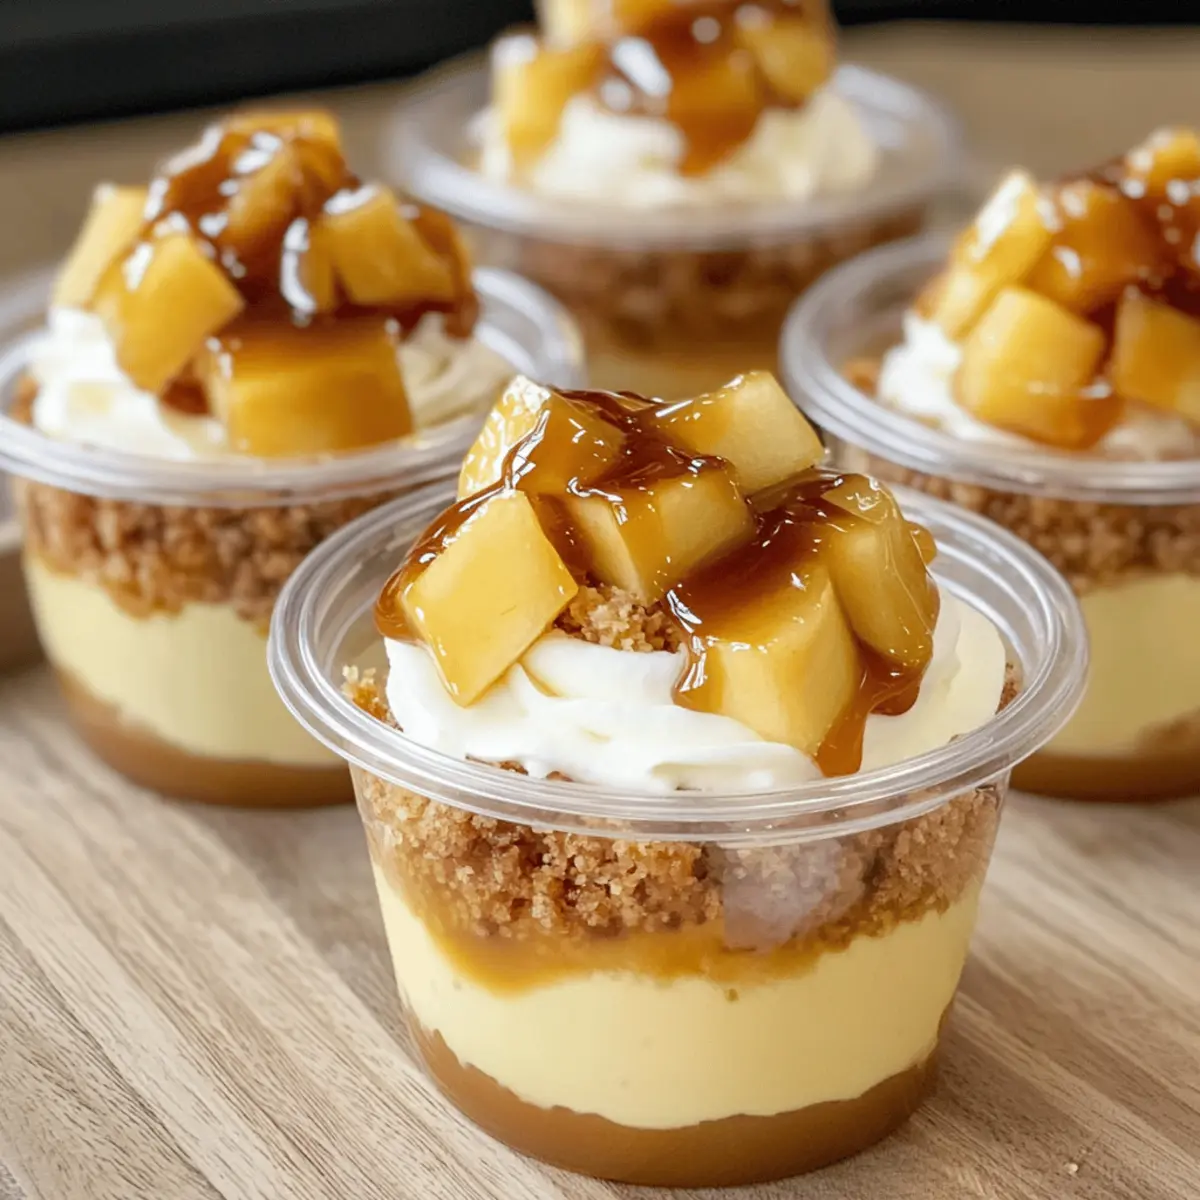
Now it’s time to assemble your Caramel Apple Dessert Cups! In individual dessert cups, begin by layering a generous spoonful of the cooled apple mixture. Follow this with a layer of fluffy whipped cream or your favorite cream alternative. Repeat the layers until the cups are filled, creating a delightful showcase of the warm apples and creamy topping.
Step 5: Add Caramel Sauce
To each dessert cup, generously drizzle caramel sauce on top. This step adds an indulgent touch, enhancing the sweetness of the apples while providing a delightful contrast in flavors. Depending on your preference, you can use store-bought or homemade caramel sauce, ensuring every bite of your Caramel Apple Dessert Cups is decadent.
Step 6: Chill
For the best flavor and texture, refrigerate the assembled cups for at least 30 minutes. This chilling time allows the flavors to meld and helps the dessert firm up slightly. The result will be a refreshing treat that’s perfect for enjoying after a meal or sharing with friends at gatherings.
Expert Tips for Caramel Apple Dessert Cups
- Choose Tart Apples: Select Granny Smith or similar tart apples for a perfect balance against the sweetness of the caramel. This will enhance the overall flavor.
- Layer Wisely: Allow the apple mixture to cool slightly before layering in cups to keep the whipped cream from melting and creating a messy dessert.
- Refrigerate Before Serving: Chilling the assembled Caramel Apple Dessert Cups for at least 30 minutes improves texture and flavor meld, making them even more delightful to enjoy.
- Experiment with Toppings: Feel free to switch whipped cream for cinnamon yogurt or vanilla ice cream to personalize your dessert while keeping it comforting.
- Watch Your Cook Time: Ensure that the apples are tender but still hold their shape when caramelized; overcooking can lead to mushy apples and ruin the cup’s texture.
Caramel Apple Dessert Cups Variations
Feel free to get creative with your Caramel Apple Dessert Cups by exploring these delightful variations! Each twist brings an exciting new flavor or texture to this comforting treat.
- Dairy-Free: Replace butter with coconut oil and whipped cream with coconut whipped cream for a deliciously creamy alternative.
- Spicy Kick: Add a pinch of nutmeg or even a dash of cayenne pepper to the apples while cooking for a surprising burst of heat.
- Savory Touch: Incorporate a sprinkle of sea salt over the caramel sauce to enhance the sweet and savory flavor experience.
- Nutty Texture: Mix in some chopped pecans or walnuts into the apple mixture for a delightful crunch that pairs beautifully with the soft apples.
- Gourmet Twist: Use spiced rum in the cooking process to infuse warm, rich flavors. Just a splash will create a lovely depth.
- Fruit Fusion: Combine apples with pears or berries for a fruity medley that adds vibrant color and taste to your dessert cups.
- Granola Crunch: Top the whipped cream with granola for a satisfying crunch and an extra layer of texture—perfect for morning brunch!
- Chocolate Drizzle: For chocolate lovers, drizzle melted dark chocolate alongside the caramel sauce for a decadent touch.
These variations can transform your Caramel Apple Dessert Cups into a new culinary creation every time you make them! For an extra delightful dessert experience, check out the luscious flavors in Salted Caramel Kentucky cake or the delightful Sara Lee Cheesecake. Enjoy customizing your treat!
Make Ahead Options
These Caramel Apple Dessert Cups are perfect for meal prep, allowing you to save time on busy evenings! You can prepare the caramelized apple mixture up to 24 hours in advance by cooking it as directed and letting it cool completely before storing it in an airtight container in the refrigerator. If you’re short on time, you can also layer the dessert cups without the whipped cream and drizzle them with caramel sauce ahead of time—just wait to add the whipped cream until 1-2 hours before serving to keep it fluffy and fresh. Trust me, waiting makes all the difference for texture, and you’ll end up with delicious, impressive dessert cups ready to enjoy with minimal last-minute effort!
Storage Tips for Caramel Apple Dessert Cups
- Room Temperature: Best enjoyed fresh, but if left out, consume within 2 hours for optimal flavor and safety.
- Fridge: Store any leftovers in an airtight container in the fridge for up to 3 days. This helps maintain the dessert’s deliciousness.
- Freezer: While it’s not recommended to freeze the dessert cups due to potential texture changes, the apple mixture can be frozen separately for up to 2 months; just reheat before serving.
- Reheating: If you’ve stored them in the fridge and prefer a warm dessert, briefly microwave the cups for 10-15 seconds, ensuring the whipped cream remains intact.
What to Serve with Caramel Apple Dessert Cups
As you savor the cozy blend of sweet and tart, it’s time to elevate your meal with delicious pairings that enhance the experience.
- Cinnamon Vanilla Ice Cream: This creamy treat mirrors the warm spices in the dessert, creating a harmonious flavor combination. The cold ice cream beautifully contrasts the warm apples.
- Ginger Snap Cookies: Their crunchy texture and spiced flavor make for a delightful crunch beside the smoothness of the dessert cups. Enjoy them for added warmth with each bite.
- Hot Apple Cider: A cup of this spiced drink complements the apple flavors, wrapping you in a cozy embrace. It’s like autumn in a glass, enhancing the whole dining experience.
- Pecan Pie Bars: A nutty and sweet bar that serves as a fantastic contrast, adding a chewy texture to your dessert, making the entire plate irresistible.
- Maple Glazed Brussels Sprouts: For a savory contrast, these vegetables bring a nutty sweetness that pairs surprisingly well with the dessert. Their earthy flavor provides balance to your meal.
- Decaf Coffee or Tea: A warm drink to sip alongside your dessert helps cut through the sweetness and adds a touch of warmth, making for a perfect ending to your meal.
Caramel Apple Dessert Cups Recipe FAQs
What type of apples should I use for the best flavor?
Absolutely! For your Caramel Apple Dessert Cups, I recommend using tart apples like Granny Smith. Their balance of tartness against the sweetness of the caramel creates a delightful flavor combination that really elevates the dish. If you prefer a sweeter taste, feel free to experiment with Honeycrisp or Fuji apples, but remember that you’ll lose some of the tart contrast.
How should I store leftover Caramel Apple Dessert Cups?
Very good question! If you have leftovers, store them in an airtight container in the fridge for up to 3 days. Make sure the cups are covered well to prevent the whipped cream from absorbing odors. When you’re ready to enjoy them again, you can eat them cold or pop them into the microwave for about 10-15 seconds to warm the apple mixture a bit while keeping the cream intact.
Can I freeze the Caramel Apple Dessert Cups?
The more the merrier! While I don’t recommend freezing the entire dessert cup due to texture changes in the whipped cream, you can freeze the caramelized apple mixture separately. Just cool it completely, then transfer it to an airtight freezer-safe container. You can freeze it for up to 2 months. When you’re ready to enjoy, simply reheat the apple mixture on the stovetop or in the microwave before assembling it in cups again.
What should I do if the apples become mushy while cooking?
Oh no! If your apples end up mushy while cooking, it’s likely they were cooked for too long. To avoid this, keep a close eye on the cooking time and remove the skillet from heat as soon as the apples are tender but still holding their shape. You can also choose firmer apple varieties and reduce cooking time slightly, stirring just enough to caramelize them without turning them to mush.
Are there any dietary considerations for pets or allergies with this recipe?
Certainly! While the Caramel Apple Dessert Cups are perfect for humans, be cautious as they contain ingredients that may not be suitable for pets, especially caramel and sugar. Also, if you’re serving this dessert to guests with allergies, let them know that the recipe includes butter and whipped cream, both of which can contain dairy. Always have alternatives on hand, like dairy-free whipped toppings or coconut oil, to accommodate different dietary needs.
Can I substitute the whipped cream with something else?
Very much, yes! If you’re looking for lighter options, consider using whipped coconut cream for a dairy-free version or even a lightly sweetened cinnamon-flavored yogurt. This will add a unique twist and reduce the calories while still complementing the sweetness of the caramel and apples beautifully!
Caramel Apple Dessert Cups: A Cozy Treat for Every Occasion
Ingredients
Equipment
Method
- Melt 2 tablespoons of butter in a large skillet over medium heat.
- Add 4 cups of peeled and chopped tart apples, sprinkle with 1/4 cup of brown sugar and 1 teaspoon of ground cinnamon. Sauté for 8-10 minutes.
- Remove from heat and allow the mixture to cool for 5 minutes.
- Layer a spoonful of cooled apple mixture in individual cups, followed by a layer of whipped cream.
- Drizzle caramel sauce on top of each cup.
- Refrigerate for at least 30 minutes before serving.
")