")
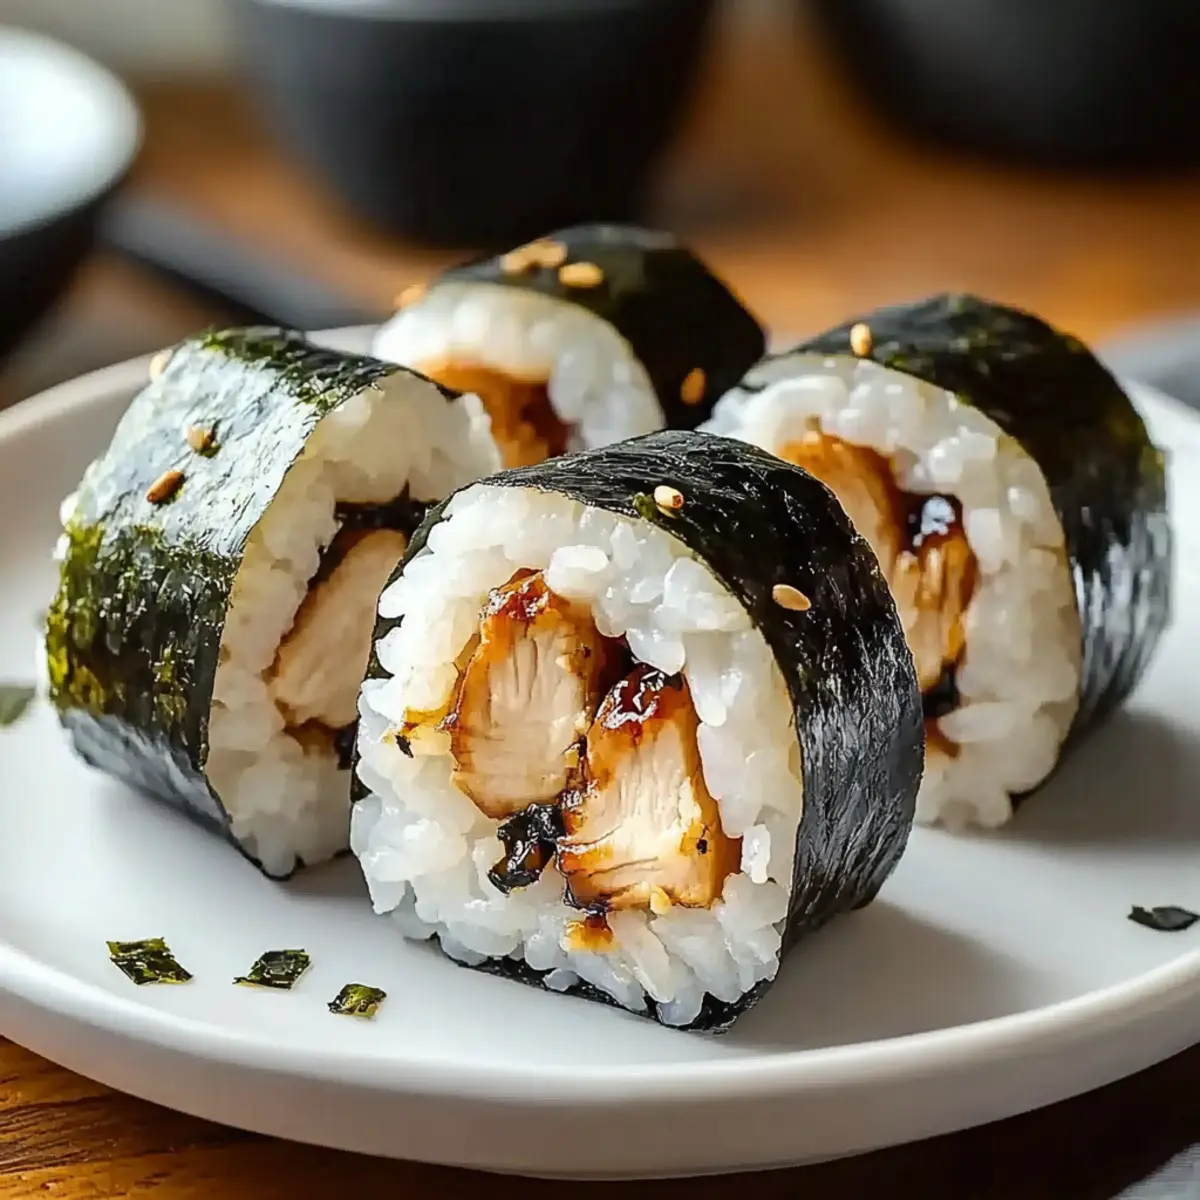
As I unwrapped the warm rice ball, a tantalizing aroma of savory chicken filled the air, whisking me away to the streets of Japan. This Chicken Onigiri recipe is a delightful way to bring traditional Japanese cuisine into your home, offering a comforting meal that can be prepped in a flash. Perfect for a quick lunch or as a unique appetizer for friends, these irresistible rice balls are not only easy to make but also incredibly adaptable, allowing you to customize the fillings to suit every taste. Whether you’re looking to elevate your lunch game or simply savor a moment of culinary creativity, I promise these Chicken Onigiri will make every bite a heartwarming experience. Ready to explore this delicious journey? Let’s dive in!
Why is Chicken Onigiri a Must-Try?
Simplicity at Its Best: This recipe is a breeze to prepare, requiring just a few ingredients and minimal cooking skills.
Savory Goodness: The blend of tender chicken and fluffy rice delivers an unforgettable flavor that you’ll crave again and again.
Endless Adaptability: Create unique variations by experimenting with different fillings, like avocado or tofu, just like in our Marry Chicken Pasta recipe!
A Perfect Make-Ahead Meal: These rice balls are ideal for meal prep—ready to grab for busy days ahead.
Crowd-Pleasing Appeal: Impress your friends at gatherings or create fun bento boxes for those you love with these delightful treats!
Chicken Onigiri Ingredients
• Discover the essential components for perfect Chicken Onigiri!
For the Rice
- Sushi Rice – Provides stickiness and structure to form the rice balls; short-grain rice can also work if sushi rice is unavailable.
For the Filling
- Cooked Chicken – Adds savory filling and protein; shredded or diced chicken makes mixing easier.
- Soy Sauce – Enhances the flavor of the filling; switch to gluten-free soy sauce for a gluten-free version.
- Salt – Boosts overall flavor; adjust to taste based on other ingredients used.
For Presentation
- Nori (seaweed) – Wraps or decorates your Onigiri; can be omitted or replaced with thinly sliced vegetables if desired.
Step‑by‑Step Instructions for Chicken Onigiri
Step 1: Prepare the Rice
Begin by rinsing 2 cups of sushi rice under cold water until the water runs clear, removing excess starch. Cook the rice in a rice cooker or on the stovetop with 2.5 cups of water, bringing it to a boil over medium heat, then reduce to low, covering for 15 minutes. Once done, let it sit for 10 minutes to steam, creating the perfect fluffy texture for your Chicken Onigiri.
Step 2: Mix the Filling
While the rice is cooking, shred or dice your cooked chicken into small pieces and place it in a bowl. Drizzle in about 2 tablespoons of soy sauce and add a pinch of salt, mixing thoroughly to ensure the flavors blend together. This savory filling will complement the tender rice beautifully when assembled into your Chicken Onigiri.
Step 3: Shape the Onigiri
Once the sushi rice has cooled enough to handle, wet your hands with a little water to prevent sticking. Take a handful of rice (approximately 1/4 cup), flatten it in your palm, and create a small indentation in the center. Place about 1 tablespoon of the chicken filling into this space, then mold the rice around it, pressing gently to form a compact ball or triangle shape.
Step 4: Wrap the Onigiri (if using)
Prepare the nori by cutting it into strips or squares, depending on your preferred wrapping style. Take your shaped Chicken Onigiri and wrap the nori around the bottom or sides, leaving the top exposed for a decorative touch. This adds a delightful seaweed flavor and serves as a handy handle for enjoying your rice balls.
Step 5: Serve and Store
Arrange your beautifully crafted Chicken Onigiri on a serving platter, showcasing their inviting shapes. They can be enjoyed immediately as a warm snack or packed into an airtight container for a refreshing lunch later. If storing, be sure to keep them in a cool place to maintain their texture, perfect for a quick meal on the go.
Expert Tips for Chicken Onigiri
-
Stick-Free Hands: Wet your hands before shaping the Onigiri to prevent the rice from sticking, ensuring a smooth shaping process.
-
Optimal Rice Texture: Allow the cooked sushi rice to cool before handling; warm rice may become too sticky and hard to mold into perfect shapes.
-
Flavor Boost: Consider enhancing the chicken filling with a dash of sesame oil or green onions for added taste and texture.
-
Packaging Perfection: If you’re making these for a meal prep, store in an airtight container with a slice of parchment paper to avoid moisture buildup.
-
Decorative Touch: Use nori creatively—consider cutting into fun shapes or adding garnishes like sesame seeds when serving your Chicken Onigiri for a presentable dish.
What to Serve with Chicken Onigiri
Looking to create a complete meal that’s as satisfying as it is delicious?
- Miso Soup: A warm bowl of miso soup offers a comforting umami contrast to the savory rice balls.
- Pickled Vegetables: Bright and tangy pickles provide a refreshing crunch that beautifully balances the soft texture of Chicken Onigiri.
- Japanese Sesame Salad: The nutty flavors and crisp greens of a sesame salad offer a delightful crunch alongside the tender rice balls.
- Edamame: Lightly salted edamame pods bring a fun and nutritious protein punch, making them a perfect snack to accompany your meal.
- Teriyaki Chicken Skewers: Tender skewers of teriyaki chicken add extra savory notes, creating a harmonious blend of flavors on your plate.
- Chilled Green Tea: A refreshing glass of chilled green tea cleanses the palate and enhances the overall dining experience, reminding you of Japanese-style meals.
- Fruit Salad: A light fruit salad with seasonal fruits adds a sweet touch, rounding off the meal with a joyful burst of flavor.
- Tempura Vegetables: Crispy tempura vegetables provide a delightful crunch, adding a contrasting texture to the soft and savory onigiri.
- Sushi Rolls: If you’re feeling adventurous, serving classic sushi rolls alongside your Chicken Onigiri can make for an impressive and varied meal.
Make Ahead Options
These Chicken Onigiri are perfect for meal prep, allowing you to enjoy homemade goodness even on your busiest days! You can prepare the sushi rice up to 24 hours in advance; simply cook and let it cool before storing in an airtight container in the refrigerator. Meanwhile, the chicken filling can be mixed and refrigerated for up to 3 days to enhance the flavors. When you’re ready to assemble, just take the cooled rice, shape it around the filling, and wrap in nori if desired. This way, you’ll have delicious, ready-to-eat Chicken Onigiri, just as satisfying as fresh-made, with minimal effort!
Chicken Onigiri Variations & Substitutions
Customize your Chicken Onigiri to create your ideal flavor experience and delight your taste buds!
- Protein Swap: Experiment with tofu, tuna, or shrimp for a protein-packed filling. This flexibility allows for a plant-based twist or fresh seafood delight!
- Vegan Option: Substitute cooked chicken with mashed chickpeas or sautéed mushrooms for a hearty vegan option that still delivers on flavor.
- Gluten-Free: Use gluten-free soy sauce instead of regular soy sauce while keeping all the savory goodness intact.
- Creamy Addition: Add a spoonful of sriracha mayo or spicy yogurt to the filling for a zesty kick that’ll tantalize your taste buds.
- Flavor Boost: Mix in green onions or sesame seeds into the filling—they add freshness and appealing textures that elevate your Onigiri.
- Veggie Twist: Replace traditional nori with thinly sliced cucumbers or avocados for a vibrant and crunchy surprise.
- Herbal Infusion: Incorporate fresh herbs like cilantro or basil into your chicken filling. It adds a fragrant touch and a new dimension of flavor.
- Spicy Kick: For those who love a bit of heat, add diced jalapeños or a touch of wasabi into your chicken filling for a bold experience!
Feeling adventurous? Check out our delicious recipe for Buffalo Chicken Bombs—the spicy flavor is sure to impress!
Storage Tips for Chicken Onigiri
Fridge: Store your Chicken Onigiri in an airtight container for up to 3 days. Keep them cool to maintain their delightful texture and flavor.
Freezer: For longer storage, wrap individual Onigiri in plastic wrap and place them in a freezer-safe bag. They can be frozen for up to 1 month.
Reheating: To enjoy, let frozen Onigiri thaw in the fridge overnight, then reheat briefly in the microwave or enjoy them at room temperature.
Make-Ahead: If prepped ahead, feel free to assemble the Onigiri, then store in the fridge and consume within a day for the best quality.
Chicken Onigiri Recipe FAQs
How do I choose the best sushi rice for my Chicken Onigiri?
Absolutely! Look for short-grain sushi rice, which is crucial for that perfect sticky texture. When selecting, ensure the grains are glossy and not broken, as this ensures fresh quality. If you can’t find sushi rice, short-grain rice works as a solid substitute, just remember it might not be quite as sticky.
What’s the best way to store Chicken Onigiri?
For the best storage, place your Chicken Onigiri in an airtight container and keep them in the fridge for up to 3 days. Make sure they are completely cooled before sealing, as warm rice can create condensation and make them soggy. If you want to enjoy them later, a well-wrapped Onigiri can be your best friend.
Can I freeze Chicken Onigiri, and how should I do it?
Absolutely! To freeze, wrap each individual Onigiri tightly in plastic wrap, ensuring there are no air pockets that could cause freezer burn. Then, place them in a freezer-safe bag. You can enjoy them for up to 3 months. When you’re ready to eat, let them thaw in the fridge overnight, and then you can either microwave them for a bit or enjoy them at room temperature.
What should I do if my Chicken Onigiri falls apart?
The more the merrier! If your Onigiri crumbles, it’s often due to the rice being too warm when you shape them. Ensure your sushi rice has cooled adequately after cooking and that your hands are damp to help mold without sticking. If it’s still challenging, try adding a touch more moisture to the rice or pressing harder to bond the rice together.
Can I make Chicken Onigiri for my kids with dietary restrictions?
Very much so! Just adapt the ingredients to suit their needs. For gluten-free options, replace soy sauce with a gluten-free version, and feel free to customize the fillings. You can use shredded vegetables, tuna, or tofu. Just ensure any allergy concerns are addressed with substitutions, like checking the nori for any potential allergens.
Savory Chicken Onigiri: Quick, Comforting Rice Balls to Love
Ingredients
Equipment
Method
- Rinse 2 cups of sushi rice under cold water until the water runs clear. Cook the rice with 2.5 cups of water, bringing it to a boil, then reducing to low for 15 minutes. Let it sit for 10 minutes to steam.
- Shred or dice your cooked chicken into small pieces. Mix with 2 tablespoons of soy sauce and a pinch of salt in a bowl.
- Once the sushi rice has cooled, wet your hands and take a handful of rice (approximately 1/4 cup). Flatten it, create a small indentation, add 1 tablespoon of chicken filling, and mold the rice around it.
- Cut nori into strips or squares and wrap around the Onigiri, leaving the top exposed.
- Serve on a platter or store in an airtight container for later.
")