")
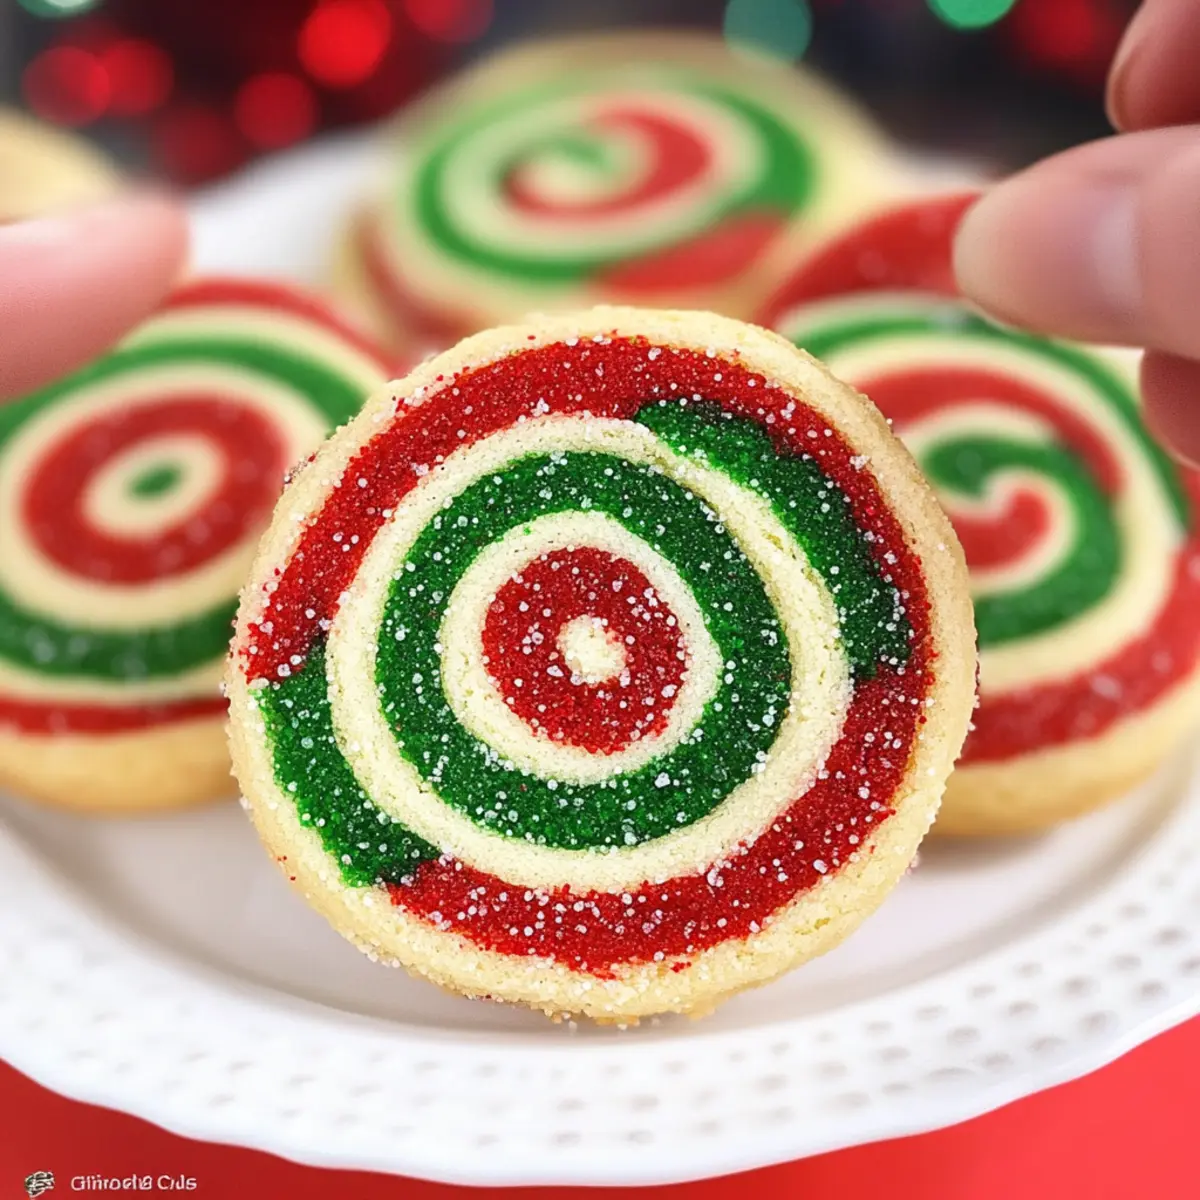
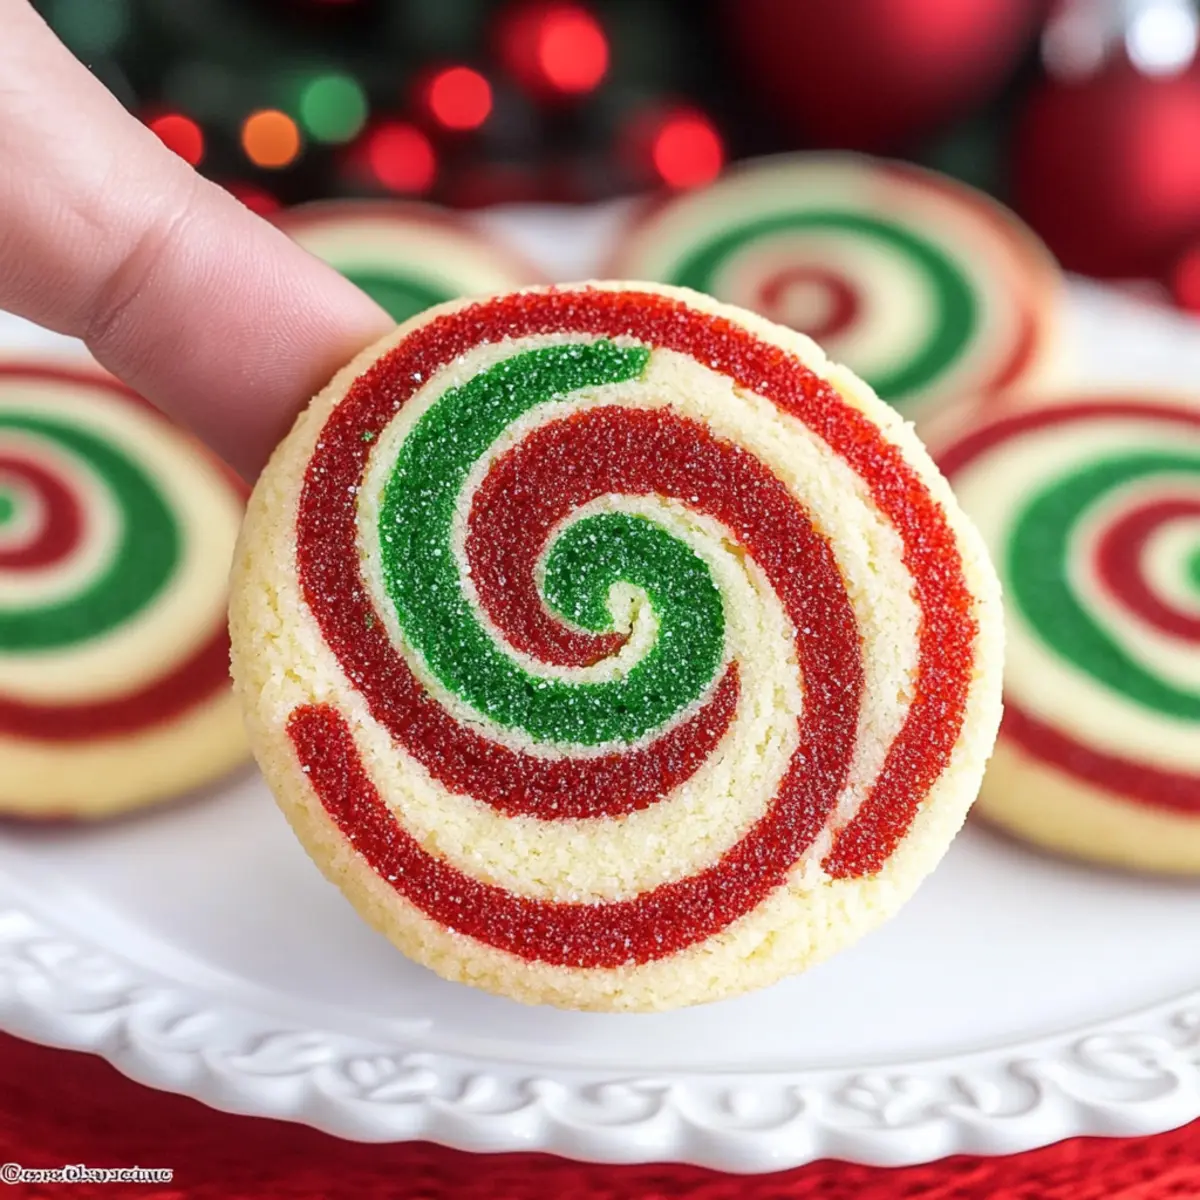
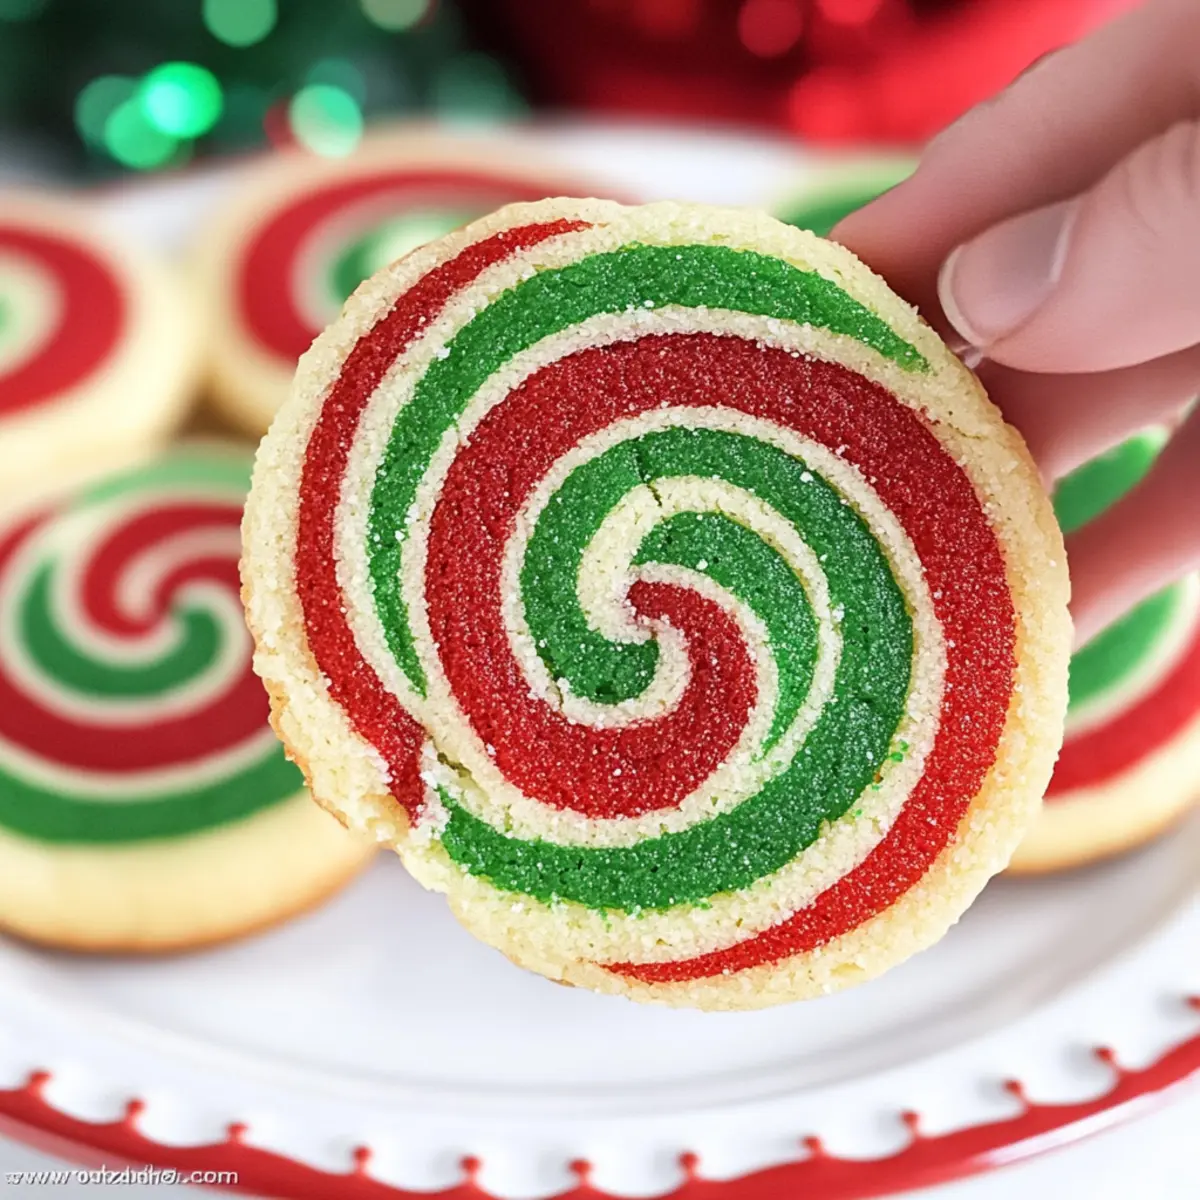
The kitchen was filled with laughter and a hint of sugar as we embarked on our holiday cookie baking extravaganza. This year, I’ve got something truly special for you: festive Christmas Pinwheel Cookies! With their vibrant red, white, and green spirals, they are not just a feast for the eyes but also incredibly easy to make. These delightful treats come together in no time, requiring just a handful of ingredients and no fuss—perfect for busy holiday schedules. Plus, their soft texture paired with a light crunch at the edges makes them an instant crowd-pleaser at any gathering. Whether you’re sharing with family, friends, or neighbors, these cookies will surely spread joy and warmth. Ready to add some colorful cheer to your cookie exchange? Let’s dive into this festive recipe!

Why Are These Cookies So Special?
Vibrant colors: The stunning red, white, and green spirals bring a festive flair to your holiday celebrations, making them perfect for cookie exchanges.
Easy to make: With minimal ingredients and no special equipment needed, even beginner bakers can whip these up swiftly—ideal for busy holiday schedules!
Soft and crunchy: These cookies achieve a delightful balance between a tender center and a crispy edge, creating the ultimate festive treat.
Versatile flavors: Experiment with various extracts, like peppermint or almond, to customize these cookies for any occasion beyond Christmas!
Crowd favorite: Their bright appearance and delicious taste will delight family and friends, ensuring they’re the star of your holiday gatherings—want more cookie inspiration? Check out our Millies Cookies Bake or Cool Whip Cookies for more delectable treats!
Christmas Pinwheel Cookies Ingredients
For the Dough
- All-purpose flour – Provides the structure for the cookies; can be swapped with gluten-free flour blend if needed.
- Baking powder – A leavening agent that helps cookies rise beautifully while keeping them soft.
- Salt – Balances sweetness and enhances flavor for a delightful taste.
- Unsalted butter – Adds richness and tenderness; ensure it’s softened at room temperature for easy mixing.
- Granulated sugar – Sweetens the cookies and contributes to their delightful texture.
- Large egg – Acts as a binder and adds moisture; consider a flax egg for a vegan twist.
- Vanilla extract – Introduces a warm depth of flavor; substitute with almond extract for a unique note.
For the Color
- Red and green food coloring – Ensures your Christmas Pinwheel Cookies burst with festive colors; gel colors work best for vibrancy.
For Optional Decoration
- Sprinkles – Adds a fun touch for decorating the outer edge of the cookies, making them irresistible.
Step‑by‑Step Instructions for Christmas Pinwheel Cookies
Step 1: Prepare Dry Ingredients
In a medium bowl, whisk together 2 cups of all-purpose flour, 1 teaspoon of baking powder, and ½ teaspoon of salt until well combined. This mixture will form the base for your Christmas Pinwheel Cookies, ensuring they have the right texture. Set the bowl aside to focus on the wet ingredients next.
Step 2: Cream Butter and Sugar
In a stand mixer fitted with a paddle attachment, cream together 1 cup of room temperature unsalted butter and 1 cup of granulated sugar. Beat the mixture on medium speed for 2-3 minutes until it turns light and fluffy, which signifies that your butter is aerated. Scrape down the sides of the bowl to incorporate all ingredients for an even mixture.
Step 3: Incorporate Wet Ingredients
Add 1 large egg and 1 teaspoon of vanilla extract to the butter and sugar mixture. Mix on low speed until the ingredients are fully integrated and smooth. This step adds moisture and richness to your Christmas Pinwheel Cookies. Ensure everything is evenly blended before proceeding to the dry ingredients.
Step 4: Combine Dry and Wet Mixtures
Gradually add the prepared dry ingredients to the wet mixture in your stand mixer. Mix on low speed until a soft dough forms, which should take about 1-2 minutes. The dough should be cohesive and slightly sticky but not overly wet. Stop mixing as soon as everything is combined to avoid overworking the dough.
Step 5: Divide and Color Dough
Turn the dough out onto a clean surface and divide it into three equal portions. Leave one portion uncolored for the white layer and dye the other two with red and green gel food coloring. Knead each coloring into the dough until fully integrated. Aim for vibrant colors to create beautifully festive Christmas Pinwheel Cookies.
Step 6: Chill Dough
Wrap each colored portion of dough in plastic wrap and refrigerate for at least 45 minutes. Chilling will help firm up the dough and make it easier to roll out. This step is crucial for achieving neat pinwheels, so don’t skip it! Meanwhile, prepare your workspace for rolling the dough.
Step 7: Roll Out Dough
After chilling, place each colored dough between two sheets of parchment paper and roll them into rectangles about ¼ inch thick. Stack them in this order: green, uncolored, and red. Once stacked, gently roll the layers together into a tight log, ensuring that the dough adheres well to form the festive swirl of your Christmas Pinwheel Cookies.
Step 8: Add Sprinkles (Optional)
If desired, brush the rolled dough log lightly with corn syrup and roll it in sprinkles to add a fun, festive touch. This step is optional but adds a delightful crunch and visual appeal. After decorating, chill the log again for at least 45 minutes to set before slicing.
Step 9: Preheat Oven
While the dough log is chilling again, preheat your oven to 350°F (175°C) and line your baking sheets with parchment paper. This preparation ensures that everything is ready for baking your colorful Christmas Pinwheel Cookies as soon as you take the log out of the refrigerator.
Step 10: Slice and Bake
Remove the chilled dough log from the refrigerator and slice it into ½ inch thick pieces using a sharp knife. Place the slices on the prepared baking sheets, leaving space in between each cookie. Bake in the preheated oven for 13-15 minutes, or until the centers are set and the edges are just beginning to turn golden. Allow the cookies to cool on the baking sheets before transferring them to a wire rack.
What to Serve with Festive Christmas Pinwheel Cookies
Elevate your holiday celebrations by pairing these colorful cookies with delightful sides and treats that complement their festive flair.
- Eggnog: A traditional holiday beverage, creamy and spiced, to enhance the sweet flavors of your cookies.
- Winter Fruit Salad: Bright and refreshing, mix pomegranate seeds, oranges, and apples for a crunchy contrast to the cookies.
- Hot Cocoa Bar: Create a cozy gathering with rich hot chocolate, topped with marshmallows and whipped cream for a delicious treat.
- Gingerbread Men: Serve these classic cookies alongside your pinwheels for a playful, festive contrast that everyone loves.
- Caramel Sauce: Drizzle it over your cookies for an extra layer of sweetness; it’s a match made in dessert heaven!
- Coffee or Tea: A warm beverage balances the sweetness, and adds a comforting touch to your festive cookie platter.
- Christmas-themed Platter: Present pinwheel cookies with a mix of other decorated cookies to create a visually appealing holiday display.
Each of these suggestions enhances the spirit of the season and makes for a joyful holiday spread that your loved ones will adore!
Expert Tips for Christmas Pinwheel Cookies
-
Measure Precisely: Use a kitchen scale for accurate ingredient amounts; this helps avoid a dry or crumbly dough.
-
Chill for Success: If your dough is too soft during rolling, pop it back in the fridge for a short time. This makes shaping easier and neater.
-
Perfectly Baked: Keep an eye on the cookies; if they still have a raw shine in the center, they need more time. Remember, they will continue to cook outside the oven!
-
Sprinkle Smartly: For a playful touch, experiment with various sprinkles; mix colors to enhance your Christmas Pinwheel Cookies’ vibrancy!
-
Flavor Variations: Don’t be afraid to try flavored extracts like peppermint; they can elevate your cookies for festive cheer beyond just Christmas!
Christmas Pinwheel Cookies Variations & Substitutions
Feel free to sprinkle your creativity on these delightful cookies—they’re as customizable as they are delicious!
-
Gluten-Free: Use a 1:1 gluten-free flour blend to create a cookie everyone can enjoy without sacrificing flavor or texture.
-
Vegan: Substitute the egg with a flax egg (1 tablespoon ground flaxseed mixed with 2.5 tablespoons water) and use vegan butter for a delightful plant-based treat. No flavors lost, just the love!
-
Colorful Themes: Swap red and green for pastel pink and lavender for a spring celebration or orange and black for a spooky Halloween twist that keeps your treats vibrant year-round.
-
Flavored Extracts: Try using peppermint extract in place of vanilla for a refreshing minty taste that pairs beautifully with festive vibes, perfect for a holiday winter treat!
-
Nutty Crunch: Fold in chopped nuts or chocolate chips to the dough for an irresistible texture contrast that enhances each bite with a lovely crunch.
-
Zesty Hint: Add grated lemon or orange zest for a refreshing citrus note that brightens up the sweetness and makes these cookies a true sensory experience.
-
Interactive Decor: Create DIY decorating stations with sprinkles, colored sugars, or edible glitter for a fun baking activity that’s perfect for family gatherings or holiday parties.
-
No-Bake Version: For a quick option, make a pinwheel-inspired no-bake treat by combining crushed cookies, cocoa powder, and cream cheese for a delicious chilled dessert without the oven!
With these variations, your Christmas Pinwheel Cookies can shine in any season! Want more inspiration? Check out our Delicious Chocolate Chips Cookies or explore our Cake Mix Cookies for even more tasty ideas.
How to Store and Freeze Christmas Pinwheel Cookies
-
Room Temperature: Store baked cookies in an airtight container at room temperature for up to 4-5 days to maintain their freshness and flavor.
-
Fridge: For longer-lasting cookies, keep them in the refrigerator for up to a week, ensuring they are well wrapped to prevent drying out.
-
Freezer: Unbaked cookie logs can be frozen for up to 3 months. Just wrap them tightly in plastic wrap and foil before placing them in the freezer.
-
Reheating: When ready to enjoy frozen cookies, let them thaw in the fridge overnight, then bake them directly from the freezer at 350°F for a few extra minutes for freshly baked goodness!
Make Ahead Options
These delightful Christmas Pinwheel Cookies are perfect for meal prep enthusiasts looking to save time during the busy holiday season! You can prepare the cookie dough up to 24 hours in advance by following the first six steps, then wrapping each colored portion tightly in plastic wrap and refrigerating them. Additionally, the chilled dough log can be frozen for up to 3 months; simply wrap it in plastic wrap and place it in an airtight container. When you’re ready to bake, just slice the log into cookies and bake from frozen, adding a couple of extra minutes to the baking time for deliciously festive treats with minimal effort. Enjoy the joy of homemade cookies without the last-minute rush!
Christmas Pinwheel Cookies Recipe FAQs
How do I choose the right food coloring?
Absolutely! When making Christmas Pinwheel Cookies, I recommend using gel food coloring as it provides vibrant hues without altering the dough’s consistency. It takes just a few drops to achieve a rich color, so start small and add more until you reach your desired shade.
How should I store my Christmas Pinwheel Cookies?
For the best freshness, store your baked cookies in an airtight container at room temperature for up to 4-5 days. If you want them to last even longer, consider placing them in the refrigerator, which can keep them good for about a week. Just ensure they’re wrapped tightly to prevent drying out.
Can I freeze unbaked cookie logs?
Yes! Unbaked Christmas Pinwheel Cookie logs can be frozen for up to 3 months. To freeze, tightly wrap them in plastic wrap followed by aluminum foil to prevent freezer burn. When you’re ready to bake, simply thaw them in the refrigerator overnight before slicing and baking as directed.
What if my cookie dough is too soft to roll?
Very! If your dough feels too soft while rolling, don’t worry. Just pop it back into the refrigerator for about 15-20 minutes to chill. Chilling the dough firms it up, making it much easier to roll out and shape into pinwheels, ensuring neat slices.
Are these cookies safe for pets?
While our luscious Christmas Pinwheel Cookies are delightful for humans, it’s essential to keep them away from pets. The ingredients like sugar and chocolate can be harmful to animals. Always check for pet-safe options if you’re looking to bake treats for your furry friends!
Can I substitute any ingredients to accommodate allergies?
Absolutely! If you’re catering to dietary restrictions, there are a few easy substitutions you can make. For a gluten-free version, swap all-purpose flour with a gluten-free blend. If you need them dairy-free, use vegan butter and a flax egg in place of the large egg. Always read labels on your ingredients to ensure they meet specific allergy needs.
Deliciously Festive Christmas Pinwheel Cookies to Love
Ingredients
Equipment
Method
- In a medium bowl, whisk together flour, baking powder, and salt.
- Cream together butter and sugar until light and fluffy.
- Add egg and vanilla extract to the mixture and blend well.
- Gradually add the dry ingredients to the wet mixture until a soft dough forms.
- Divide the dough into three portions, coloring two with red and green food coloring.
- Refrigerate each colored portion for at least 45 minutes.
- Roll out each colored dough between parchment paper and stack them.
- Optionally brush with corn syrup and roll in sprinkles.
- Preheat oven to 350°F and prepare baking sheets.
- Slice dough log into ½ inch thick pieces and bake for 13-15 minutes.
- Cool on baking sheets before transferring to a wire rack.
")