")
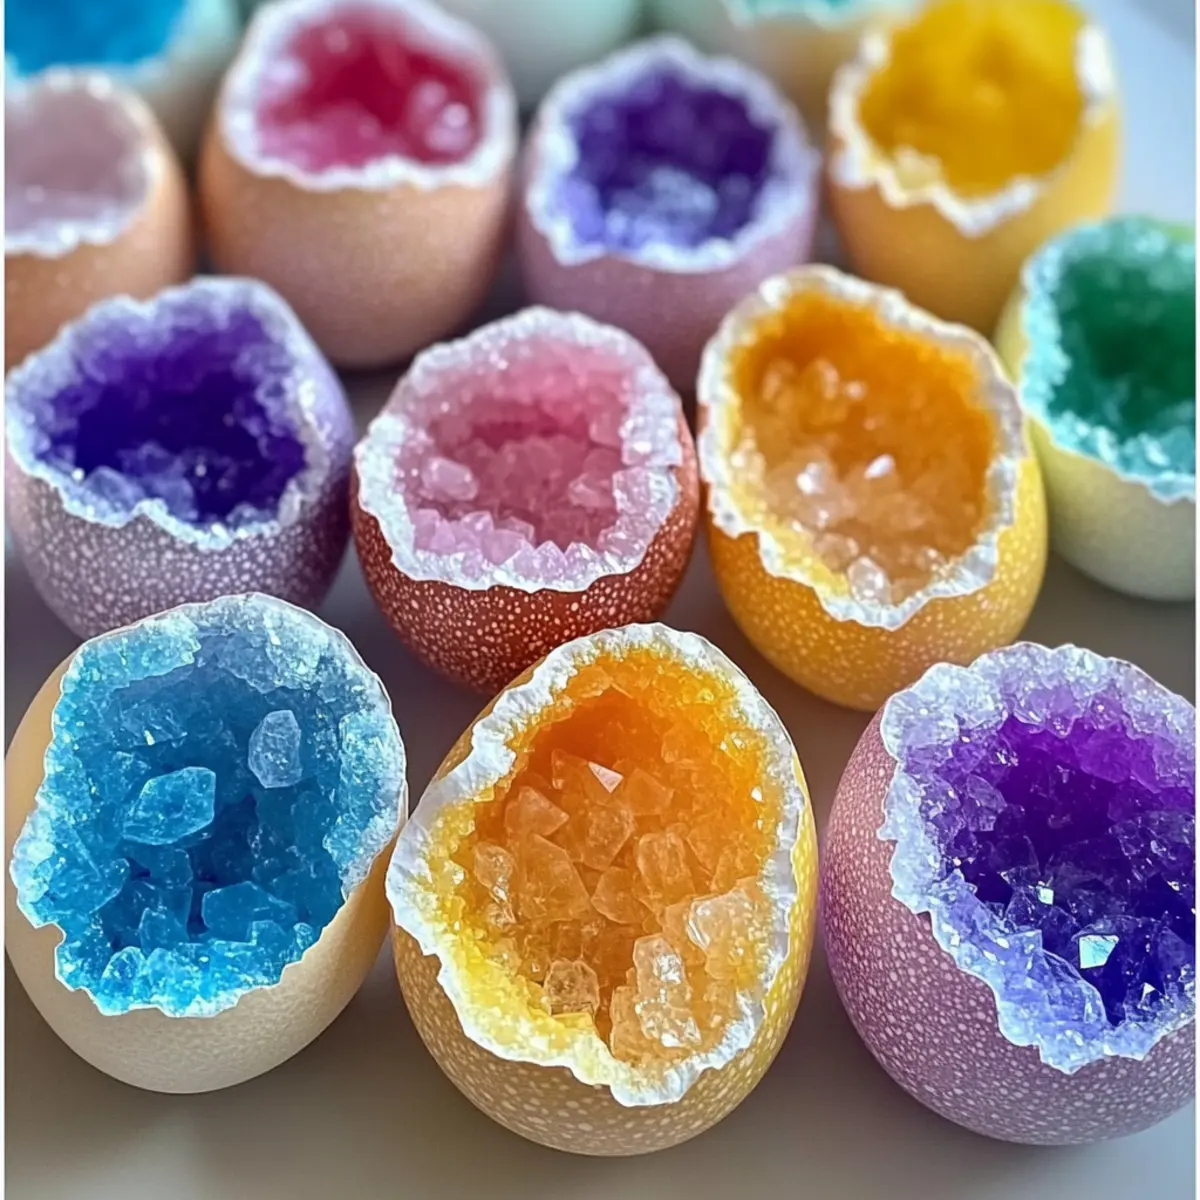
Walking through a sunlit craft store the other day, I stumbled upon a dazzling display of crystals that ignited my creativity. I couldn’t help but think about how to capture that beauty at home, and that’s when I decided on DIY Egg Geodes. This delightful crafting project invites both kids and adults to explore the fascinating world of crystal formation, all while having fun together. It promises not only an engaging experience but also beautiful homemade decor that’s perfect for any occasion. With easy-to-find materials and a straightforward process, these vibrant geodes will inspire everyone’s inner artist. So, are you ready to transform simple eggshells into colorful masterpieces?
Why Make Egg Geodes at Home?
Creativity Unleashed: Transform ordinary eggshells into spectacular works of art that sparkle like natural crystals.
Educational Fun: This project provides a unique opportunity to explore science concepts like crystallization while crafting.
Family Bonding: Perfect for kids and adults, this activity is a delightful way to spend quality time together.
Versatile Variations: Feel free to customize your egg geodes with different colors and sizes; the possibilities are endless!
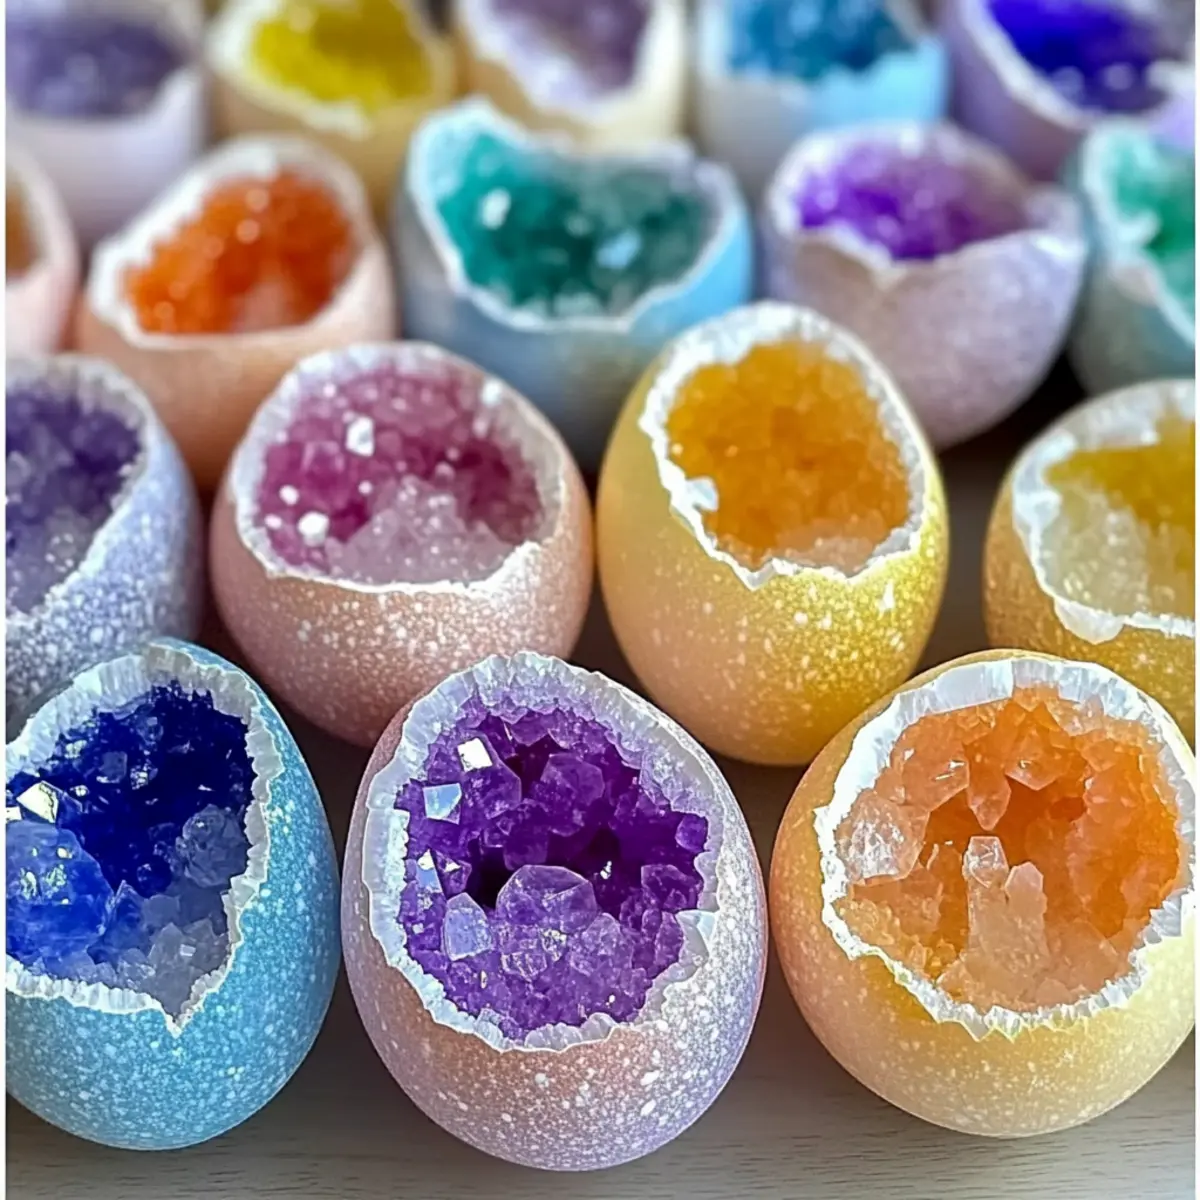
Eye-Catching Decor: Use these colorful creations to brighten up your home or as stunning decor for parties—everyone will be impressed!
Ready to dive more into crafting? Check out our guide on DIY Craft Projects for Kids for even more creative ideas.
Egg Geodes Ingredients
Here are the essential ingredients you’ll need to create your vibrant egg geodes!
For the Geodes
- Eggshells – These serve as the sturdy base; ensure they’re thoroughly cleaned and dried before use.
- Borax – The magical ingredient for crystal growth; you can substitute it with salt, but the results will be less impressive.
- Water – Hot water is key for dissolving borax; make sure it’s steaming to ensure complete saturation.
- Food Coloring – Optional, but this adds a pop of color to your crystals; mix and match colors for unique effects.
Unlock the science of crystal formation with your DIY Egg Geodes and prepare for a fun crafting adventure!
Step‑by‑Step Instructions for Egg Geodes
Step 1: Prepare the Eggshells
Start by cleaning your eggshells, ensuring you thoroughly wash them in warm, soapy water to remove any residue, then rinse well. Allow the eggshells to dry completely, leaving them in a sunny spot for about an hour. A clean and dry base is essential for creating beautiful Egg Geodes.
Step 2: Make the Borax Solution
In a heatproof container, boil water until steaming, then carefully pour in 1 cup of hot water. Gradually stir in 3 tablespoons of borax, mixing until the powder is fully dissolved. This saturated borax solution is crucial for crystal growth, so ensure no granules remain for the best results.
Step 3: Add Color
If you want colorful crystals, now’s the time to add food coloring to your solution. Drop in a few drops of your chosen color and stir gently until the color is evenly distributed throughout the borax solution. This step enhances the visual appeal of your Egg Geodes, making them even more exciting!
Step 4: Pour Solution
Carefully pour the colorful borax solution into each eggshell half, filling them about three-quarters full. Be cautious not to overfill, as the borax could spill out; a steady hand and patience will go a long way here! Make sure all the eggshells get the vibrant mixture for uniform crystal growth.
Step 5: Let Crystals Form
Place the filled eggshells in a dry, undisturbed area at room temperature for at least 24 hours. Over this period, watch as the crystals begin to form and grow in stunning patterns. Ensure they remain still to encourage the best crystal formation in your Egg Geodes.
Step 6: Remove and Dry
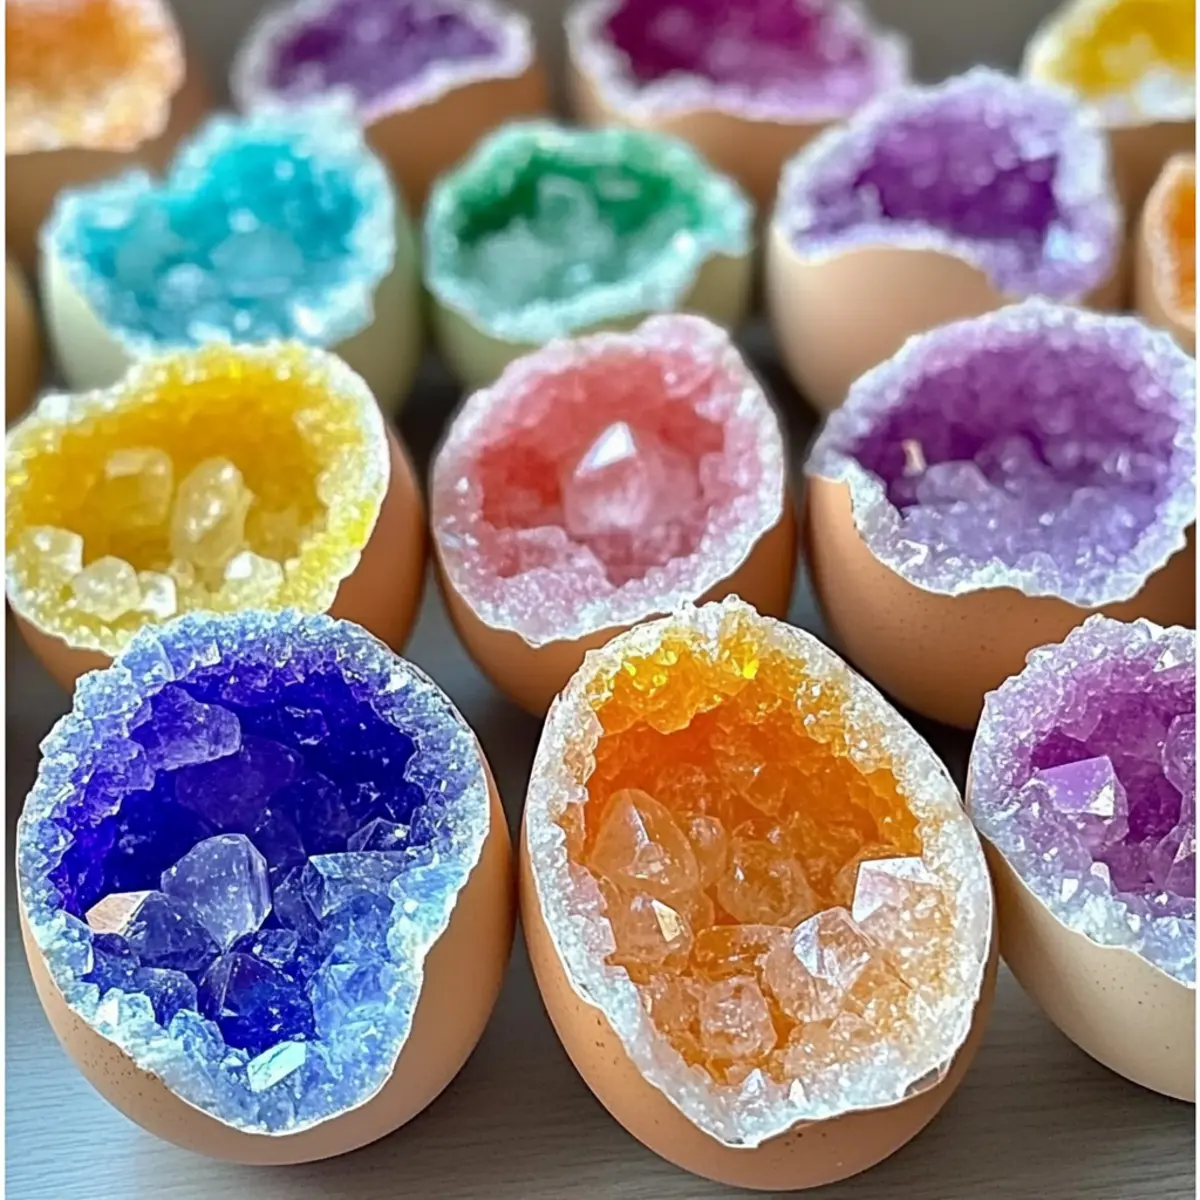
After 24 hours, carefully crack away the eggshells without damaging the delicate crystals inside. Gently rinse the geodes under a light stream of water to remove any powdery residue from the borax, then allow them to dry completely on a paper towel. Your breathtaking Egg Geodes are now ready to shine!

Make Ahead Options
These Egg Geodes are fantastic for busy home cooks who want to combine creativity with efficiency! You can clean and prepare the eggshells up to 3 days in advance, allowing you to have a head start on this captivating project. Once your eggshells are dry and ready, make the borax solution and add food coloring 24 hours before you plan to let your crystals form. Simply store the prepared eggshells in a cool, dry place to maintain their quality. When it’s time to create, pour the borax solution into the prepared shells and leave them undisturbed for the best crystal growth. This way, you’ll transform simple materials into stunning Egg Geodes with minimal last-minute effort!
Storage Tips for Egg Geodes
- Dry Environment: Store your completed egg geodes in a dry place to maintain their integrity and prevent moisture damage; avoid areas with high humidity.
- Avoid Moisture: Keep geodes away from water sources or damp areas, as moisture can cause the crystals to melt or degrade over time.
- Display with Care: If showcasing your egg geodes, make sure they are in a stable position to prevent accidental breakage; a shelf or a cabinet works well.
- Longevity: While egg geodes can last for months, it’s best to periodically dust them gently with a soft cloth to keep them looking vibrant and clean.
Egg Geodes Variations & Substitutions
Feel free to get creative with your egg geodes by trying out these fantastic variations and substitutions!
-
Different Egg Sizes: Experimenting with larger or smaller eggs can create varying geode sizes, adding unique charm to your display. Each egg’s shape can yield different crystal formations, giving you a delightful surprise!
-
Alternative Color Combinations: Play around with different food coloring blends to produce mesmerizing crystal colors. Combining hues can lead to beautiful gradients and unexpected shades that will truly impress!
-
Add Glitter: For some extra sparkle, add a sprinkle of glitter into your borax solution. This will enhance the visual appeal of your geodes, creating shimmering crystals that catch the light beautifully. It’s the perfect touch for that extra pizzazz!
-
Include Fragrance: Consider adding a few drops of essential oil to your solution for fragrant geodes. While the crystals won’t hold the scent well, the aroma from the oil will enhance the crafting experience, making it even more enjoyable.
-
Try Epsom Salt: Instead of borax, you can use Epsom salt to grow crystals. While the appearance may differ slightly, this swap is a unique twist, introducing a softer crystal structure to your creations.
-
Use Colored Eggshells: If you can find dyed eggshells, they can add intrigue without needing food coloring at all. The natural hues will interact beautifully with your crystals, enhancing the overall aesthetic.
-
Seasonal Themes: Get festive by adding seasonal color themes! Red, green, and gold for the holidays or pastels for spring can transform your geodes into a beautiful seasonal decor. Each season brings an opportunity for new designs!
-
Explore Other Crystals: For a change, why not dive into the world of crystal growing with other compounds? There are many DIY projects like growing sugar or salt crystals that can complement your egg geodes, offering even more crafting fun.
Creating your egg geodes is all about personal expression and enjoying the crafting experience together. Dive into more ways to spark creativity by checking out our article on Fun Kid-Friendly Craft Ideas.
What to Serve with DIY Egg Geodes?
Creating your colorful egg geodes is just the beginning of the fun—let’s elevate your crafting experience!
- Crafting Station Snacks: Keep the energy high with bite-sized fruits like grapes and strawberries. These refreshing treats will keep little hands busy and nourished during the crafting fun.
- Sipping Magic: A light lemonade with a splash of berry syrup is perfect, not only hydrating but adding a burst of color to your crafting table. Kids will love the fizzy twist!
- Decorative Dishes: Set out platters of colorful crackers and cheese cubes. Their varied textures and hues can inspire your creations while providing a delightful munching experience as you craft.
- Sweet Rewards: After finishing your geodes, reward everyone with homemade cookies decorated to match the colors of your crystal creations. They make for a delicious celebration of your hard work!
- Creative Clean-Up: Set up simple, engaging activities like coloring sheets related to crystals or eggs to keep kids entertained as you tidy up. It transforms the clean-up process into an extension of the fun!
Expert Tips for Egg Geodes
- Adult Supervision Needed: This project involves hot water and borax; it’s important for adults to supervise children during the process for safety.
- Water Temperature Matters: Make sure the water is steaming hot to fully dissolve the borax; if it’s not hot enough, you may end up with sparse crystal growth in your egg geodes.
- Be Patient: Let the crystals form undisturbed for a full 24 hours; checking on them prematurely can disrupt their growth and lead to disappointing results.
- Prevent Moisture Damage: Store finished egg geodes in a dry environment; moisture can cause crystals to degrade over time, diminishing their beauty.
- Experiment Freely: Don’t hesitate to mix food coloring or try different egg sizes; this is your chance to showcase creativity and create one-of-a-kind egg geodes!
Egg Geodes Recipe FAQs
What type of eggshells should I use for egg geodes?
I recommend using large, clean eggshells, like those from chicken eggs, as they provide a sturdy base for your geodes. Make sure to rinse them thoroughly to remove any residue, and allow them to dry completely before starting your craft. This cleanliness ensures that the crystals will form beautifully without any interference.
How should I store my completed egg geodes?
It’s important to store your completed egg geodes in a dry environment to maintain their integrity. I recommend placing them on a shelf or cabinet, far from moisture sources. Avoid areas with high humidity where the crystals could melt or degrade. A gentle dusting with a soft cloth every few weeks will keep them looking vibrant and clean.
Can I freeze my egg geodes?
Freezing is not recommended for egg geodes. The moisture in the eggshells and crystals could cause them to crack or change shape when thawing. Instead, enjoy them as decorative pieces in your home. They can last for months in a dry place, maintaining their charm and beauty.
What are some common troubleshooting tips if my crystals don’t form?
If you notice that your crystals aren’t forming well, it’s usually due to water temperature not being hot enough or not enough borax dissolved in your solution. Make sure to boil the water until steaming and add the borax gradually while stirring until completely dissolved. Also, ensure that the filled eggshells are in a still, undisturbed location for a full 24 hours.
Are egg geodes safe for pets?
Egg geodes are not meant to be eaten and can pose a choking hazard to pets if they are curious. It’s best to keep them out of reach of animals. If you do use borax, be cautious as it can be harmful if ingested. Always supervise pets around crafting materials to ensure their safety!
Is there a way to make my egg geodes shimmer more?
Absolutely! For a sparkling touch, consider adding a dash of glitter to the borax solution before pouring it into the eggshells. This addition can make your crystals twinkle and catch the light beautifully, creating a more stunning visual effect once they’re fully formed.
Create Colorful Egg Geodes: Fun Crafting for All Ages
Ingredients
Equipment
Method
- Start by cleaning your eggshells in warm, soapy water, rinse well, and let dry for about an hour.
- Boil water until steaming, pour in 1 cup of hot water, then stir in 3 tablespoons of borax until dissolved.
- Add food coloring to the borax solution and stir gently until the color is evenly distributed.
- Pour the colorful borax solution into each eggshell half, filling them about three-quarters full.
- Place the filled eggshells in a dry area and let them sit undisturbed for at least 24 hours.
- After 24 hours, crack away the eggshells, rinse the geodes, and let them dry completely.
")