")
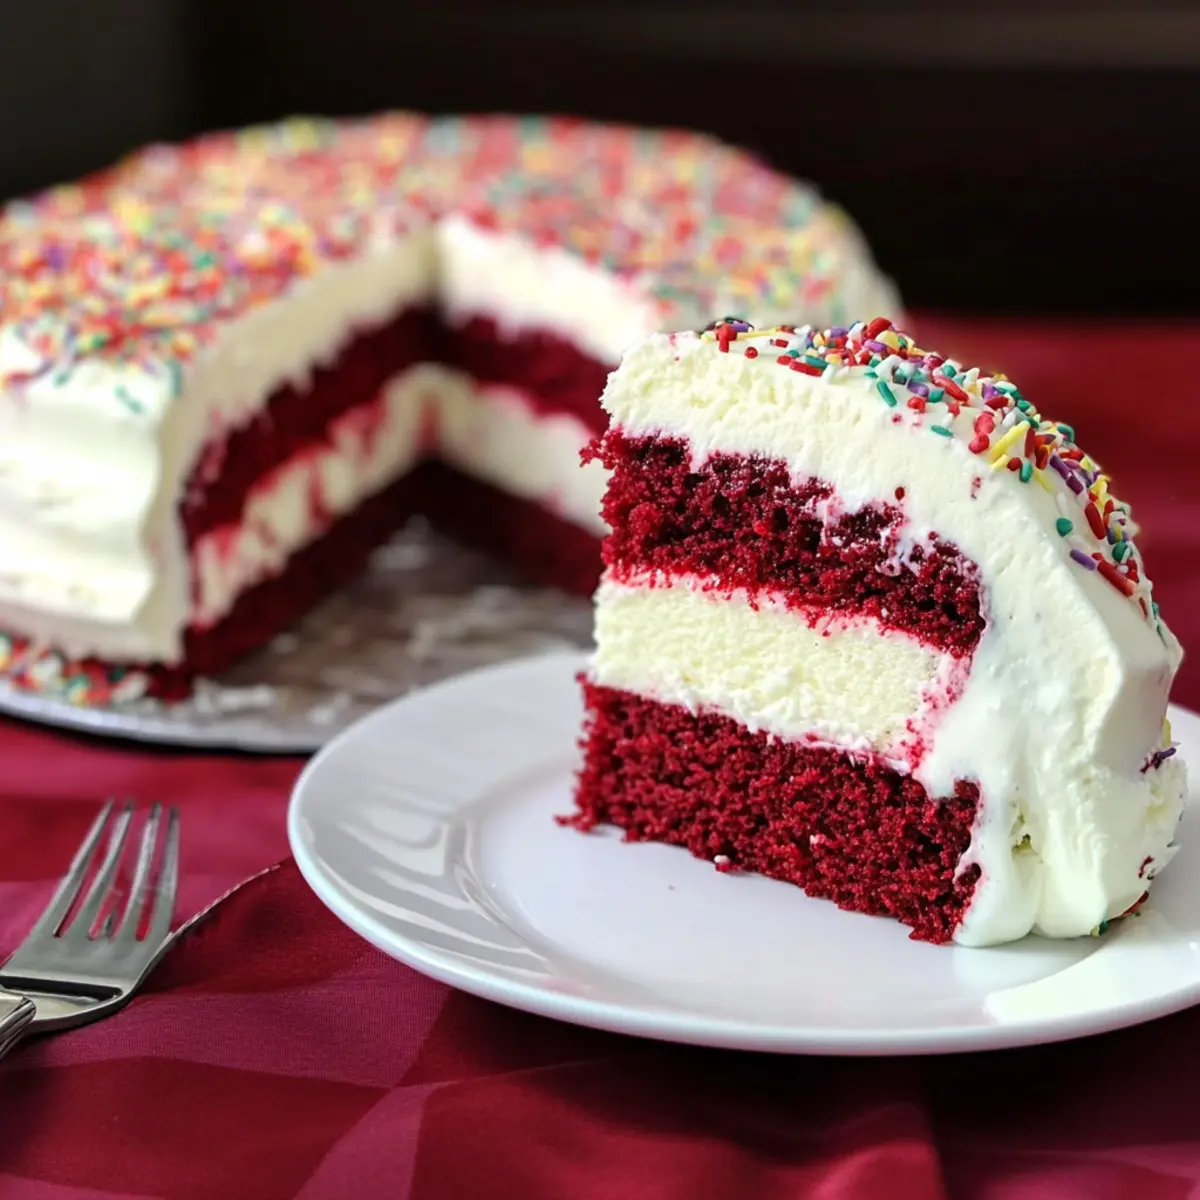
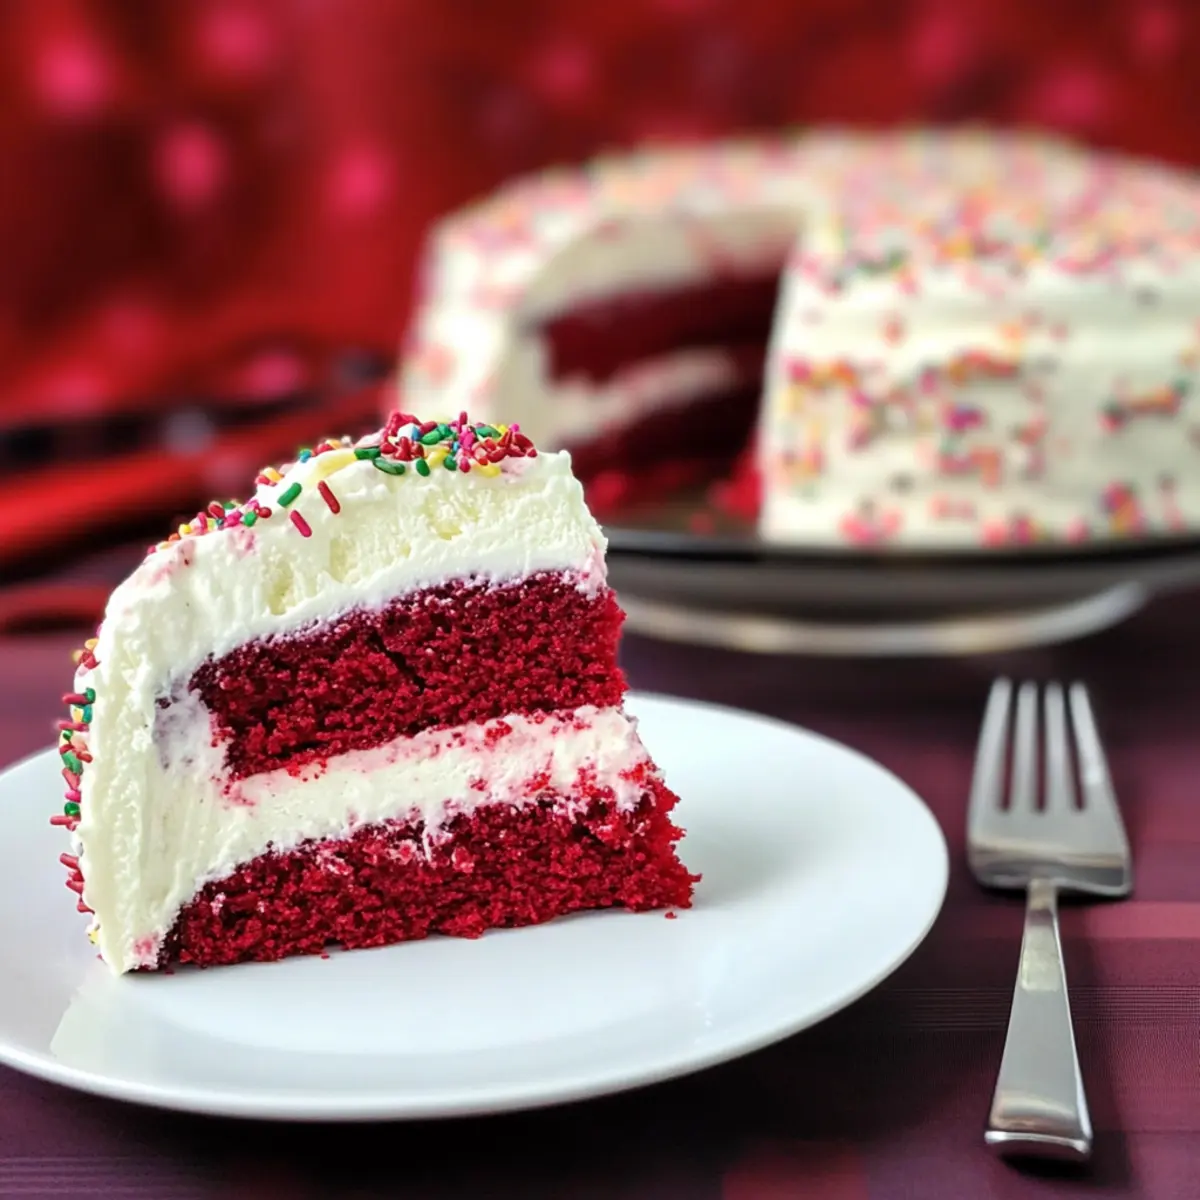
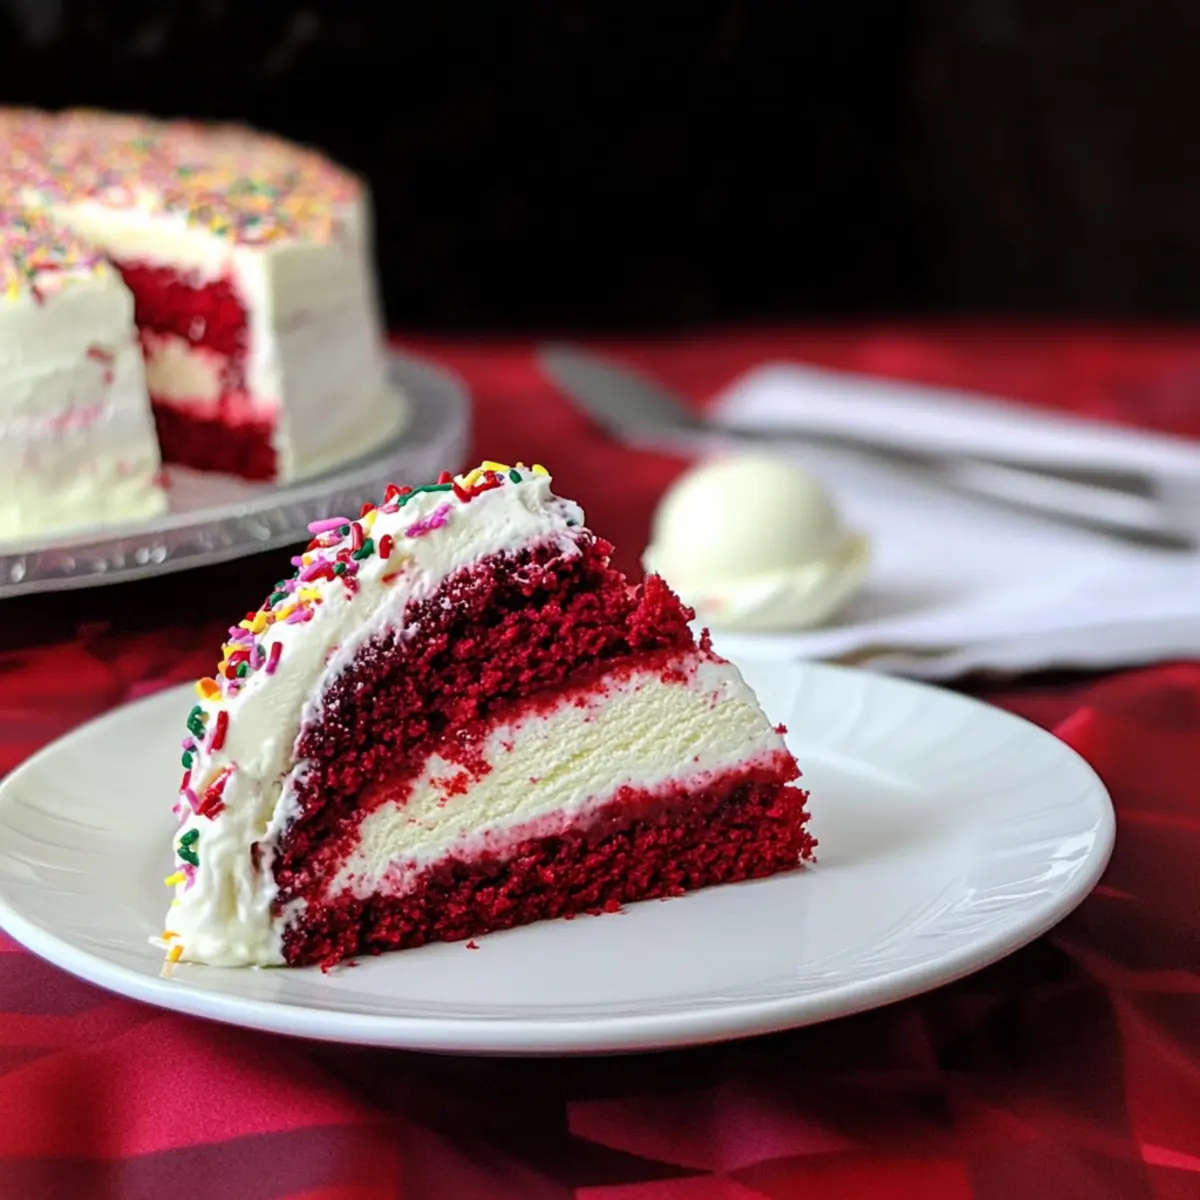
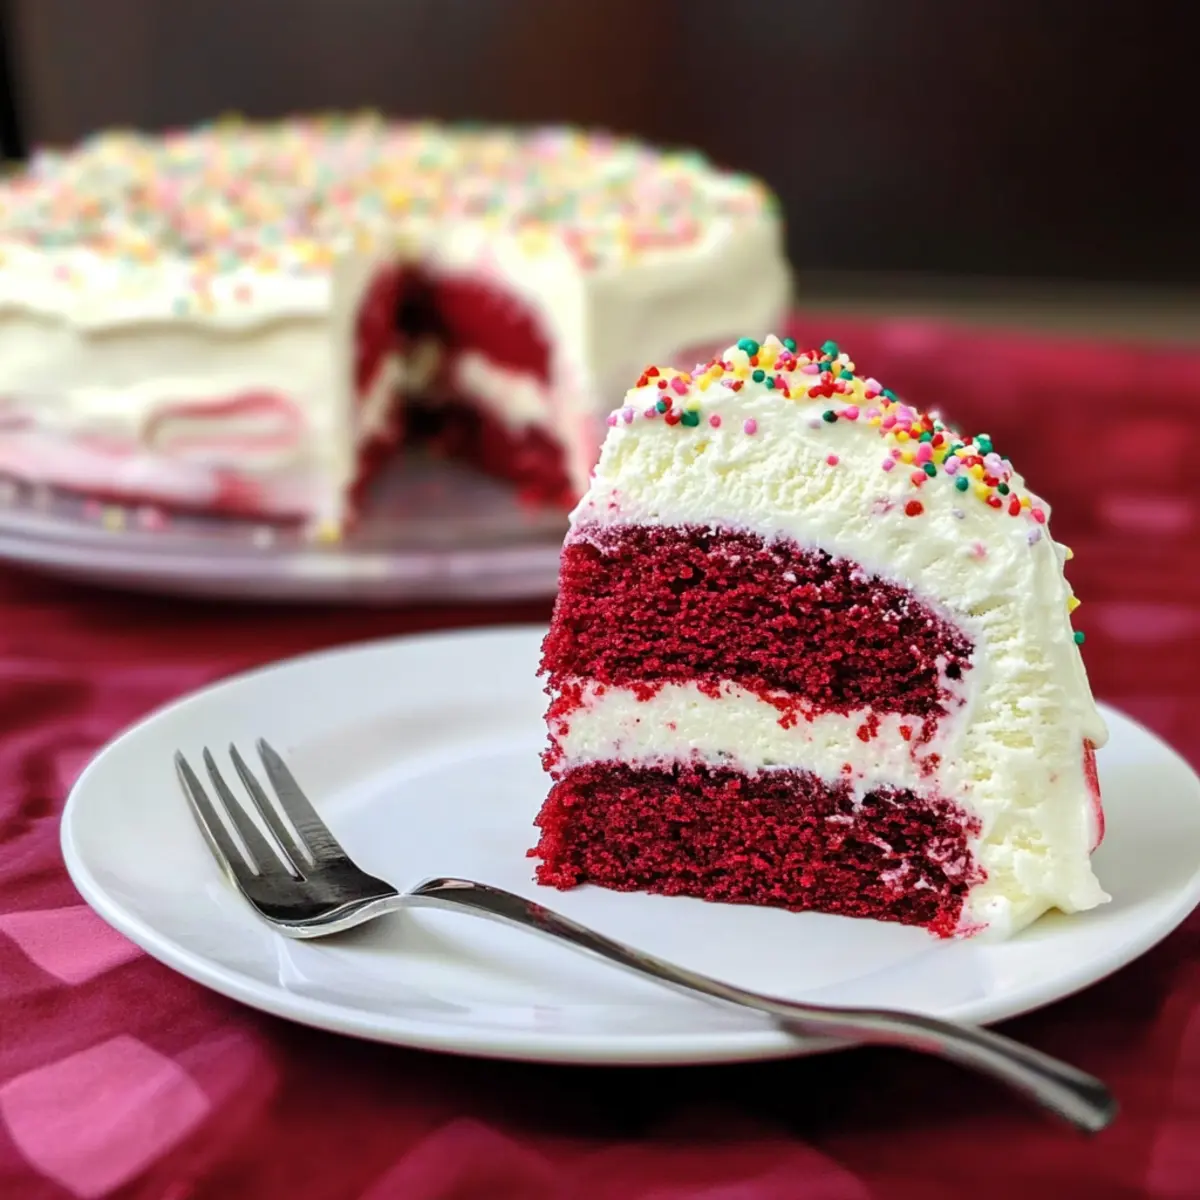
As summer approaches, my mind drifts to joyous celebrations, and what could better embody the spirit of good times than a slice of Red Velvet Ice Cream Cake? This irresistible dessert is a delightful fusion of two all-time favorites—fluffy red velvet cake and creamy, no-churn cheesecake ice cream. With the sun shining, it’s the perfect treat to impress guests or indulge your own sweet tooth. Not only is this cake visually stunning, with its vibrant colors and dreamy white chocolate cream cheese icing, but it’s also a crowd-pleaser that comes together without any fuss. Whether you’re hosting a backyard barbecue or simply craving a slice of happiness, this cake fits the bill beautifully. Ready for an unforgettable baking adventure? Let’s dive in!
Why is Red Velvet Ice Cream Cake a must-try?
Decadent Layers: This cake combines luxurious red velvet layers with creamy cheesecake ice cream, creating a visually stunning and indulgent dessert that’s hard to resist.
No Churn Needed: With no-churn ice cream, the ice cream filling is easy to make—perfect for chefs at any skill level or those new to homemade desserts.
Versatility Galore: You can customize this cake by using different flavors of ice cream or even altering the cake layers, such as swapping in chocolate or vanilla.
Perfectly Crowd-Pleasing: Not only does this dessert stand out at parties, but it’s also a treat that can delight everyone from kids to adults, making it ideal for any gathering.
Make Ahead Convenience: With the ability to prepare in advance, it’s a time-saver for busy cooks who want something special without last-minute stress.
Get ready to impress your friends and family with this show-stopping treat that’s sure to be a hit! If you’re fond of cream cheese flavors, don’t forget to check out our Strawberry Cream Cheese Frosting for inspiration!
Red Velvet Ice Cream Cake Ingredients
For the Cake
- All-Purpose Flour – Provides structure; substitute with gluten-free flour for a gluten-free option.
- Sugar – Sweetens the cake; no substitutions suggested, but can be reduced for a less sweet cake.
- Baking Soda – Helps the cake rise; ensure it’s fresh for best results.
- Salt – Balances sweetness; essential for flavor.
- Cocoa Powder – Adds a slight chocolate flavor and enhances color; use unsweetened cocoa powder.
- Vegetable Oil – Keeps cake moist; can substitute with melted coconut oil or unsweetened applesauce.
- Milk – Liquids the batter; use almond or soy milk for a dairy-free version.
- Large Egg – Binds ingredients and adds moisture; substitute with flax egg for a vegan option.
- Red Food Coloring – Provides signature color; use gel food coloring for brighter results.
- White Vinegar – Enhances the cake’s fluffiness; can use lemon juice as an alternative.
- Vanilla Extract – Adds depth to flavor; use pure vanilla for the best taste.
For the Ice Cream Filling
- Cream Cheese – Provides flavor and richness; substitute with vegan cream cheese if desired.
- Sweetened Condensed Milk – Sweetens and provides a creamy texture; can replace with coconut cream for a dairy-free version.
- Whipping Cream – Creates a fluffy texture; can use coconut cream for a dairy-free version.
For the Frosting
- White Chocolate – Adds sweetness and richness; use high-quality chocolate bars for best results.
- Unsalted Butter – Gives creaminess to the frosting; use vegan butter for a dairy-free option.
- Almond Extract – Enhances frosting flavor; omit if nut allergies are a concern.
- Sour Cream – Adds moisture and tang to the frosting; substitute with Greek yogurt for a healthier option.
- Icing Sugar – Sweetens the frosting; no substitutions recommended.
This collection of ingredients will help you create the decadent Red Velvet Ice Cream Cake that’s perfect for sunny celebrations or any special occasion!
Step‑by‑Step Instructions for Red Velvet Ice Cream Cake
Step 1: Cake Preparation
Preheat your oven to 350°F (176°C) and prepare two 8-inch round cake pans by greasing them with butter and lining the bottoms with parchment paper. This ensures that your decadent Red Velvet Ice Cream Cake layers release effortlessly. Set the prepared pans aside while you move on to creating the batter.
Step 2: Make Batter
In a small bowl, mix the vinegar with the milk and let it sit for about 5 minutes to sour. Meanwhile, sift together your dry ingredients, including flour, cocoa powder, baking soda, and salt. In a separate large bowl, whisk together the wet ingredients: sugar, vegetable oil, eggs, red food coloring, and vanilla extract. Gradually combine the dry ingredients with the wet ones until just mixed, ensuring not to overmix for a fluffy cake.
Step 3: Bake
Divide the batter evenly between the two prepared cake pans and smooth the tops with a spatula. Place them in the preheated oven and bake for 25–30 minutes, or until a toothpick inserted into the center comes out clean. Once baked, remove the cakes from the oven and let them cool in the pans for 10–15 minutes. Carefully invert them to cool completely on wire racks, leveling the tops if necessary.
Step 4: Ice Cream Filling
In a large mixing bowl, beat the cream cheese until smooth, then blend in the sweetened condensed milk until well combined. In another bowl, whip the heavy cream until stiff peaks form. Gently fold the whipped cream into the cream cheese mixture until fully incorporated. Pour this mixture into an 8-inch lined pan and freeze for at least 8 hours, until solid and ready to layer within your cake.
Step 5: Frosting
While the ice cream freezes, melt the white chocolate in a microwave or double boiler, allowing it to cool slightly. In a mixing bowl, beat together the cream cheese, unsalted butter, and sour cream until creamy and smooth. Gradually add in the cooled white chocolate, followed by the almond extract and icing sugar, mixing until you achieve a luscious frosting perfect for your Red Velvet Ice Cream Cake.
Step 6: Assembly
Once the cakes and ice cream are completely cooled and frozen, place one cake layer onto a serving plate. Carefully unwrap the ice cream from its pan and center it on top of the first cake layer. Gently place the second cake on top of the ice cream layer. Use the frosting to apply a crumb coat over the entire cake, which helps catch any loose crumbs, and then freeze briefly for 15 minutes.
Step 7: Final Frosting
After the crumb coat has set, generously frost the entire Red Velvet Ice Cream Cake with the creamy frosting using a spatula. Take your time to create a smooth finish, adding decorative sprinkles if desired. Once decorated, freeze the completed cake until ready to serve, ensuring it stays fresh and keeps its form.
Expert Tips for Red Velvet Ice Cream Cake
-
High-Quality Color: Use a high-quality gel food coloring for the most vibrant red hue in your cake. This enhances the visual appeal and makes your dessert truly standout.
-
Avoid Overmixing: Be careful not to overmix the batter. Overworking it can lead to a dense cake texture. Mix until just combined for that light, fluffy result.
-
Cool Completely: Allow the cakes to cool completely before assembling. This prevents the ice cream from melting and helps maintain the cake’s structure.
-
Chilled Equipment: Whip the cream in a chilled bowl for quicker, fluffier peaks. This will make your ice cream filling light and airy, perfect for your Red Velvet Ice Cream Cake.
-
Proper Storage: Store the finished cake in an airtight container in the freezer. This prevents freezer burn and helps maintain its delightful texture until you’re ready to serve.
Make Ahead Options
Preparing the Red Velvet Ice Cream Cake in advance is a fantastic way to simplify your dessert planning! You can bake the red velvet cake layers up to 3 days ahead and store them in an airtight container at room temperature to maintain their moisture. The ice cream filling can also be made ahead; simply freeze it in an 8-inch lined pan for at least 8 hours or overnight for convenience. When you’re ready to assemble, just layer the cake with the frozen ice cream and finish with the frosting. For best results, frost the cake on the day you plan to serve it, then freeze it until it’s time to celebrate, ensuring it stays just as delicious as when freshly made!
How to Store and Freeze Red Velvet Ice Cream Cake
Fridge: Store any leftover slices in an airtight container in the fridge for up to 3 days. This will keep the cake fresh while the flavors meld beautifully.
Freezer: Wrap the whole cake or individual slices tightly in plastic wrap, then in aluminum foil, and freeze for up to 2 months. This method prevents freezer burn.
Thawing: To enjoy, remove the cake from the freezer and let it thaw in the fridge for a few hours or at room temperature for about 30 minutes before serving. This ensures a delightful texture for your Red Velvet Ice Cream Cake.
Reheating: If desired, you can warm individual slices in the microwave for 10-15 seconds for a cozy, melty treat. Just be careful not to overheat!
What to Serve with Decadent Red Velvet Ice Cream Cake?
Indulging in a slice of this vibrant red dessert is only the beginning; let’s create the perfect meal experience!
- Fresh Berries: Juicy strawberries or raspberries add a burst of tartness that contrasts beautifully with the cake’s sweetness.
- Classic Vanilla Ice Cream: A scoop of smooth vanilla enhances the creamy texture while blending harmoniously with flavors of the cake.
- Chocolate Ganache Drizzle: A rich, warm chocolate sauce elevates the dessert, bringing a luxurious finish that enchanted chocolate lovers will adore.
- Light Fruit Salad: A medley of citrus fruits refreshes the palate and balances the cake’s richness, making each bite feel light.
- Sparkling Lemonade: The fizzy, zesty notes of lemonade cut through the sweetness, adding a refreshing twist to your dessert experience.
- Caramelized Nuts: Crunchy pecans or almonds with a hint of caramel add texture and nuttiness, rounding out the flavor profile.
- Mint Garnish: A few fresh mint leaves offer not only a pop of color but also a refreshing coolness that complements the cake.
Pairing these delightful additions will surely create a memorable feast that brings smiles to your gathering!
Red Velvet Ice Cream Cake Variations
Let your creativity shine in the kitchen with these fun and flavorful twists on the classic Red Velvet Ice Cream Cake!
-
Dairy-Free: Substitute cream cheese ice cream with almond or coconut-based ice cream for a plant-based delight. This choice maintains creaminess while being gentle on the tummy.
-
Gluten-Free: Use a high-quality gluten-free flour blend instead of all-purpose flour. Your cake will still be tender and delicious, perfect for gluten-sensitive friends.
-
Flavor Fusion: Add a teaspoon of espresso powder to the cake batter for a mocha twist. This enhances the chocolate flavor and adds a rich, complex note.
-
Nutty Crunch: Incorporate chopped pecans or walnuts into the cake batter for added texture and flavor. Toasting the nuts brings out their natural oils, making your dessert more indulgent.
-
Berry Delight: Swirl in a layer of raspberry or strawberry puree between the cake and ice cream layers for a fruity surprise. This refreshing tang pairs beautifully with the sweetness of the cake.
-
Ice Cream Variations: Experiment with different ice cream flavors like mint chocolate chip or cookie dough to create a new signature dessert. Each variation transforms the cake into a whole new experience!
-
Citrus Zest: Add a tablespoon of orange or lemon zest to the frosting for a zesty kick. This balances the sweetness and offers a refreshing lift.
-
Spicy Kick: For those who love a bit of heat, consider adding a pinch of cayenne pepper to the frosting. This unexpected twist will intrigue and delight adventurous eaters!
Whichever variation you choose, you’re bound to create a memorable dessert! And if you’re in the mood for something equally exciting, why not try your hand at our delicious Taro Ice Cream or bake up some luxurious Red Velvet Brownies? Each recipe is sure to satisfy your sweet tooth!
Red Velvet Ice Cream Cake Recipe FAQs
How do I select the best ingredients for my Red Velvet Ice Cream Cake?
Absolutely! When choosing your ingredients, look for high-quality red food coloring in gel form for the most vibrant results, and ensure your baking soda is fresh for optimal rising. Using unsweetened cocoa powder will yield the best flavor, while fresh all-purpose flour provides structure. Always check your cream cheese for creaminess and richness, which will make a world of difference in your ice cream filling.
What’s the best way to store leftover Red Velvet Ice Cream Cake?
Very! To keep any leftover pieces fresh, I recommend placing them in an airtight container and storing them in the refrigerator for up to 3 days. If you want to preserve the cake for a longer period, wrap it tightly in plastic wrap and aluminum foil, and freeze it for up to 2 months. This helps maintain its delicious texture and flavor.
Can I freeze the Red Velvet Ice Cream Cake? If so, how?
Absolutely! To freeze your entire Red Velvet Ice Cream Cake, wrap it carefully in plastic wrap and then in aluminum foil to prevent freezer burn. Individual slices can be wrapped in a similar manner. When you’re ready to enjoy it, simply thaw the cake in the refrigerator for a few hours or at room temperature for about 30 minutes. This method ensures the cake retains its delightful flavor and texture.
What should I do if my cake sinks in the middle?
Oh no! If your cake sinks, it could be due to overmixing the batter or not baking it long enough. To troubleshoot, make sure you gently combine your wet and dry ingredients until just mixed, and always use a toothpick to check if it’s fully baked. If it still sinks, layering with ice cream can help make it equally delicious, hiding any imperfections!
Is this recipe suitable for those with dietary restrictions?
Definitely! This Red Velvet Ice Cream Cake can easily be adjusted for various dietary needs. For a gluten-free option, simply replace the all-purpose flour with a gluten-free flour blend. If you’re looking for a dairy-free or vegan version, swap in almond or soy milk, and use vegan cream cheese and whipped coconut cream. The icing can be made with vegan butter to keep it dairy-free, too!
Can my pets enjoy this cake?
Very! While the cake itself contains ingredients like sugar and chocolate that are not suitable for pets, you can make a pet-friendly version by substituting certain elements. I often use pureed pumpkin, flour, and peanut butter to create a special treat. Just be cautious with any human food and consult your vet when necessary!
Irresistible Red Velvet Ice Cream Cake for Ultimate Indulgence
Ingredients
Equipment
Method
- Preheat your oven to 350°F (176°C) and prepare two 8-inch round cake pans by greasing them with butter and lining the bottoms with parchment paper.
- In a small bowl, mix the vinegar with the milk and let it sit for about 5 minutes to sour.
- Sift together the dry ingredients: flour, cocoa powder, baking soda, and salt.
- In a separate large bowl, whisk together the wet ingredients: sugar, vegetable oil, eggs, red food coloring, and vanilla extract.
- Gradually combine the dry ingredients with the wet ones until just mixed.
- Divide the batter evenly between the two prepared cake pans and smooth the tops with a spatula.
- Bake for 25–30 minutes, or until a toothpick inserted into the center comes out clean.
- Let the cakes cool in the pans for 10–15 minutes and then invert them to cool completely on wire racks.
- In a large mixing bowl, beat the cream cheese until smooth.
- Blend in the sweetened condensed milk until well combined.
- In another bowl, whip the heavy cream until stiff peaks form.
- Gently fold the whipped cream into the cream cheese mixture until fully incorporated.
- Pour this mixture into an 8-inch lined pan and freeze for at least 8 hours.
- Melt the white chocolate and allow it to cool slightly.
- In a mixing bowl, beat together the cream cheese, unsalted butter, and sour cream until creamy.
- Gradually add in the cooled white chocolate, almond extract, and icing sugar, mixing until smooth.
- Once the cakes and ice cream are completely cooled and frozen, place one cake layer onto a serving plate.
- Unwrap the ice cream and center it on top of the first cake layer.
- Gently place the second cake on top of the ice cream.
- Apply a crumb coat over the entire cake and freeze briefly for 15 minutes.
- After the crumb coat has set, frost the entire cake with the creamy frosting.
- Decorate with sprinkles if desired and freeze until ready to serve.
")