")
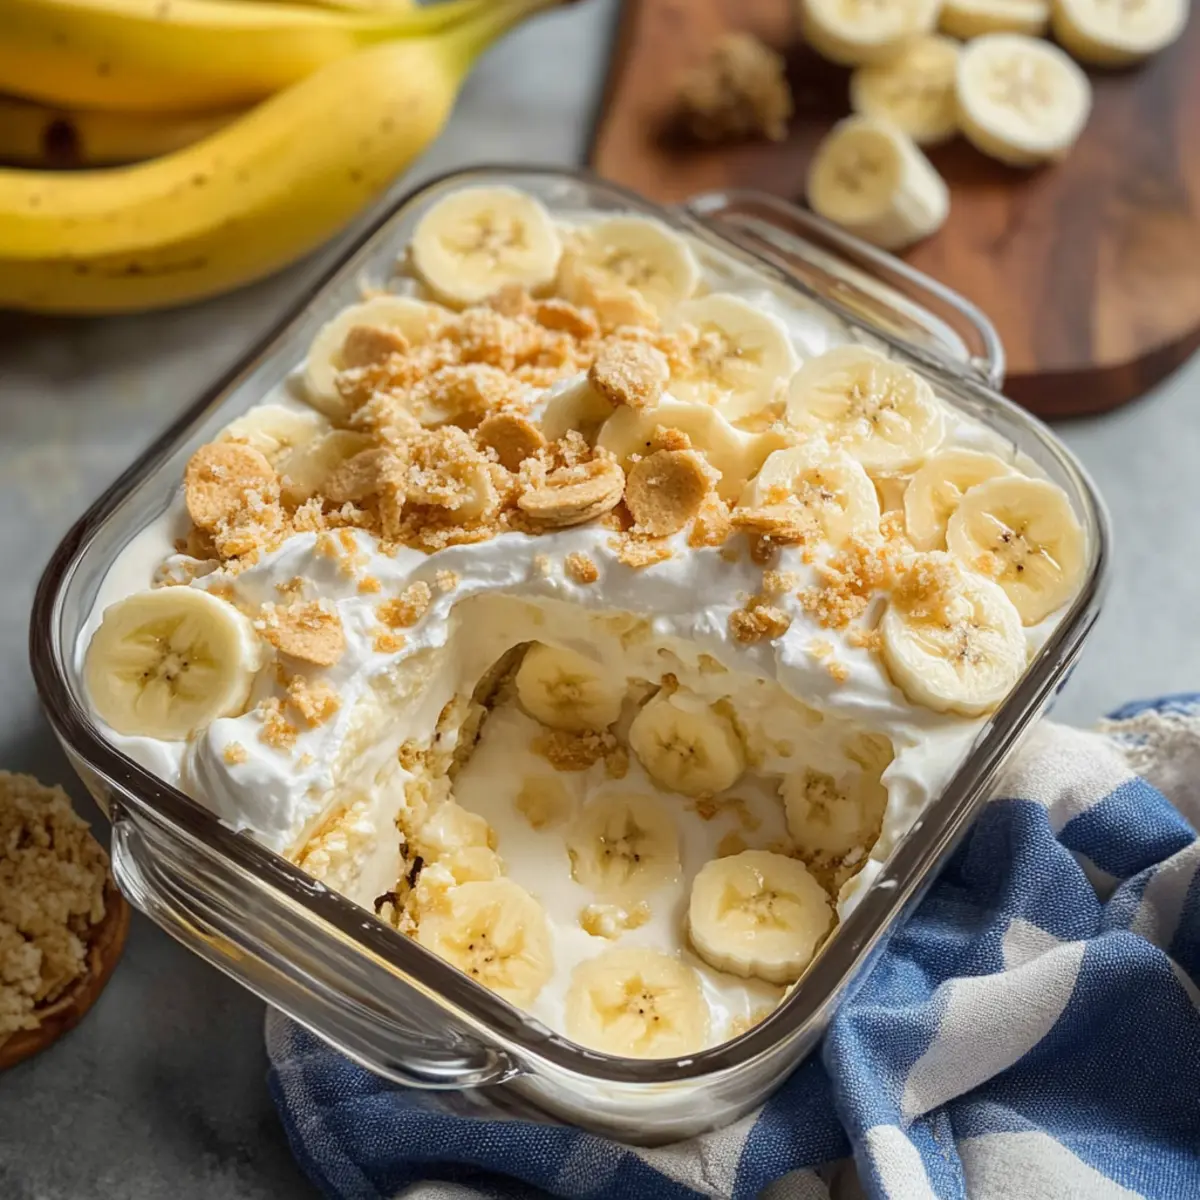
One afternoon, as I was rummaging through my kitchen, a nostalgic craving hit me like a sweet wave—Homemade Banana Pudding. This classic dessert, with its creamy custard and layers of tender bananas nestled between vanilla wafers, wrapped me in a warm embrace of memories. The best part? It’s an indulgent treat that requires no baking, making it a quick delight to whip up for gatherings or a cozy night in. Just imagine the surprise on your loved ones’ faces as you serve up this chilled goodness, perfect for satisfying sweet tooth cravings without the hassle of heating up the oven. So, are you ready to dive into this easy and delicious recipe? Let’s get started!
Why is Banana Pudding so Irresistible?
Creamy Indulgence: Each scoop of this Homemade Banana Pudding envelops your taste buds in a creamy, velvety custard that’s pure heaven.
No Baking Required: This easy, no-bake recipe means you can whip up deliciousness in just minutes, making it perfect for busy days.
Classic Comfort: This nostalgic dessert never fails to impress at gatherings or family dinners, evoking sweet memories with every bite.
Versatile Layers: With fresh bananas and vanilla wafers, each layer brings textures that elevate this dessert, but you can personalize it with fruits of your choice—like adding berries for a fun twist!
Quick Chill Time: Just a couple of hours in the fridge and your masterpiece is ready to wow guests—ideal for last-minute dessert decisions.
Transform your dessert game with this indulgent treat that stands out in any setting; check out my nutritional breakdown for more details!
Banana Pudding Ingredients
For the Pudding Base
- Half and Half – Provides creamy richness; substitute with whole milk for a lighter version.
- Vanilla Bean or Vanilla Extract – Adds aromatic flavor notes; use 2 teaspoons of vanilla extract if vanilla bean is unavailable.
- Nutmeg – Enhances flavor complexity; preferably freshly grated for best results.
- Granulated Sugar – Sweetens the pudding effectively; no direct substitution suggested.
- Cornstarch – Thickens the pudding to the right consistency; ensure it’s fresh for best thickening.
- Salt – Balances sweetness.
- Egg Yolks – Provides richness and structure; can’t be substituted for vegan versions.
- Butter (unsalted or salted) – Adds flavor; replace with vegan butter if needed.
For Layering
- Vanilla Wafer Cookies – Forms the dessert layers; Goya Maria cookies can be used as an alternative.
- Bananas – Key fruit component; should be ripe but not overly spotty, making it the star of your banana pudding.
- Lemon Juice – Prevents bananas from browning; optional but recommended.
For the Topping
- Heavy Cream – Adds a fluffy topping to the pudding; substitute with whipped coconut cream for a non-dairy option.
- Granulated Sugar – Sweetens the whipped cream.
- Vanilla Extract – Enhances the flavor of the whipped cream.
Dive into this delightful layering of flavors that elevates a classic dessert to new heights!
Step‑by‑Step Instructions for Ultimate No-Bake Homemade Banana Pudding
Step 1: Warm the Pudding Base
In a medium saucepan, combine 2 cups of half and half, the seeds from 1 vanilla bean (or 2 teaspoons of vanilla extract), and a pinch of freshly grated nutmeg. Heat the mixture over medium heat until it begins to shimmer but not boil, stirring occasionally. This step infuses your pudding base with warmth and aromatic flavor to create the perfect foundation for your Homemade Banana Pudding.
Step 2: Whisk Egg Mixture
In a separate mixing bowl, whisk together 3/4 cup of granulated sugar, 1/4 cup of cornstarch, 1/4 teaspoon of salt, and 4 egg yolks until the mixture is light and fluffy, about 2 minutes. Whisk vigorously to ensure that the egg yolks are fully combined and aerated, which helps to create a rich texture in the pudding. This will be combined with the warm base in the next step.
Step 3: Combine Mixtures
Gradually pour the hot half and half mixture into the egg mixture, whisking constantly to temper the eggs and prevent curdling. Once combined, return all the ingredients to the saucepan. Heat over medium heat, whisking continuously, until the pudding begins to bubble and thickens, which should take about 5–7 minutes. The mixture should coat the back of a spoon when it’s ready, ensuring a creamy consistency.
Step 4: Cook Until Thickened
Continue to cook the pudding for an additional minute after it reaches a bubbling boil, stirring constantly. Once thickened, remove the saucepan from heat and stir in 2 tablespoons of unsalted butter and 1 teaspoon of vanilla extract (if you haven’t used vanilla bean). Make sure everything is well blended, creating a smooth, glossy pudding that’ll be the heart of your Banana Pudding.
Step 5: Chill Pudding
Transfer the pudding to a bowl and cover it with plastic wrap pressed directly onto the surface to avoid a skin forming. Allow it to chill in the refrigerator for at least 2 hours until it firms up nicely. This cooling time is essential for the proper texture of your Ultimate No-Bake Homemade Banana Pudding, making sure it’s perfectly luscious and rich when assembled.
Step 6: Layer Pudding
Once the pudding has chilled, it’s time to start layering. In a large baking dish, place a layer of vanilla wafer cookies at the bottom. Spread half of the chilled pudding over the cookies, then add sliced ripe bananas brushed with lemon juice to prevent browning. Top with another layer of vanilla wafers followed by the remaining pudding. Chill for an additional 2 hours to allow the flavors to meld beautifully.
Step 7: Make Topping
In a clean mixing bowl, whip 1 cup of heavy cream with 2 tablespoons of sugar and 1 teaspoon of vanilla extract until stiff peaks form, which takes about 3-5 minutes. This fluffy topping will add an airy finish to your dessert. Once ready, carefully spread the whipped cream over the top layer of pudding, creating a decadent layer that enhances your Homemade Banana Pudding.
Step 8: Garnish and Serve
For an elegant presentation, sprinkle crushed vanilla wafers over the whipped topping and add a few banana slices as garnish. This final touch not only adds visual appeal but also invites your guests to indulge in the ultimate experience of this incredible dessert. Serve chilled and watch as your Homemade Banana Pudding becomes the star of the gathering.
How to Store and Freeze Homemade Banana Pudding
Fridge: Store your Homemade Banana Pudding in the refrigerator, covered, for up to 3 days. This ensures it retains its creamy goodness without drying out.
Freezer: While this pudding is best enjoyed fresh, you can freeze it for up to 2 months by placing it in an airtight container. However, be aware that the texture may change slightly upon thawing.
Reheating: If frozen, thaw in the fridge overnight. Do not reheat as it may affect the creamy texture; it’s best served chilled.
Prevent Browning: To maintain freshness, avoid placing cut bananas on the pudding too early. Instead, layer them right before serving to keep them looking and tasting their best.
Banana Pudding Variations & Substitutions
Feel free to explore these delightful twists and swaps that will make your homemade banana pudding even more exciting!
- Fruit Fusion: Add crushed pineapple or layer in mixed berries for a refreshing fruit twist. You can let your imagination run wild with the flavors!
- Nutty Crunch: Sprinkle chopped pecans or almonds between layers for added crunch and nutty flavor that contrasts beautifully with the creamy pudding.
- Chocolate Lover’s Delight: Incorporate chocolate chips or layers of chocolate pudding for a rich, indulgent treat that any chocolate fan will adore.
- Dairy-Free Option: Substitute half and half with coconut milk and heavy cream with whipped coconut cream, creating a rich, non-dairy delight.
- Flavor Boost: Stir in a teaspoon of almond extract or a splash of espresso for a surprising flavor kick that’ll elevate your banana pudding to new heights.
- Graham Cracker Swap: Replace vanilla wafers with graham crackers for a slight twist in texture and taste; this can add a delightful touch of nostalgia.
- Spiced Up: Dust the top layer with a little cinnamon or nutmeg for a warm, cozy flavor that complements the bananas perfectly.
These variations not only enhance the classic flavor but also allow you to tailor the dessert to suit your preferences. Whether you’re serving it at a gathering or enjoying a quiet night in, your updated banana pudding will surely impress friends and family! Don’t forget to check out my tips on how to effectively store and freeze your Homemade Banana Pudding for future enjoyment!
What to Serve with Ultimate No-Bake Homemade Banana Pudding
Imagine a warm evening, good company, and the delightful sweetness of homemade desserts that create lasting memories.
- Classic Vanilla Ice Cream: A scoop of vanilla ice cream adds a creamy contrast to the pudding’s textures, enhancing every sweet bite.
- Fresh Berries: Strawberries or blueberries introduce a burst of freshness that complements the richness of the pudding, providing a balanced flavor profile.
- Coconut Flakes: Toasted coconut flakes sprinkled on top add a delightful crunch and tropical flair, transporting you to a sunny paradise with each spoonful.
- Chocolate Whipped Cream: For a decadent twist, make chocolate whipped cream to slather on top, adding a rich layer of flavor that pairs wonderfully with bananas.
- Homemade Lemonade: A refreshing glass of homemade lemonade provides a tangy contrast that cuts through the sweetness and cleanses the palate beautifully.
- Coffee or Espresso: A warm cup of coffee or espresso enhances the dessert experience, where the rich flavors of the brew can mingle with the sweetness of the pudding.
- Spiced Nuts: A handful of spiced nuts can introduce a crunchy element, perfectly balancing the creaminess while adding a hint of savory warmth.
- Chocolate Cookies: Serving alongside chocolate wafer cookies creates a fun pairing, allowing guests to enjoy dipping and mixing flavors in every bite.
- Peanut Butter Delights: If you’re a fan of peanut butter, a small dish of chocolate-covered peanut butter balls can be an indulgent match for the pudding’s sweetness.
Make Ahead Options
These Ultimate No-Bake Homemade Banana Pudding are ideal for busy cooks looking to save time during the week! You can prepare the creamy pudding base and chill it up to 24 hours in advance, covering it tightly to prevent skin formation. Additionally, you can slice bananas and brush them with lemon juice, storing them in an airtight container in the refrigerator for up to 3 days without browning. When you’re ready to serve, simply layer the pudding, cookies, and bananas, then top with whipped cream. This way, you’ll have a show-stopping dessert that’s just as delicious with minimal last-minute effort!
Expert Tips for Homemade Banana Pudding
-
Whip Cream Properly: Ensure to keep whipping the cream until stiff peaks form to achieve that perfect elevated topping for your banana pudding.
-
Use Fresh Ingredients: Always opt for ripe bananas—not overly spotty—to enhance flavor and avoid mushiness.
-
Prevent Browning: Brush banana slices with lemon juice right after cutting to preserve their bright appearance and fresh taste.
-
Chill Adequately: Don’t rush the chilling process! Allow the pudding to chill for at least 2 hours after layering to achieve the creamy, luscious texture you desire.
-
Layer Wisely: When layering, space out your bananas and cookies to ensure every serving is a delightful mix of flavors and textures.
-
Experiment With Flavor: Feel free to customize your banana pudding by adding a sprinkle of cinnamon or using different cookies—make it uniquely yours!
Ultimate No-Bake Homemade Banana Pudding Recipe FAQs
How do I choose the right bananas for this recipe?
Look for bananas that are ripe, meaning they’re mostly yellow with just a few brown spots; this ensures they’re sweet without being overly soft. Avoid bananas that have dark spots all over, as they may be too ripe and mushy for your banana pudding.
Can I store leftover Banana Pudding, and for how long?
Absolutely! You can store your Homemade Banana Pudding in the refrigerator, covered, for up to 3 days. This will keep it creamy and delicious, but make sure to avoid placing cut bananas on the pudding too early to prevent browning.
Is it possible to freeze Homemade Banana Pudding?
Yes, you can freeze your banana pudding! It can be stored in an airtight container for up to 2 months. However, be aware that the texture might change slightly after thawing, so it’s best enjoyed fresh. Remember to thaw it overnight in the fridge and do not reheat, as it should be served chilled.
What should I do if my pudding doesn’t thicken properly?
If your pudding isn’t thickening, ensure you’ve cooked it long enough and kept whisking continuously. The key is to cook it until it bubbles and thickens; usually about 5–7 minutes. If it still seems runny, consider returning it to the heat for a few minutes longer, whisking continuously until the desired consistency is achieved.
Can I use any other ingredients for allergy considerations?
Certainly! For allergy-friendly versions, you can substitute the regular milk with almond or soy milk and use vegan butter for a dairy-free option. Just remember that egg yolks can’t be replaced if you’re looking for a vegan version, but you can consider using a store-bought egg replacer designed for custards.
Do I need to worry about leftovers that contain bananas?
Yes, it’s best to serve banana pudding soon after it’s assembled, as the bananas can brown and soften. To keep things fresh, layer the bananas right before serving, or store any leftover pudding separately without the bananas and layer them back in just before enjoying it again.
Irresistibly Creamy Banana Pudding That'll Wow Your Guests
Ingredients
Equipment
Method
- Warm the Pudding Base: In a medium saucepan, combine 2 cups of half and half, the seeds from 1 vanilla bean, and a pinch of freshly grated nutmeg. Heat until it begins to shimmer, stirring occasionally.
- Whisk Egg Mixture: In a separate bowl, whisk together 3/4 cup of granulated sugar, 1/4 cup of cornstarch, 1/4 teaspoon of salt, and 4 egg yolks until light and fluffy, about 2 minutes.
- Combine Mixtures: Gradually pour the hot half and half mixture into the egg mixture, whisking constantly. Return to the saucepan and heat, whisking continuously, until it thickens, about 5–7 minutes.
- Cook Until Thickened: Continue to cook for an additional minute after boiling, stirring constantly. Remove from heat and stir in 2 tablespoons of unsalted butter and 1 teaspoon of vanilla extract.
- Chill Pudding: Transfer pudding to a bowl and cover with plastic wrap pressed directly on the surface. Chill in refrigerator for at least 2 hours.
- Layer Pudding: In a large baking dish, layer vanilla wafer cookies, half of the chilled pudding, sliced bananas brushed with lemon juice, and top with remaining pudding. Chill for another 2 hours.
- Make Topping: In a clean mixing bowl, whip 1 cup of heavy cream with 2 tablespoons of sugar and 1 teaspoon of vanilla extract until stiff peaks form, about 3-5 minutes.
- Garnish and Serve: Sprinkle crushed vanilla wafers over whipped topping and add banana slices as garnish. Serve chilled.
")