")
Staring into the fridge, I grappled with the age-old dilemma: what to whip up for my kids after school? That’s when I stumbled upon the perfect solution—Banana Sushi! This fun and healthy snack comes together in minutes and is packed with protein, making it an ideal choice for hungry little ones craving something delightful. Imagine your kids gleefully devouring rolled tortillas filled with sweet banana and a hint of creamy Nutella, each bite resembling playful sushi rolls. This vibrant snack not only offers a nutritious twist on traditional fare but’s also a huge crowd-pleaser. Plus, it’s a breeze to customize with their favorite nut butters or even a sprinkle of granola for extra crunch. Will your next kitchen adventure include this creative treat? Let’s get rolling!
Why is Banana Sushi a Hit?
Unique, Playful Presentation: Kids will love the fun sushi-like rolls, making snack time an exciting experience!
Quick Preparation: You can whip these up in just minutes, perfect for busy afternoons or a last-minute treat.
Healthy Ingredients: Packed with protein and nutrients, it’s a guilt-free choice compared to other snacks.
Customizable Delight: Whether using different nut butters or adding fruits like strawberries, there’s no limit to the creativity!
Crowd-Pleasing Option: This versatile snack appeals to kids and adults alike—great for family gatherings or playdates!
Make sure to check out different nut butter variations for added health benefits and flavor!
Banana Sushi Ingredients
• Here’s everything you’ll need for this fun, healthy snack!
For the Sushi Wrap
- Flour Tortilla – A soft base; both whole wheat and white will work beautifully!
For the Filling
- Banana – The star of the show, delivering natural sweetness and essential vitamins.
- Peanut Butter – Boosts protein and creaminess; swap for almond or sunflower seed butter if allergies are a concern.
- Nutella – Just a smear adds a touch of indulgence; feel free to replace with chocolate sauce or skip for a lower sugar option.
Get ready to roll and enjoy your delicious Banana Sushi!
Step‑by‑Step Instructions for Banana Sushi
Step 1: Prepare the Tortilla
Start by laying a flour tortilla flat on a clean cutting board or plate. If you prefer a softer wrap, consider warming the tortilla in the microwave for about 10-15 seconds, just until it’s pliable. This will make rolling the Banana Sushi easier and prevent tearing. Ensure the tortilla is smooth and ready for a delicious filling.
Step 2: Add the Peanut Butter
Spread a generous layer of peanut butter evenly across one side of the tortilla, leaving about an inch at the edges. This creamy base not only adds flavor but also helps hold the ingredients together. The peanut butter should coat the tortilla smoothly, creating a great foundation for your Banana Sushi. Remember, you can adjust the thickness based on your preference for nuttiness!
Step 3: Add the Nutella
Next, take a small amount of Nutella and lightly smear it in a line above the peanut butter. The Nutella adds a delightful sweetness and makes the Banana Sushi exciting for kids. Be careful not to overdo it—just a thin line will bring that rich chocolate flavor without overpowering the snack. The blend of nut butter with Nutella creates a tasty contrast.
Step 4: Place the Banana
Now, take a banana and peel it carefully, then place it at one end of the tortilla, aligning it with the edge. Press the banana gently into the Nutella to secure it in place. Make sure the banana is straight and positioned well, as this will help when rolling the tortilla into a sushi shape. The banana serves as the main attraction of this fun snack!
Step 5: Roll the Tortilla
With the banana positioned, begin rolling the tortilla tightly around the filling. Start from the edge where the banana is placed, and roll away from you, keeping the tortilla snug to prevent any fillings from spilling out. Continue rolling until you reach the end of the tortilla, using the peanut butter to seal the edge. This rolling technique is key to achieving that perfect Banana Sushi!
Step 6: Slice the Sushi
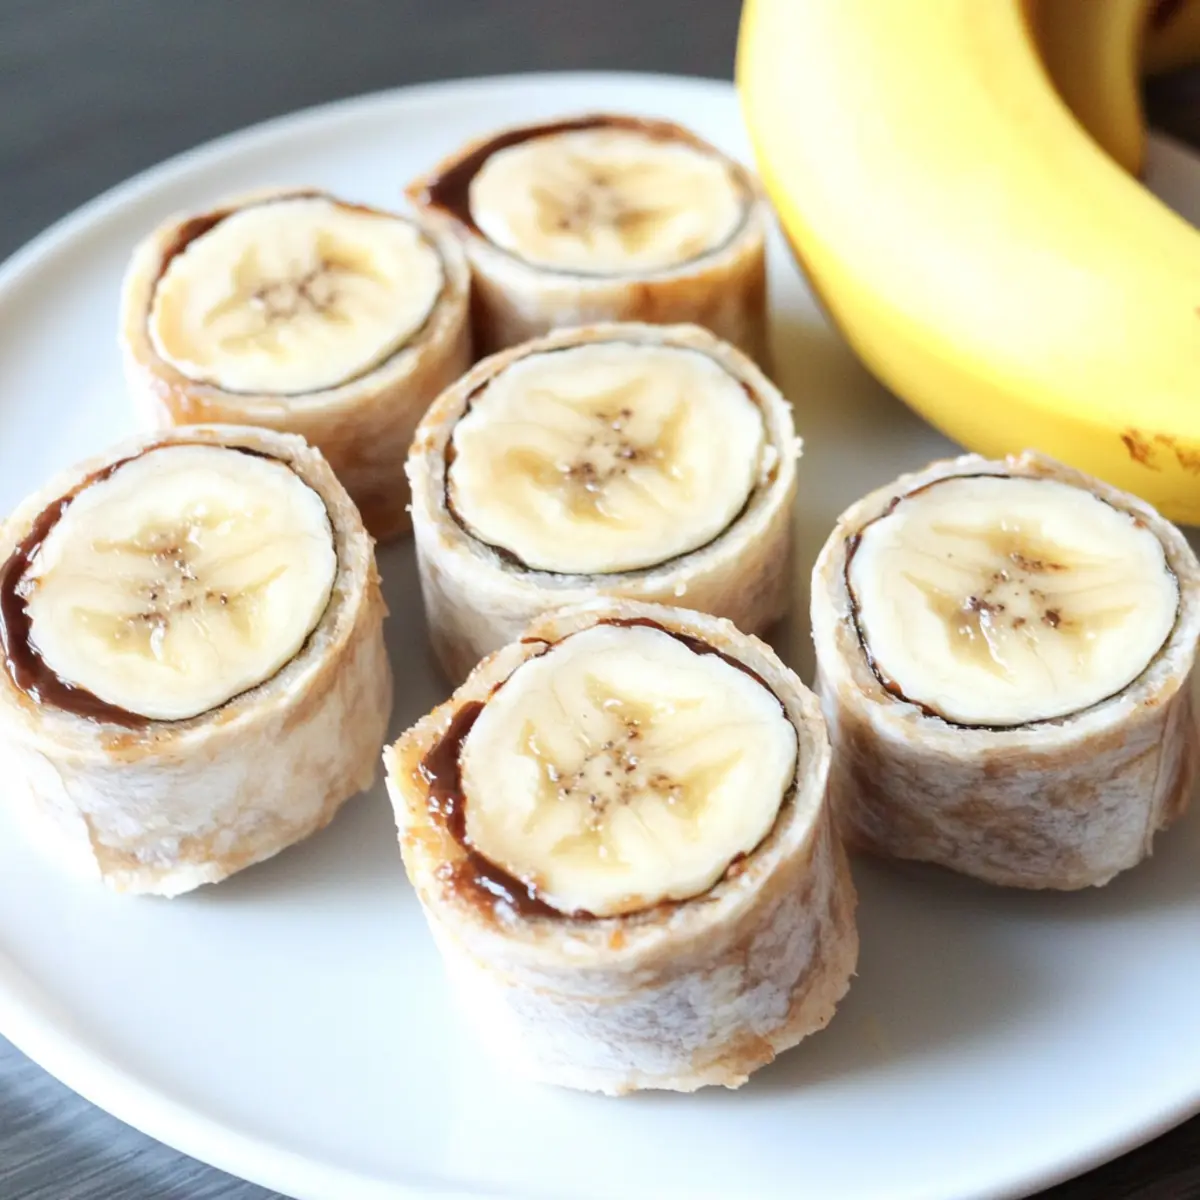
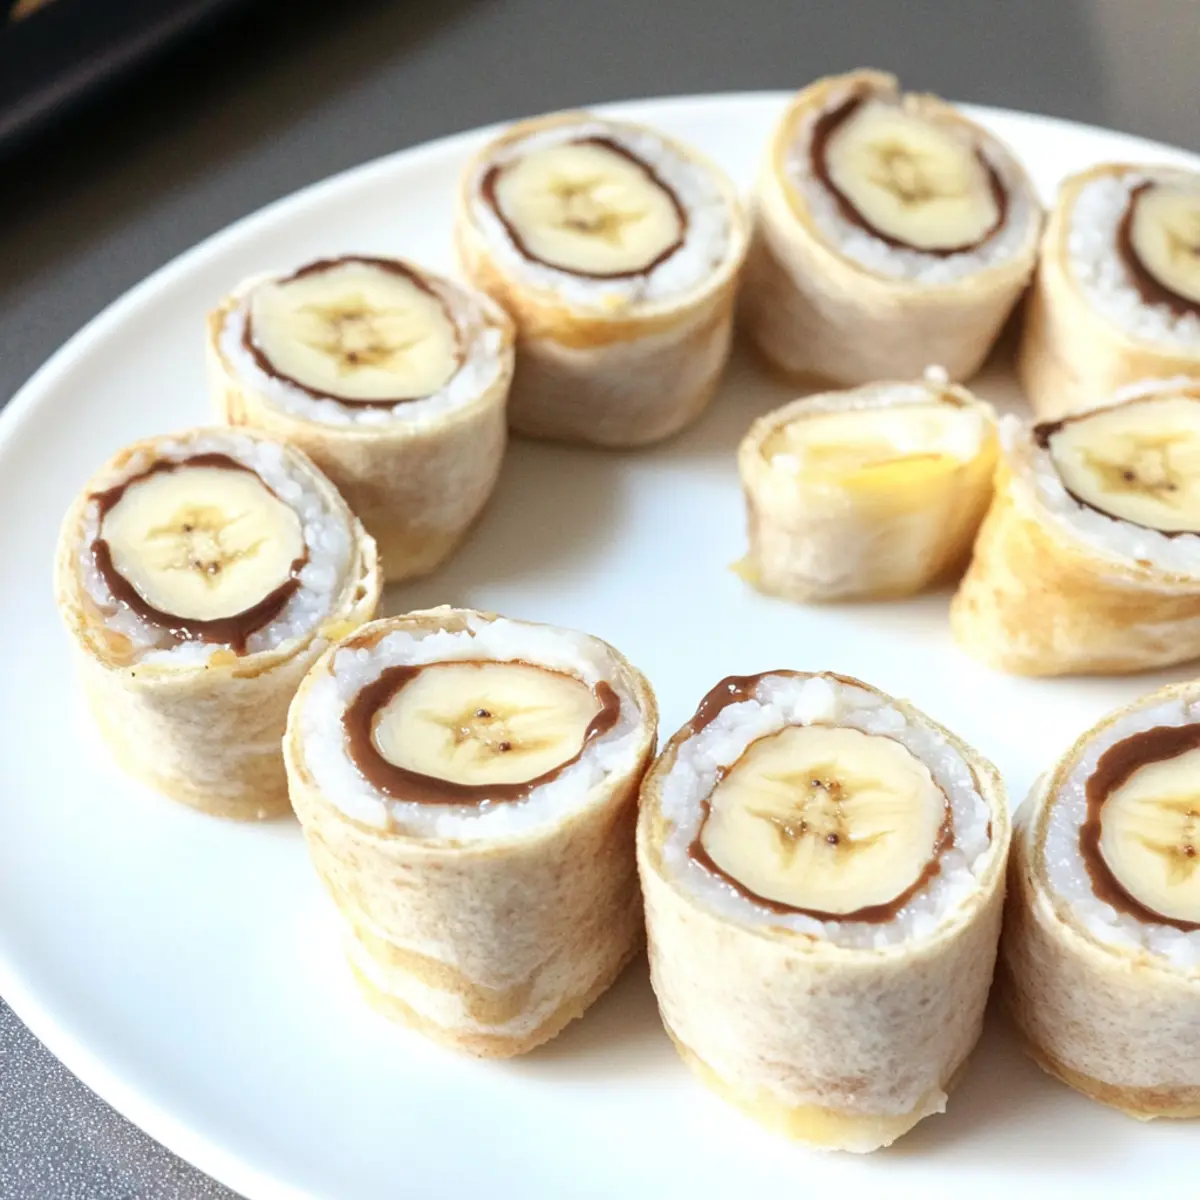
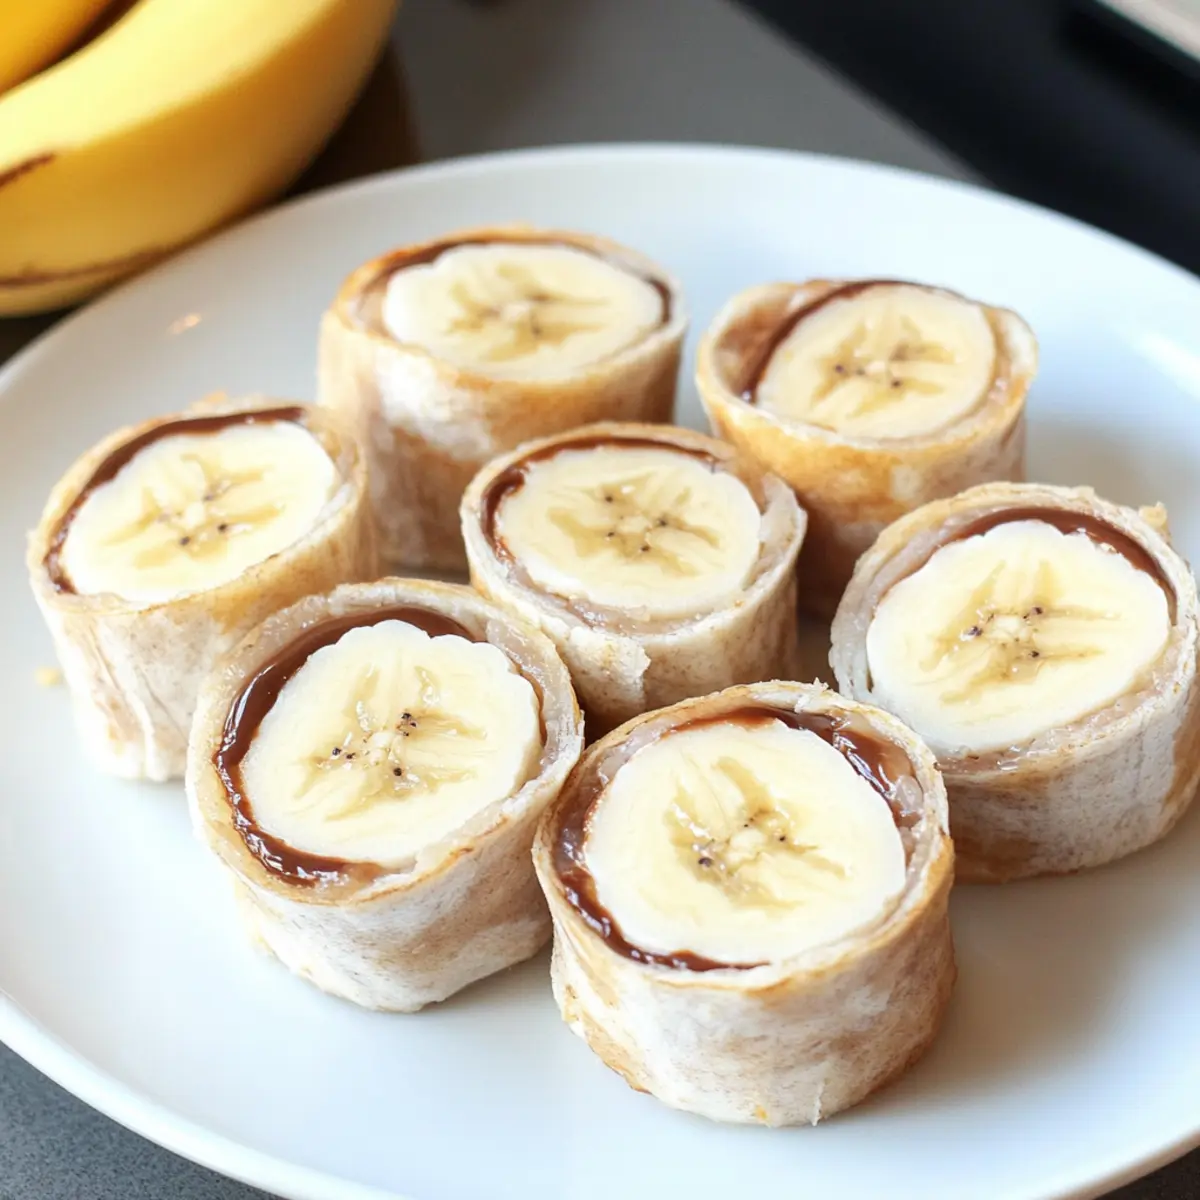
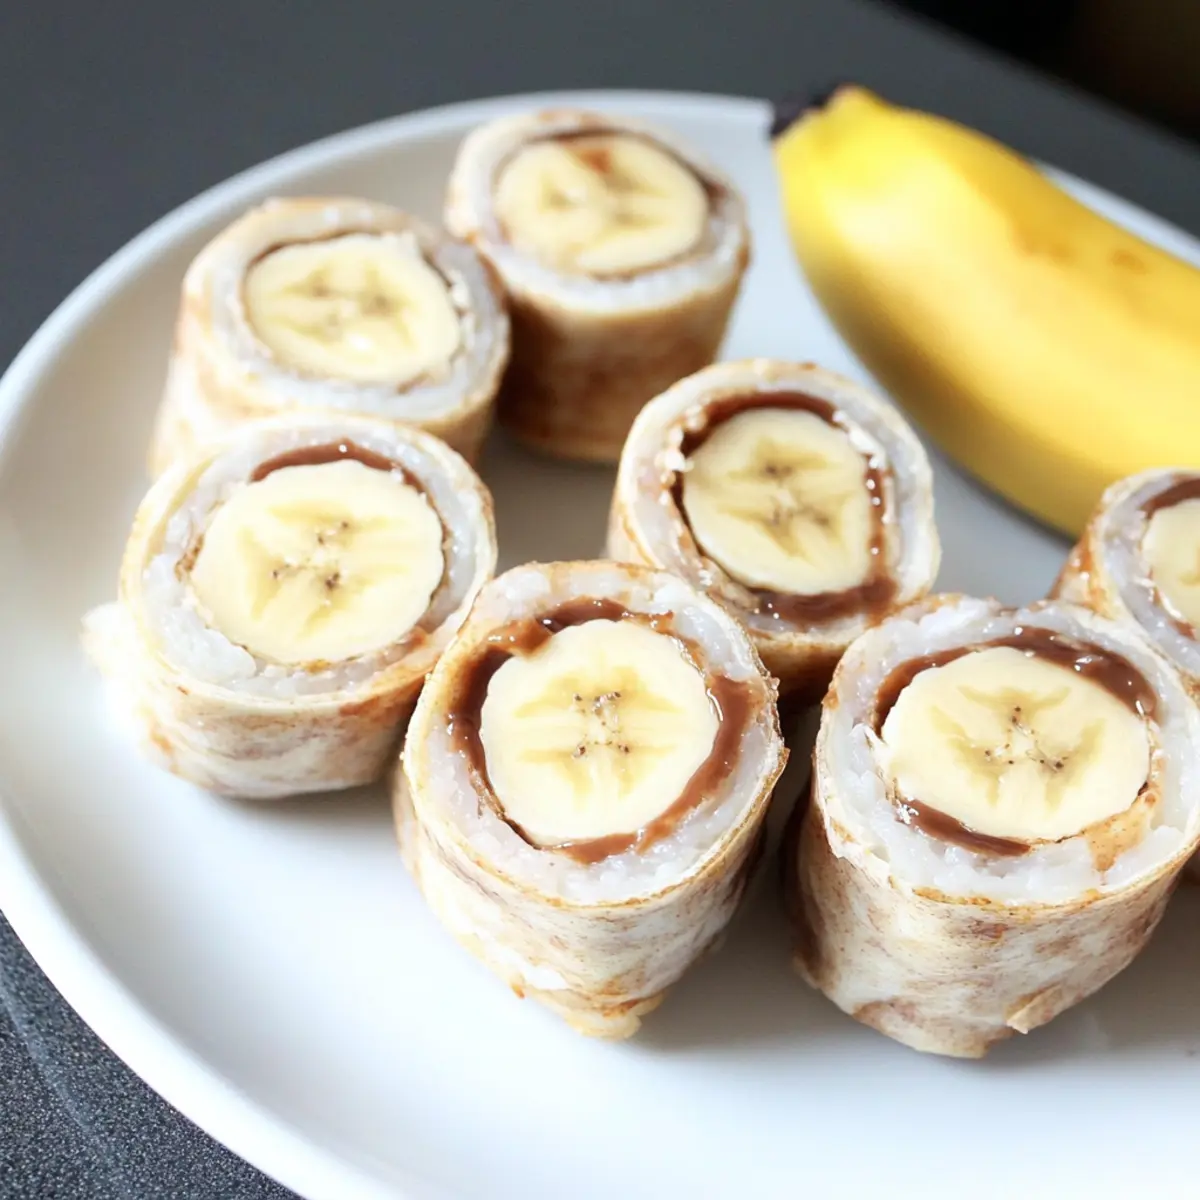
Once you have your sushi roll, it’s time to slice! Using a sharp knife, cut the rolled tortilla into 1/2 to 1-inch rounds, making sure to use a gentle sawing motion. This helps to maintain the structure of your Banana Sushi and keeps the banana intact. Each slice should reveal a beautiful cross-section of banana, nut butter, and Nutella—a treat for the eyes and taste buds!
Step 7: Serve and Enjoy
After slicing, arrange the Banana Sushi pieces on a colorful plate for an appealing presentation. Serve immediately for the best flavor and texture, as the tortilla will taste its freshest. This fun, healthy snack is perfect for after-school energy boosts or lunchbox surprises. Revel in the joy of watching your kids delight in each delicious bite of their Banana Sushi!
What to Serve with Quick and Easy Banana Sushi
Elevate your Banana Sushi experience with delightful pairings that add flavor, texture, and fun to every bite.
- Fresh Fruit Salad: A mix of seasonal fruits adds vibrant colors and refreshing flavors, enhancing the wholesome goodness of banana sushi.
- Yogurt Dip: Creamy Greek yogurt with a drizzle of honey creates a luscious dip, adding tanginess and protein to the party.
- Granola Crunch: Sprinkle a handful of crunchy granola on top for delightful texture and added nutrients—perfect for ricing the energy level!
- Chocolate Milk: A chilled glass of chocolate milk is a guaranteed kid-favorite that brings a nostalgic touch to your snack time.
- Veggie Sticks: Crisp carrot and cucumber sticks offer a fresh, healthy crunch that pairs wonderfully with the sweet sushi rolls.
- Nut Butter Dippers: Extra nut butter served on the side can make each bite even more indulgent and satisfying for those who love creaminess.
- Frozen Fruit Bars: Serve these delightful treats for a refreshing dessert while keeping with the fruity fun of banana sushi!
- Nature Valley Bars: These chewy, nutty bars create a satisfying texture contrast, making them a perfect, healthful accomplice for our star recipe.
Banana Sushi Variations & Substitutions
Get ready to play with your Banana Sushi and create delightful twists that will keep snack time exciting!
-
Nut-Free: Swap peanut butter for sunflower seed butter to create a nut-free alternative that still packs a punch of flavor.
-
Chocolate Lovers: Replace Nutella with chocolate sauce for a sweeter version that will satisfy any chocolate craving without losing the fun.
-
Fruit Switch-Up: Use sliced strawberries or apples instead of bananas for a refreshing change. Each fruit adds its unique sweetness that kids will adore!
-
Granola Crunch: Add a sprinkle of granola inside for a satisfying crunch. This not only enhances the texture but also turns your sushi into a mini power snack!
-
Spice It Up: For an adventurous twist, sprinkle a pinch of cinnamon on the peanut butter layer. The warm spice can ignite a whole new snack experience.
-
Wrap Variety: Experiment with different wraps like spinach tortillas or flavored wraps for an added layer of taste and color. Each variation opens new culinary horizons!
-
Dairy-Free: Substitute Nutella with a dairy-free chocolate spread if you’re looking to keep it entirely plant-based. Dairy-free options are becoming deliciously conventional!
Feel free to explore these variations for a playful and colorful take on your delicious Banana Sushi! Check out our ideas for different nut butter variations or some exciting fruit substitutes to spark your next kitchen adventure!
Make Ahead Options
These delightful Banana Sushi are perfect for meal prep enthusiasts! You can prepare the tortillas with the peanut butter and Nutella spread up to 24 hours in advance—just wrap them tightly in plastic wrap to maintain freshness. Additionally, slice the bananas and sprinkle them with a little lemon juice to prevent browning, doing this no more than 3 hours before serving. When it’s time to enjoy, simply roll the tortillas around the bananas and cut them into bite-sized pieces. This way, you’ll have a quick, healthy snack ready to go for busy weeknights, all while keeping your preparation efforts minimal and stress-free!
Expert Tips for Making Banana Sushi
- Tight Roll: Roll the tortilla as tightly as possible to keep the filling secure, avoiding any unwanted spills during slicing.
- Sharp Knife: Use a sharp knife for cutting, employing a gentle sawing motion to preserve the banana’s shape and avoid mushy slices.
- Freshness Matters: Serve immediately after slicing for the best taste, but if storing, place cut sides of the banana facing each other to minimize browning.
- Nut Butter Flexibility: Don’t hesitate to switch up the nut butter to suit preferences or dietary needs; almond or sunflower seed butter works great!
- Fruit Substitutes: Experiment with different fruits for exciting variations—try strawberries or apples for a tasty twist on your Banana Sushi!
How to Store and Freeze Banana Sushi
Fridge: Keep any leftover Banana Sushi tightly wrapped in plastic wrap or stored in an airtight container for up to 2 days. This helps maintain freshness and prevents browning.
Freezer: If you want to make a batch ahead of time, slice the Banana Sushi and place the pieces in a single layer on a baking sheet. Freeze for 1-2 hours, then transfer to a freezer bag for up to 1 month.
Reheating: For best quality, serve Banana Sushi cold, but if it’s been frozen, allow it to thaw in the fridge overnight before enjoying!
Banana Sushi Recipe FAQs
How do I select ripe bananas for my Banana Sushi?
Absolutely! When choosing bananas, look for fruit that is slightly firm with a hint of yellow. Avoid ones with dark spots all over, as they may be overripe and mushy. Ideal bananas for sushi should be sweet yet firm enough to hold their shape when rolled.
How long can I store leftover Banana Sushi?
Very! You can keep any leftovers tightly wrapped in plastic wrap or in an airtight container in the fridge for up to 2 days. This method helps maintain freshness and reduces the browning of the banana.
Can I freeze Banana Sushi?
Of course! To freeze, slice the Banana Sushi into rounds and arrange them in a single layer on a baking sheet. Freeze for about 1-2 hours until firm, then transfer the pieces into a freezer bag. They can be stored like this in the freezer for up to 1 month. When you’re ready to enjoy them, thaw in the fridge overnight for the best taste and texture.
What if the Nutella isn’t spreading well on the tortilla?
No worries! If you find the Nutella too thick, try warming it slightly in the microwave for around 15 seconds. This will make it easier to spread over the tortilla. Just be careful not to overheat it, as you don’t want it to become too runny.
Is this recipe suitable for kids with allergies?
Absolutely! You can customize Banana Sushi easily for dietary needs. Substitute peanut butter with almond or sunflower seed butter for nut allergies. Additionally, ensure all other ingredients are allergy-friendly, especially if your kids have specific sensitivities.
What are some fun variations to make my Banana Sushi even more exciting?
Very! You can experiment with different nut butters like cashew or pumpkin seed butter. Try swapping the banana for other fruits, like strawberries or apples, to create delightful combinations. Adding a sprinkle of granola or mini chocolate chips inside can provide extra crunch and flavor, making it an adventurous treat for your kids!
Deliciously Fun Banana Sushi: A Healthy Kid-Friendly Snack
Ingredients
Equipment
Method
- Prepare the Tortilla: Lay a flour tortilla flat and warm it in the microwave for about 10-15 seconds for better rolling.
- Add the Peanut Butter: Spread a generous layer of peanut butter evenly across one side of the tortilla, leaving about an inch at the edges.
- Add the Nutella: Lightly smear a small amount of Nutella in a line above the peanut butter.
- Place the Banana: Peel the banana and place it at one end of the tortilla, aligning it with the edge.
- Roll the Tortilla: Start rolling the tortilla tightly around the filling from the edge with the banana, sealing it with the peanut butter.
- Slice the Sushi: Cut the rolled tortilla into 1/2 to 1-inch rounds using a sharp knife.
- Serve and Enjoy: Arrange the pieces on a colorful plate and serve immediately.
")